Five things to do on an icy day

By Mel Bellis

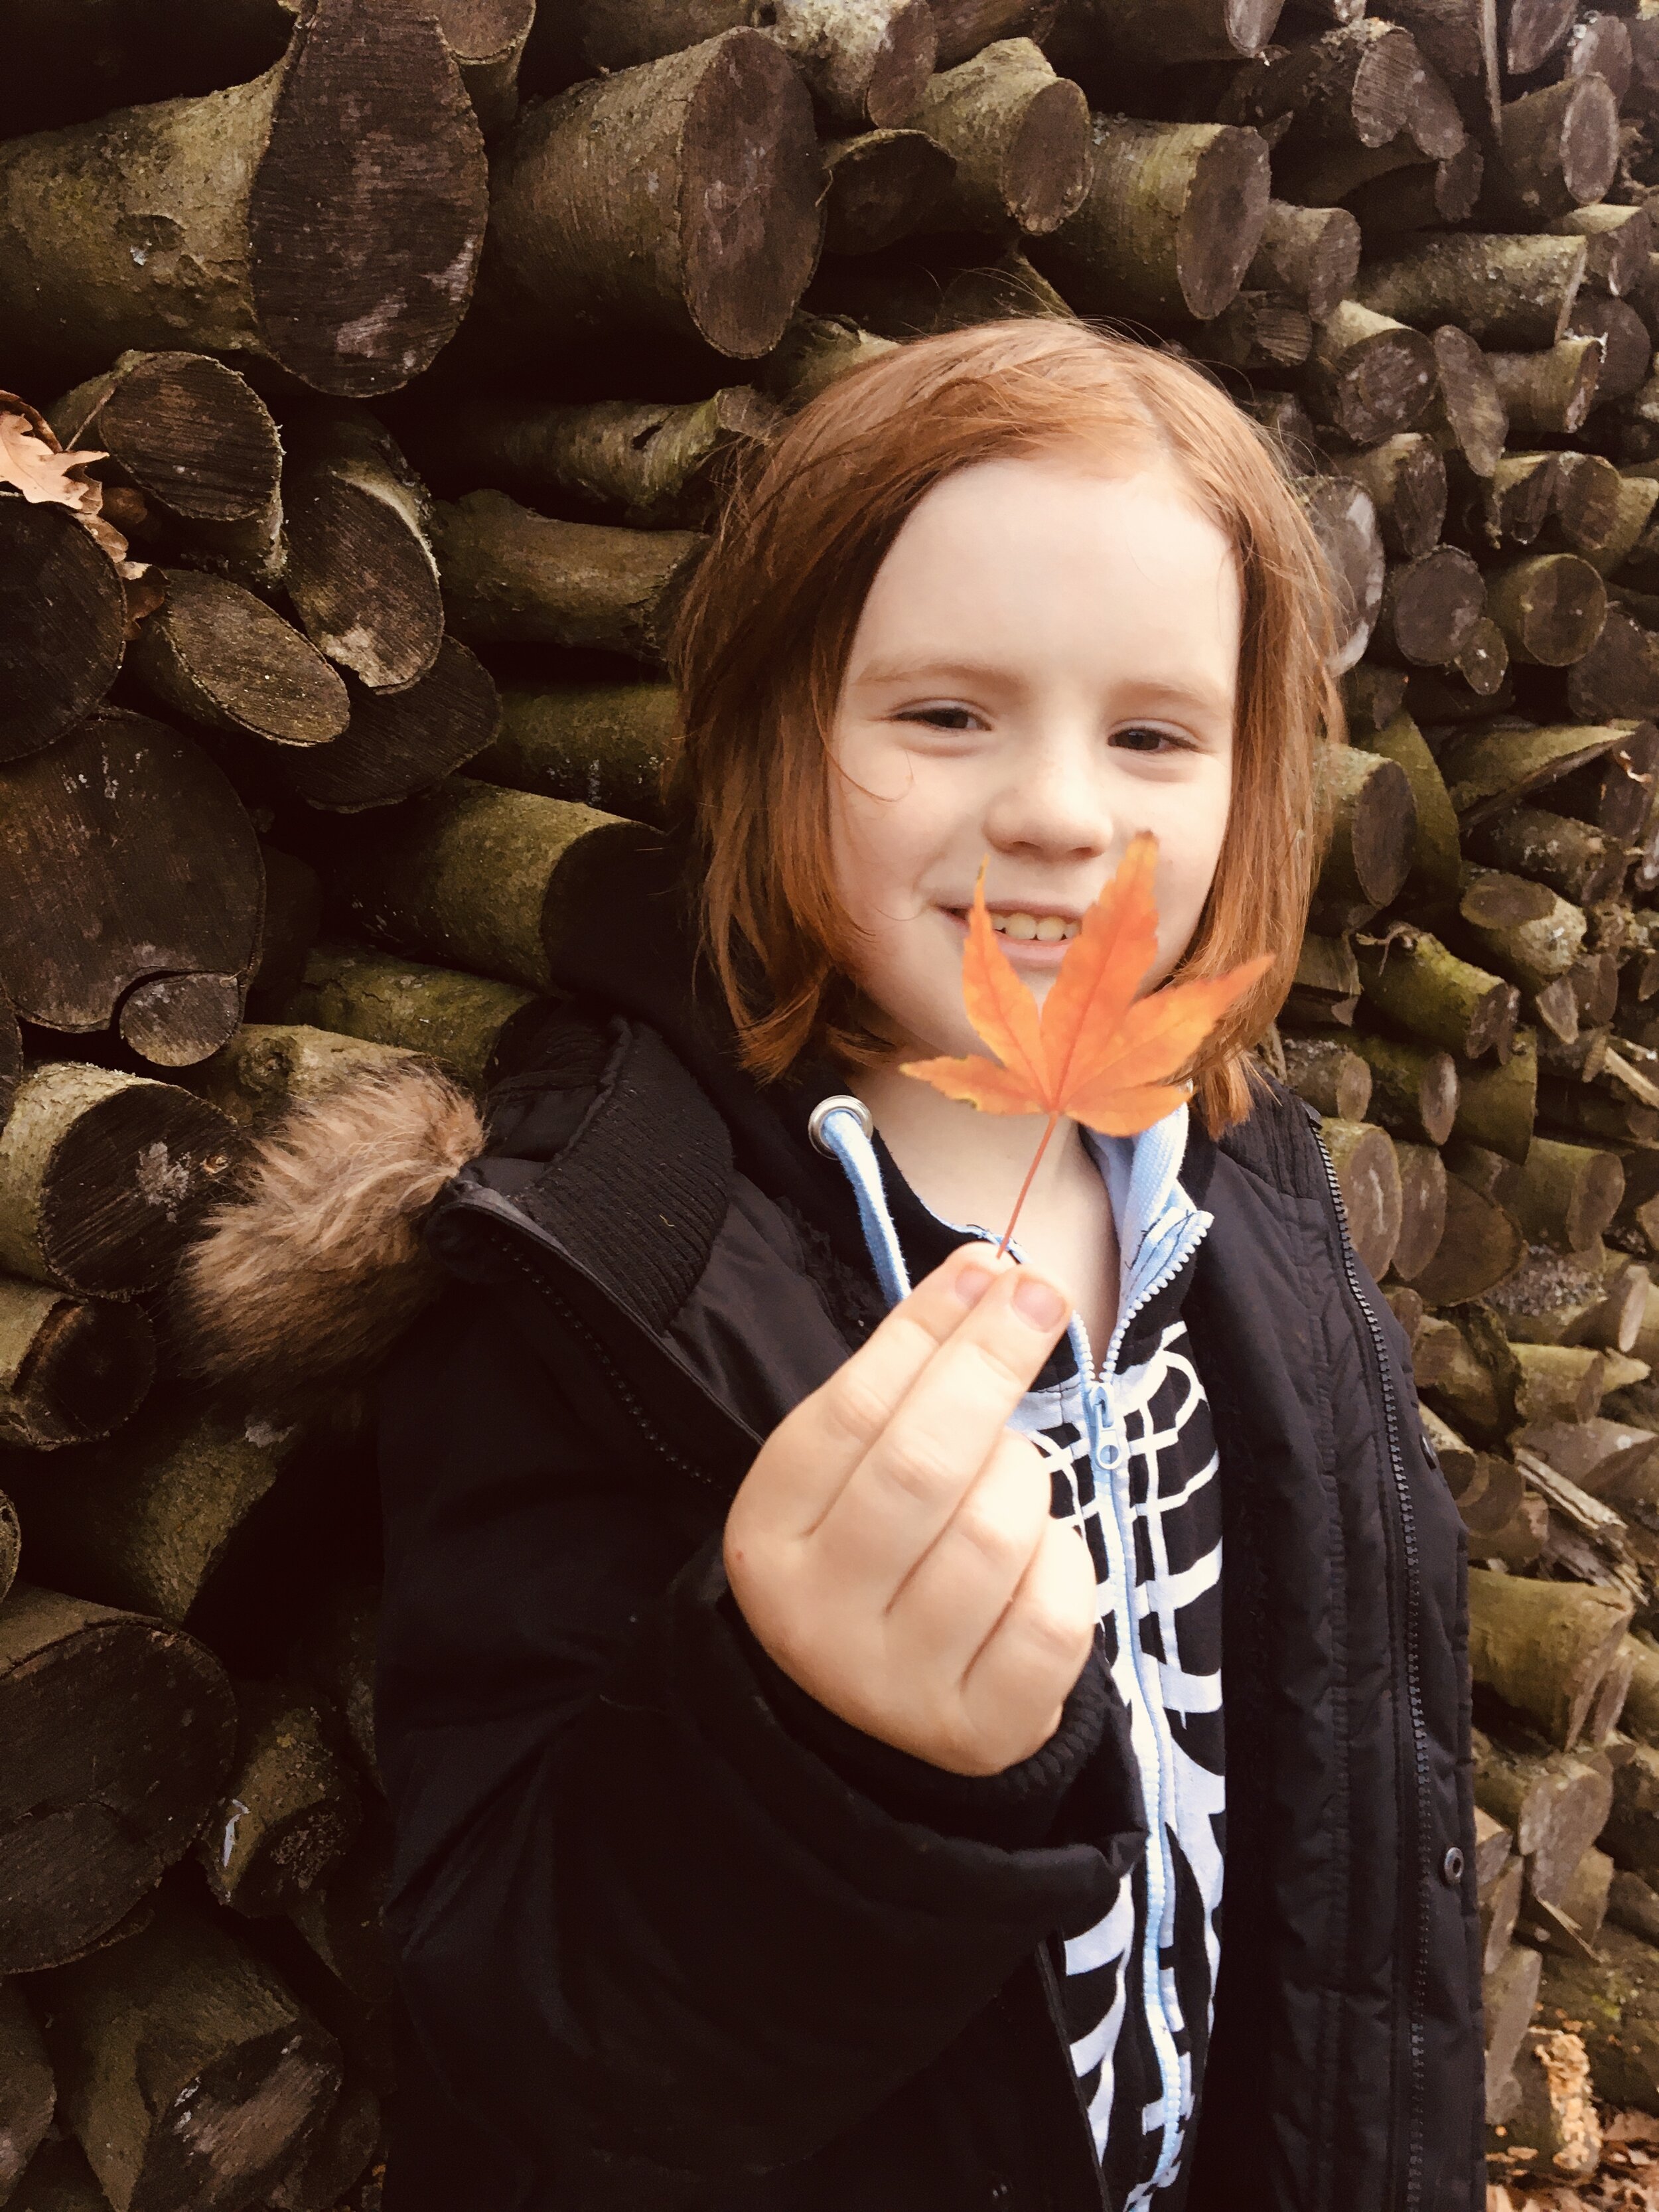
Waking up to a frosty, icy morning is admittedly not as exciting as waking up to a fresh fall of snow. However, it still is quite exciting. Overnight temperatures are set to fall as low as -3 in Sussex this weekend, so we thought it time to look back at some of the ice activities we have done in the past. Maybe this will inspire your family to embrace the cold mornings.
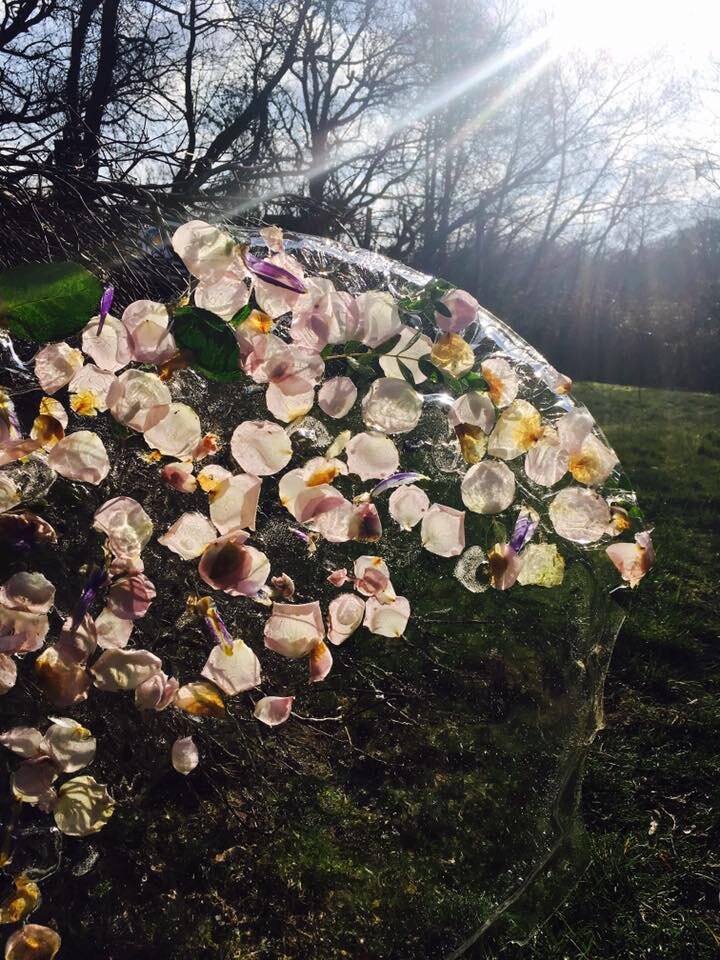
Ice sculptures

How about making some ephemeral art al la Andy Goldworthy? We foraged for ice in the garden and used it to create sculptures.
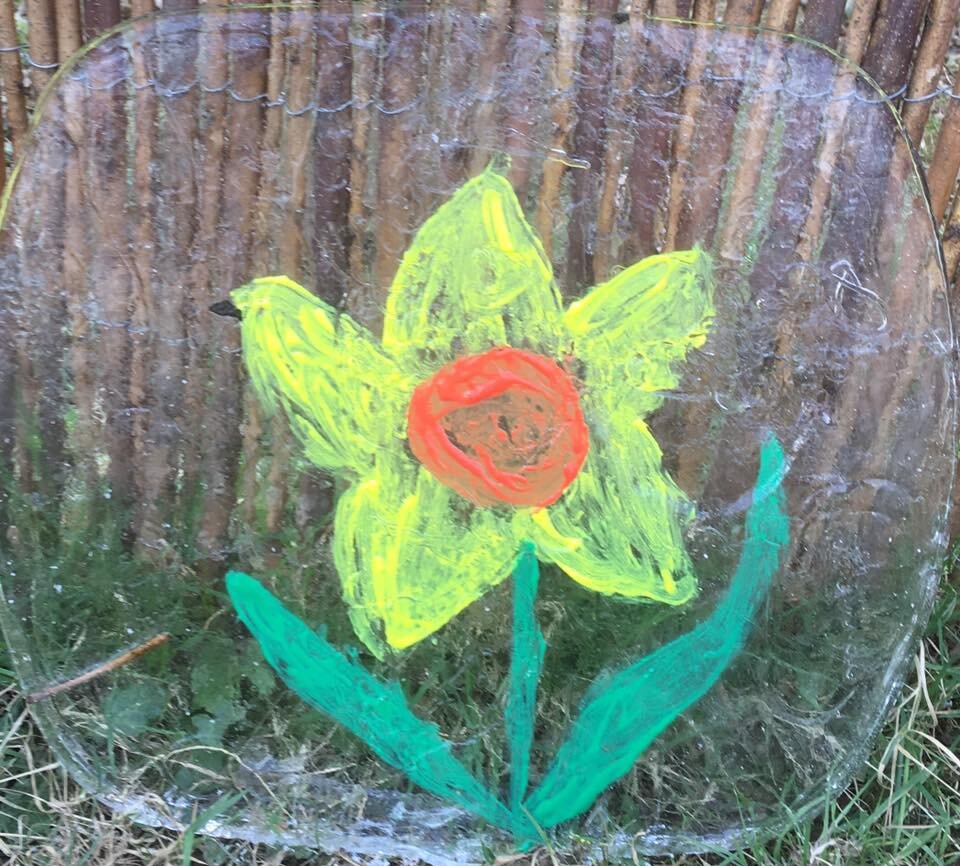
28168191_2096009883961515_9220338412265409548_n.jpg

Ice Paintings

We also found that ice was fun to paint on. Our creations lasted a while before slowly melting away.

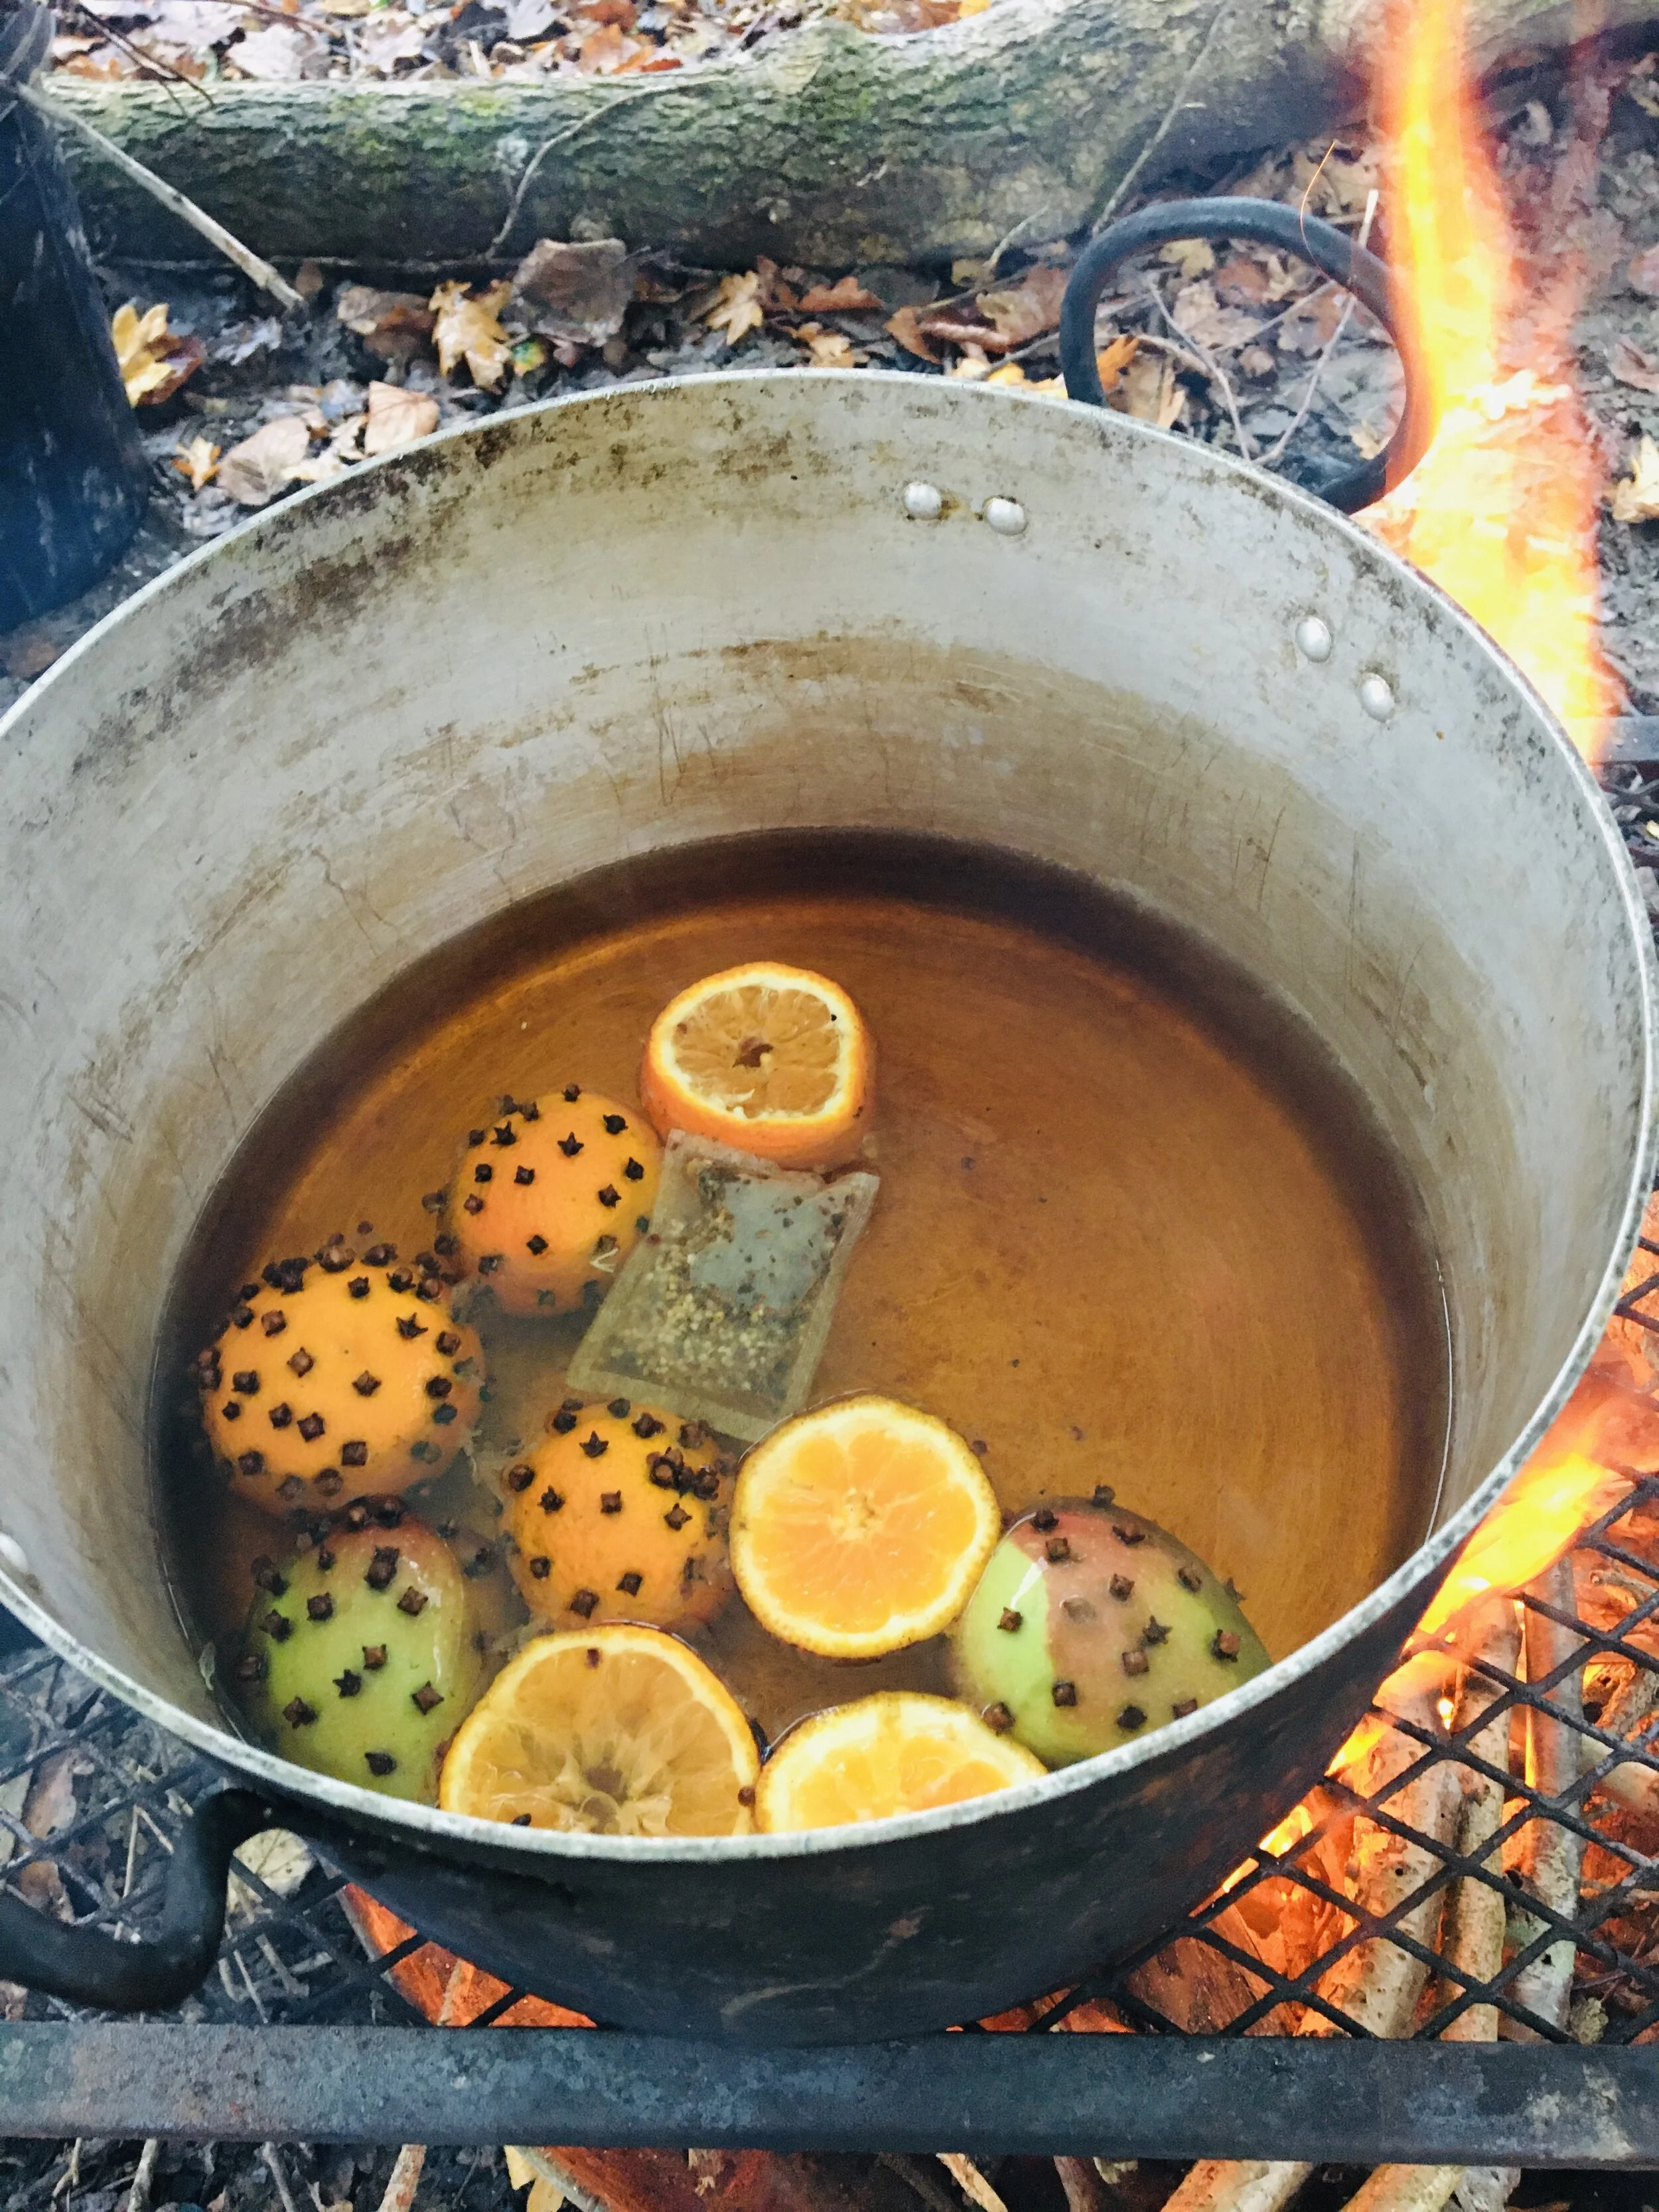
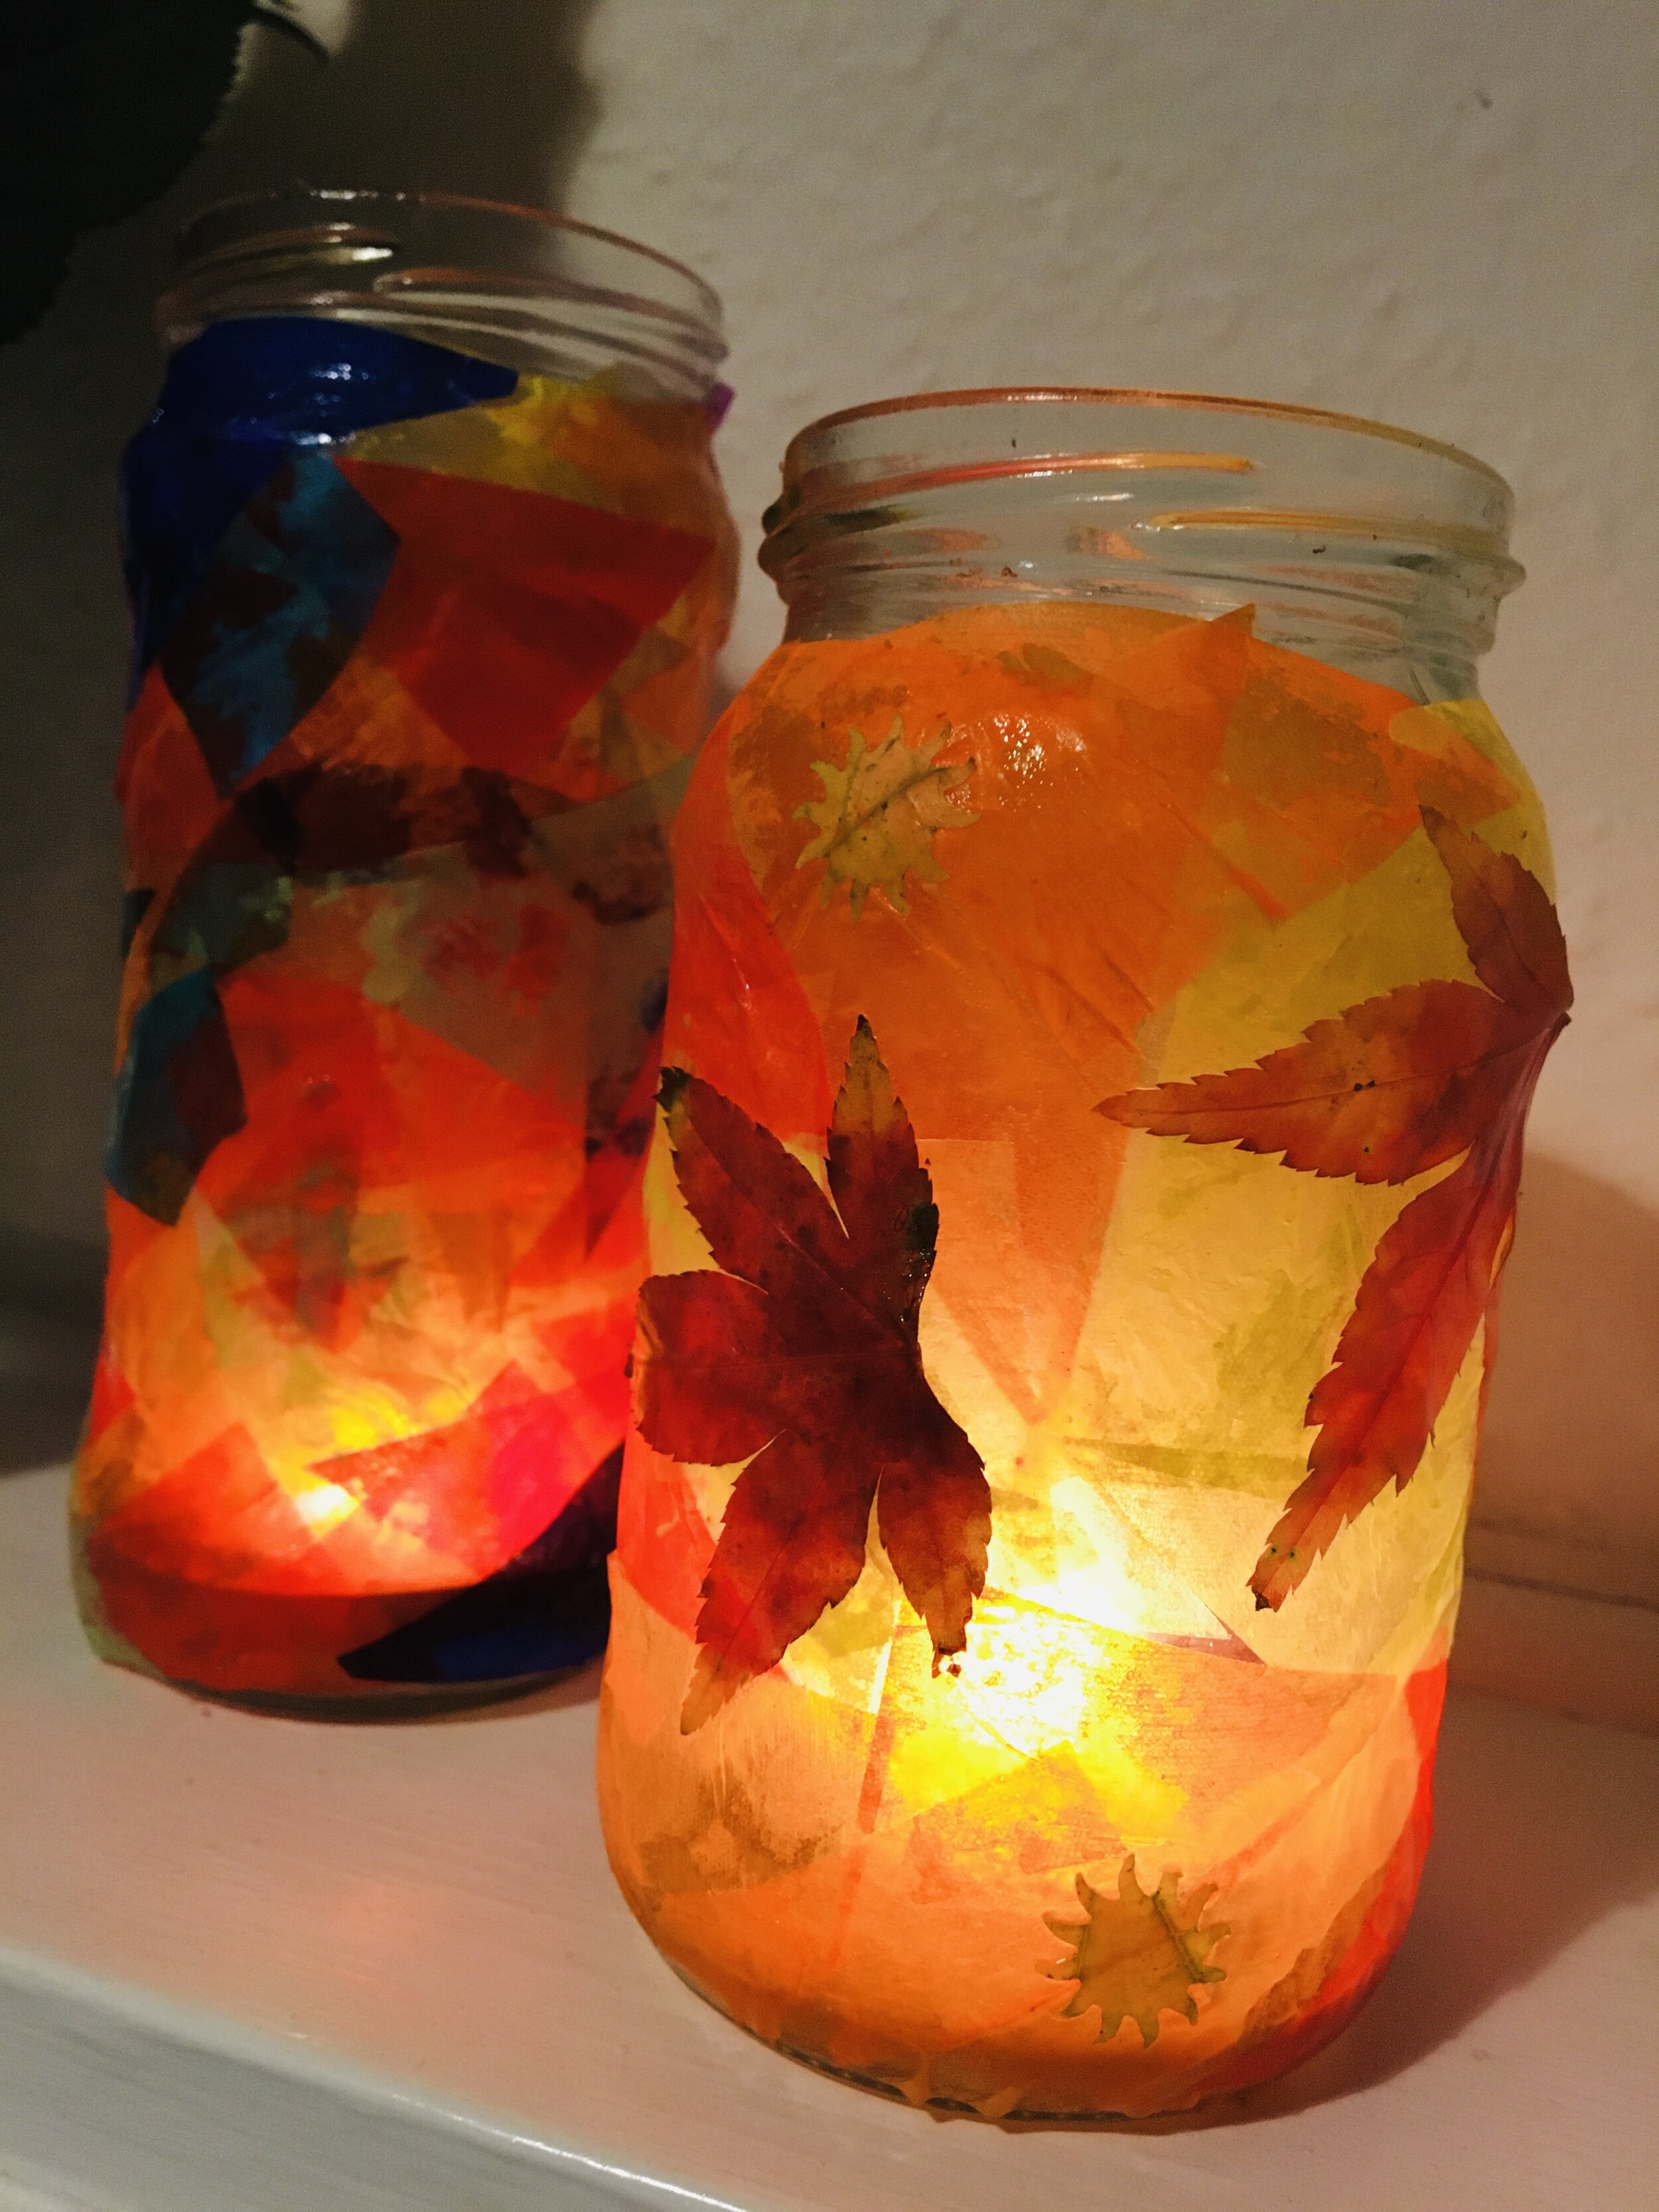
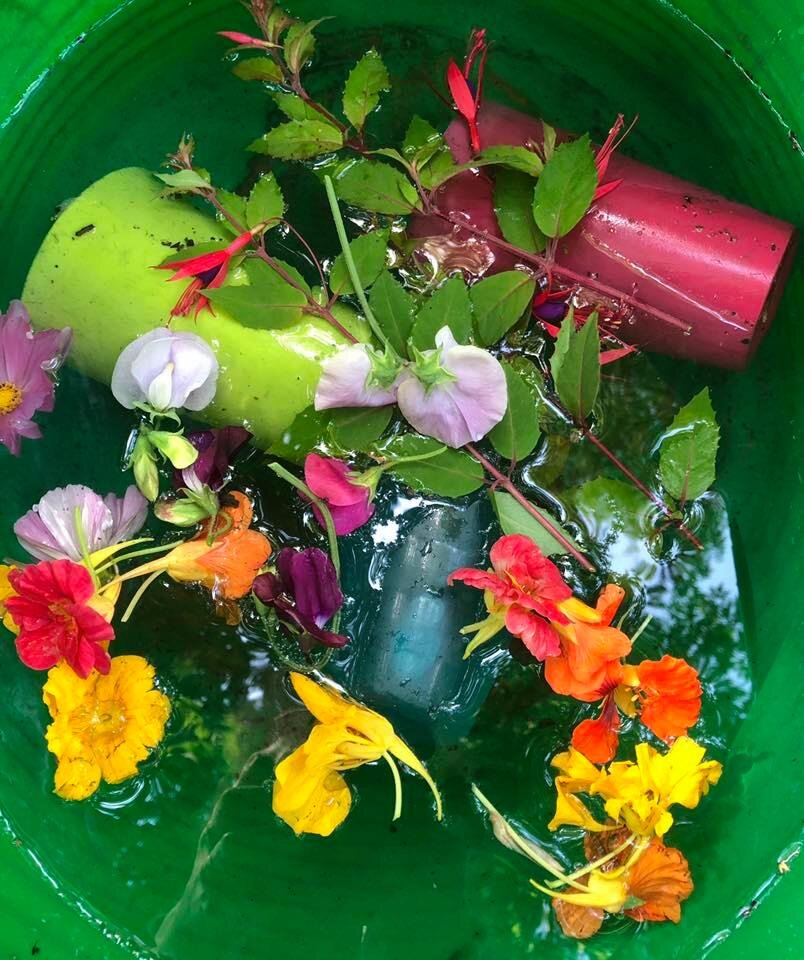
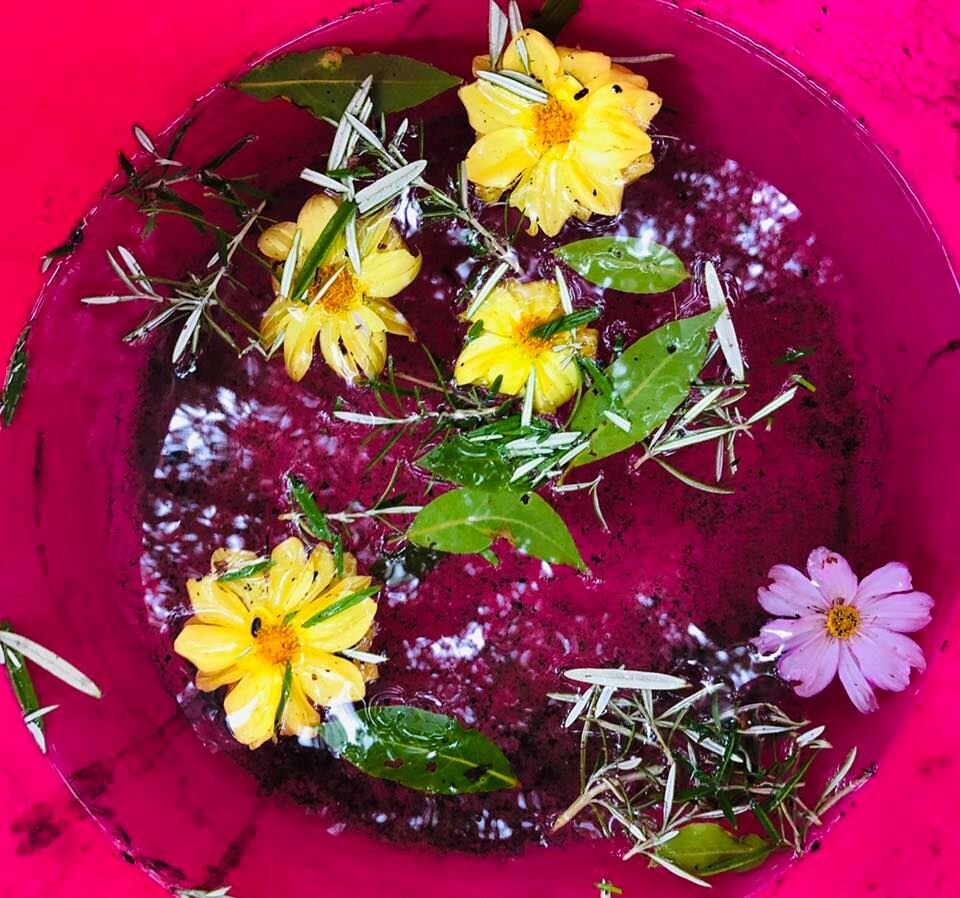
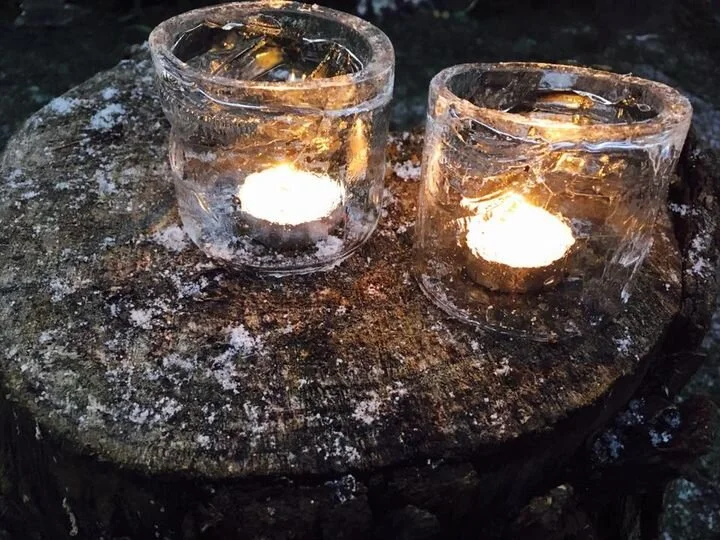
Ice cups or Lanterns

The process for making ice cups and lanterns is the same. You take a container and fill it with water. You take a smaller container and place it in the middle of the larger container. You may need to weight it with stones, but don’t let the second container touch the bottom of the first container. You can add petals or leaves to the water between the two containers for decoration.

:Leave the whole thing out overnight and (fingers crossed) the water should have frozen in the morning. Carefully remove the containers to reveal your ice cup or lantern.

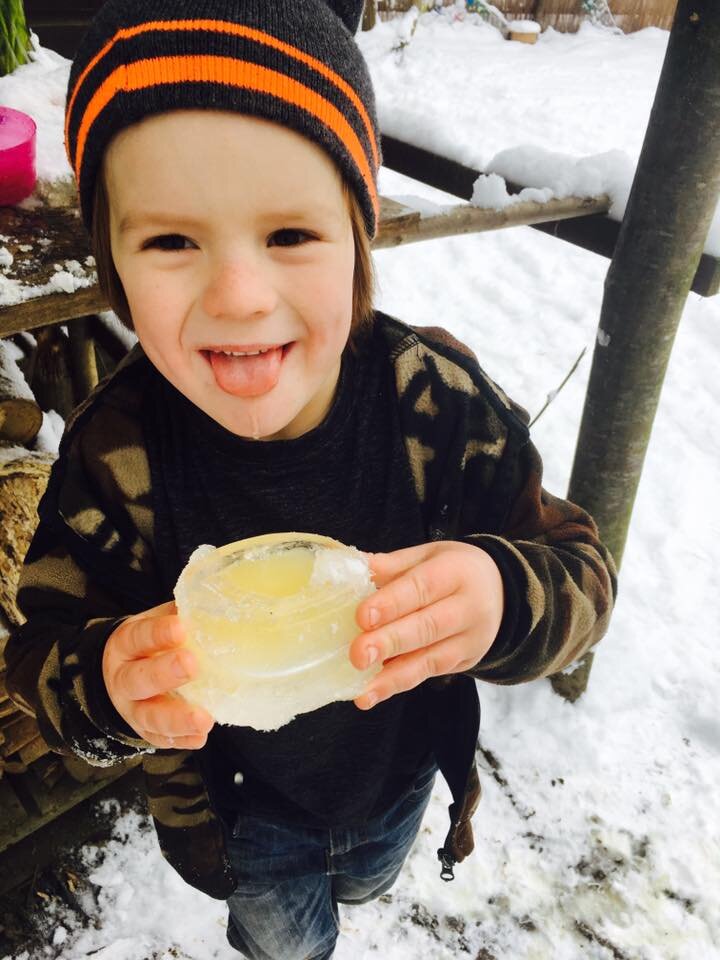
In honesty it took us several attempts to create a cup that was perfectly water tight and could hold juice. However, we learned a lot in the process and our failed cups made very good lanterns!
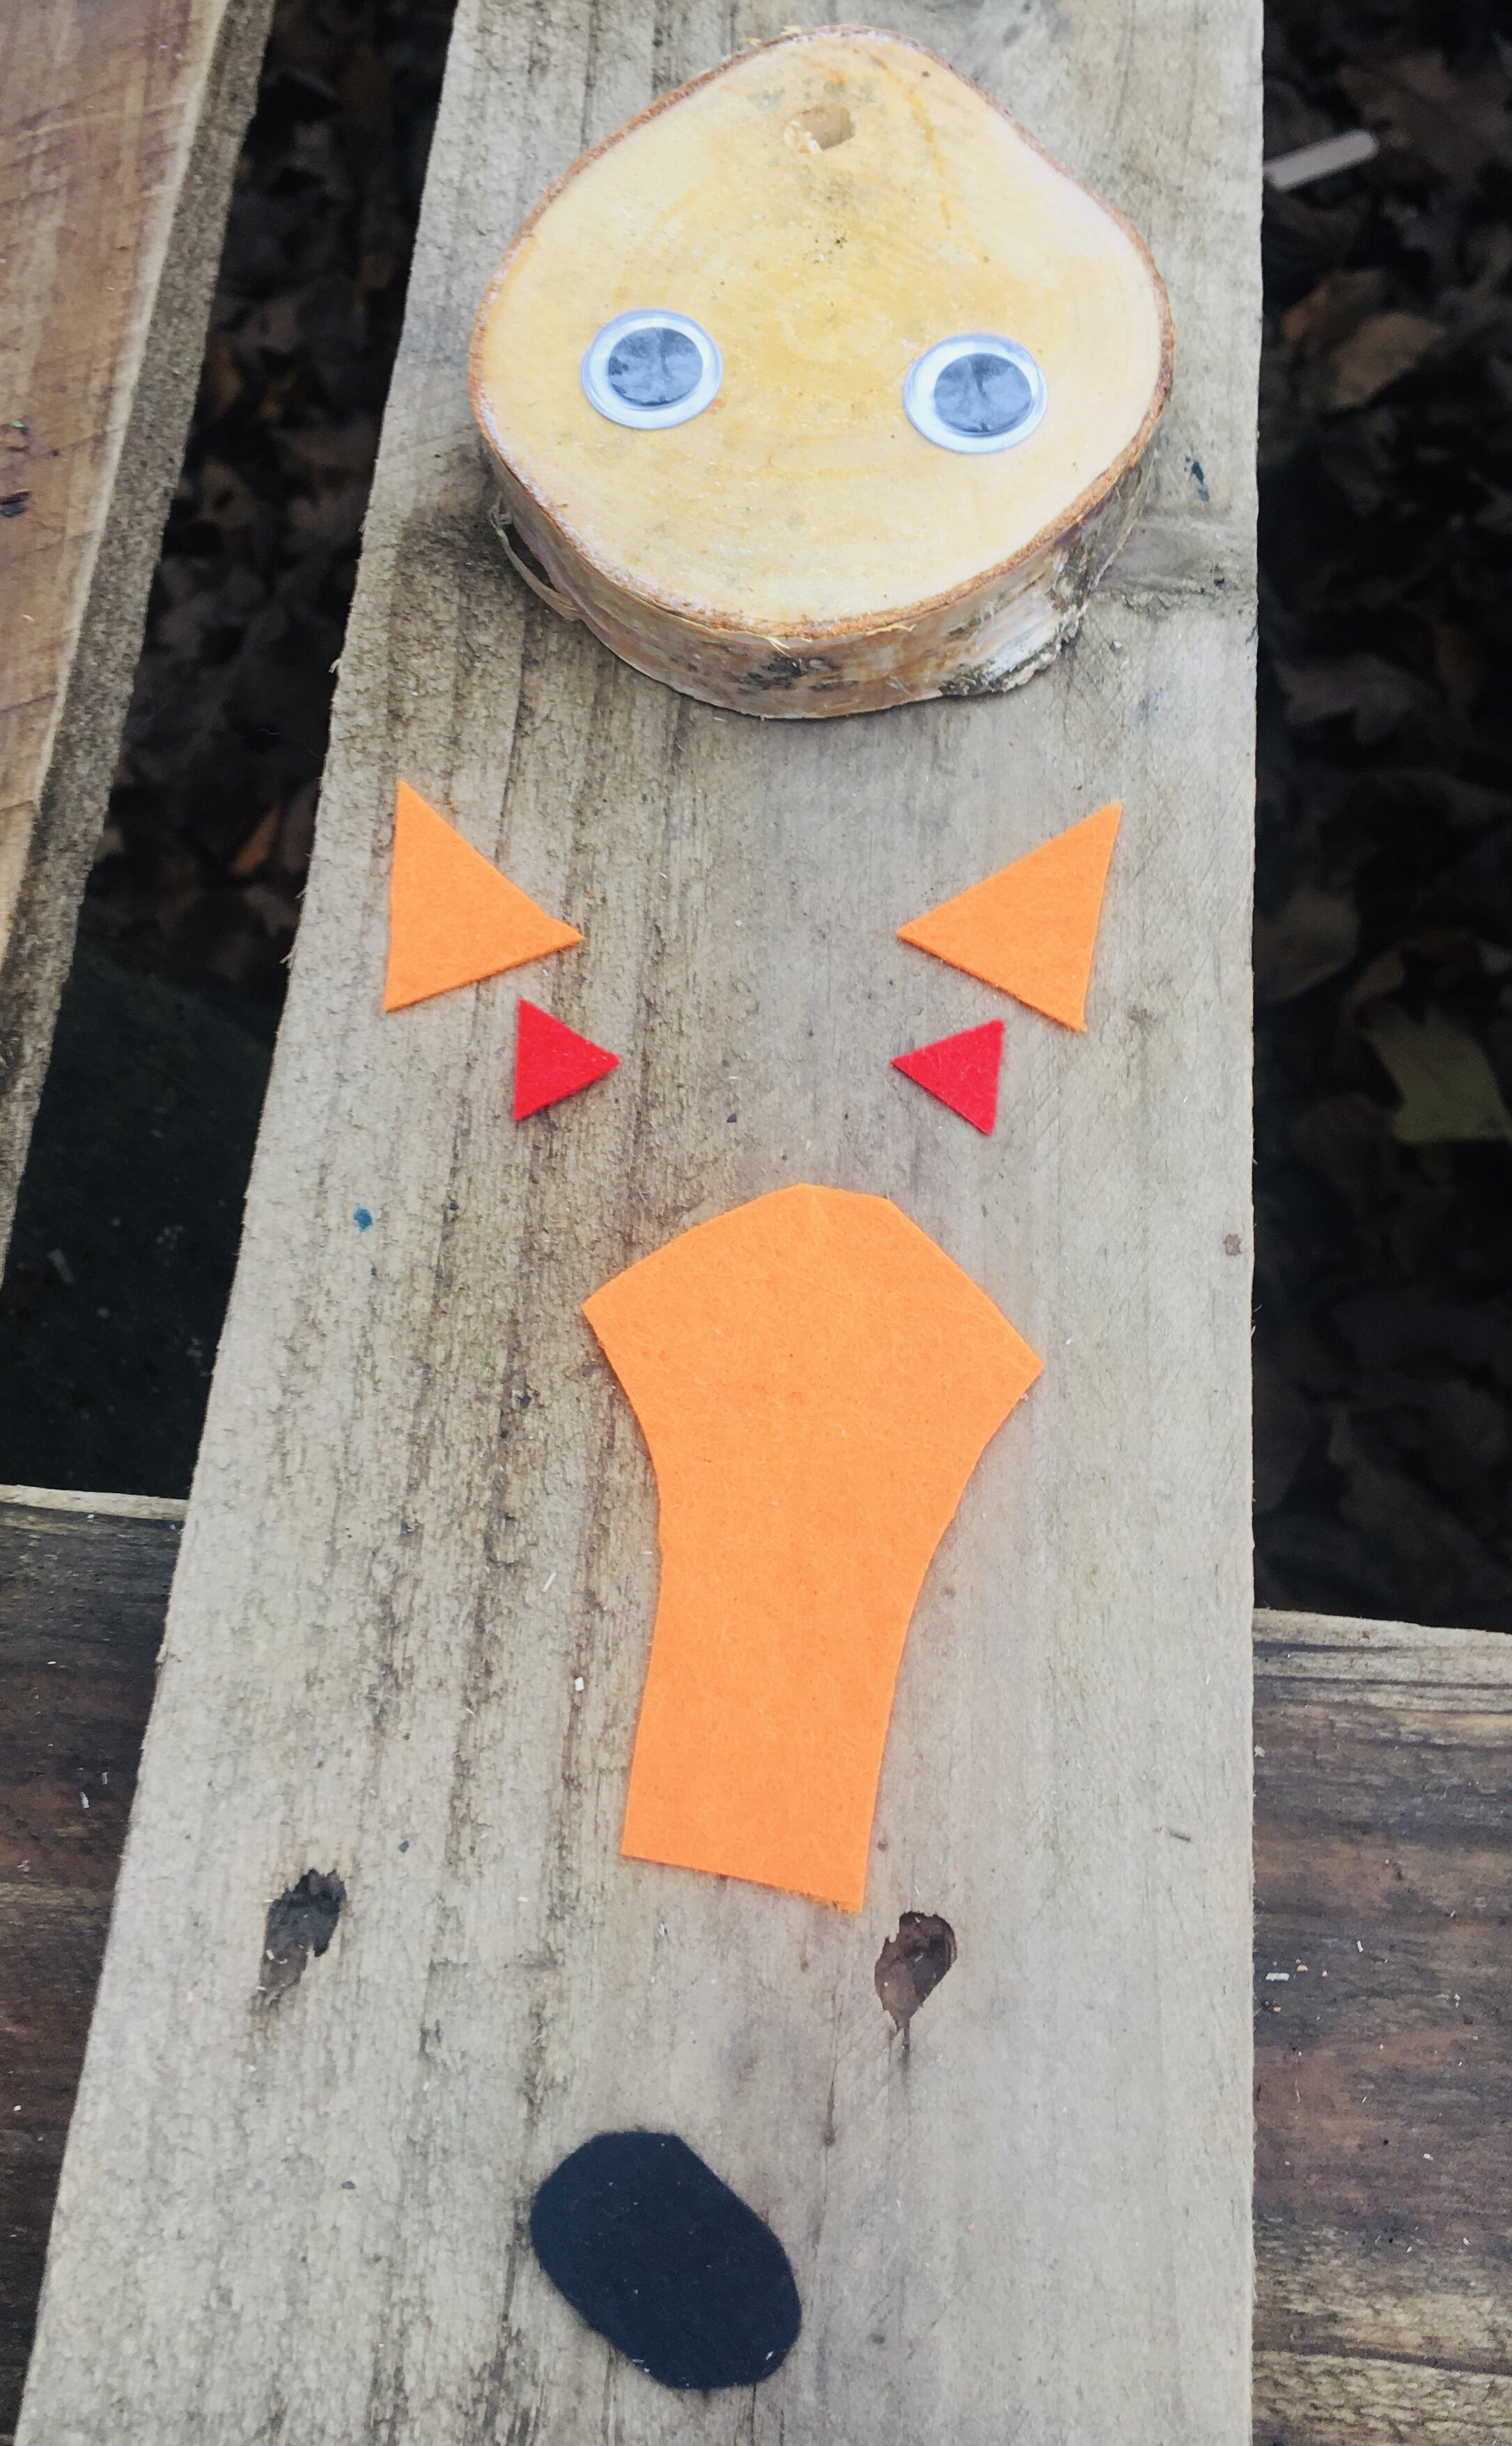
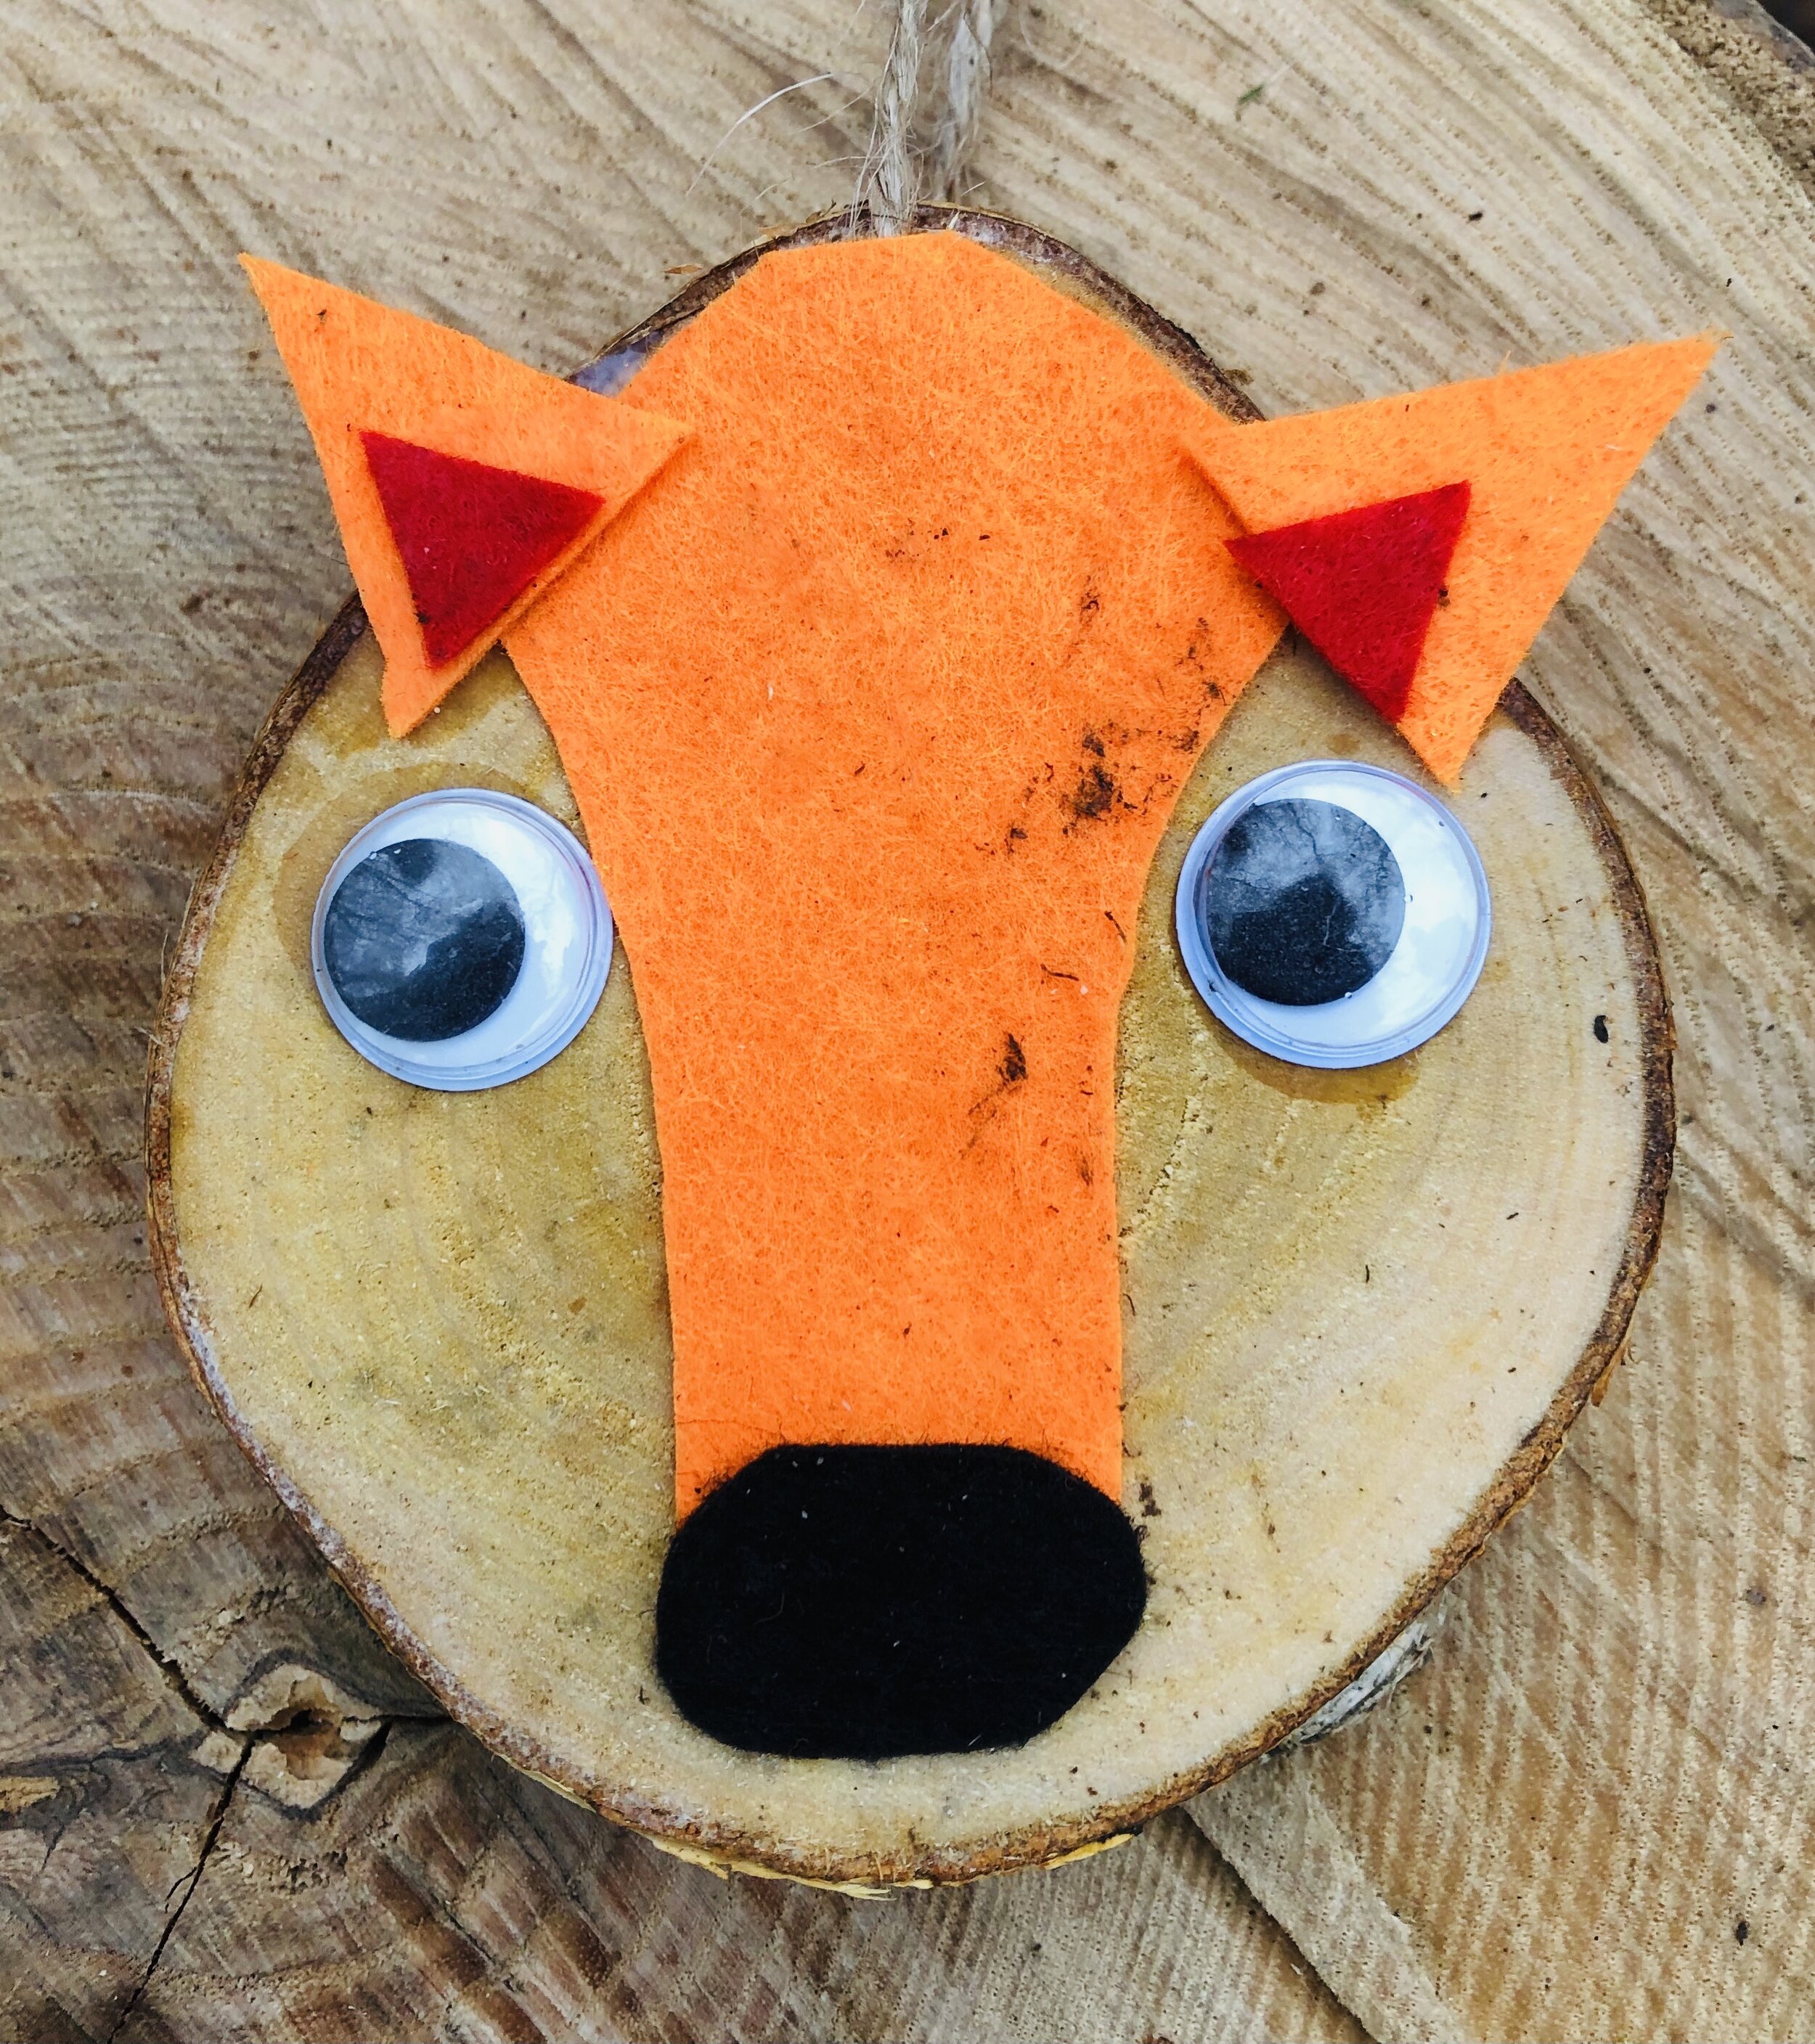
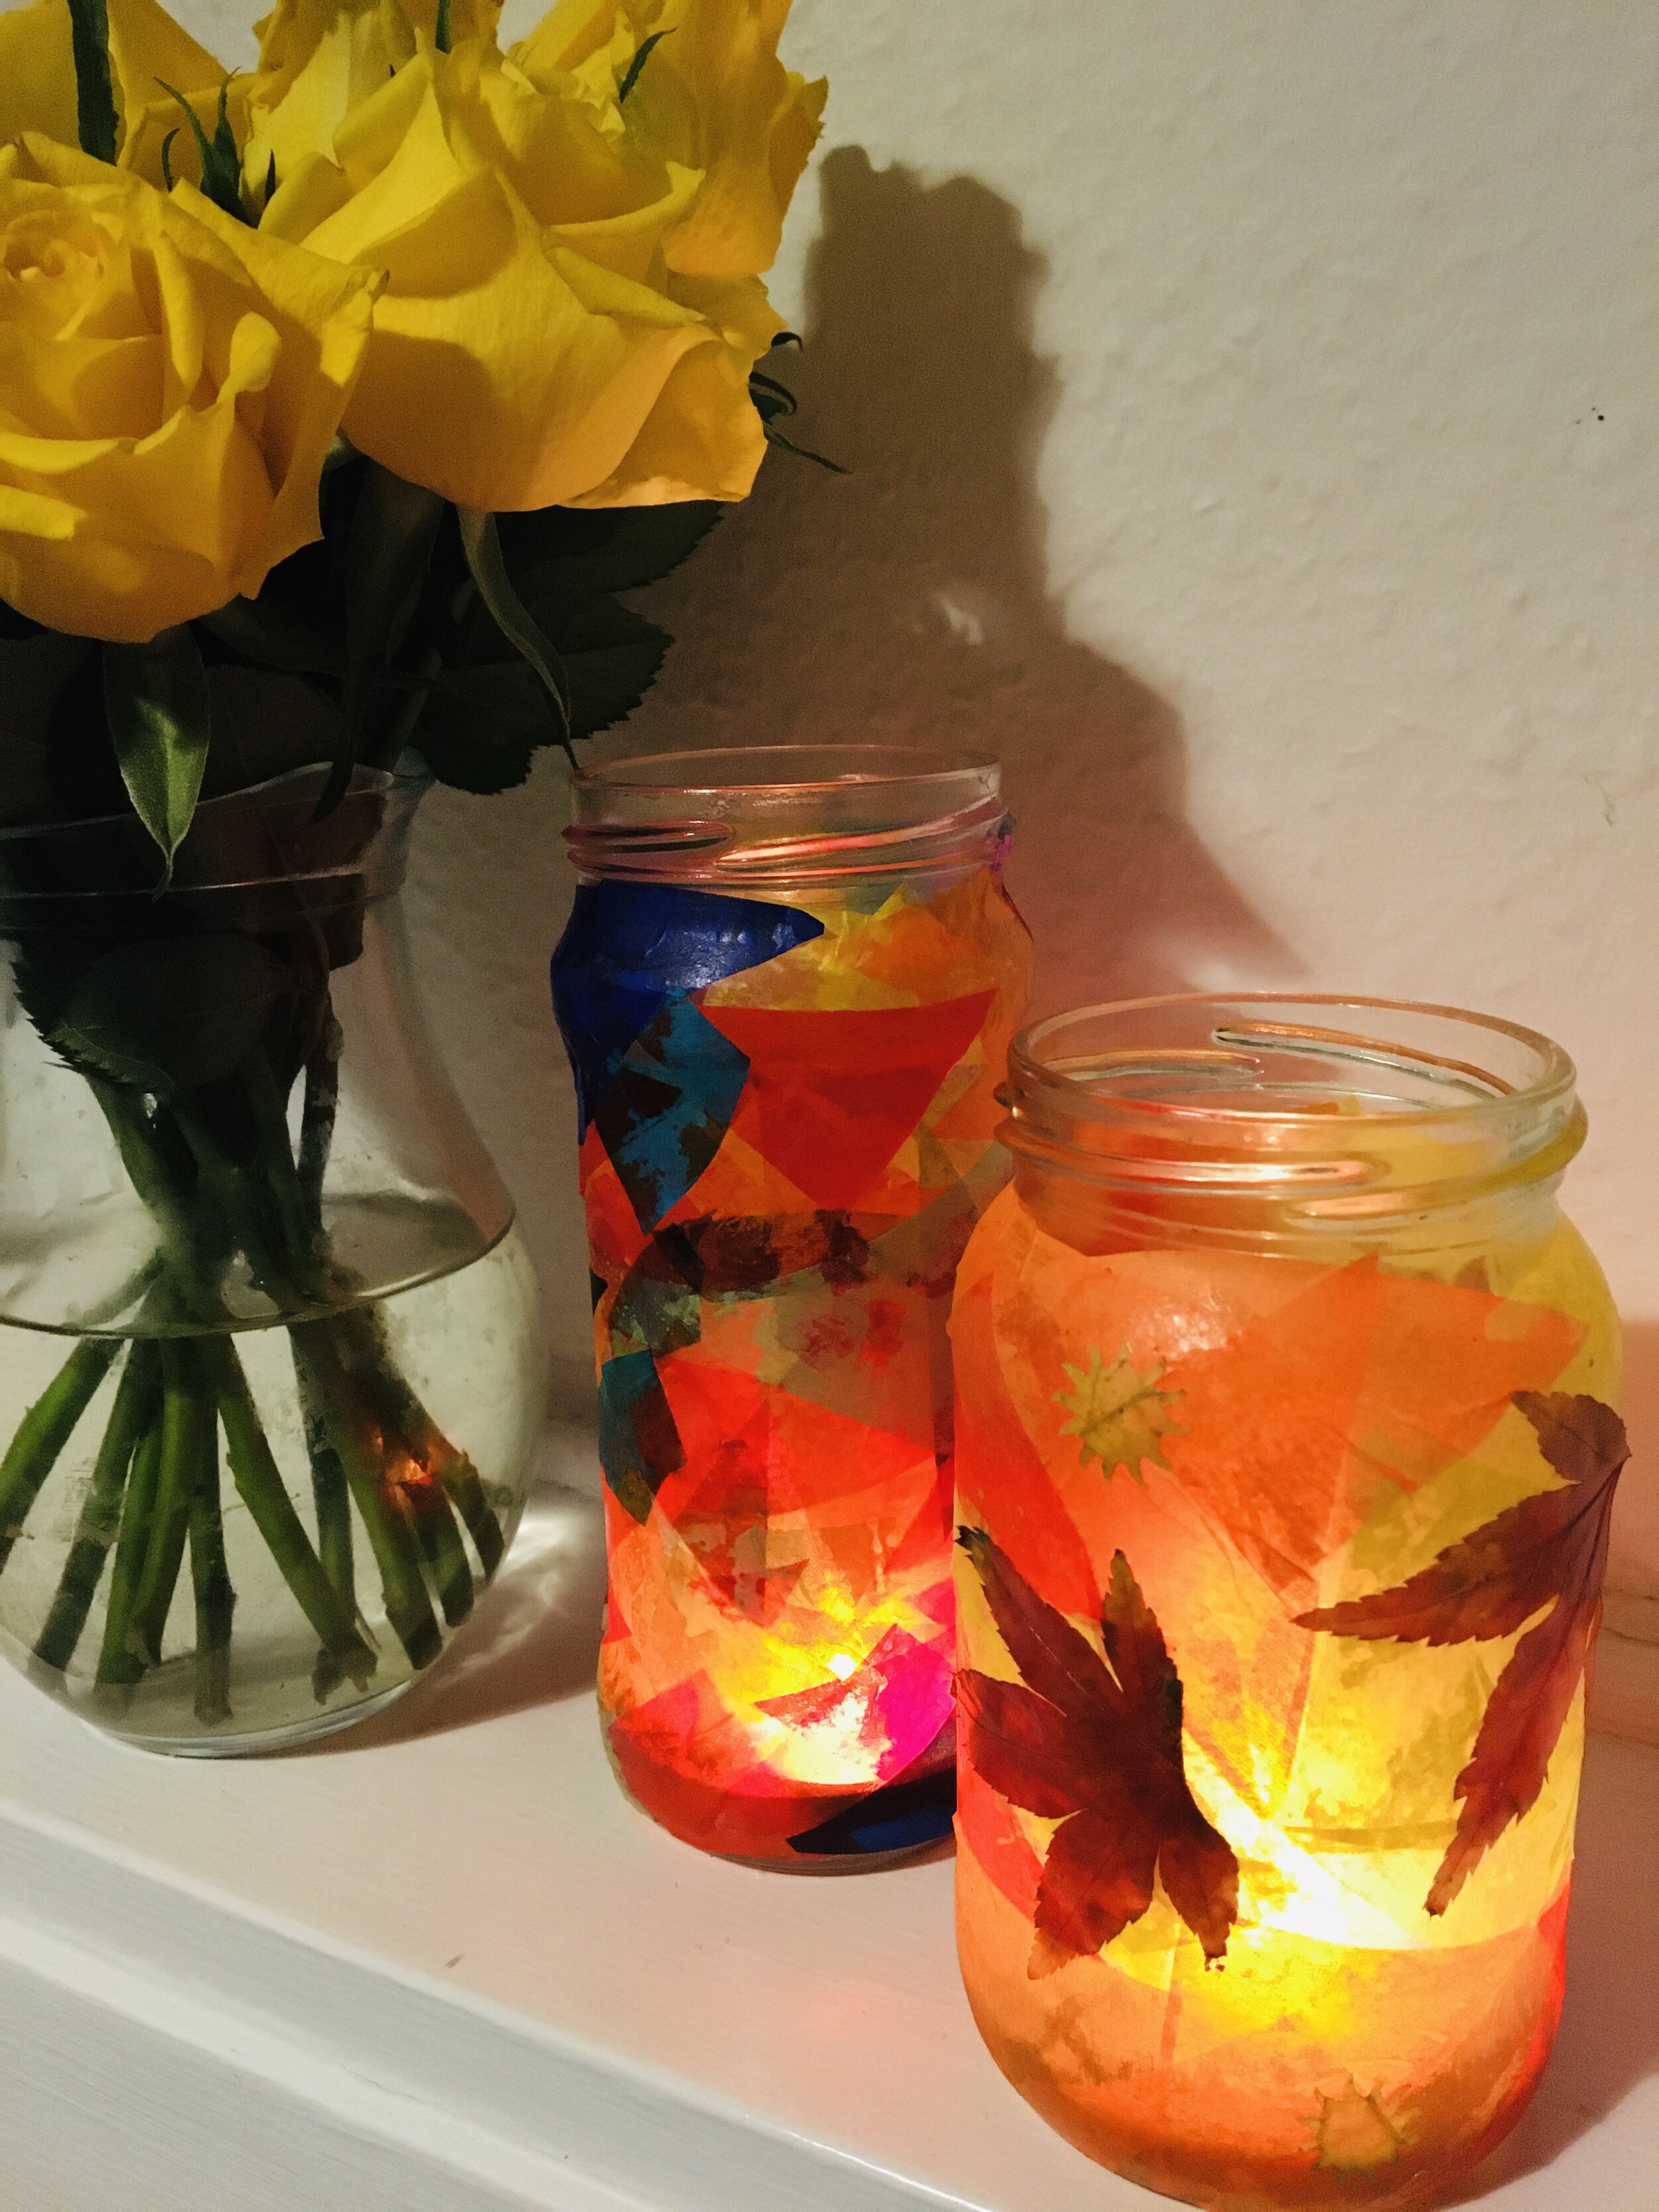
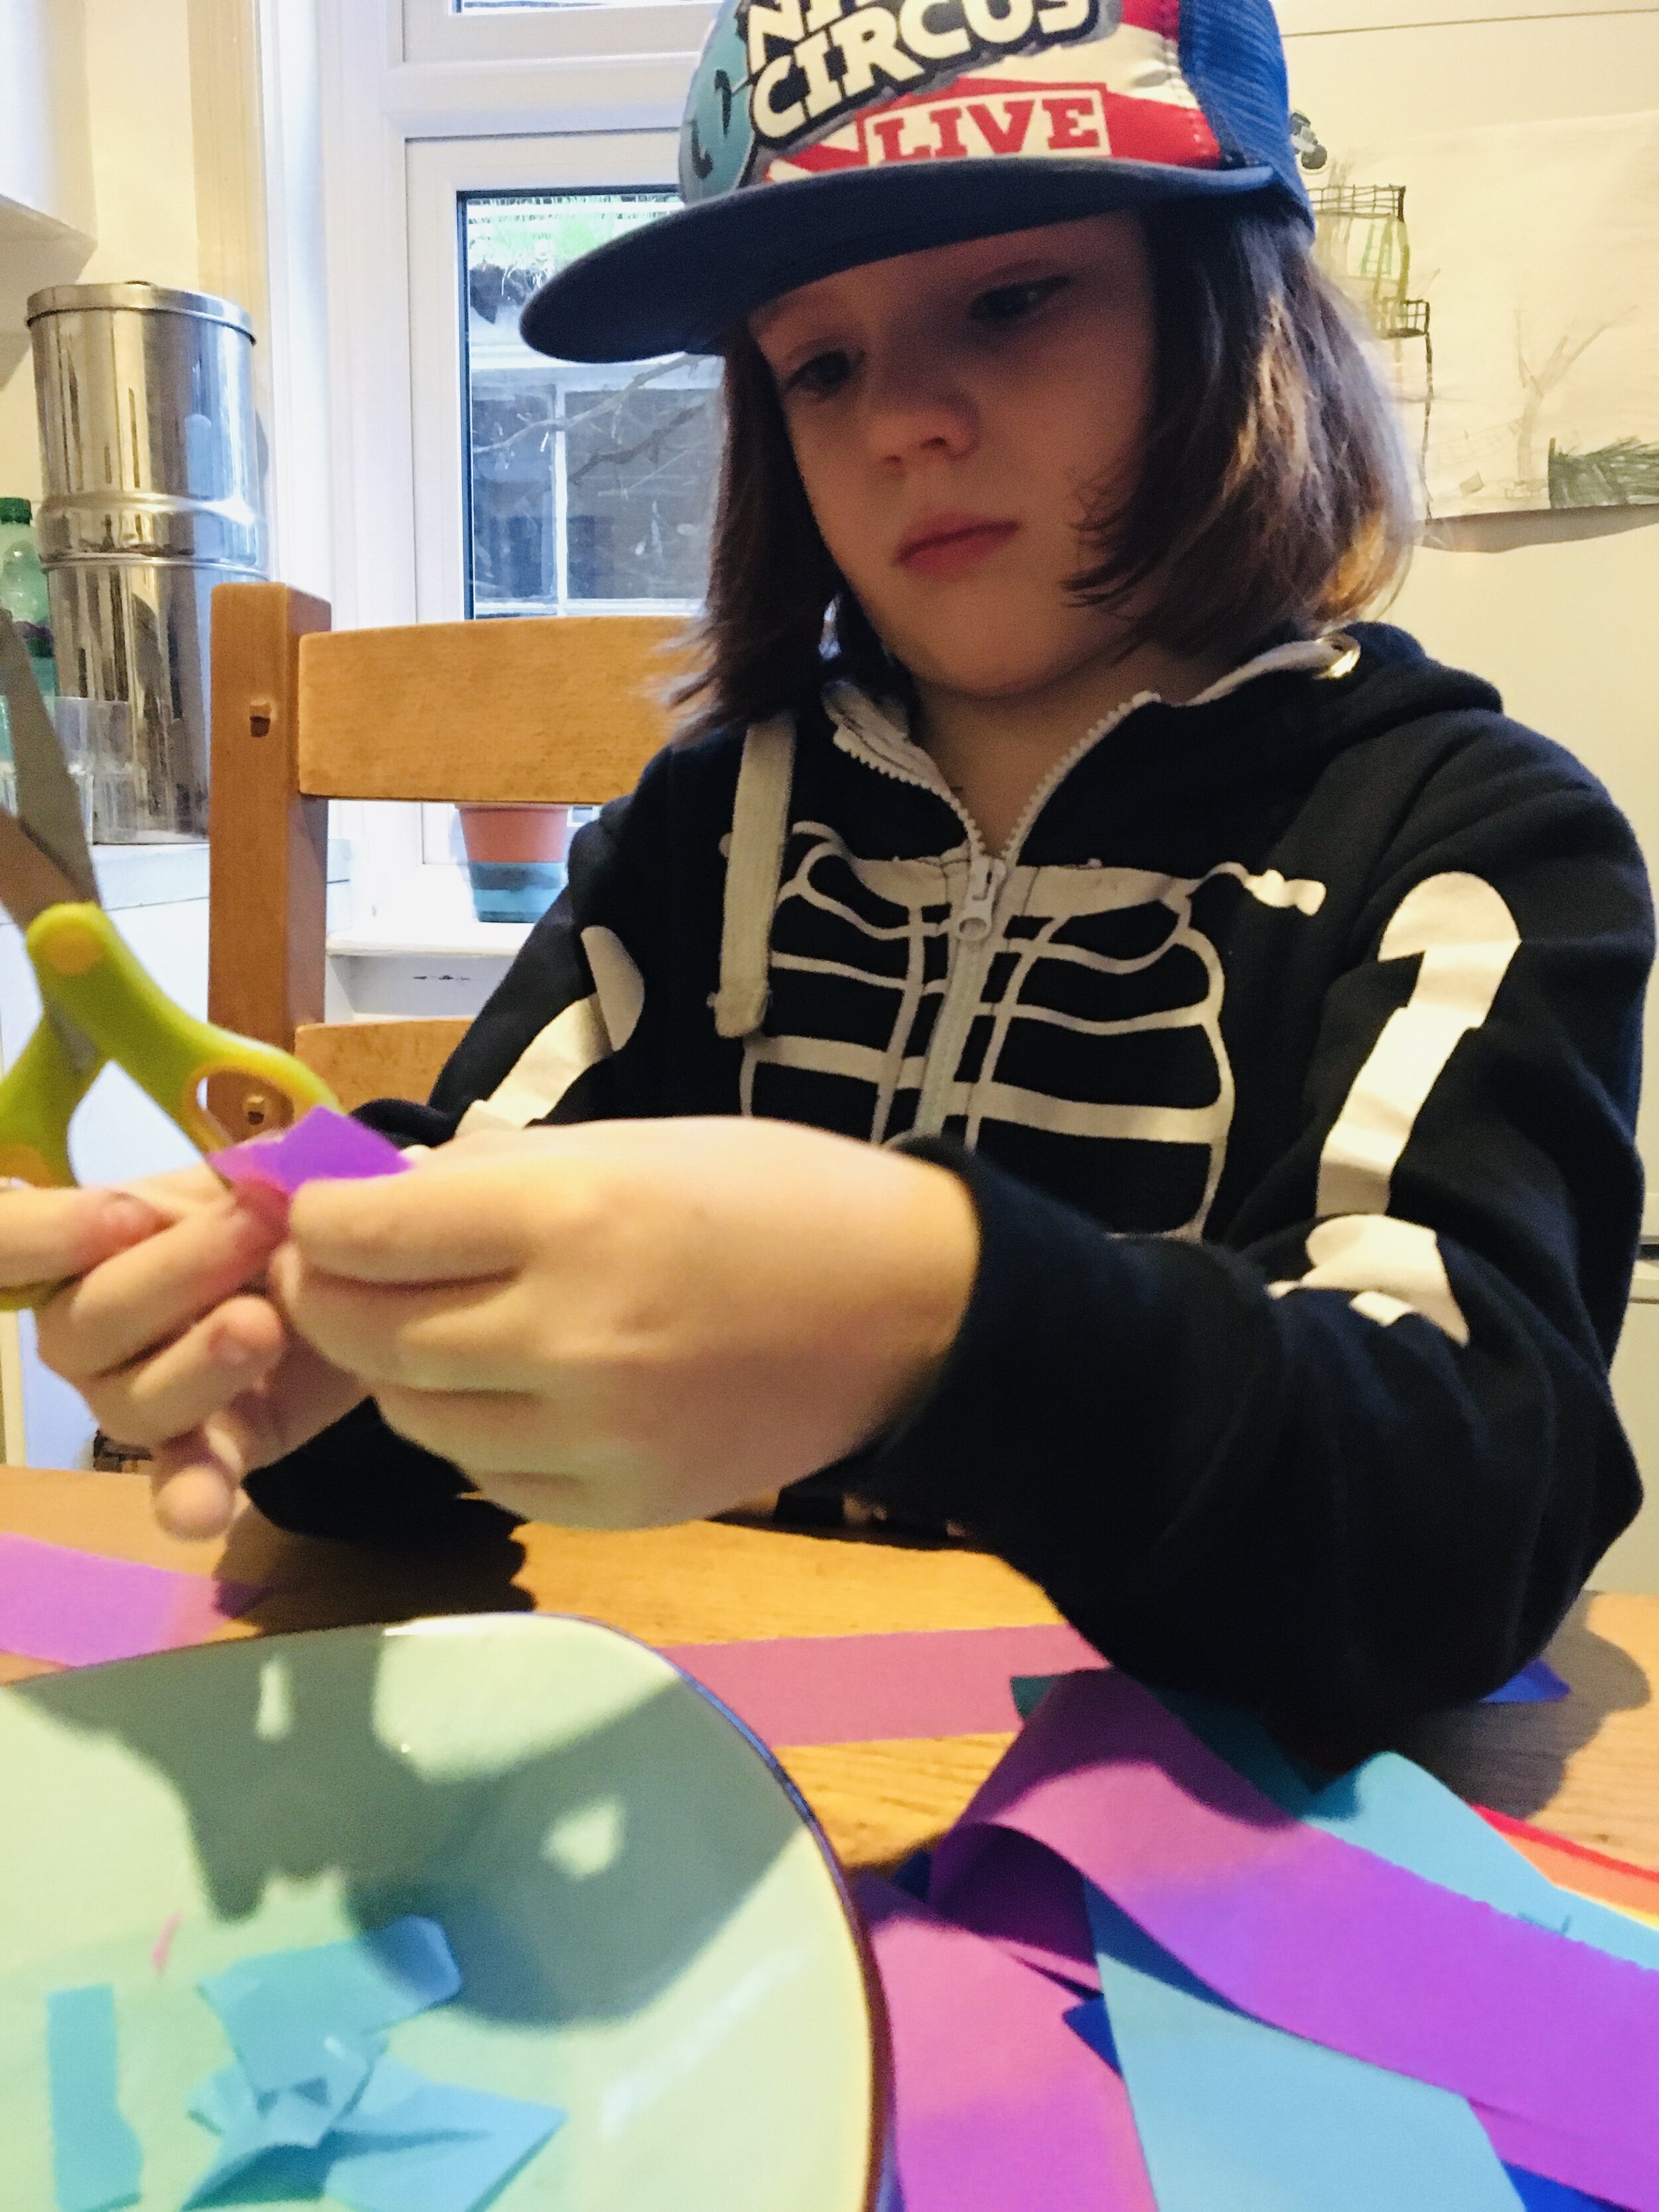
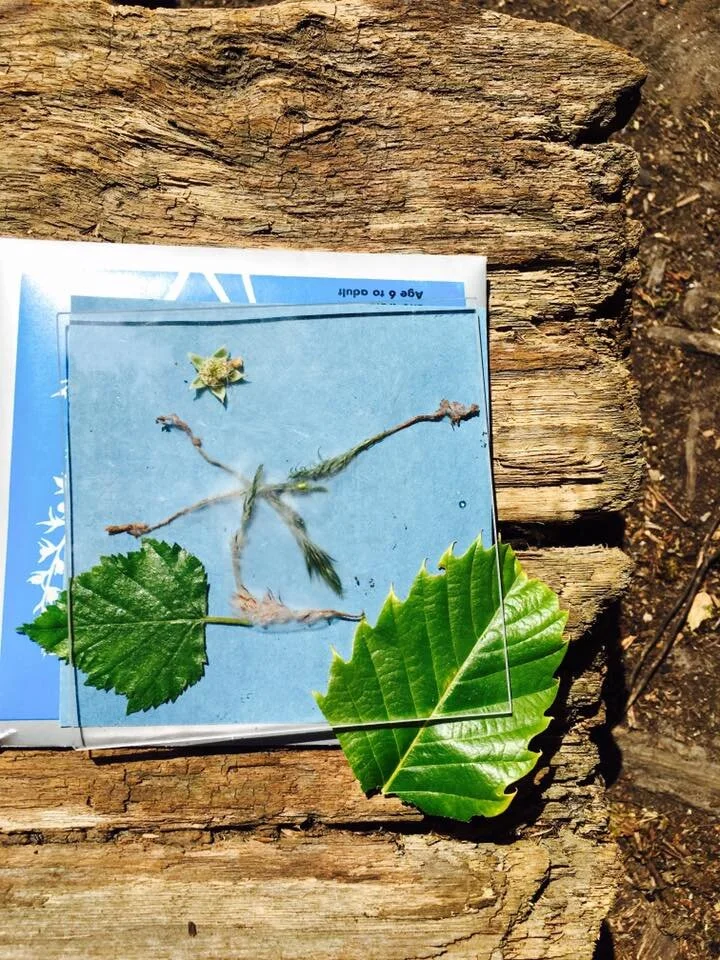
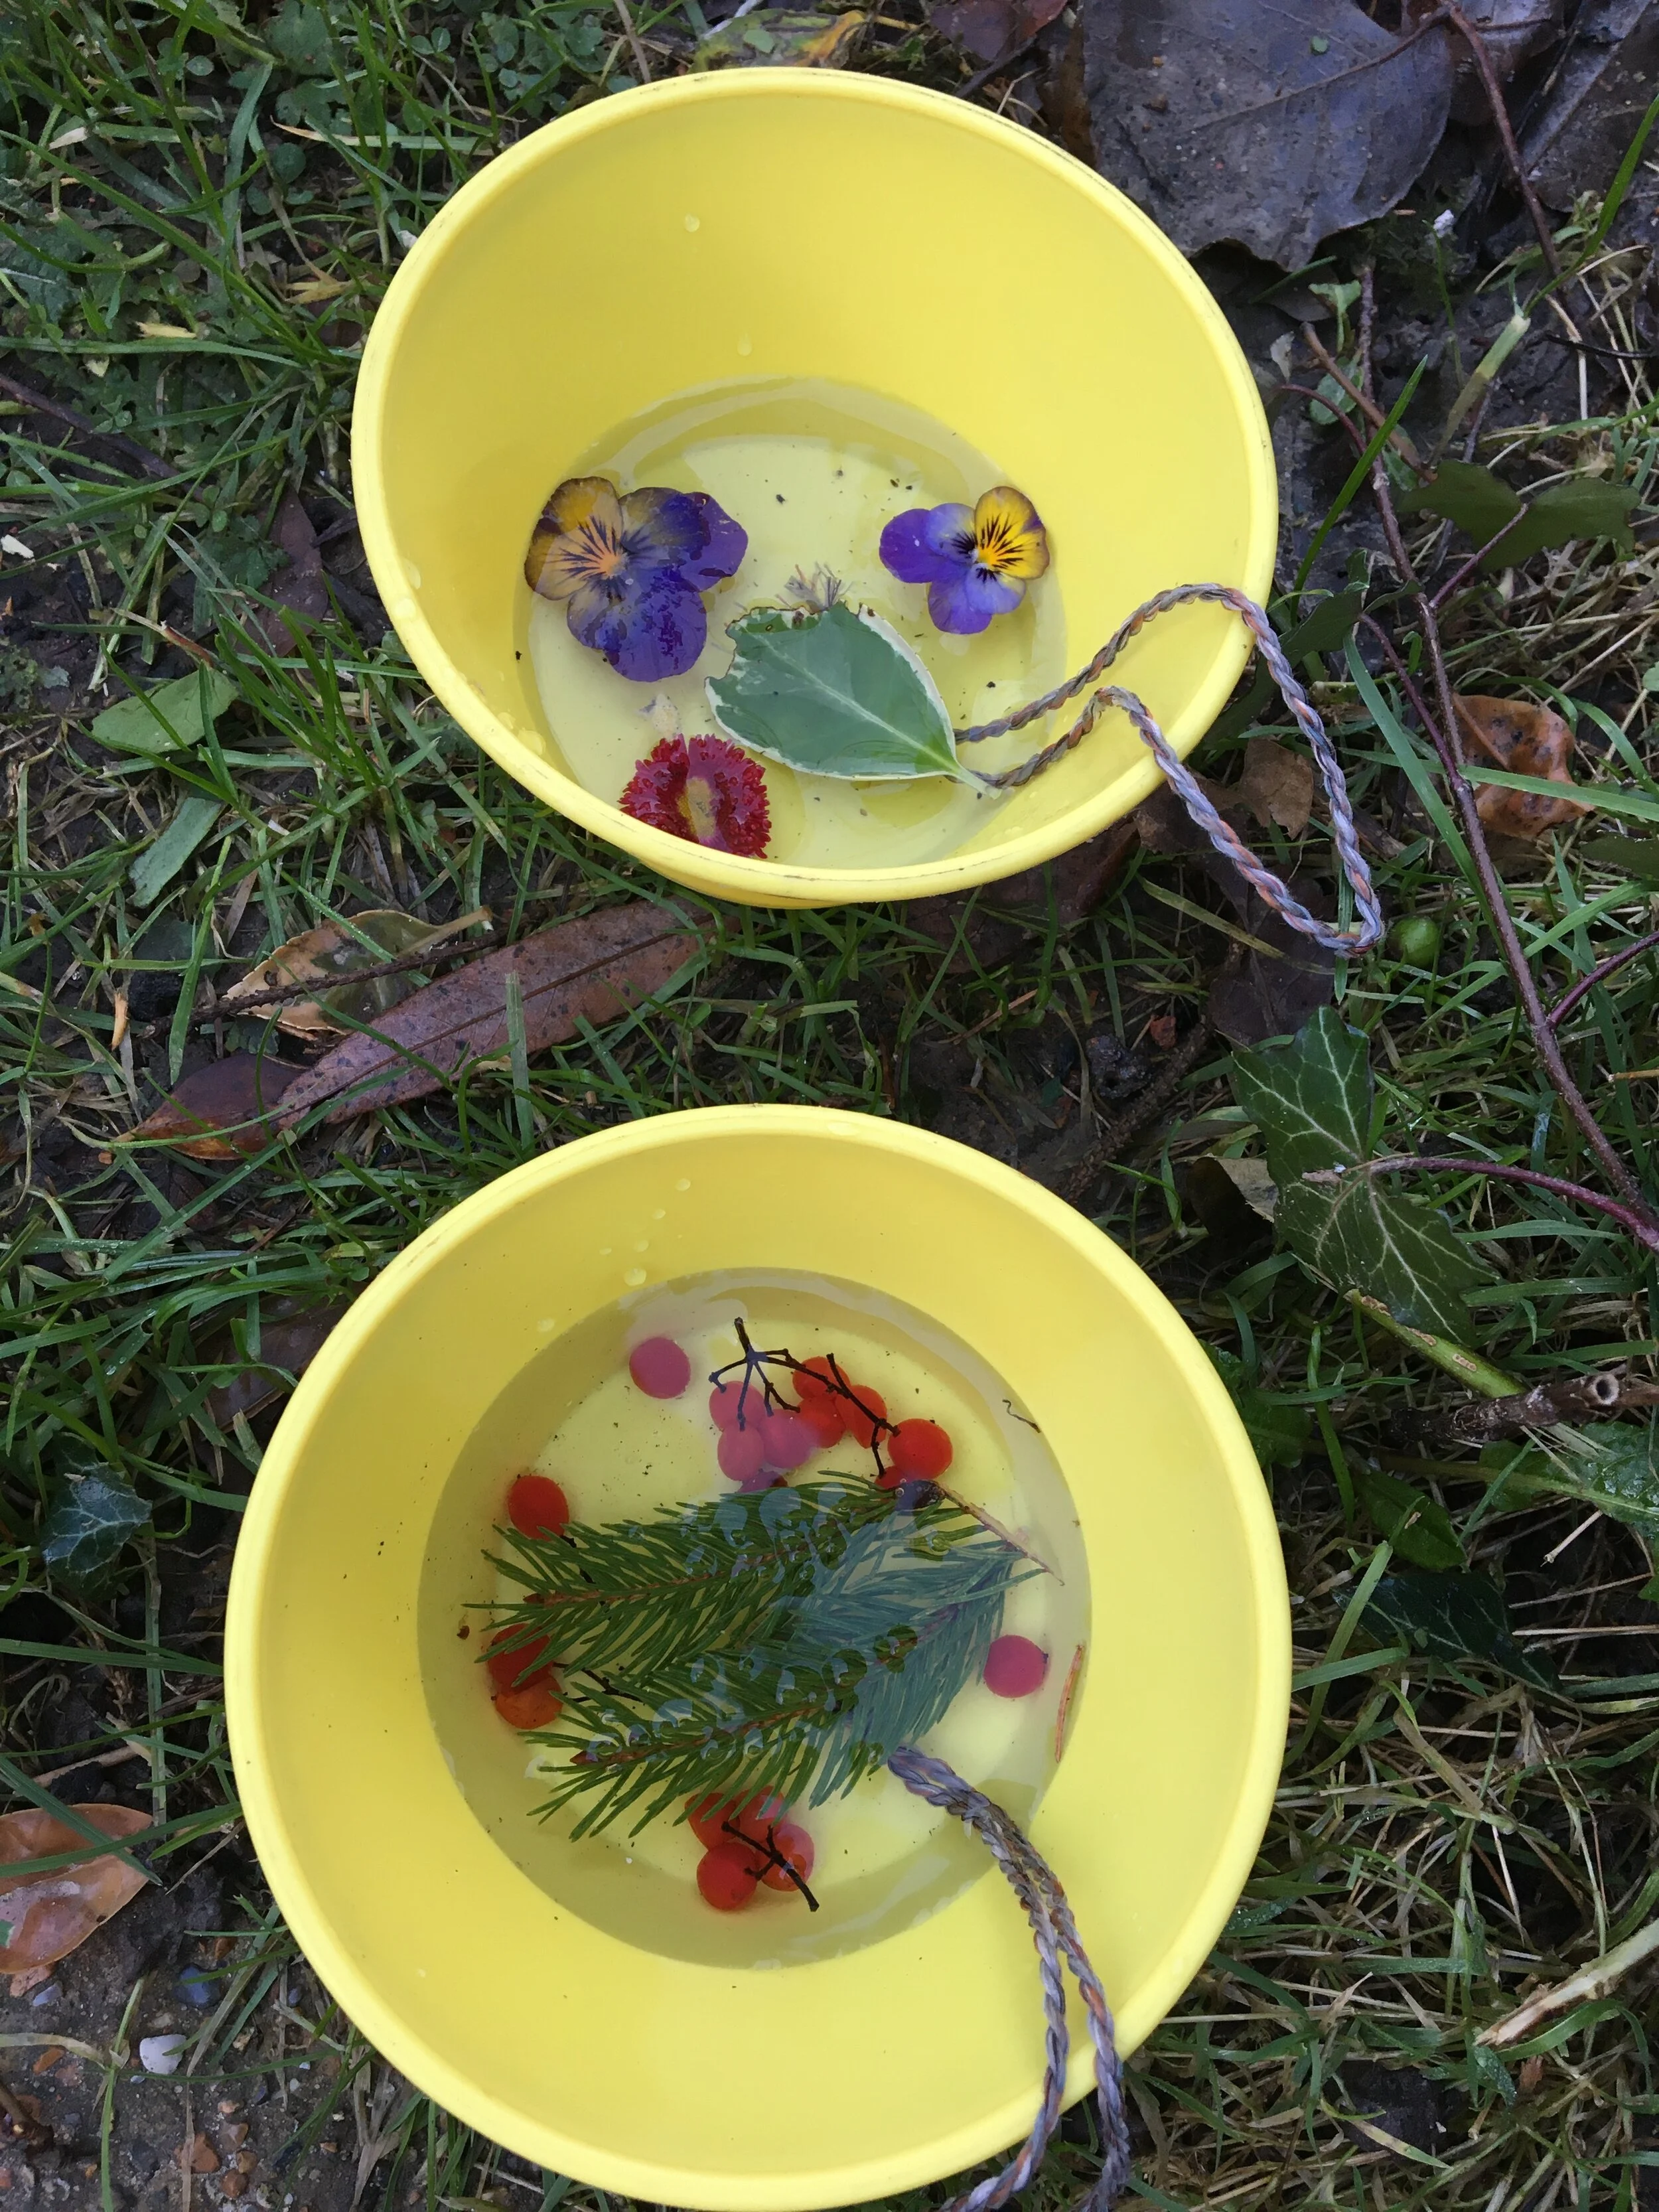
28379730_2096220227273814_3308427481761698546_n.jpg

Sun Catchers

To make a suncatcher you simply find a container and add some water. You can then add natural items such as leaves, petals, berries, or twigs. These will freeze in place and create a beautiful decoration. You can even add a string to the water to allow you to hang your suncatcher up when it has frozen.
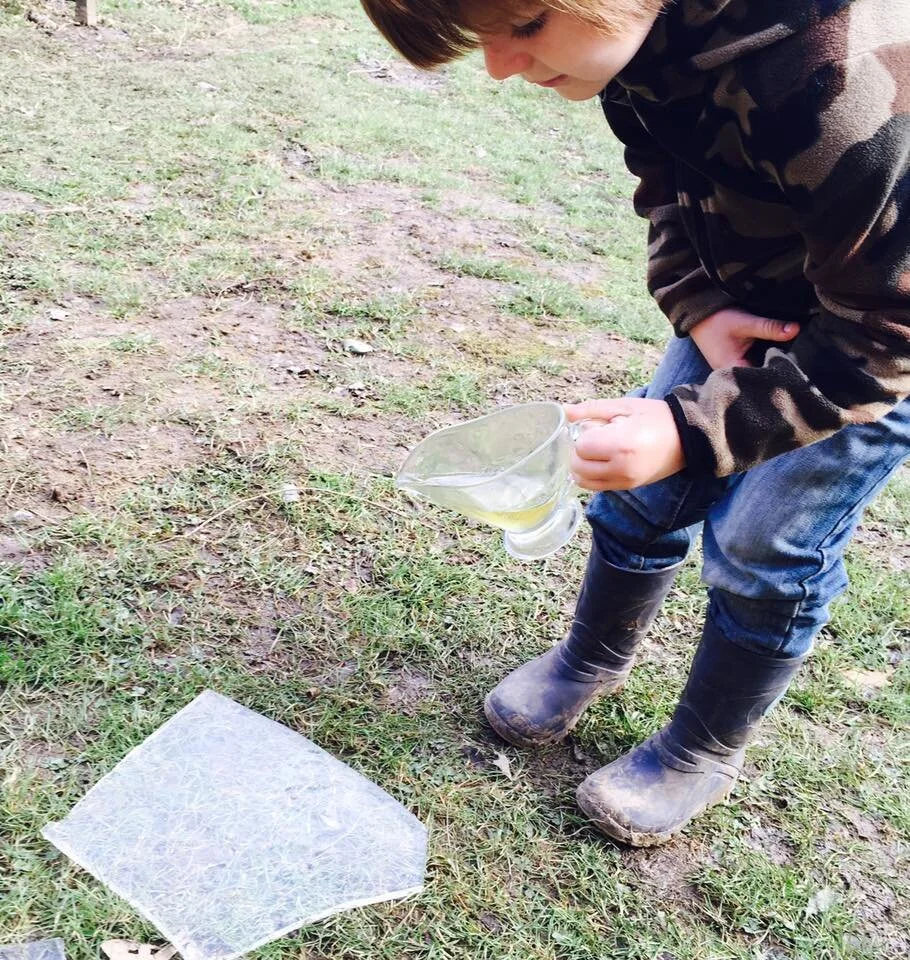
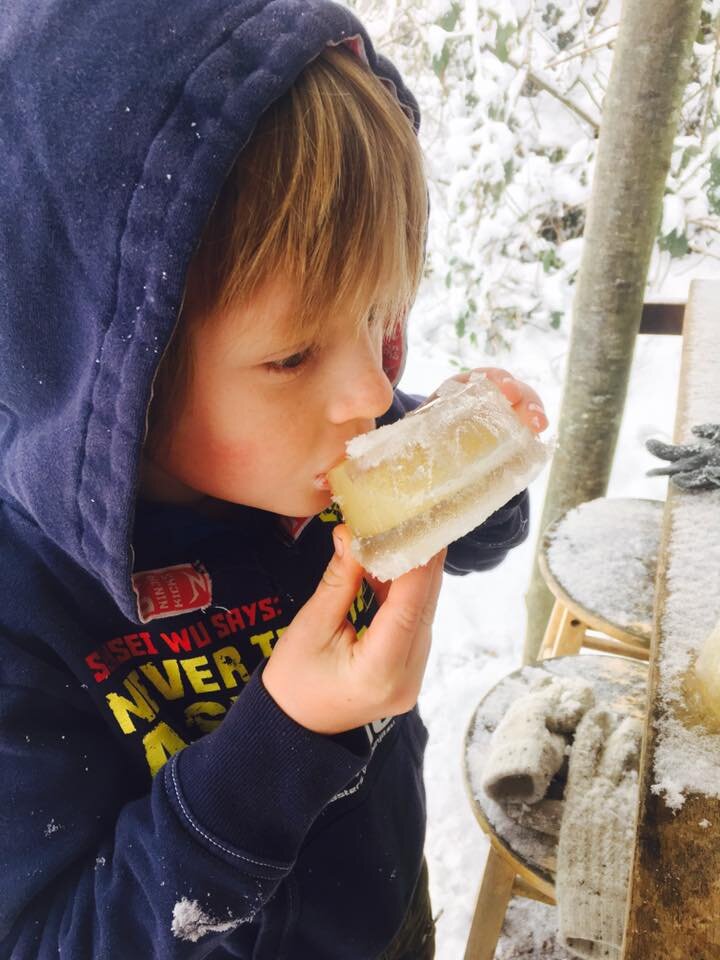
Toffee Lollies

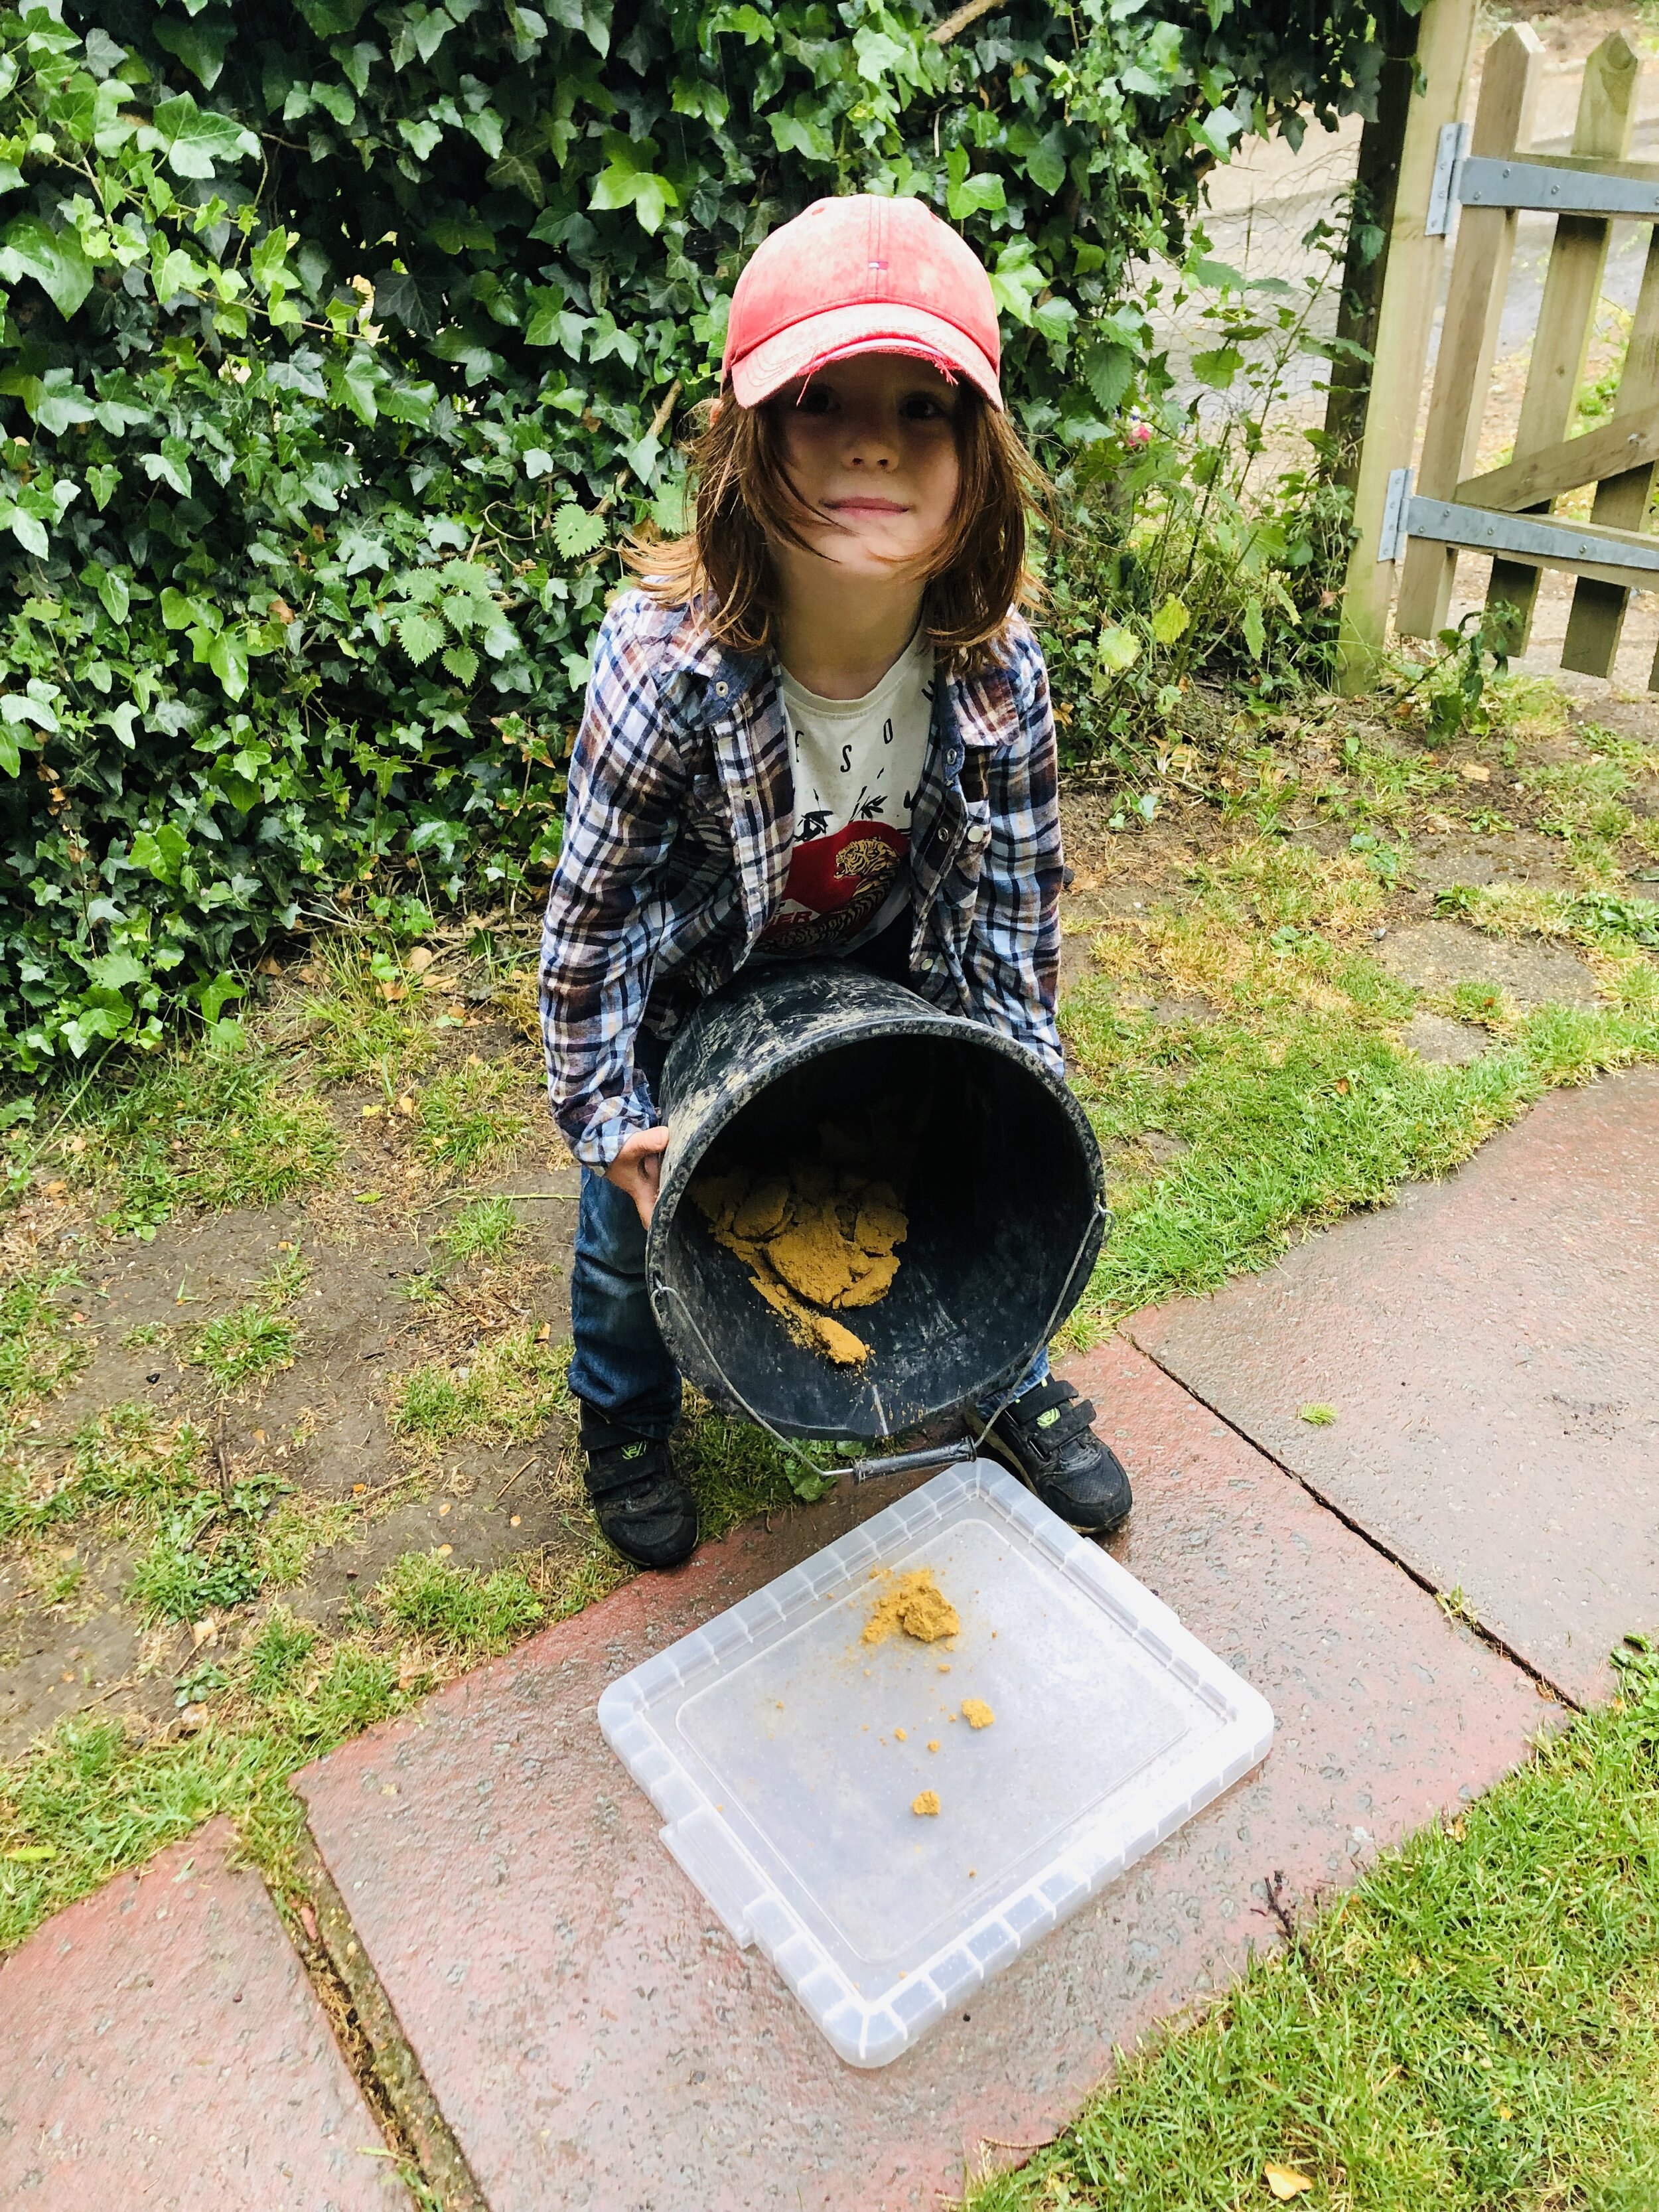
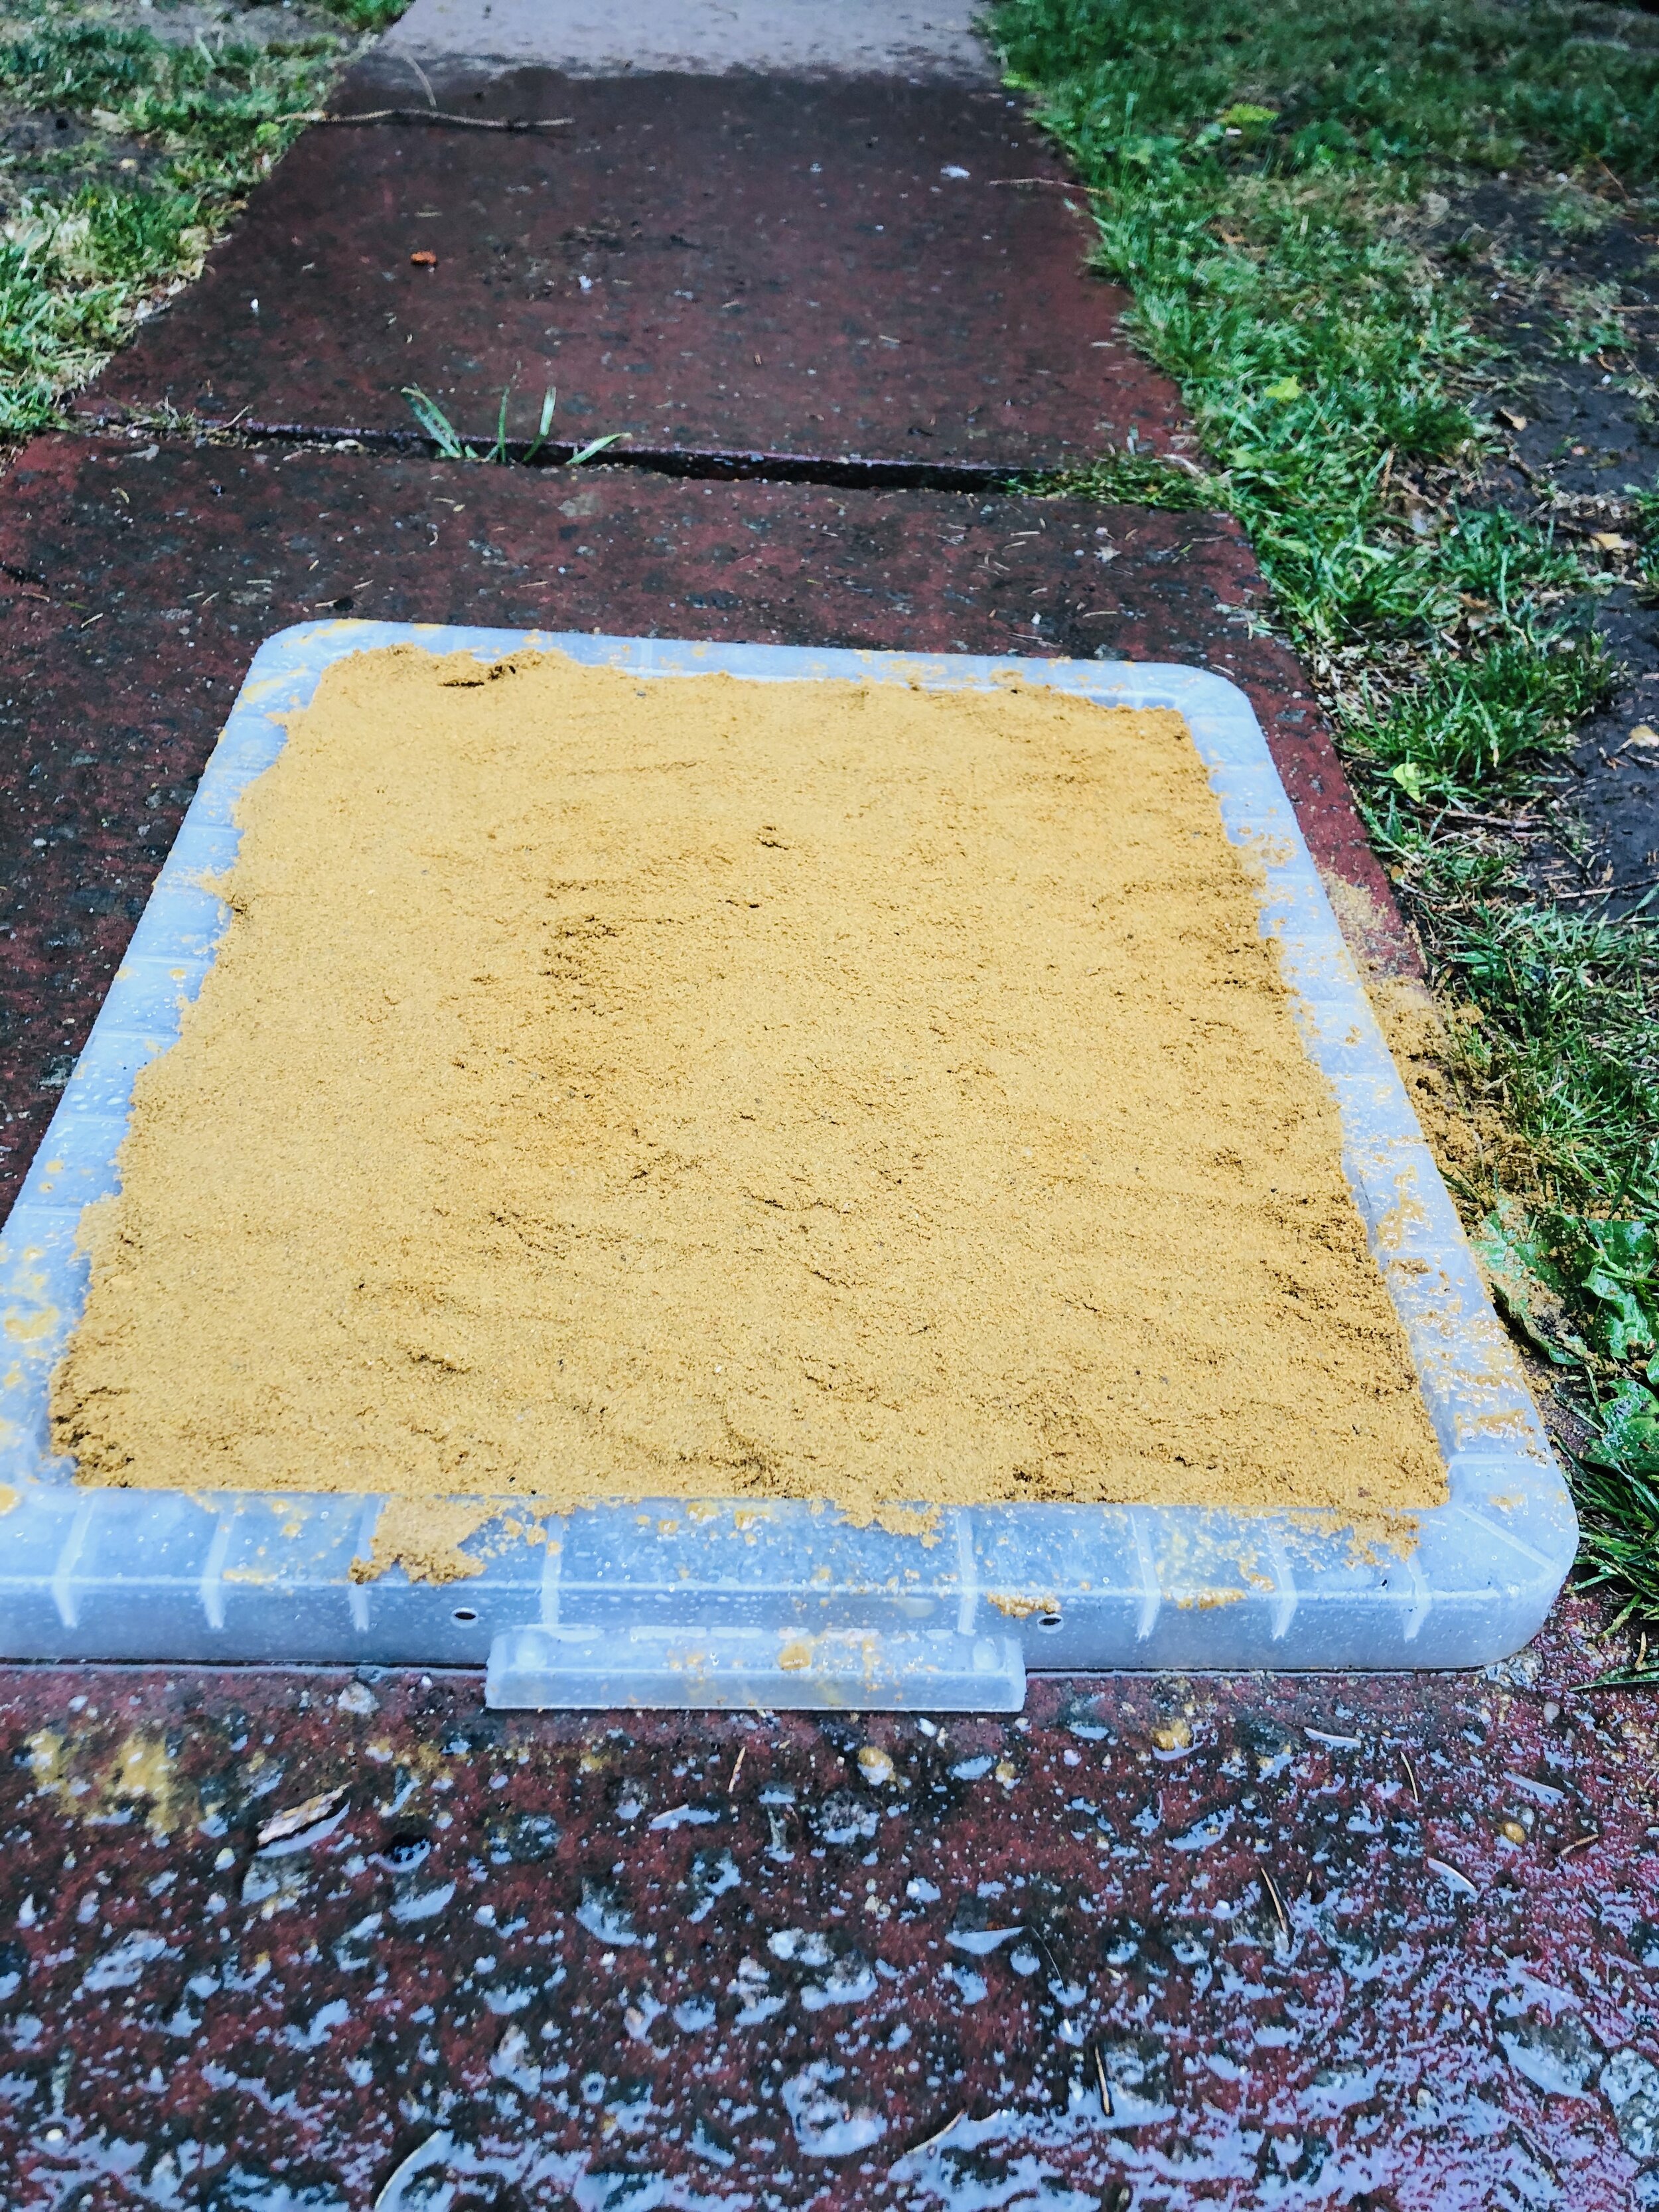
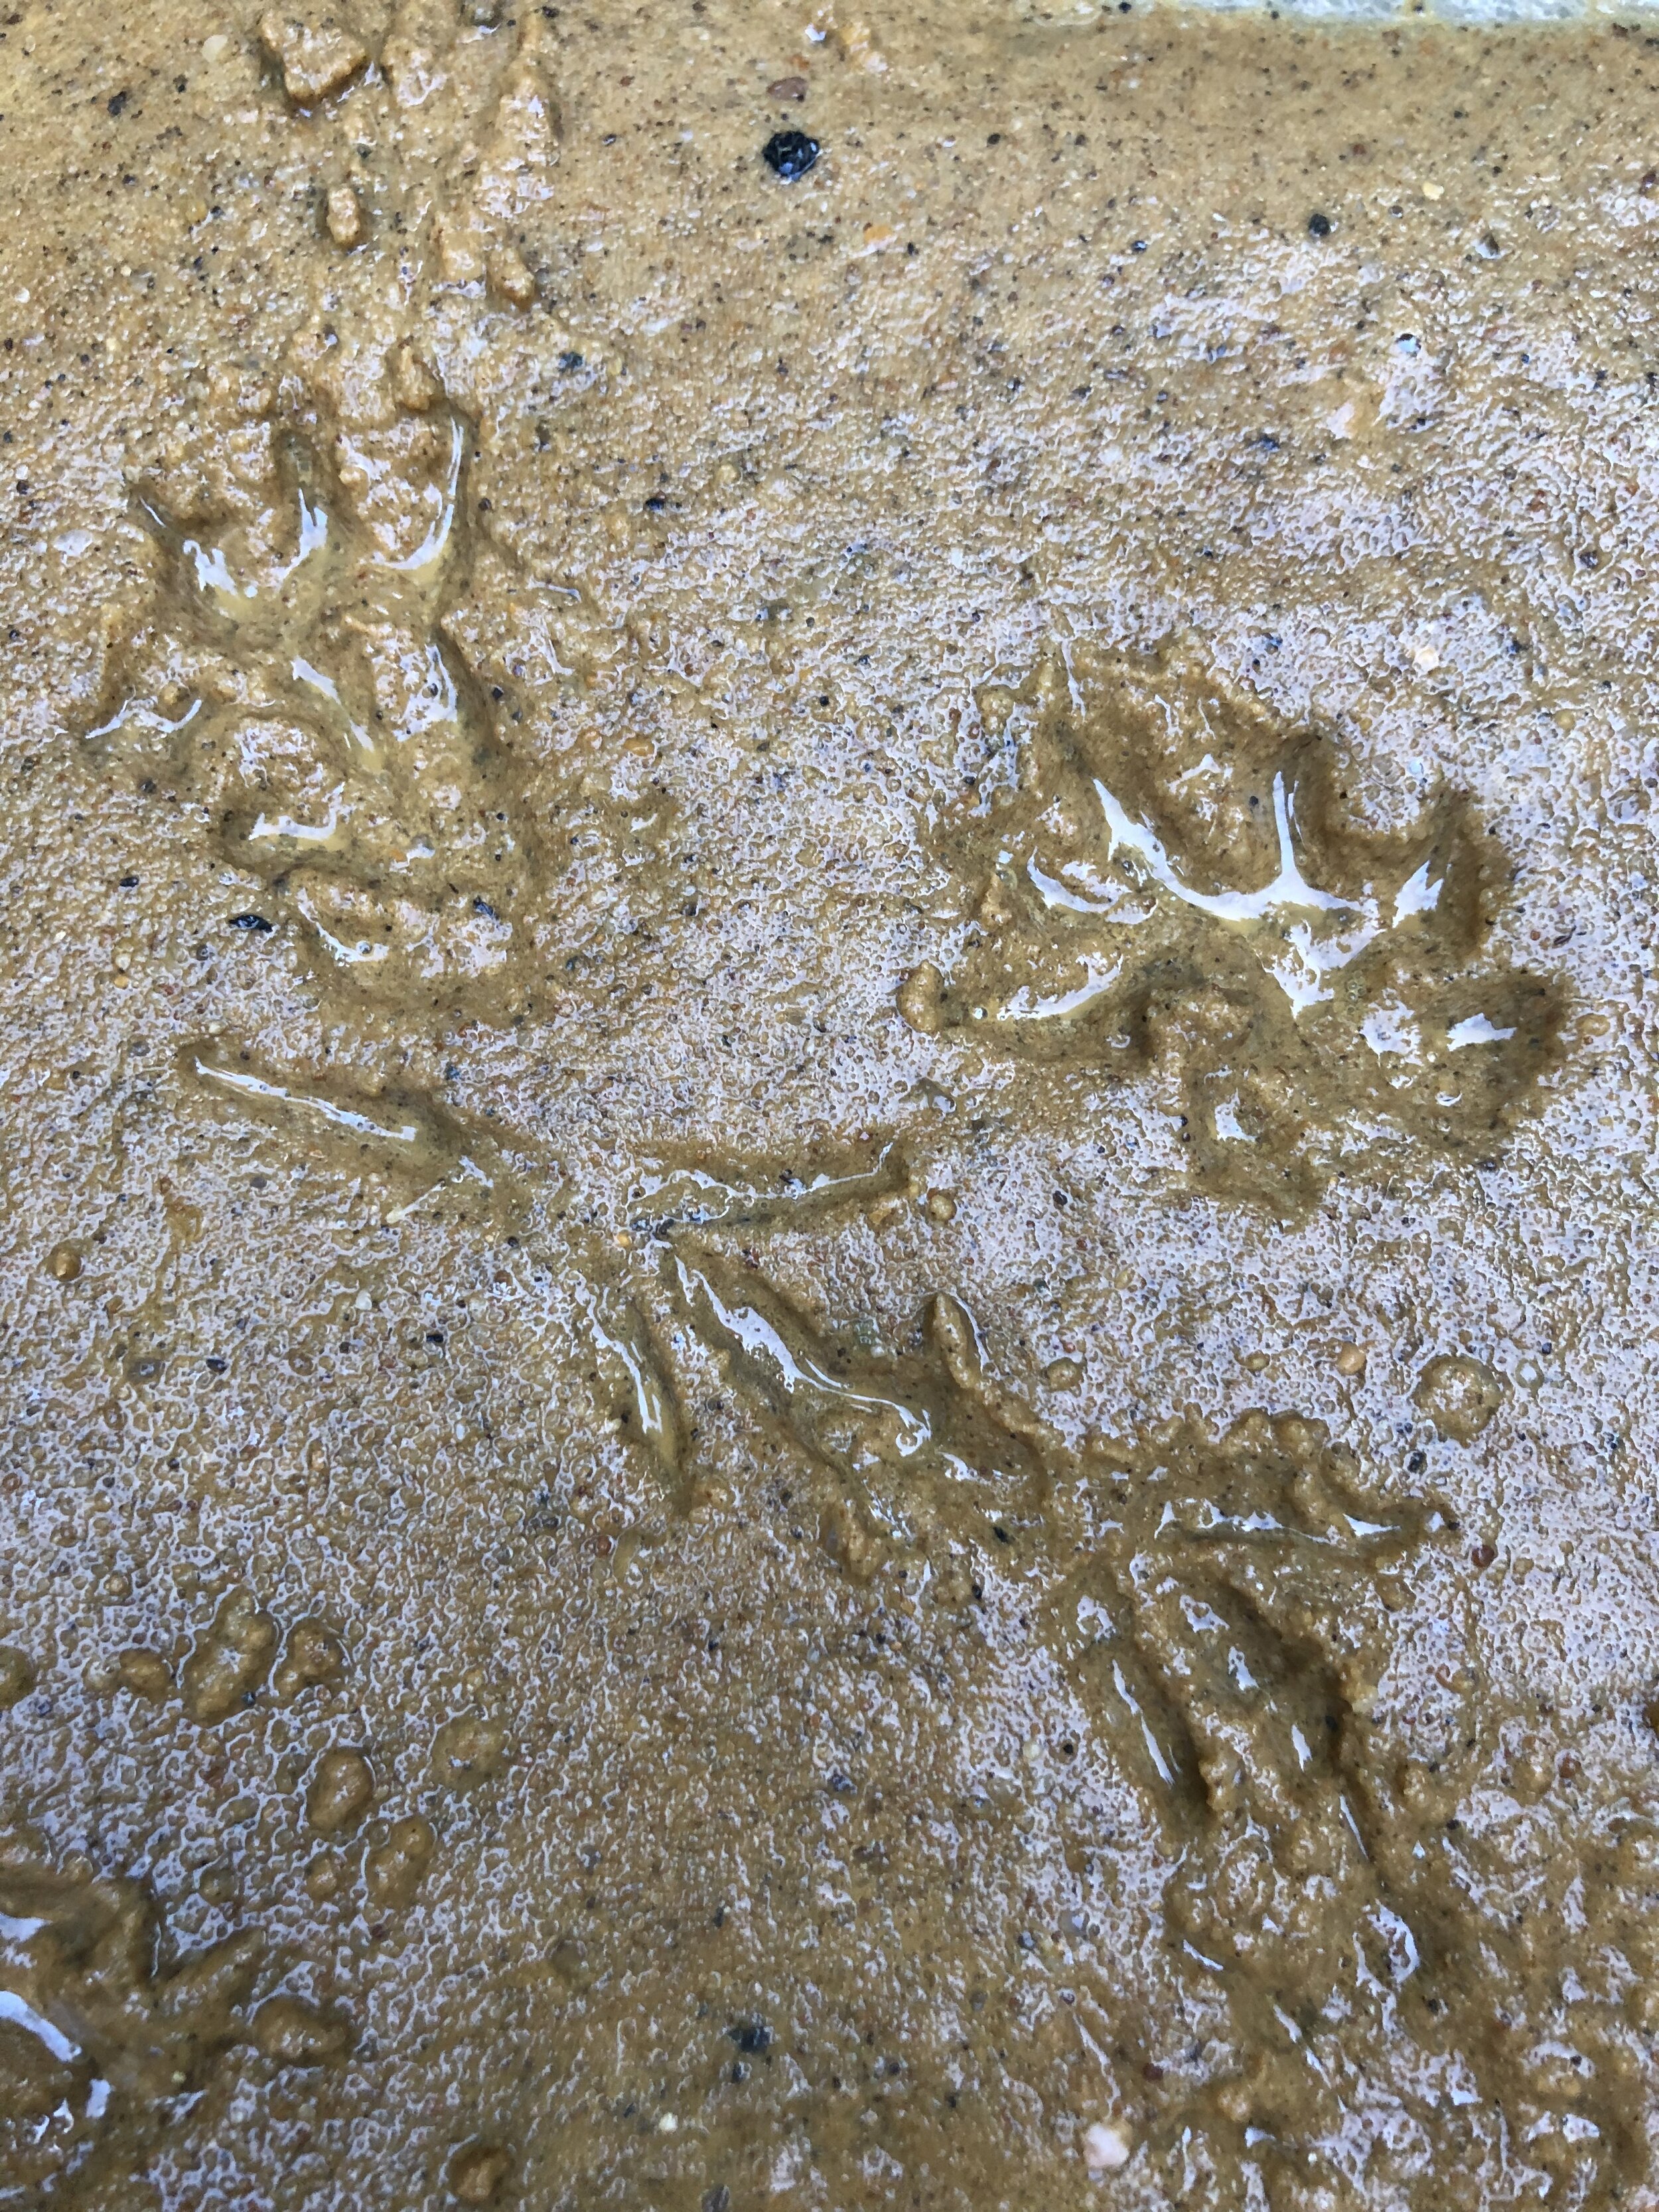
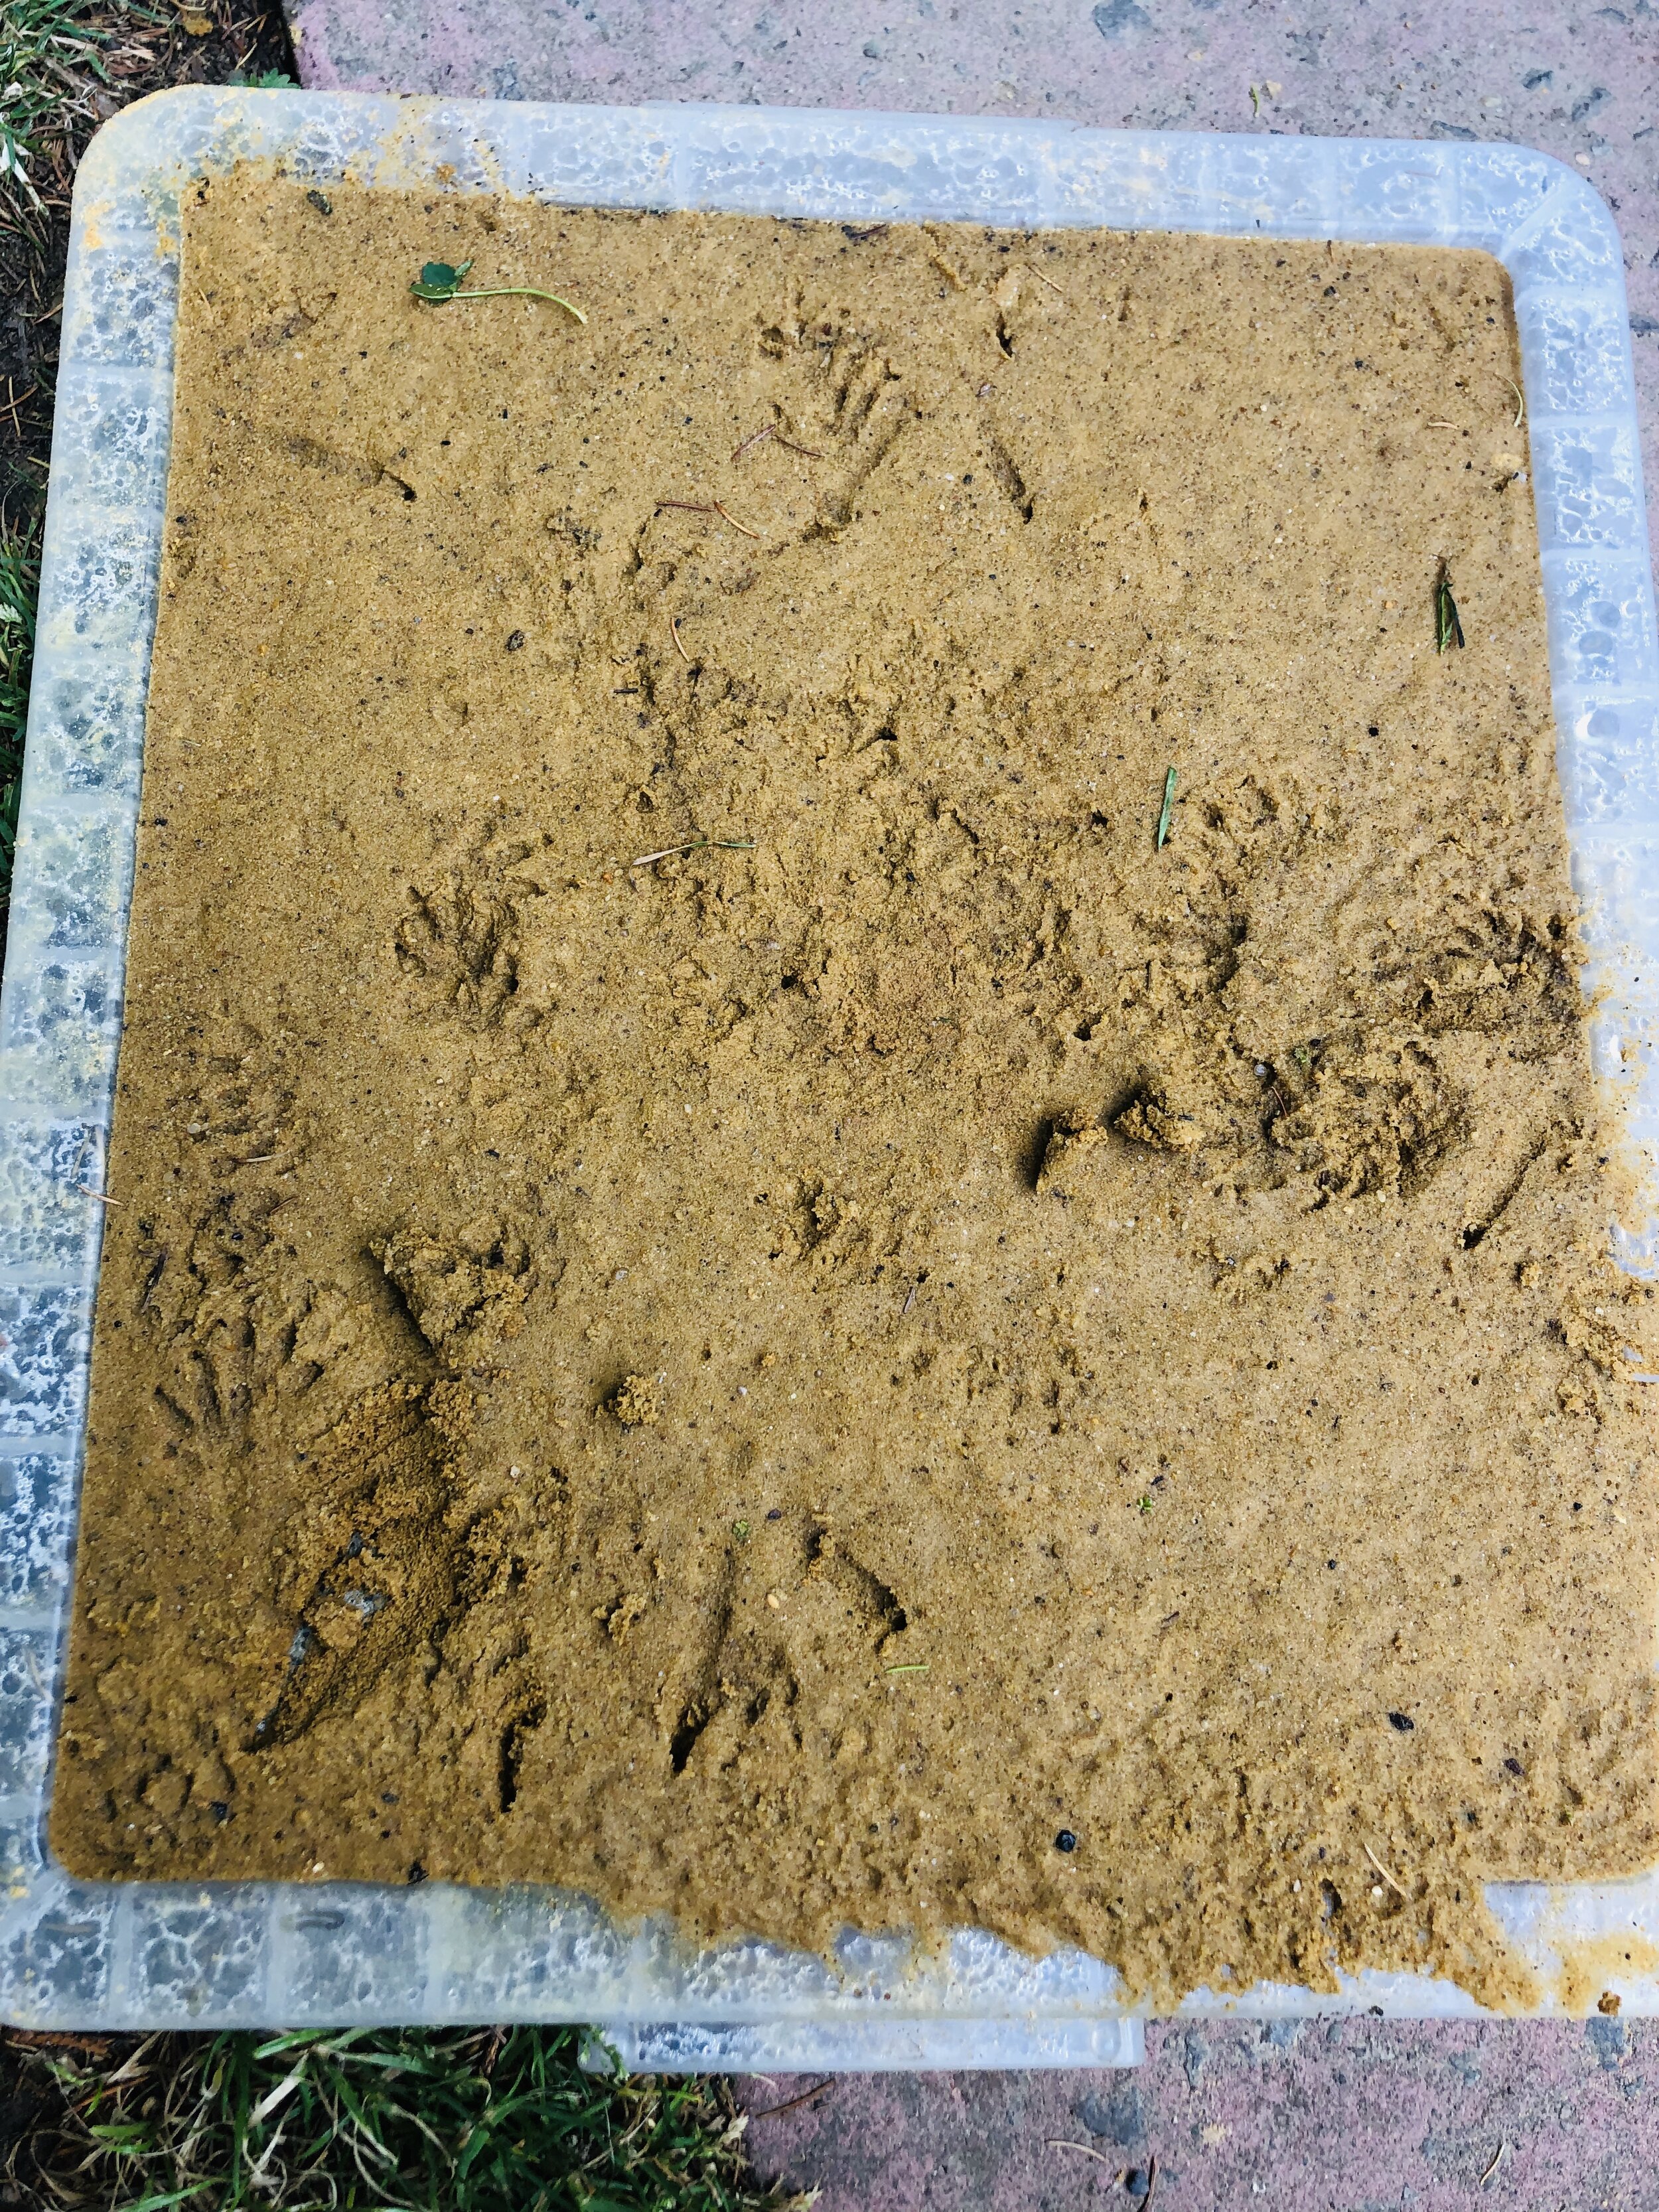
We found this activity in The Wild Weather Book, by Fiona Danks and Jo Schofield. In order to do this you need some slabs of ice. You might be able to forage for these, but if you are planning on eating the lollies its best to make ice using fresh water. You can do this by leaving a plastic box or washing up bowl filled with water out over night.

To make the toffee you take 400g of sugar and 100ml of water and heat until the sugar has dissolved. You then add 1 teaspoon of vinegar and 4 tablespoons of golden syrup. Bring the boil and simmer for 10 minutes. The mixture gets very hot so this is best done by a grown up.

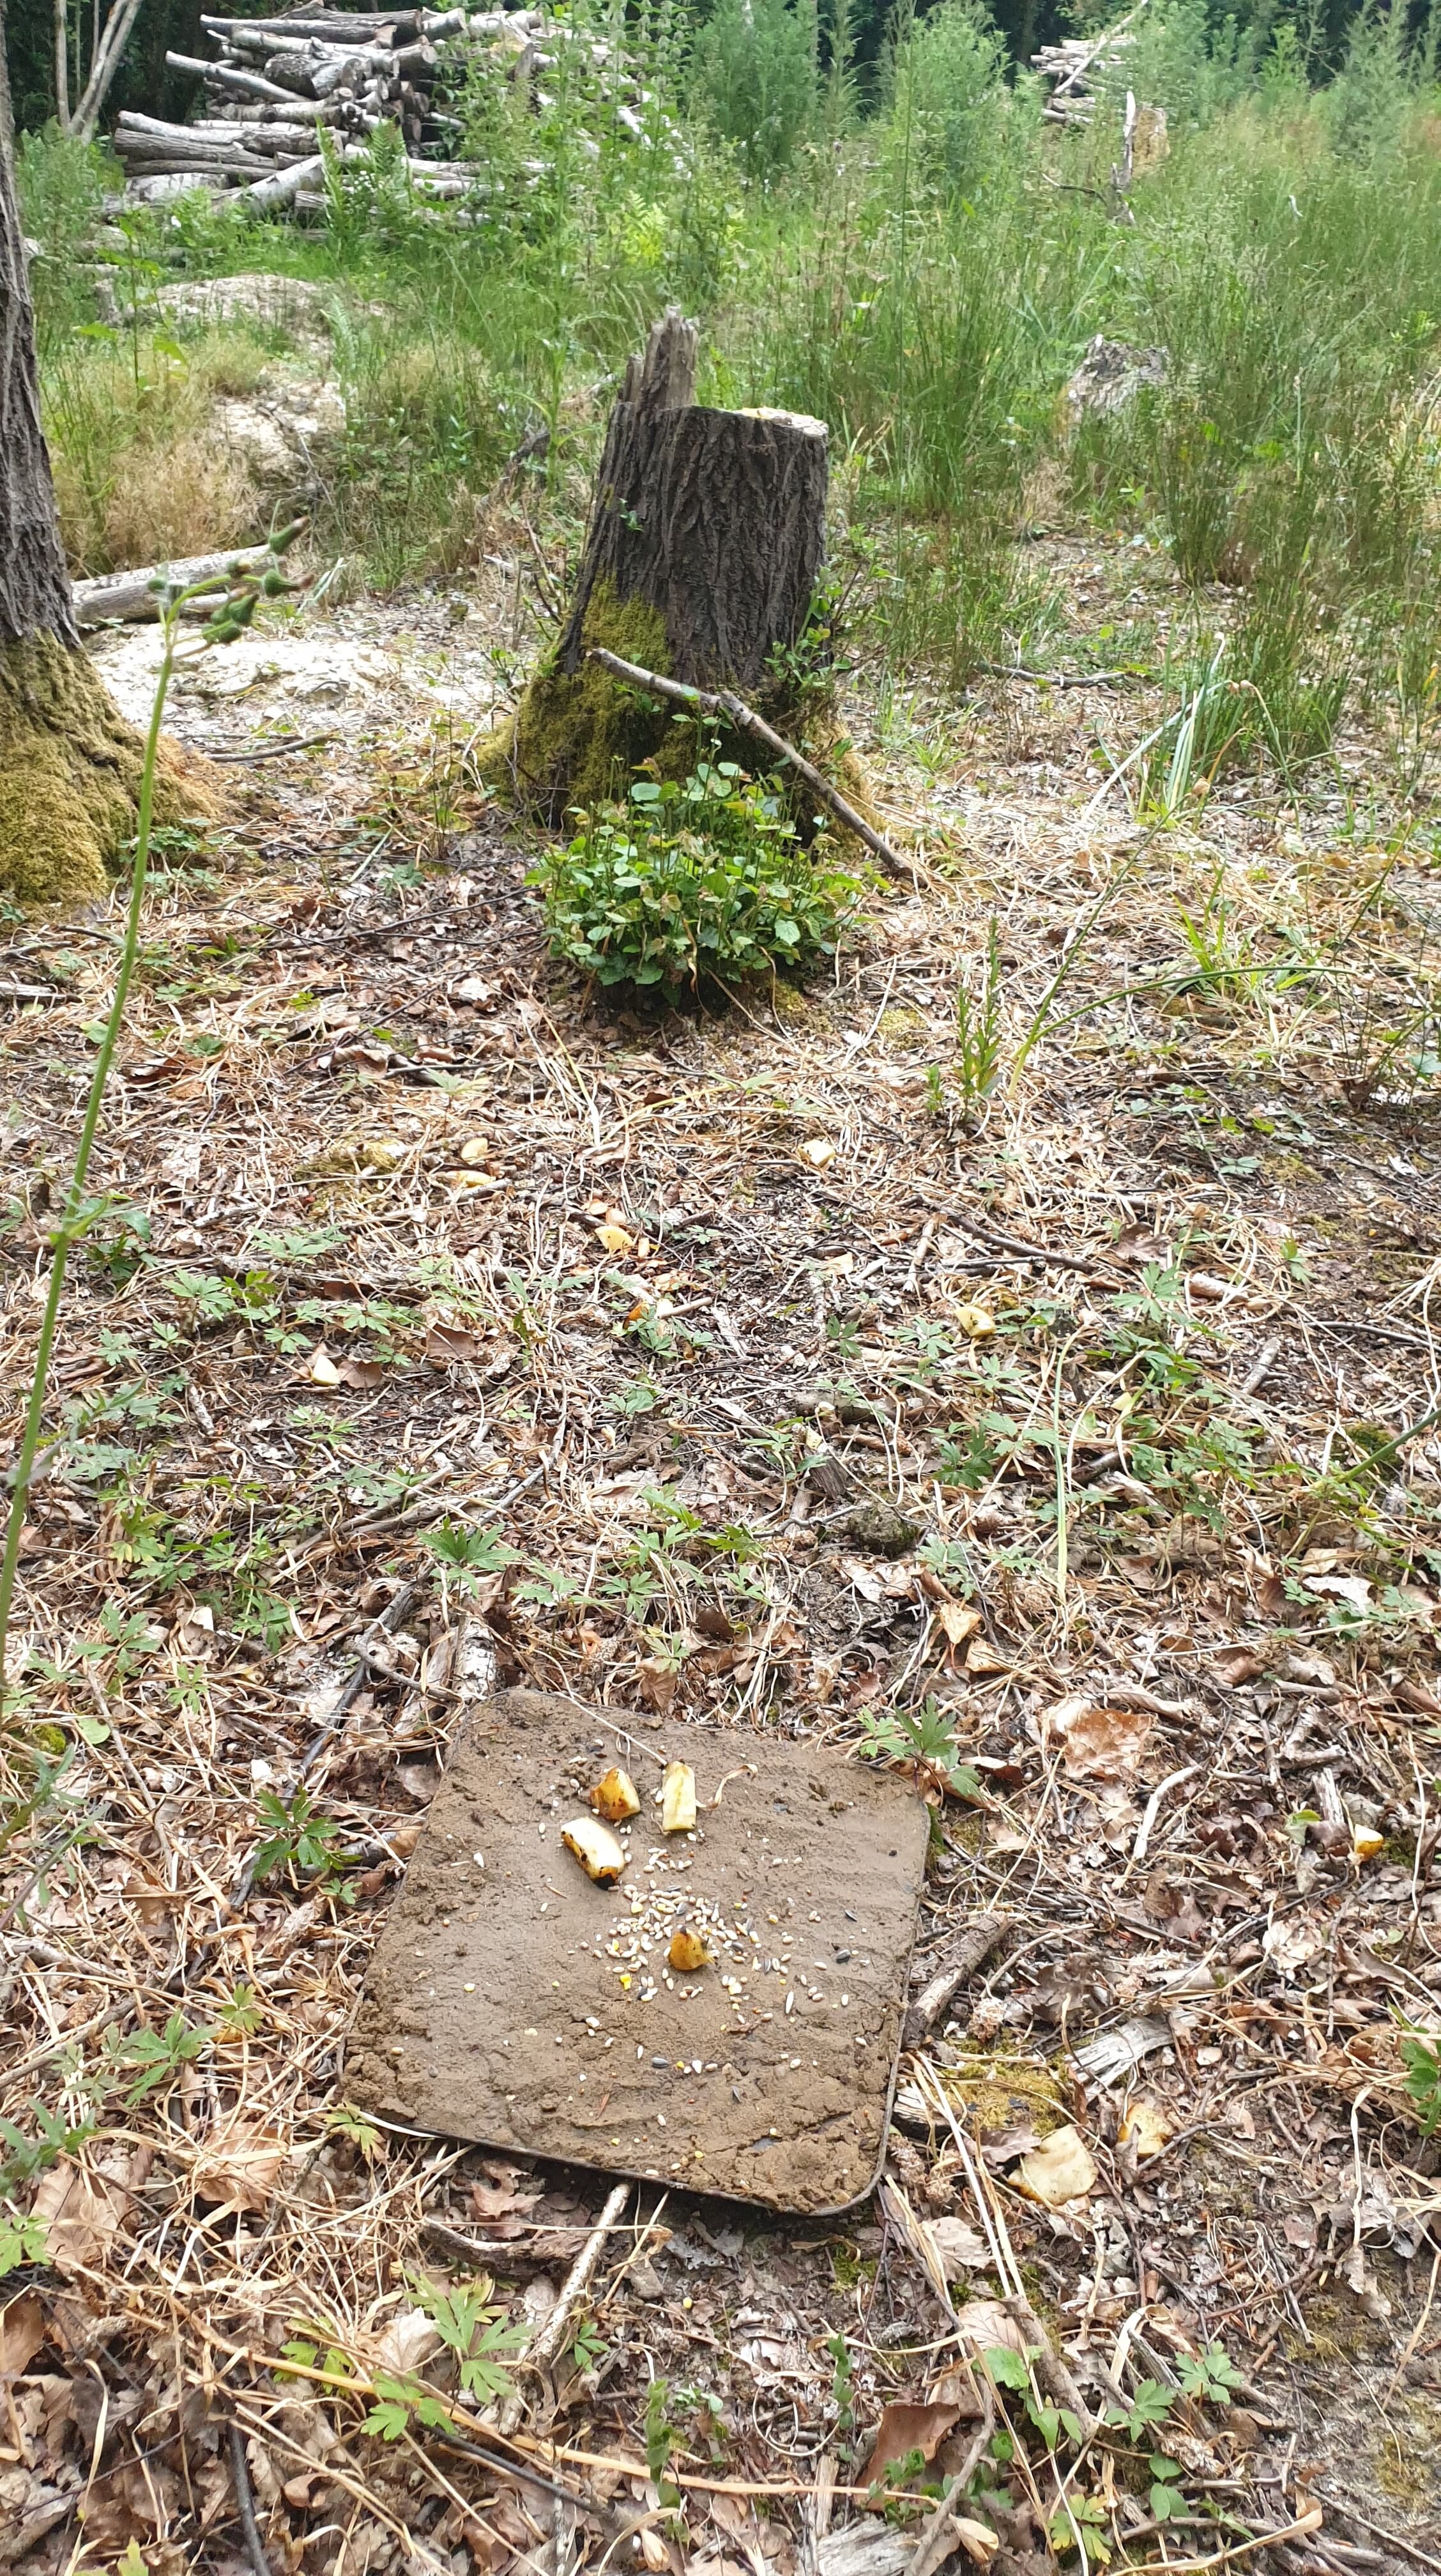
When the toffee is ready it can be put in a jug and drizzled on the ice to make toffee. You can add a wooden stick or skewer while the toffee is setting.

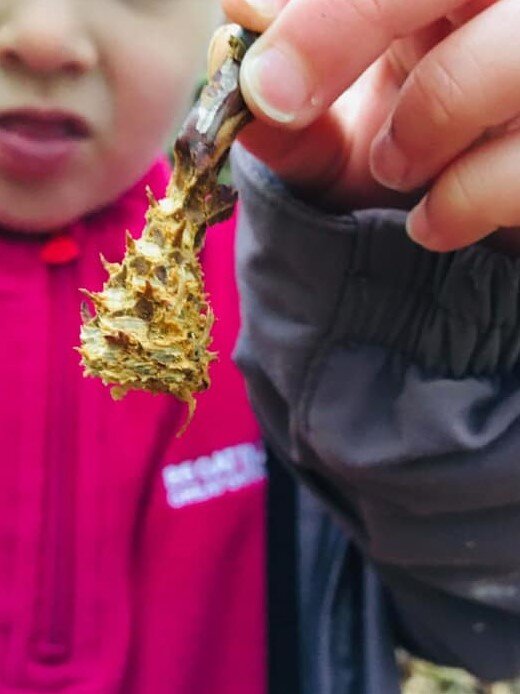
If the mixture does not set immediately it means that it has not been simmered for long enough, It can be returned to the pain to simmer some more until it works.

We did taste our lollies and unless you have a seriously sweet tooth then I don’t think you would want to eat a whole one!

We did however, enjoy the process and they make great decorations poked in plant pots glistening in the Winter sunshine.

Forest Friends (Pack 1)

We don’t always see the creatures we share the woods with, but we often see the signs that they have been there. Tracks in the snow (or more likely mud!), a nibbled pine cone and of course poo!

Then there are the animals we DON’T share the woods with too. The Bears, the Wolves and what about those elusive Wild Boar? During our sessions the children often delight in discussing what does and doesn’t live in English woods. Did Wolves ever roam these woods? What would happen if Bears were introduced? There is so much scope for discussion, imagination and free play!

This activity celebrates the animals we do (and don’t) share our native woods with. These Forest Friends decorations could adorn a Christmas Tree. They would also look lovely hanging from a bare fallen branch gathered in January.

Bear.jpg

The Winter Care packages will contain wooden disks, felt, string, eyes, glue and a spreader. Felt tip pens will also be handy.

Thread the string through the hole in the wooden disk and tie in a knot so the finished decoration can be hung up. Try and do this before the glue comes out as, if you have started sticking, this can get messy!

Felt shapes can be cut out and glued to the disk along with some eyes to create a fox.

This deer’s antlers are made from twigs collected in the woods

Deer.jpg

Children might find it easier to draw their design on a piece of felt. Once they have cut this out they can be shown how to layer other felt shapes on top to create their design.

While we hope our fox, bear and deer have given you some ideas on which woodland animals you could make, we know the children will have lots of their own ideas. The most important thing is to enjoy the process. Maybe take some time to remember the woods and the creatures that live there. Better still go for a walk in the woods to get some inspiration. Your own Forest Friends can be anything you like in any colour you like! We would love to see any pictures of your finished creations.

Mix.jpg

Snowman Scene (Pack 1)

Making Snowmen from wood is one of our favourite Winter Forest School activities. It is always enjoyed by the children. We have, therefore, created a ‘flat pack Snowman’ for our Winter care packages.

The kit will contain everything you need to create your very own Winter Woodland scene as demonstrated in the video below.

Among the craft materials provided is some desiccated coconut that can be used as snow. This can be avoided if it is an allergen.

Mulled Apple Juice (Pack 1)

We love making Mulled Apple Juice on the campfire in December. The smell always gets everyone talking about the festive season. Then we gather around to warm our hands on hot cups of juice.

Apple 1.jpg

We have included a Mulled Spice sachet in our Winter Care Packages so you can recreate this comforting drink at home.

You will need a litre of apple juice and if you have any spare apples, oranges, satsumas, lemons or cloves its fun to add these as a garnish. However, the Mulled Spice Sachet will flavour the juice perfectly well on its own.

Little fingers can push cloves into apples and oranges. The skin of the fruit should first be pierced with a cocktail stick or skewer.

Everything is placed in a large pan before pouring on the apple juice.

Apple 2.jpg

Heat to just below boiling point and hold this temperature for 10 minutes, stirring occasionally. Allow the juice to cool slightly, serve and enjoy with your family!

Lanterns (Pack 1)

Lanterns are associated with many of the Festivals that happen during the long Winter months such as Diwali, Martinmas, The Winter Solstice, Christmas and Chinese New Year.

However you decide to spend the Winter and whatever festivals you choose to celebrate, beautiful lanterns lighting the dark nights bring hope and joy in the depths of Winter.

Our Winter Care Packages will contain all the materials needed to create beautiful lanterns to light your home. If you are receiving a pack you will need to save a glass jar as this won’t be included. If you are not receiving a pack, and would like to make a lantern, you will need a glass jar, PVA glue and tissue paper. You might have other decorative items you could use, such as sequins or you might choose to forage leaves.

Before we made our Lanterns we went for a walk around the country lanes. We collected a few leaves, but also took in the colours nature was offering at this time of year. As it was November we were presented with a lot of oranges, yellows and browns and these were the colours we chose to use for our lanterns. A walk in December might have led us to use more greens and reds. We could have chosen whites and blues to represent the coldest months of January and February.

Back home in the warm we chose the tissue paper we wanted to use and snipped it into small pieces.

We also sorted out our leaves and used the bigger ones to make ‘leaf confetti’ using decorative hole punches.

IMG_1875.JPG

When all the materials are prepared it is time to get the PVA glue out and start sticking everything to the jar. You should paint glue onto the jam jar, add layers of tissue paper and leaves if you are using them, and then add more glue on top. This decoupage technique will result in a strong and beautiful lantern to light your way through the Winter.

IMG_1884.jpg

Campfire Jam and Wild Toast

67963113_2079433559028029_3672145627321466880_n.jpg

At this time of year soft fruit is abundant and you might have some growing in your garden. If not there are plenty of farms where you can pick your own strawberries, raspberries or blackcurrants.

We love to make a super simple campfire jam from these fruits and serve them with wild toast. Unlike a true jam, this uses a small amount of sugar meaning it won’t keep for long. This doesn’t seem to be a problem though and a small batch usually disappears in a session!

To make a ‘Jam’ like this you simply add your cleaned fruit to the pan. Add a little water, but not enough to cover the fruit. Add several tablespoons on sugar depending on your taste and the volume of fruit. If you put in the juice of a lemon this will help it set. The mixture should then be simmered until the fruit has broken down and the jam begins to thicken. It can then be left to cool before eating.

We serve ours with Wild Toast cooked on the campfire. Nothing really beats it, but if you try this beware that it burns very quickly!

68601062_2082678142036904_8327660846406696960_n.jpg

Celebrate the Bees

As it is Solitary Bee Week we have put all our Bee related activities on one post.

White Tailed Bumble Bees are a common site, but they are only 1 of 270 species of Bee living in Britain.

270 separate species of Bees have been recorded in the UK. 90% of these species are Solitary Bees. The remaining 10% are made up of Bumble Bees and Honey Bees. Bellow is a picture of a Honey Bee and a Red Tailed Bumblebee.

Solitary Bees live alone in holes in wood or in the ground. They don’t produce wax or honey, so they are actually better at pollinating than Honey Bees or Bumble Bees. This is because, unlike the other types of Bees, they don’t have pollen baskets. This means they drop lots of pollen. Solitary Bees are therefore crucial to our food chains and should be celebrated and protected.

Bare patches of earth are great for Solitary Bees as many like to ‘mine’ a home.

Below are five ways you can celebrate and raise awareness of Bees.

Go on a Bug Hunt

This ‘Wanna-Bee’ is actually a Hoverfly.

We shared a post in the Spring all about our passion for a Mini-Beast Safari. You could go on a bug hunt and pay special attention to the Bees. Can you spot any Solitary Bees? Can you see any places they might live? Can you tell the difference between a Honey Bee and a Bumblebee? Can you find any ‘Wanna-Bees’? These are insects that try to look like Bees as a form of defense! One way of identifying these is by their forward facing eyes. Bees eyes are always on the side of their heads. The Bumble Bee Conservation Trust have launched an app to help with Bee identification.

Make a Pine Cone Bee

This is one of our favorite activities and a lovely way to start talking about Bees.

Build a Mini-Beast Hotel (With a Bee ‘Wing’)

Solitary Bees need places to nest and you can add materials to a Mini-Beast Hotel that will suit them.

Make a Clay or Salt Dough Bee

If you want to make a Bee that is a little more anatomically correct than a Pine Cone Bee, you could have a go with clay or salt dough. How about finding some seed pods for wings? What could you use as eyes?

Earn Your Stripes

Visit the Solitary Bee Week website and pledge to help Solitary Bees. There is advice on the website ranging from how to plant a wild flower garden to how to raise awareness.

67780567_2073706136267438_2366671445615968256_n.jpg

5 Ways To Make The Most Of Your Mud Kitchen

Today is international Mud Day today. This day was founded in an effort to make all the children of earth feel closer together through the uniting medium of MUD! Covered in mud we all look the same.

We have been passionate about mud play for a long time. It is sensory play the old fashioned way and requires digging, squeezing, mixing and pouring. Mud play builds resilience both physically and mentally. It requires imagination, team work and communication Most of our sessions feature a mud kitchen in some guise or other and its true that mud brings children together. Many a friendship has been made or cemented over a few mud pies.

Below we have shared five tips to get the most out of a mud kitchen at home.

Keep it clean

It might seem counter intuitive, but it is really important to clean your mud kitchen between play. There is nothing more unappealing than cooking equipment caked in old dried on mud or filled with smelly stagnant water. If you periodically wash the pots and pans then it will be much more inviting and will more likely be played with. It also sends a message to the child that they are valued and so is their play. You could incorporate the washing up into the play and provide some warm bubbly water towards the end.

Use top quality mud

36641764_1839386356366085_6535311023157542912_n.jpg

You can’t create a perfect meal without good quality ingredients so its important to source the best mud you can. You could dig a mud pit in a corner of the garden or provide a bucket of potting compost. We think the best mud is Mole hill mud! Hunting for Mole hills, digging the fine soil and carrying it home in a bucket is an activity all by itself. Can you find the Mole’s hole beneath the soil?

Involve seasonal loose parts

Adding extra ingredients to the mud kitchen extends the play and keeps mud dishes seasonal! Flowers and blackberries make great mud pie decor on Summer days, pumpkin seeds and acorns are perfect in Autumn, pine cones and evergreen branches can be used in the Winter and catkins and pussy willow in the Spring. Its a little bit like an interactive seasonal nature table!

Up-cycle/recycle/reuse.

35359395_1821180584853329_1142909072551444480_n.jpg

Although there are some beautiful mud kitchen on the market you really don’t need one. Old pots and pans do the job. You can ask friends and relatives if they are getting rid of any of these or have a look in charity shops. Some of the most dated items are often the best. We have a 1970’s Salad Spinner that brings great joy!

Children are generally happy to work on the floor, but you can make an easy kitchen counter by balancing a plank of wood over some buckets or logs.

Encourage role play

Playing in the mud kitchen gains an extra level and even more skills develop when the imagination starts to flow. Children could set up a pizza restaurant or a bakery and parents could be customers. Menus are written, prices are devised and communication skills advance. In fairness this tends to be an organic process and grown ups don’t need to force this. They just need to support it and play their role as the game emerges.

Most of all have fun and remember everything can be cleaned up (children included) at the end of the day!

Wild Dyes - Madder Root

We have experimented with many, many natural dyes in our time. It is one of those activities that seems really simple in principle, but in practice is a lot more tricky! Once you have had a go you realise why it is an art form! In fact one of our favourite textile artists India Flint has produced a whole book on the subject entitled Eco Colour. You might remember that Flint is the inventor of Hapa Zome, which has now become a much loved Forest School activity.

There is also a comprehensive section on natural dyes in the book Make It Wild by Fiona Danks and Jo Schofield. However, they admit their most impressive results were achieved using an indigo dye vat at a professional workshop

One natural dye we have found to be reliable and fun is Madder root. Madder is a plant that grows in Mediteranian regions and has a vivid red root. This has been used to dye fabric for centuries and can be bought in a powder form online.

69264661_2467534490142384_1736159131187806208_n.jpg

We kept things simple and didn’t bother with a mordant to fix the dye, however we did use an aluminium pot as our dye vat. This may be why these items have kept their colour reasonably well.

We mixed the packet of powered Madder root with water and heated it all on the fire. Once simmering we added the fabric until it looked like it had changed colour. At this point we removed it and hung it out to dry. If we weren’t happy with the result we returned the fabric to the pot for another go.

We had a lovely afternoon dying some old stained tops and a couple of canvas bags. You can buy canvas bags online, but these have to be washed before you dye them.

A great thing about using Madder root was that there was lots of scope for experimentation. We tied some of the fabric with nylon string for a tie-dye effect. We also had a go at dip dying by leaving half the fabric in the pot longer than the other half.

68890219_2467534526809047_3598240754964627456_n.jpg

We dip dyed by suspending the fabric in the vat with a stick.

You can also change the colour of the dye vat by changing its acidity. After our first attempt we added some vinegar and this gave us a more pink colour. We then added bicarbonate of soda to turn the mix alkali and this resulted in a browner red. Obviously this has to be done with care as the dye vat will be hot and by mixing in acid and alkali ingredients you can create a pretty active volcano!

69262829_2467534486809051_6077203003843018752_n.jpg

Adding bicarbonate of soda to hot vinegar needs to be done with care!

This was a really fun activity and not only did we get to experiment with something new, but we breathed new life into some old clothes.

Deer Tracking

By Mel Evans

We recently shared a post about making a Footprint Trap to help discover what wildlife is living in your area. You might remember Kev captured a footprint of a deer and later filmed some footage using the Wildlife Camera.

Well, this week I came face to face with a very young deer. I was off to the meadow to pick Clover for Sun Tea when it came bounding towards me. It stopped, starred at me for a while and then turned and ran off again!

Photo 18-06-2020, 14 46 27.jpg

We were both surprised to see each other!

I was really keen to find out what type of deer it was and how many young are in the area so I started to investigate. There are some obvious tell tale signs that deer have been visiting and you can look out for them while walking in the woods or countryside.

Deer tracks are a great indicator and looking at the size of the footprint can even give clues to the age and type of deer that left it. I found these tracks accompanied by lots of deer poo!

Photo 19-06-2020, 07 34 39.jpg

Deer poo is small and round. It is highlighted in the top left corner above the track.

At this time of year you might find areas where the grass is very long. The deer leave corridors through the grass as they trample it. You can follow these paths to see where the deer are travelling.

Photo 19-06-2020, 07 25 03.jpg

This corridor led to a gap in the hedge.

I also found a ‘Deer Couch’ in the long grass, This is the flattened area of grass where a deer has laid. Mother Deer will leave their young sat hidden in the long grass while they go off to feed. The size of this couch indicates this might have been where my baby deer had been sat before I disturbed it.

Photo 18-06-2020, 15 04 50.jpg

Looks comfy!

Once I had put all these clue together I found a spot which looked like the deer were travelling through regularly. I set up my wildlife camera (the same as the one we have available to borrow) and was rewarded with some footage.

The film below show two young deer. Their bouncy tails indicate these are probably Fallow Deer. Although Fallow Deer are commonly tan with white spots they do some in three other colours. The ones i filmed are Melanistic Fallow Deer and are a beautiful chocolate brown near black. This means my ‘baby’ deer are Fawns. Not all types of deers’ young are called Fawns. Red Deer and Sika Deer have Calfs and Roe Deer have Kids.

If you are interested in learning more about deer or identifying the deer you have seen then the British Deer Society website is a great place to start.

Water Play

It looks like the sun is going to have his hat on all week and there is nothing we like better when the weather heats up than a spot of water play. Water play is calming, cooling, sensory and develops a host of skills. We have also found it doesn’t really have an age limit. Older children might enjoy our Water Filter Challenge and below we have shared a few more ideas we have used in the past to spice up water play.

Water Wall

Raid your kitchen, raid the shed, raid your recycling bin! Colanders, tubes and drain pipes can be tied to a fence to create a fun water wall. Empty plastic milk bottles can be cut in two and the half with the handle used as a jug. Holes can be added to the bottom half to allow water to trickle through. A water wall can be set up in advance for younger children. Older children can be involved from the start building, testing and redesigning the water wall.

65542374_2052946155010103_4755279522595602432_n.jpg

Chalk

This is a hugely popular activity and its not hard to see why. Chalk is smashed with a hammer to create a fine powder and mixed with water to create different colours. The coloured waters can them be tipped and mixed to create new colours!

Food Colouring

Sometimes water is more appealing to play with if you can actually see it and all it takes is a few drops of food colouring!

Flowers and Herbs

Adding flowers and herbs to the mix increases the sensory element of water play and makes a for a beautiful and fragrant experience. Obviously you should choose non toxic flowers, but we like to play it super safe and use edible ones. If you don’t have a Herb Garden why not plant one?

Tea Set

Make believe garden tea parties are older than time. If you have a stainless steel tea set in the back of a cupboard now is the time to get it out. Add a few herbs for tea leaves and some flowers for cupcakes and you will have a spread suitable for even the most discerning teddy bear!

Wet Felting

Last summer the children really enjoyed wet felting in the woods. It is a wonderfully sensory activity resulting in a unique piece of fabric. Its very calming, grounding and satisfying. We made sun pictures for the Solstice and also made rainbows on rainy days.

Dragonflies will find a selection of wool, soap and a cloth in their activity packs and Sarah demonstrates how to make your own piece of Summer art in the video below. We can’t wait to see your results!

Sun Tea

This Summer Solstice we be brewing some foraged teas using the power of the sun. This is such a simple activity and the only equipment you need is a glass jug or large glass jar.

(Dragonflies - For this reason you won’t find anything in your activity packs for this, but there is a bonus packet of sunflower seeds and a couple of plant pots. Plant your sunflowers and let us know how tall they grow!)

For safety reasons it is important to use a sterilised glass container to brew your tea in. You should fill this with filtered or spring water along with your fresh ingredients. It should be left in the sun for no more than 3-4 hours and then chilled in the fridge before drinking. It should not be kept for longer than 24 hours.

This method of brewing tea originates from the Southern States of American and is usual made with black tea. The long slow brewing gives for a more subtle taste. We really like the addition of foraged ingredients though and our favourite teas are Mint and Lemon and Red Clover. Maybe you could come up with some of your own wild flavour combinations!

IMG_2057.jpg

We packed our jug with mint from the garden and slices of lemon. This made a refreshing tea that didn’t need sweetening.

IMG_2130.jpg

Red Clover makes a delicious iced tea and can be sweetened with a little honey.

Lighting a Fire with the Sun

Fire lighting is a central part of Forest School and we have talked about this before in our post about making Fire Tins. It is therefore natural that we experiment with different ways of starting a fire.

On long hot days it is very easy to start a fire with a magnifying glass and the heat of the sun. In fact it is very, very easy so this activity definitely requires parental supervision!

Dragonflies will find a magnifying glass and a variety of tinder (char cloth, King Alfred’s Cake, cotton wool and eucalyptus leaves and bark) in their activity pack to experiment with. We also recommend having a bucket of water to hand, working on a metal tray, tin lid or similar and weighting the tinder with a stick if there is a risk it might blow away.

long mag.jpg

If you are interested in learning more about what char cloth is and how it is made you can find out here.

At a Forest School session we would add the smoldering tinder that has been lit to a larger tinder bundle and use it to start the main fire. Families should decide if this is appropriate for them to do at home.

Below are a couple of videos from Sarah and Kev going through the process of starting a fire with the power of the sun. We hope you have as much fun as they did!

Natural Prints on Sun Paper

If you received one of our resource packs you will find a black packet with some sun paper inside. Sun paper is also available to buy online and makes for a unique summer activity.

The paper reacts with the sunlight causing it to change colour. Objects placed on the sun paper block the light and therefore leave their print.

It is important to leave the paper in the packet until you are ready to use it as it will start reacting as soon as it comes into the light.

The first stage of this activity is to gather some objects that might make good prints. Spend some time on a walk collecting natural objects with interesting shapes that appeal to you.

When you have a good collection of treasures you can lay them all out in front of you and have a good look at them. Which ones have the most interesting outline? Which one might let some light in around the edges? Which shapes do you like the best?

IMG_2048.jpg

When you have selected a few you can open the packet containing the sun paper and lay it on the ground in the sun. Quickly arrange your objects on the paper and leave for around two minutes for the paper to react.

19399684_1972657859630052_5963983355993298334_n.jpg

On a windy day you might need to put a sheet of glass on top the paper. You could take one out a picture frame.

When we do this activity in the woods we sometimes get the children to take their paper to a ‘Magic Spot’, and ask them to sit there for two minutes while the paper reacts. This time offers a window for some forest bathing or immersion in the sounds and smells of the woods. You could spend your two minutes listening to the birds perhaps.

After two minutes the paper will have changed colour and it should be placed in water for around a minute. The paper can then be dried flat and the images will start to develop and sharpen.

64787571_10161716394555237_316084634930642944_n.jpg

Sun Weaving

This weekend marks the Summer Solstice and the official start of Summer. This is the day when the sun is the highest in the sky giving us the longest day of the year.

Of course we can’t actually guarantee we will be able to see the sun and sometimes the solstice falls on a cloudy or even rainy day.

In case this happens we like to make our own sunshine! The symbolism of this is fantastic and really is at the heart of Forest School. We don’t base our well being on things we can’t control and instead change how we respond to our environment. If it is cold we light a fire, if it is wet we build a shelter and if there is no sun on the Solstice we make one!

This sun weaving is simple and effective and so calming and satisfying to make. You need three straight sticks, a pipe cleaner and a collection of appropriately coloured wool or ribbons. Dragonflies will find everything they need, apart from the sticks, in their pack when they receive it.

The sticks are crossed over each other and then secured with the pipe cleaner. Wool or ribbon can then we tied to one of the sticks and woven around. To make a nice neat sun you should wrap the wool all the way around each stick in turn. Saying that younger children might want to weave the wool and ribbons in a less uniform way and that makes a nice sun too. You can continue attaching wool or ribbons until the sticks are full and then tie off the last piece of wool.

When you are finished you can find a place to hang your sun and you will have sunshine all summer long!

35836914_1826809304290457_4579162374283460608_n.jpg

Marigold Tortilla Wraps

By Mel Evans

We tend to forage for wild and native plants at Forest School. However, spending more time at home has led me to experiment with the flowers I am growing in my garden.

Marigolds are a popular bedding plant as their cheerful bright flowers are produced all summer long. They also work as a natural pesticide as they repel flying insects and soil bound Nematodes which attack crops such as tomatoes.

There are French Marigolds and larger African Marigolds, but confusingly they all originate in Mexico and South America. Here they are used to make impressive Day of the Dead (Dia de Los Muertos) decorations.

Although we found a little Marigold cooking inspiration on the internet, they don’t seem to play a major role in Mexican recipes. Possibly because the taste is not overwhelming. All Marigolds are edible, but apparently they don’t all taste good! We had a nibble on ours and they didn’t seem to taste of much!

Their colours are so striking though that we thought we would attempt to make some tortilla wraps and decorate them with the petals. These worked really well and the petals held their colour through cooking making for a cheerful picnic!

IMG_1942.jpg

We made the dough by combining 250 g plain flour, half a teaspoon of salt, two table spoons of veg oil and 100 ml of water. The dough was kneaded for 5 mins and rested for 15 mins.

The dough was divided into 6 equal pieces,

IMG_1960.jpg

We rolled each piece as thinly as we could.

IMG_1950.jpg

We spritzed the tortilla with a little water before sticking on the petals.

IMG_1955.jpg

We cooked the tortillas on both sides in a hot dry pan.

IMG_1957.jpg

The wraps were left to cool.

IMG_1970.jpg

Then we filled them for our picnic.

Footprint Traps

By Mel Evans and Kevin Fuller

A great way to discover what animals are in an area is to look at the footprints they leave behind. However, this can be easier at some times of the year than others. One of the magical things about a snowy day in the woods is just how easy it is to track animals. The below pictures show rabbit tracks and squirrel tracks clear enough to be identified by even the youngest of children.

Sadly we get very few snowy days and when we do some of our most interesting animals, such as hedgehogs and badgers are fast asleep. We sometimes find tracks in the mud, but often in the woods, this starts to dry out through the summer months. This is just the time the wildlife is at its most active. Below are prints in mud from a fox and a horse. These were found in March.

Making your own footprint traps in the Summer is an ideal solution to this problem. Its very easy to do, quite a fun sensory process that young children can help with and a great way to start to gather clues on what is living in an area and the routes they follow.

To make a footprint track you need to spread material that will take a print. Wet sand is ideal and can be spread over a tray. The tray is then baited with a little food such as bird seed, fruit, raw meat or cat/dog food.

This track trap picked up some lovely hedgehog prints shown in the first picture below, so we set it up for a second night and filmed it with the wildlife camera. We got some great footage of the hedgehog making the tracks in the second picture.

Kev’s also set a footprint trap and it picked up a deer print. Its not overly clear as the deer looks like it might have twisted its foot in the sand. However, combined with other clues like deer droppings in the area we can guess it was a deer that left this print. Kev also filmed deer in the area using the wildlife camera.

You might be able to make a footprint trap from other materials too. We have a lot of clay in this area so we dug some out the pond and spread it at the entrance of a hole under a tree. The trap did not pick up any footprints, but did confirm that nothing was living in the hole.

If you have a go at making your own footprint trap we recommend RSPB Animal Tracks ID Sheet for identifying your results. Do let us know what is living in your area!

Campfire Doughnuts

By Kevin (and Zach) Fuller

This is the ideal campfire recipe if you are being very active and burning lots of energy outside. These campfire doughnuts are essentially fried jam sandwiches and are absolutely delicious!

102328599_2706564222907889_5810817791280901083_n.jpg

You need eggs, bread, jam, butter and oil.

102886848_2644965329117938_4334820024222804245_n.jpg

Start by making some jam sandwiches and whisking the eggs.

103053781_605259950341000_1851806832138712661_n.jpg

Coat the sandwiches in the egg.

102302862_968158113615622_386088947783816945_n.jpg

Fry the sandwich in some oil on both sides.

102371437_250115359611962_4977950302275817224_n.jpg

Carefully take the sandwich out the pan and coat in sugar.

102678601_255138365773805_5477575514871990006_n.jpg

Cut it into four squares.

102959667_903266576807741_5564695710768435508_n.jpg

Enjoy!

Hedgehog Bread

By Mel Evans

Wednesdays blog post was all about Back Garden Hedgehogs and my families new found appreciation for them after using a Wildlife Camera. I also shared some resources useful for anyone who wants to learn more about Hedgehogs and how we can help halt their sad decline.

Today we are celebrating our prickly friends with a recipe for Hedgehog Bread - Don’t worry its Vegan!

We use this Easy Bread Roll Recipe to make the dough, but shape the rolls into Hedgehogs.

This is such a fun process and involves rolling the do ugh into a Hedgehog shape, adding raisins for eyes and snipping the dough with scissors to form the prickles. The dough should be proved and cooked in the way directed on the recipe.