Back Garden Hedgehogs

By Mel Evans

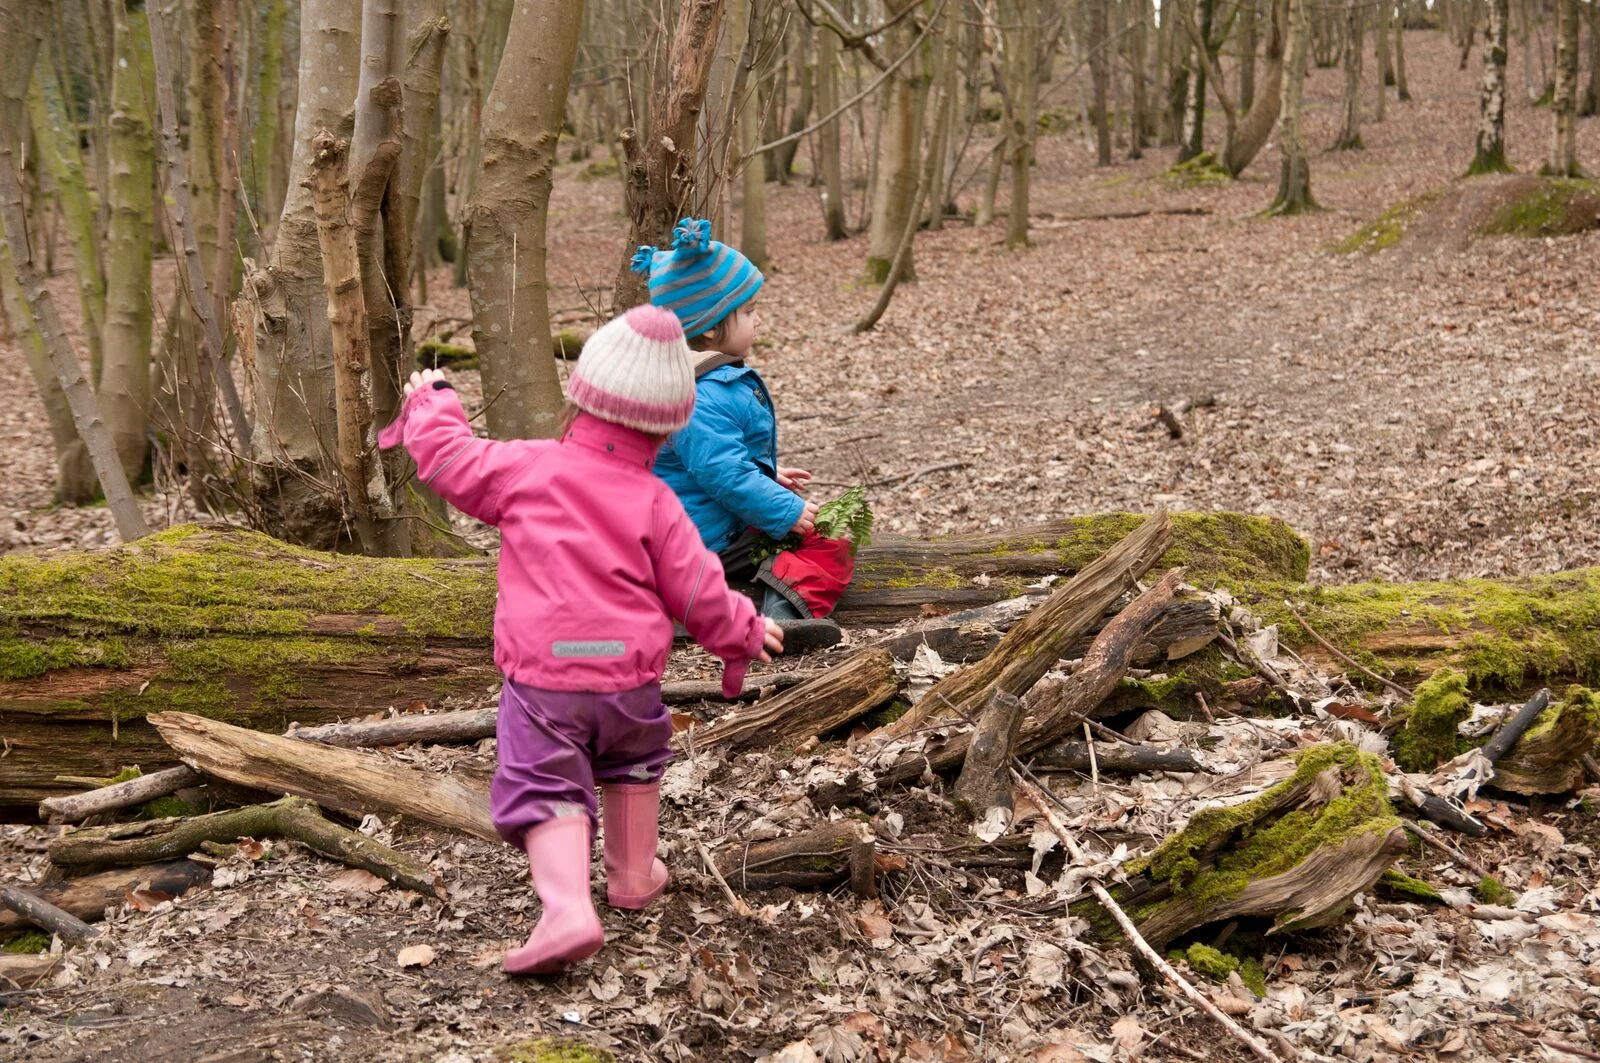
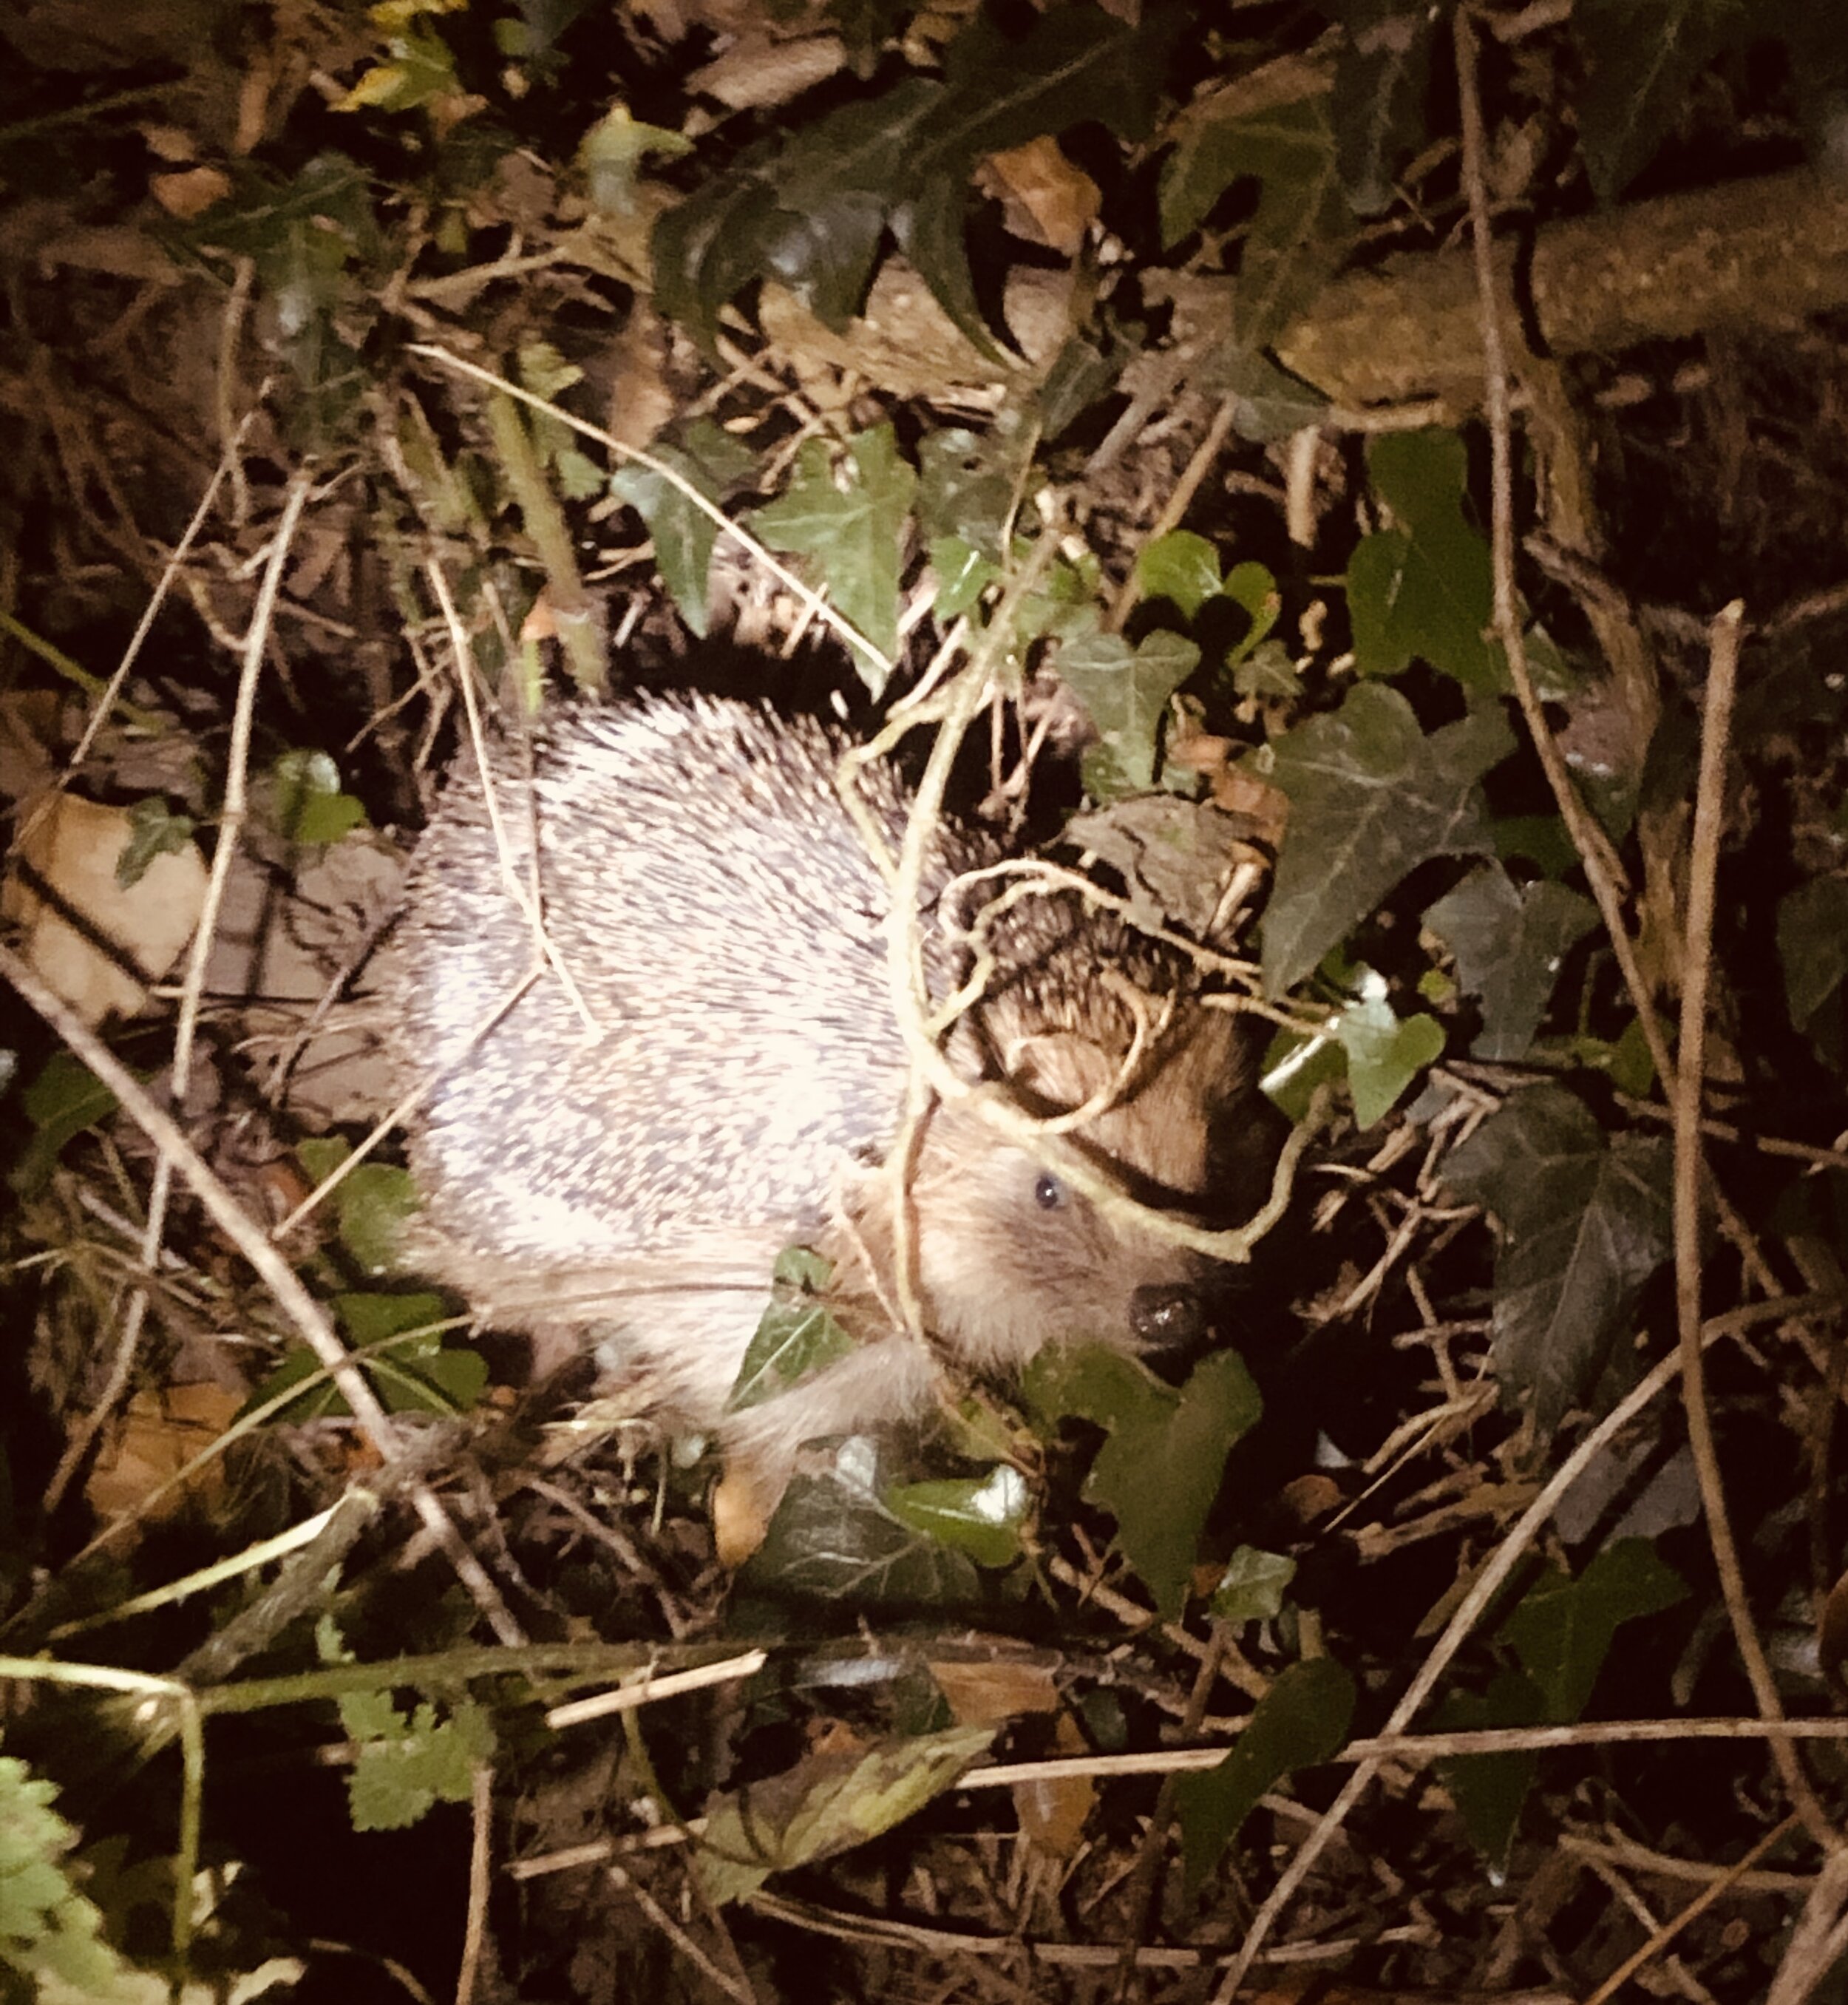
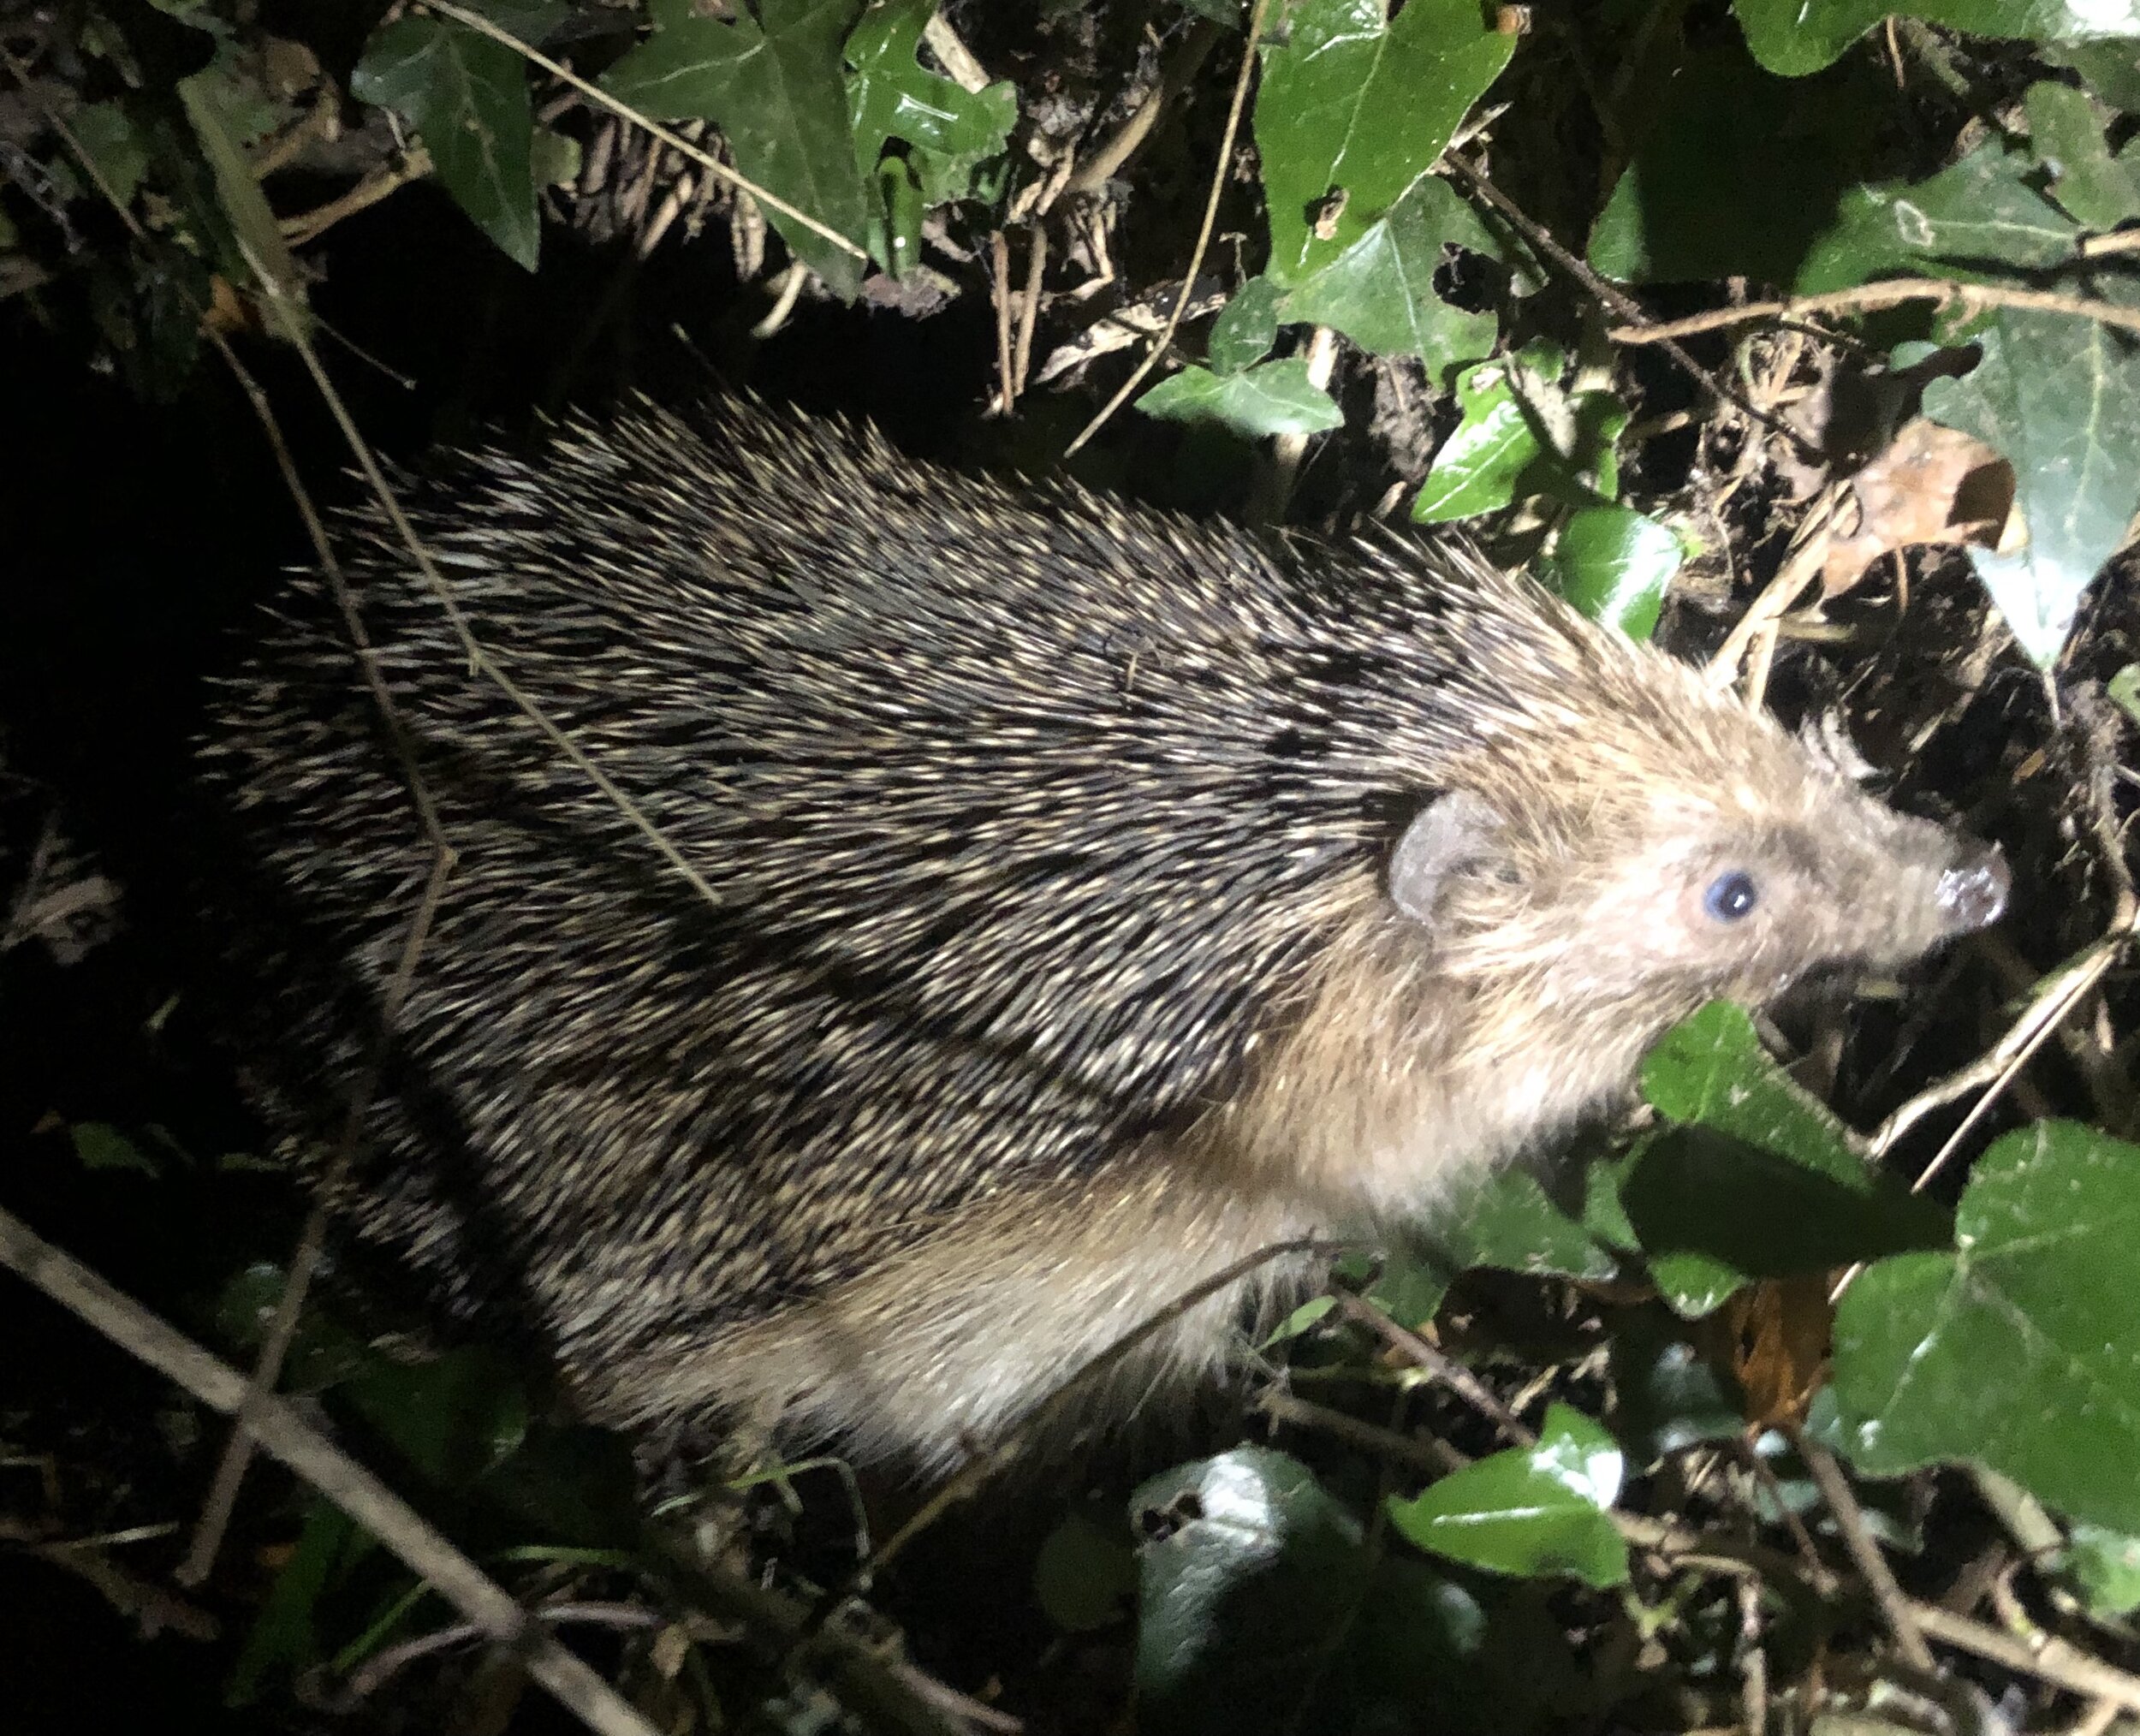
I have a wildlife camera of my own here at home. It is exactly like the one we have available to loan under the wildlife camera scheme we launched this week. In a short time we have captured lots of animals that live around our cottage. The one that has stolen our hearts though are the hedgehogs.

I don’t know what it is about hedgehogs that is so fascinating and endearing. Maybe its the adorable antics they get up too. Maybe we love them because of the way they have been portrayed from Mrs Tigglewinkle to Sonic! Maybe its the fact that, although hedgehogs are not shy, we don’t often see them. Sleeping all day and hibernating all Winter means they are not the easiest of animals to observe. Maybe our appreciation of them comes from the knowledge that we could lose them.

Hedgehogs are on the endangered list and in the last ten years they have declined by 50% in rural areas and a third in urban areas. While the decline seems to be slowing in towns and cities that is not the case in the countryside. You can find more information about these worrying trends here.

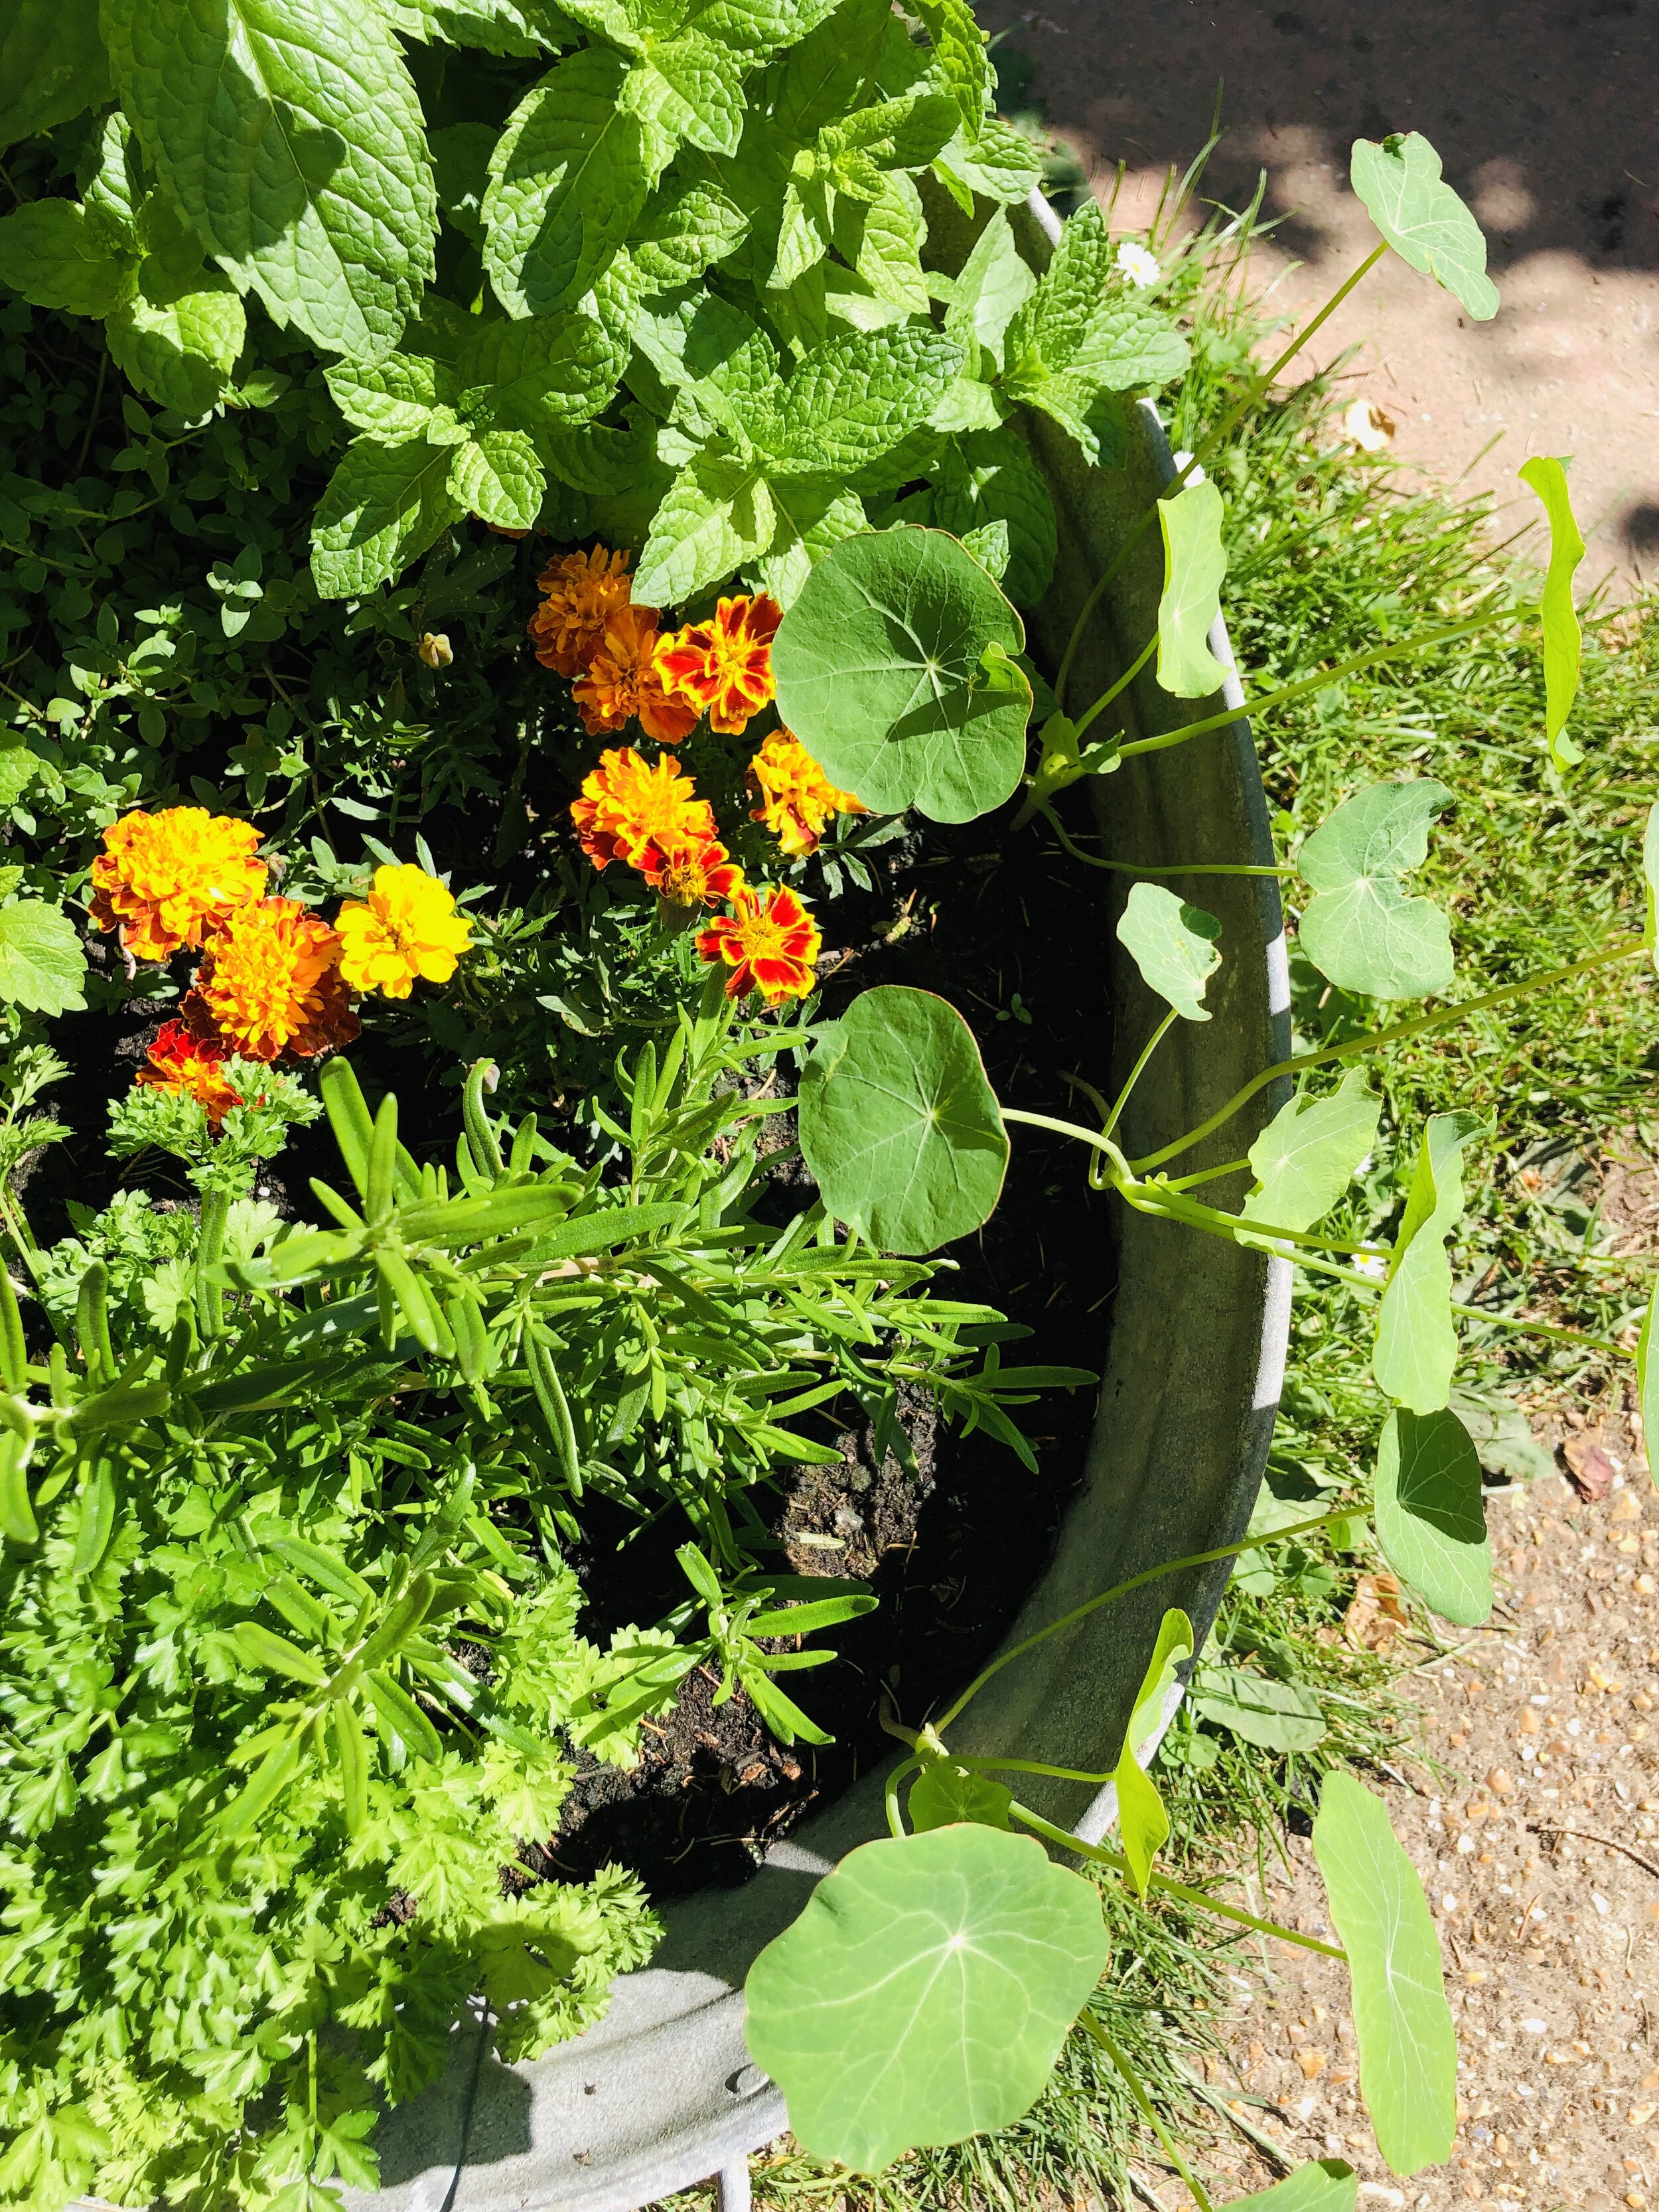
Capturing our own local hedgehogs on the wildlife camera has really inspired us to understand their behavior and act sensitively towards them. We have caught a variety of hedgehog behaviours on film from nesting to playing with a raddish!

You can see some of this footage below and at the end of this post I have described some of the resources we have found useful on our hedgehog journey.

This shows a hedgehog roaming. They can travel between 1 and 3 kilometres a night.
Hedgehog gathering nesting materials. Fingers crossed that Hoglets are on the way.
We believe this hedgehog is playing with a raddish!

Hedgehog Resources

The Peoples Trust for Endangered Species and The British Hedgehog Preservation Society have joined forces to try and save our prickly friends. They are working with farmers to halt the decline in the countryside and are calling on everyone with a garden to help too.

They have created an online community called Hedgehog Street offering information and resources to make your home Hedgehog friendly. They are calling on us all to become Hedgehog Champions and spread the word in our own communities. If you are able to observe Hedgehogs you can even log their behaviors as part of their Hedgehogs After Dark project.

You can also find footage filmed by families around the country on the Hedgehog Street YouTube Channel

We loved the documentary Year of the Hedgehog and how it explained hedgehog behaviours throughout the year. Its a beautiful film with no graphic scenes so should be suitable for most children However a Hoglet is implied to be eaten by an owl and a mother Hedgehog is shown after it was hit on a road.

Make a Herb Garden

By Mel Evans

Herbs are obviously great for cooking with, but we also often use them for crafts and sensory play too. Adding fresh herbs to water play or the mud kitchen adds an extra sensory element and the herbs’ fragrances release as they are played with.

I have the fondest memories of making Mint Tea in my Granny’s garden. I would bash the leaves into cold water in a steel tea pot before pouring it into tiny cups and handing it out to everyone. Nobody ever drank it, but that wasn’t really the point!

Incorporating herbs in Hapa Zome means the scents release as you bash them and they are usually juicy enough to get good prints from even in the height of Summer.

Rumour has it that Fairies are more likely to visit Fairy Gardens decorated with herb as they are drawn in by the fragrances. You could even make your own Flower Fairy adorned with herbs.

Of course before you can do any of this you need to grow some herbs! The good news is they are simple to grow from seed or you can buy plants. At this time of year its probably better to plant fully grown plants outside as a pose to starting from seed. You can get them in a garden centre, but the easiest (and chespest) way to get started is to pick up some of those herb plants you see in the supermarket veg aisle. They will continue to grow if you repot them and the ease of planting and replacing them will mean you won’t be precious about using them to make cold mint tea that nobody drinks!

Delicate herbs such as Basil and Coriander will need to be kept on a sunny window ledge inside the house. Other herbs such as Mint, Lemon Balm, Parsley, Rosemary and Thyme can all be planted in a sunny sheltered spot outside.

We also added Nasturtiums and French Marigolds for a bit of colour and these flowers are also edible too.

Once you have sourced your herbs you need a container with drainage holes, filled with soil to plant them into. Tin baths herb gardens are popular right now, but can cost up to £50 unless you can salvage one yourself for free. Instead you could use an old bucket or washing up bowl. Whatever you use the most important thing is drainage holes! If your container dosn’’t have any you need to make some. This can be done with a drill or a screwdriver and a mallet.

After your herb garden is planted water it regularly and watch it grow. Try some herb crafts or sensory play and keep your eyes peeled for fairies!

Butterfly Feeders

By Mel Evans

One of the clear signs that Spring is turning into Summer is the Butterflies fluttering around the parks and gardens. You may have even raised your own butterflies from caterpillars and watched their life cycle unfold.

One of the families from our Dragonflies SEND Forest School sessions did just that last year. They brought the butterflies to one of the sessions and shared their release with us. It really was a magical moment.

You can attract more butterflies to your garden by planting the right kinds of flowering plants, but if this isn’t possible right now you could make a butterfly feeder.I have also used these while waiting for the plants, in a newly planted butterfly garden, to establish and bloom.

Ensuring butterflies have enough food is important as many species are in decline. Following the work of Butterfly Conservation is a great way to learn how to support our butterflies.

To make a butterfly feeder you need a clean jam jar, some string, a small piece of sponge and some way of decorating the jar. We used glass pens, but you could try acrylic paint.

Firstly you make a hole in the lid of the jam jar. We did this using a power drill and a large drill bit. You then cut a small square of sponge and pull it through the hole.

Next you use the string to make a net to hold the jam jar when you hang it. This is explained in the video below.

You can decorate the jam jar using the glass pens or acrylic paint. If you make the feeder colourful then butterflies are more likely to be attracted to it, just as they are with flowers.

Finally you can fill the butterfly feeder and hang it in a sunny spot. You can fill it with sugar water or honey water made with approximately 1 part sugar/honey and 8 parts water. You can also fill the feeder with fruit juice.

If you enjoy watching the butterflies that come to your feeder you could take part in The Big Butterfly Count starting on the 17th of July.

Wild 'Noughts and Crosses'

By Mel Evans

I was slightly horrified to discover my children had very little knowledge of the game ‘Noughts and Crosses’, so we decided to make our own version to play in the garden. At first I wondered how this little game might be able to compete with the X Box, so I was delighted (and surprised!) when they played many games of ‘Noughts and Crosses’ over the weekend.

You could have a game in the garden, on the beach or in the woods simply by making a grid from sticks and finding four things the same each to use as the ‘Noughts and Crosses’.

IMG_1660 (1).jpg

We played in the garden using Clematis Flowers and Ivy Leaves.

I wanted our set to be a little more permanent though so I could leave it in a basket in the garden as a prompt for us to have a game. I painted slices of wood with chalk paint and drew the ‘Noughts and Crosses’ on with chalk pens. Another idea is to paint pebbles.

IMG_1668.jpg

We made a more permanent set from wood.

How ever you do it, a game of ‘Noughts and Crosses’ is really good, old fashioned family fun! Sometimes the simply ideas are the best!

5 Things To Grow With Children

By Mel Evans

We have pretty much gardened our way through lockdown and are hoping for an abundance of flowers and vegetables anytime soon. If you haven’t started yet then there is still plenty of time and you don’t even need a big outdoor space. Plenty can be achieved in pots or on a sunny window ledge.

In some ways gardening and Forest School go together hand in hand. Both take place outside, and encourage an awareness in nature and the changing seasons. Both involve exercise, gross and fine motor skills and are believed to improve well being. Both encourage us to get our hands muddy!

I also like to grow things that can be taken to the woods and used in some of our activities so we are not always having to take resources from the woodland we are in.

However, unlike Forest School, which is child led and focuses on the processes with less thought to the end product, gardening is a bit more of a science. You should not let this put you off though as there is still scope for experimenting and improvising and just like Forest School, trial, error and reflection all have their place.

If you are starting out growing a few things with your children it is important that you aim to grow things that are easily achievable. Success now could spark a lifelong love of growing and all the associated benefits. You can also mix up your quick wins or things with a high chance of success with more experimental crops.

With this in mind we have put together our top 5 things you can grow with your children right now.

Peas

IMG_1584.jpg

There is a pea to suit every taste Mange Tout, Sugar Snaps or fat Garden Peas bursting out the pod. They delicious eaten raw straight off the plant as well as cooked. Little fingers are perfect for extracting peas out of the pod. If you have the space you can sow peas in rows in a trench 15 cm wide and 3-5 cm deep. If not they can be sown in a pot. As peas grow upwards they are a great space saver. They just need a support to grow up. Twiggy branches or netting will work or you could try some Wild Weaving.

You can sow excess seeds densely in a pot or tray and eat the shoots as soon as they emerge while you are waiting for the main crop. They are good for a fancy garnish or a quick snack or salad.

Nasturtiums

36732385_1842439326060788_8402461721955926016_n.jpg

I love growing Nasturtiums as once they get going they reward you with lots and lots of colourful flowers all summer long. They feed the bees right into the Autumn and best of all we can eat them too. This means they can be used to decorate cakes or add colour to salads. It also means they are perfect for sensory play as they are totally safe for children that like to taste things. You can get a packet of seeds and sow them outside now. They like a sunny spot with good drainage, but apart from that they are quite versatile. I have a bed of them and have also sown seeds on the edges of pots containing herbs and salad leaves. They would probably be at home in a hanging basket or window box too.

Radishes

IMG_1585.jpg

Radishes are one of Peter Rabbits favourites so that is reason enough to grow some! They grow really quickly so are great for keeping children interested. We sowed some 5 days ago and we already have lots of leaves. We can expect radishes in 4-6 weeks. You can sow these in gaps in your veggie patch or in a pot. The most important thing is to keep them moist.

Bean Sprouts

IMG_1586.jpg

Evidence that you can grow something tasty in a very small space. You can buy specialist ‘sprouters’, but a jam jar and an airing cupboard will do the job if you don’t mind keeping an eye on them. You have to rinse the seeds several times a day, but up you could be eating the shoots in as little as four days. This is a first for us, but already looks like a lot of fun!

Sunflowers

67258363_2444930472402786_7907525324445843456_n.jpg

There is something so joyful about sunflowers and all the family can have fun trying to grow the tallest one. It always amazes me that one tiny seed can create so many seeds all arranged in a perfect pattern. The sunflowers should flower in late summer and after the heads will feed the birds or be the beginning of next years blooms. Sunflowers need a sunny sheltered spot and can be sowed outside now. There are lots of varieties so you should research what suits you. Some such as American Giant can grow to 4 metres, where others such as Big Smile peak at just 30 cm.

Camp Fire Toffee Apples

By Mel Evans

This really is a recipe that has to be tried to be believed. If the word ‘Toffee Apple’ conjures up an image of a rock solid, sickly fun fair treat then put that out of your mind. These soft warm, delicious toffee apples are more akin to an apple pie on a stick.

We make these every Autumn in the woods when our local apples begin to appear on the trees, but they make the perfect camping dessert any time of the year. You can even use Elder Flower Sugar to give these apples an early summer flavour.

These are easy to make on a campfire and you just need a sharpened stick long enough to sit safely back from the fire, some apples and some sugar. The sugar can be infused with other flavours or spices like cinnamon can be mixed through.

The first stage is to push the apple onto the stick and roast it over the fire until the skin is black. This takes a bit of patience and requires a good hot fire, but its lots of fun, The best thing is you don’t need to worry about burning the apple as the blacker it goes the better!

Next you should be able to peel the blackened skin off. If its really burnt it should come off easily by scraping it with a tea spoon.

Finally you coat the apple in sugar and return it briefly to the fire to caramalise. Allow to cool slightly and enjoy!

Pine Cone Bumblebees

By Mel Evans

We love a pine cone and we love a Bumblebee so you can imagine just how happy a Pine Cone Bumblebee makes us. We have talked about these previously on our Easter Tree post, but as its World Bee Day it seems only fitting that they should get a post all of their own!

The whole point of World Bee Day is to raise awareness of these important creatures and what we can do to help their survival. Loss of habitat and a reduction in wild flowers are taking their toll, but we can help by creating homes for bees and planting their favourite plants. The Bumblebee Conservation Trust has lots of information and advice.

We like to make Pine Cone Bumblebees alongside other activities as a way to raise awareness. We often combine this activity with making (or eating) our ever popular Dandelion Jam as a reminder that we have to share the Dandelions (and other flowers) with the bees.

31265307_1801365786834809_1454182927498739712_n.jpg

More than this though, making Pine Cone Bumblebees are great for little fingers with developing fine motor skills, as well as relaxing and grounding for older children. They are fun to tie to a stick and buzz around the woods or look great hanging from a vase of flowers or decorating the garden.

Now is a great time to collect Pine Cones as they are likely to be fully open in the warm weather. Appropriately coloiured wool can be wound around the pine cone to make the bee’s stripes. Wings can then be cut from old packing materials or washed out plastic milk bottles. The wings are then tied onto the body using the hanging string.

Below are some Bee facts taken from one of our favourite books.

Bee Facts

Bees buzz by moving their wings very quickly, up to 200 times a second!

It takes 20,000 bees to make one jar of honey.

Bees communicate through dancing and making smells.

Many bees are dying out because of changes in our towns and countryside, It is getting harder for bees to find flowers.

We can help bees by giving them a place to live and planting more flowers for their food.

Bees can live happily in towns and cities if there are enough flowers around.

Bees have been around since dinosaurs walked the earth.

IMG_1559 (1).jpg

Elder Flower Fritters

By Mel Evans

Elder is one of those trees that just keeps on giving! We shared a little about the traditions and folklore surrounding the Elder Tree when we described how the wood could be used to make Elder Beads. We went on to share some of our personal traditions in the post about making Elder Flower Sugar, using the first Elder blooms.

The Elder is now starting to flower in earnest and the warm dry days should be perfect to harvest it. Its the pollen that gives the flowers their iconic taste so its important to collect them when they are fully open and dry. Washing the flowers will remove the pollen, so instead they should be shook lightly to allow any bugs to escape.

There are several way to use the flowers and Elder Flower Cordial is a very popular choice. We have found this a bit impractical to make in the woods however, as the flowers need to steep in the liquid over night. Instead we love to make Elder Flower Fritters.

Flowers are simply dipped in a light batter, fried in a little oil on both sides, removed from the pan and dusted with icing sugar. The stalk makes a great handle for dipping and can be discarded once the fritter has been eaten. We like to use a tempura batter as its light enough not to overshadow the Elder Flower flavour. It is also versatile and can be used to batter lots of wild or home grown ingredients. Nettles, dandelions and courgettes all work well.

To make a batter combine 30 g plain flour, 70 g of corn flour and a pinch of salt. Whisk in 80 ml of cold sparkling water.

Its so satisfying to harvest an ingredient in the woods and cook it immediately on the fire. The group come together to try the food and there is so much to talk about!

Pine Cone Fire Lighters

By Mel Evans

You might have read our post all about Kev’s Fire Tins. These are a great emergency means of starting a fire. We decided to have a go at making some everyday fire lighters using the same concept. The end result was really pretty and would make a great gift for someone with an open fire or a camping enthusiast.

IMG_1363.jpg

To make these you need scraps of old candles, wicks, cupcake cases and pine cones.

IMG_1370.jpg

We melted the wax in an old saucepan and ladled it into the cupcake cases.

IMG_1366.jpg

We cut the wicks to size.

IMG_1372.jpg

We carefully placed the wicks into the hot wax.

IMG_1378.jpg

We placed the pine cones on top.

IMG_1379.jpg

We then waited for the wax to set.

You simply light the wick to start the fire and the wax fuels the flame until the pine cone is roaring!

Lemon and Lilac Cupcakes

By Mel Evans

We love trying new things at our Forest School sessions and experimentation is central to the Forest School ethos. We encourage children to have a go, then reflect on the outcome and adapt and re frame where necessary.

With this in mind, yesterday we decided to try something new. I have been seeing lots of recipes using Lilac flowers so we decided to devise our own.

Lilac is a tree or bush found in gardens. It has distinctive lilac or purple blooms with a strong scent.

There are three ways to incorporate Lilac into your baking. You can make a Lilac infused sugar using the same method as our Elder Flower Sugar. You can make a syrup using the same method as our Cherry Blossom Syrup or you can use whole flowers, as in the recipe below.

IMG_1415 (1).jpg

Ingredients - 100 g Caster Sugar, 100 g Butter, 100 g Self Raising Flower, 2 Large Eggs, Zest of a Lemon and a small cup of fresh Lilac Flowers.

IMG_1399.jpg

We creamed together the butter and sugar, added the eggs, then flour and lemon zest.

IMG_1406 (1).jpg

We folded in the Lilac flowers.

IMG_1409.jpg

We spooned into cupcake cases and baked at 180 Degrees Celsius for around 15 minutes.

IMG_1411.jpg

We made an icing from butter, icing sugar and lemon juice.

IMG_1417.jpg

We iced the cakes and decorated them with fresh flowers.

The cakes were delicious, but the dominant flavour was definitely the lemon. The flowers give a beautiful look to the sponge though and retain their striking colour even after baking.

Mini-Beast Hotel

By Mel Evans

If you read our Bug Hunting post then you will know that we love the Mini-Beasts we share the woods with, so logically we have made quite a few Mini-Beast Hotels in our time.

This is a lovely way to connect with nature, improve the habitats offered in your garden and encourage empathy and understanding. Children love making Bug Hotels. The activity offers loose parts play with different tactile materials and a chance to create imaginative small worlds.

Making a Mini-Beast Hotel is really very simple. First you create a structure that will provide shelter and then you fill it with materials the bugs will love. Your hotel can be as big or as small as you like and could even sit on an external window ledge.

67780567_2073706136267438_2366671445615968256_n.jpg

Every Mini-Beast Hotel needs a cute sign.

Below are a few ideas for creating the structure of the Mini-Beast Hotel followed by a list of materials to fill it with.

30222073_1795502930754428_9203235602378522624_n.jpg

This recycled Bug Hotel uses an old plastic milk bottle filled with natural materials.

40045449_1887134041591316_3600985818887356416_n.jpg

Here we cleaved a log into parts, filled the middle and tied them back together.

61076495_2029457337358985_309361701147377664_n.jpg

Roof tiles could be used to give shelter.

14522987_1591966957774694_5066038525467327866_n.jpg

You could use an old plant pot. This one had a piece missing so sat well on the floor.

62067718_10161651830740237_6772047361360265216_n.jpg

This Mini-Beast Hotel used a plant pot with an added roof.

60951821_10161586500640237_666673087202197504_n.jpg

Pallets can be stacked up to make a grand Mini-Beast Hotel.

27540122_2082316831997487_8086360446735991022_n.jpg

This one uses pallets, plant pots and has a roof.

Your residents will generally be happy if there are some cozy spots in the hotel and some dead wood or leaves to eat. Bamboo canes and other hollow stems are great for the Mini-Beasts to hide in and if you are lucky a Solitary Bee might hibernate in one when Winter comes. You can also drill holes into logs to add to the Hotel. Solitary Bees like a hole around 7 or 8 mm in diameter, but a range of sizes will attract a range of creatures. Other things you could add include bark, hay or straw, pine cones, moss, sticks, soil and bits of terracotta pots or tiles. You can fill and replenish the spaces over time and collect things on walks, making this a lovely ongoing family project.

Camp Fire Popcorn

By Mel Evans and Kevin Fuller

We LOVE making popcorn on the fire! Its an activity and a snack all rolled into one. Not many people DON’T like popcorn and its naturally gluten free, dairy free and (possibly,ahem) sugar free.

Everyone has to work together to collect lots of sticks for a nice ‘flamey’ fire and then try their hand at popping corn in our popcorn ‘machine.’ Lots of conversations can happen in the time it takes the popcorn to pop. What makes the corn explode? Who first discovered popcorn and how? What is the best topping? Does campfire popcorn taste the same as the one we make at home? Before all the questions are answered the popcorn pops and we share in the joy of delayed gratification.

We all often joke that it is an activity that ‘never gets old.’ No matter how many times we do it, the fun is the same as the first time.

96343496_2587476794824847_6933519298258272256_n.jpg

‘Never gets old’

Below we share with you how to make your own ‘Popcorn Machine’ and how to make a popcorn cone from a Sycamore leaf. If you want a tasty seasonal topping for your popcorn you could try our Elder Flower Sugar.

The Popcorn Machine

Essentially this is two sieves connected together and attached to a stick. The popcorn kernels are place inside the two sieves and then held over the fire until the popcorn pops.

There are a number of ways to connect them depending on the resources available. Our original popcorn machine was held together with wire, but Kev soon gave this an upgrade using Jubilee Clips and a clamp. The sieves were hinged together at the top with wire.

Another technique is to use a U nails (Gate Staples) to attach the sieves to the stick. Both these methods are depicted below and Kev has made a handy video showing how a popcorn machine is put together.

The Sycamore Leaf Cone

They’re 100% biodegradable and offer another little step in improving our tree I.D, not to mention lots of fun! Sycamore leaves are easy to identify owing to their size and shape. The Woodland Trust offer a full description here.

The method to make the cone is quite simple. You snap off the stalk of the leaf and roll the leaf into a cone shape. You then use the stalk to stitch the cone together and keep the leaf from unraveling.

Fill with popcorn and enjoy!

(Don’t miss Kev’s top tips for Campfire Popcorn below.)

20799880_1712832392354816_8307120037670403825_n.jpg
22046762_1726377167667005_2761910871749619399_n.jpg

Kev’s TopTips

Don't use oil when popping the corn it doesn’t need it with the sieve method. Flames work best to pop the corn. Shake the corn when it is over the fire. Once its popped BE CAREFUL it will be hot. To flavour I have found the best way is to spray the corn with spray oil to coat the popcorn. Next add you flavourings and give it a good shake. Flavourings can be sugar, sugar and cinnamon, sugar and salt, or nothing it tastes great with no flavouring. Enjoy.

Hazel Leaf Crumble Parcels

By Mel Evans

In previous posts we have shared a lot of recipes and talked about the value of foraging and preparing food with children. We generally stick to ingredients that are easy to identify and hard to mistake when working with families. By doing this we hope to empower people to try achievable recipes. Children thrive in being involved in making food from the very beginning, cooking together and sharing food is a great way to bond people and the sensory element of exploring new flavours and textures is invaluable. There is also a feeling of resilience that comes from knowing you can source your own food.

Some of the fail safe recipes we have previously shared include Hawthorn Flower Water, Pickled Wild Garlic Buds, Elderflower Sugar, Nettle Pakoras and Dandelion Jam.

Today’s recipe uses foraged Hazel Leaves. Lots of tree leaves are edible and are at their best at this time of year, They have grown to a reasonable size, but are still young and tender. Foraging tree leaves is a great way to brush up on your tree I.D too.

If you have been watching your local trees through the seasons you might have noticed the Hazel’s yellow catkins in the Spring and its nuts in the Autumn. However, at this time of year, the leaves are the thing to look out for. They are soft to touch as they are covered in downy hairs and have a serrated or toothed edge.

Hazel is often copiced and you are more likely to see a number of stems coming out the ground rather than one trunk. Hazel may also become part of a hedgerow. We love the Woodland Trusts resources on trees and they offer a very comprehensive guide to Hazel here.

Once you have sourced your leaves you can go about making your crumble parcels. You need to make a crumble by rubbing flour and butter (or a non dairy alternative) together until it resembles breadcrumbs. Then some sugar can be mixed in. The parcels don’t take a lot of crumble so a tablespoon or two of flour and a small knob of butter will be just fine. Every family seems to have their own way of making crumble though! Oats, nuts and sweet spices such as cinnamon and nutmeg can be added in whatever combination appeals.

22492013_1731445633826825_8118707823826168011_n.jpg

Making crumble is a fun sensory activity in itself!

The crumble mix is layered onto the Hazel leafs along with stewed fruit. The obvious seasonal fruit choice now is rhubarb. You may even have some growing and if not its easy to pick up locally. You can use any fruit you feel like though and we have even used a jar of ready made apple sauce in the past.

36228289_2163982543830915_6982288901012455424_n.jpg

A teaspoon of fruit is put on the Hazel leaf and topped with crumble.

The leaf is then wrapped around the filling and secured with a cocktail stick or small skewer. These are then fried on both sides in a little butter. I’m always relieved that the soft hairs on the leaf cook away at this point, but they don’t always bother the children who will readily much on them raw. They only take a few minutes to cook and when the leaves have browned slightly they can be removed from the pan. They should be allowed to cool a little and the cocktail stick removed before eating.

Ultimate Bubble Recipe

By Mel Evans

There is nothing more uplifting than children chasing bubbles through the sunshine. Last year we kept the bubble mix going all Summer long and it made a lovely end to sessions.

As a little sunshine might be coming our way we thought it was time to share our well tried and tested ‘Ultimate Bubble Recipe’ as well as some ideas for bubble wand making.

36859030_1842415926063128_5511627270625689600_n.jpg

Ultimate Bubbles

Add 1 cup of cornflour and 1 cup of washing up liquid to a bucket. Stir together. Add 2 cups of cold water and stir again. Add 10 more cups of water and stir some more. Leave to settle for a few minutes. Now make bubbles and have fun. If the mixture separates give it another stir.

71788378_2489189027976930_2557336116311097344_n.jpg

Giant bubble wand

You can create giant bubble with this bubble mix by making a wand using two sticks, some string and a washer. A loop of string is tied to the sticks with the washer in the middle. If you don’t have any washers a bead, button or bottle top with a hole in it would all work.

65934721_2052946361676749_7225702934107914240_n.jpg

The willow wand

This is simply a piece of willow looped around and secured with string. If you can’t source willow then any thin bendy sticks would work.

Small and beautiful wands

These wands are ideal for a small space. Pipe cleaners are shaped and secured to a stick with string. They can be personalised using beads.

Wild Weaving

By Mel Evans

In some of our sessions last year we had so much fun creating great big sculptures using hazel rods, wool and flowers. I have been daydreaming about the beautiful structures the children created, while making my own structures for my beans and peas to climb this Summer. I have shared some pictures below, but their true beauty is very difficult to capture on camera. Some of them would not look out of place at a wedding!

There is something nice about creating something of size so we facilitated this by setting up a few large hazel structures before the session. However, some of the children were keen to start the process at the very beginning and found their own small sticks in the woods. Some of the most beautiful structures were very small, and starting from the beginning helped some of the children find meaning in the activity.

This means the activity can be done on whatever scale is realistic and appealing to you at home. The idea is very simple. Three sticks are tied at the top and pushed into the ground, or a plant pot to secure them. Different colour yarn is then wrapped around the sticks. Finally leaves, flowers and natural materials are woven between the yarn.

Weaving has a lovely grounding and relaxing effect on our bodies. The textures and smells of the natural materials offers a wonderful sensory experience. This is ‘Ephemeral Art’ and although the finished products are beautiful for a while, they will not last forever. The transient nature of the art means its easier to focus on process and enjoy the activity without getting too hung up on the end result.

If you do this activity in a natural area it is important to remove the structures after as birds can get caught up in the wool as they break down. I was keen to make this ephemeral art last a little bit longer so we have made some in buckets in our garden and have planted sweet peas around the base. Now we just have to be patient to see the end result.

IMG_1281.jpg

Water Filter Challenge

By Mel Evans

Its no secret that here at Nature Nurture Sussex we are very passionate about messy play. Most of our sessions will feature a mud kitchen, water station or potion lab. You only need to watch a young child tipping, measuring, mixing and pouring to understand the benefits of these activities. Experimenting, creating, testing theories and trial and error can all be witnessed. Communication skills develop and new words are learned. Its also calming and a young child will happily tip water for long periods in the woodland setting.

Chalk, flowers, herbs and coloured water are all used to create a sensory invitation to play.

I was keen to see if the power of water play would work on my older children, so I set them a challenge. I filled a bucket full of water and mixed in some soil, small sticks and leaves. I told them we were playing a game and this was the only drinking water we had so they had to try and get it clean!

IMG_1229.jpg

Our water supply.

I offered a few materials to help them. Some empty plastic bottles, some string, some scissors, some cups, a collection of odd socks and other old clothes, some hay, some wool packaging, some sand and some sawdust. They could also forage for things in the garden. You could use what ever resources you have available.

My eldest son got to work straight away and fashioned a ‘flask’ with holes in the bottom from an old plastic bottle. He then lined this with a sock and started pouring the water through. He repeated this process for a long time and noticed the more debris was removed the quicker the water moved through the system, He replaced the sock ‘filter’ several times and eventually ended up with water that was much cleaner.

My younger son was slower to get started so I suggested together we try a different approach. I strung an old bra between two sticks. I then encouraged him to line the cups with different materials and test their ability to filter the water. We found the padded bra was too thick to let the water through so opted for a lacy one.

We had a very happy afternoon in the garden pouring and experimenting and we managed to get the water (sort of) clean. Of course we didn’t actually drink the water and in a genuine survival situation it would have to be boiled or better still distilled after it had been filtered.

We talked about this and this led to an interesting conversation on desalination. It turns out the benefits if water play don’t have an age limit!

IMG_1253.jpg

Almost good enough to drink!

Star Gazing

By Mel Evans

Back in the Winter we hosted a late afternoon Forest School Session for participants of our regular Dragonflies SEND sessions. We invited local astrologer Steve Pond to bring along a telescope. Steve was fantastic at allowing the children (and adults) innate curiosity to emerge. They were able to ask questions throughout the session and the clouds cleared, with perfecting timing, so everyone got to see the moon through the telescope. This is quite an experience if you have never done it before and children and adults alike were amazed that they could see the craters (and also that the moon wasn’t made of cheese!)

During the session Steve explained he aims to encourage people to go outside and look up. Now is a great time to pay more attention to our night skies. The evenings are getting warmer and there may be less light pollution than there has been previously .

You don’t need a telescope and many things can be seen with the naked eye. You just need to know where and when to look. Steve hosts a Facebook page called ‘Above East Grinstead’ and shares information about what families can expect to see above the town. Steve welcomes anyone in the UK to join as believes the information will still be largely relevant. Below is a bit of a round up of what you might be able to see in May.

IMG_1085.GIF

Just look up!

5th-6th May - Eta Aquarids Meteor Shower

These Meteors have been active since the 19th April and are set to continue until the end of May. They are expected to hit their peak in the next few days. The catch is you need to be awake between 3 am and 5 am to see them. There is lots of information here.

7th May - Super Moon ‘Flower Moon’

The May Moon has been traditionally coined the ‘Flower Moon'.’ This is the third and final Supermoon of 2020. The moon should be visible around, a nice civilised, 845 pm.

12th May - Close approach of Saturn

Saturn gets close to Earth on this date and can be visible from 1.39 am until dawn around 4.48 am. It will be located just above the horizon in the South.

18th May - Close approach of Jupiter and Saturn.

On this day Jupiter joins Saturn close to Earth. Both should be visible between 1.16 am and dawn around 4.37 am. Both will be located in the South just above the horizon. If that is a bit late (or early) for you you can look at the latest pictures of Jupiter collected by NASA Spacecraft Juno here.

End of May - Comet Swan

This Comet is currently close to Earth and those living in the Southern Hemisphere are experiencing great views. We might get to see this in the UK towards the end of the month, where it will appear as a bright green light with a blue tail.

Skylink Satalites

While you are looking at the Sky you might spot a satellite or two. You might even see the controversial Skylink satellites. You can find times you might see them in your location here.

If this all sounds a little daunting you could try going outside on a clear night and and spotting constellations. How many can you recognise? Can you make up any new ones? We had great fun replicating constellations (and making up some new ones) by hammering nails into a piece of wood that had been painted with blackboard paint. We then used pipe cleaners to link up the nail ‘stars’

We prepared our group for the fact that it was going to get dark by making lanterns. These are simply leaves stuck to a clean jam jar with double sided tape and held in place with string. They are hugely effective though and would be lovely for a back garden star gazing session.

88009602_2236613786643338_5300139529032695808_n.jpg

Hawthorn Flower Water

By Mel Evans

May Day is usually such an exciting time. May is the month when Spring turns to Summer and our thoughts turn to festivals, parties, weddings, day trips and holidays. Without that everything might feel a little flat today.

But nature marches on and the Hawthorn is starting to bloom. The Hawthorn blossom has long been associated with May Day and is often referred to as the Mayflower (yes, just like the ship).

There is much folklore surrounding the blossom and it was once believed bathing in the dew of the Hawthorn on May Day would bring eternal beauty!

The fair maid who the first of May, Goes to the field at the break of day, and washes in the dew from the Hawthorn tree, Will ever after handsome be.

I haven’t quite worked out how one ‘washes in the dew of a hawthorn tree.’ You would have to navigate the spikes and the flowers have such a heady smell that has been likened to the plague of London or carnal sex!

A better option, I feel, is to raise a glass of Hawthorn Flower Water instead. This has traditionally been used to relieve stress and anxiety and has a beautiful almond flavour. If you really want to push the boat out you could drink it though a Dandelion straw.

IMG_0940.jpg

Hawthorn is easy to identify and is often found in hedges as well as growing alone in the woods. It has distinctive leaves, thorns and small white pungent blossoms. However it could be confused with Blackthorn (the bush that produces sloes). The Woodland Trust have produced this handy guide to help you tell the difference.

When you have collected your flowers you simply infuse them in water with a little ice if you like.

60702807_2026693677635351_4368183285667332096_n.jpg

You could infuse the flowers in a glass, but this day we were making enough for everyone in the woods.

To make a Dandelion straw you simply pick a few flowers, remove the stem and wash out the ‘milk’ inside.

You should be able to enjoy this drink throughout May as, although traditionally associated with the 1st of May, May Day moved forward 13 days in 1752 after Britain’s calendar reform. If you have never heard about the change from the Julian Calendar to the Gregorian Calendar you should Google it. Its fascinating! Nature cares little for these things though, so the ‘Mayflower’ should be in full glory by mid May and we can’t wait.

Bullroarers

By Mel Evans and Kevin Fuller

We love playing about with different ideas and the good ones are often shared as activities at our Family Forest School Sessions or our Dangerous Dads Sessions. We are tinkering around more than ever at the moment and testing ideas wherever we can.

Kev has taken inspiration from the Australian Aboriginal People and has been having a go at making Bullroarers. These were used to create ceremonial music as well as to communicate over long distances. It is worth noting that although these are most frequently associated with Australia (In no small part due to Crocodile Dundee) anthropologists have found examples all over the world.

Here is Mick Dundee in action.

All you need to make a Bullroarer is a flat rectangular piece of wood with a hole drilled in it for the string to be threaded through. Historic Bull Roarers have been found in all different shapes, but this is more a mark of the culture they come from than their aerodynamic abilities.

94100754_2537882906424345_2851488724083015680_n.jpg

We are looking forward to making these in the woods. We plan to cleave slices from a beautiful chestnut log with a billhook. However, in reality a piece of pallet will do and Kev even got good results with a cardboard Bullroarer.

If you want to whittle your Bullroarer into an interesting shape the grain must run the length of the piece of wood. We supervise children closely when whittling and make sure they wear a rigger glove on the hand holding the wood. An alternative is to shape the wood with a potato peeler, although a glove on the ‘helper hand’ is still useful.

You don’t have to shape your Bullroarer and could spend the time decorating it ornately with paint or felt tip pens instead.

94192409_2537883199757649_319809419548295168_n.jpg

This Bullroarer was shaped using a potato peeler

93859012_2537883253090977_1233601683578159104_n.jpg

The cardboard Bullroarer was made with a piece of card folded over and some Duct tape wrapped around it.

When its time to test your Bullroarer there are two important things to remember. Firstly stand far enough from the rest of the family so you don’t hit anyone! Secondly twist the string before you start swinging. This means the Bullroarer will turn as the string untwists, re-twists and untwists again as you swing it around. It is this that creates the sound. The noise is of such a low frequency that it wan carry for many miles.

Here is Kev demonstrating one of his Bullroarers.

We had lots of fun trying this out and think it will make a great activity for a Dangerous Dads Session once we are back in the woods, Let us know if you give it a go!

Pickled Wild Garlic Buds

By Mel Evans

We are big fans of Wild Garlic here and have previously shared recipes for Wild Garlic Bread and Stinging Nettle and Wild Garlic Fritters.

Blank Facebook Post (3).jpg

Judging by the pictures we have received it looks like we are not alone in our appreciation of Wild Garlic!

As Wild Garlic has proven so popular we thought we would have a go at pickling some Wild Garlic Buds. Now is a great time to collect the buds as the flowers are just starting to bloom. The first job is to take a clean jar and fill it with the buds.

We brought the jar home and made the pickling liquor. We heated 50 ml water, 50 ml of white wine vinegar and 50 g of sugar in a pan until the sugar had dissolved. We let the mixture cool and then poured it over our Wild Garlic Buds.

IMG_10741.jpg

We added black peppercorns to our Wild Garlic Buds, but you could experiment with other herbs or spices.

The Wild Garlic Buds will be ready to taste in a couple of days and should keep for six months in the fridge. They can be used in sauces or sprinkled over salads. We made a yogurt dip using fresh finely chopped Wild Garlic, Jack By The Hedge, cucumber and the pickled Wild Garlic Flowers. Let us know how you use yours.