Summer Solstice Activities
/Below you can fine links to five of our favourite sun activities to help you celebrate the Summer Solstice.

Below you can fine links to five of our favourite sun activities to help you celebrate the Summer Solstice.
Preserve leaves and make wilds art
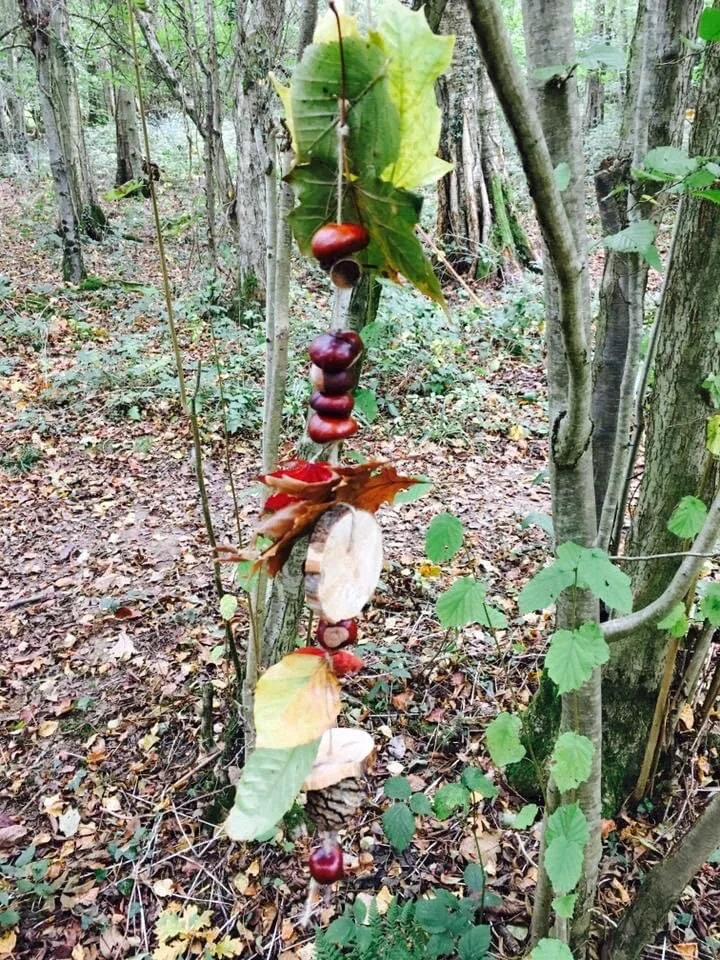
Don’t you wish those beautiful autumn leaves could last forever? We love to preserve them by carefully dipping them in bees wax that has been melted on the campfire. The wax quickly dries and the finished leaves can be used to create all sorts of things.

You can buy bees wax in blocks or as granules online or in hardware shops. This is then melted in an old pan over a fire or on a hob. When the wax has melted completely the leaves can be dipped in. The leaves should then be held over the pan until the excess wax has dripped off and then laid flat to dry. It takes a bit of trial and error to know when the wax is at the perfect temperature. Too hot and the leaves singe, but too cold and the wax does not dry clear. The hot wax will burn the skin and can catch light if left unattended so care and adult supervision are essential.
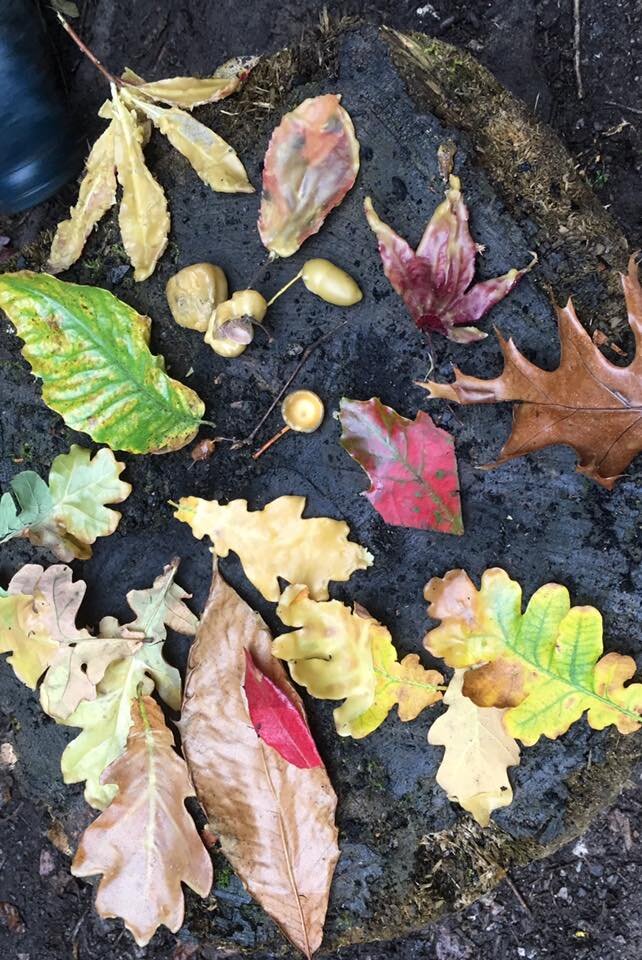
The finished leaves can be used in all sorts of crafts. You could use them to make ground art or string them up with other Autumn treasures to make mobiles and garlands. Older children and adults enjoy making dream catchers or wreaths adorned with the leaves. You could even use them to dress an Autumn Flower Fairy along the same lines as our Spring Flower Fairies.
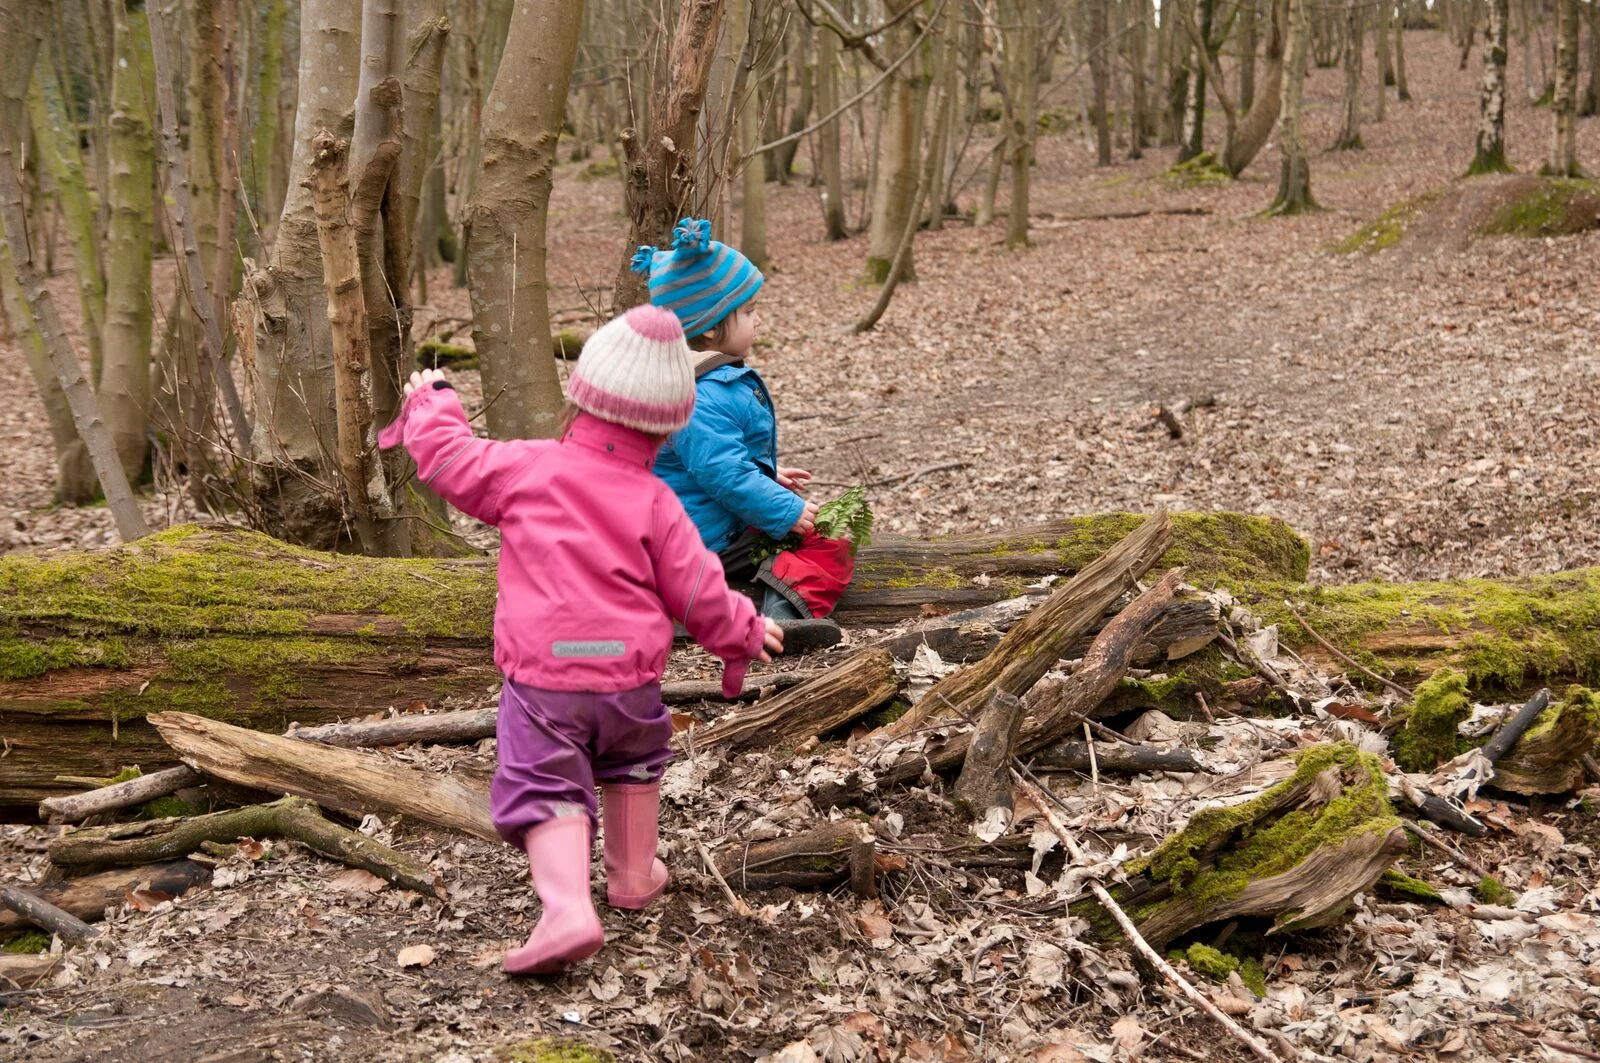
We love building dens in the woods, but if time or resources are against you then mini-shelters make a great alternative.
You could make a mouse from an acorn or a hedgehog from some clay and foraged materials. You could take a much loved teddy bear with you and build them a house. This is a great chance to great creative and indulge in some imaginative play in nature. When your house has been built you will need to think about the garden. What will you use for furniture and what will your inhabitants eat? An acorn cup makes a great bowl and a small stick the perfect spoon. Before you know it you will have created your own small world.

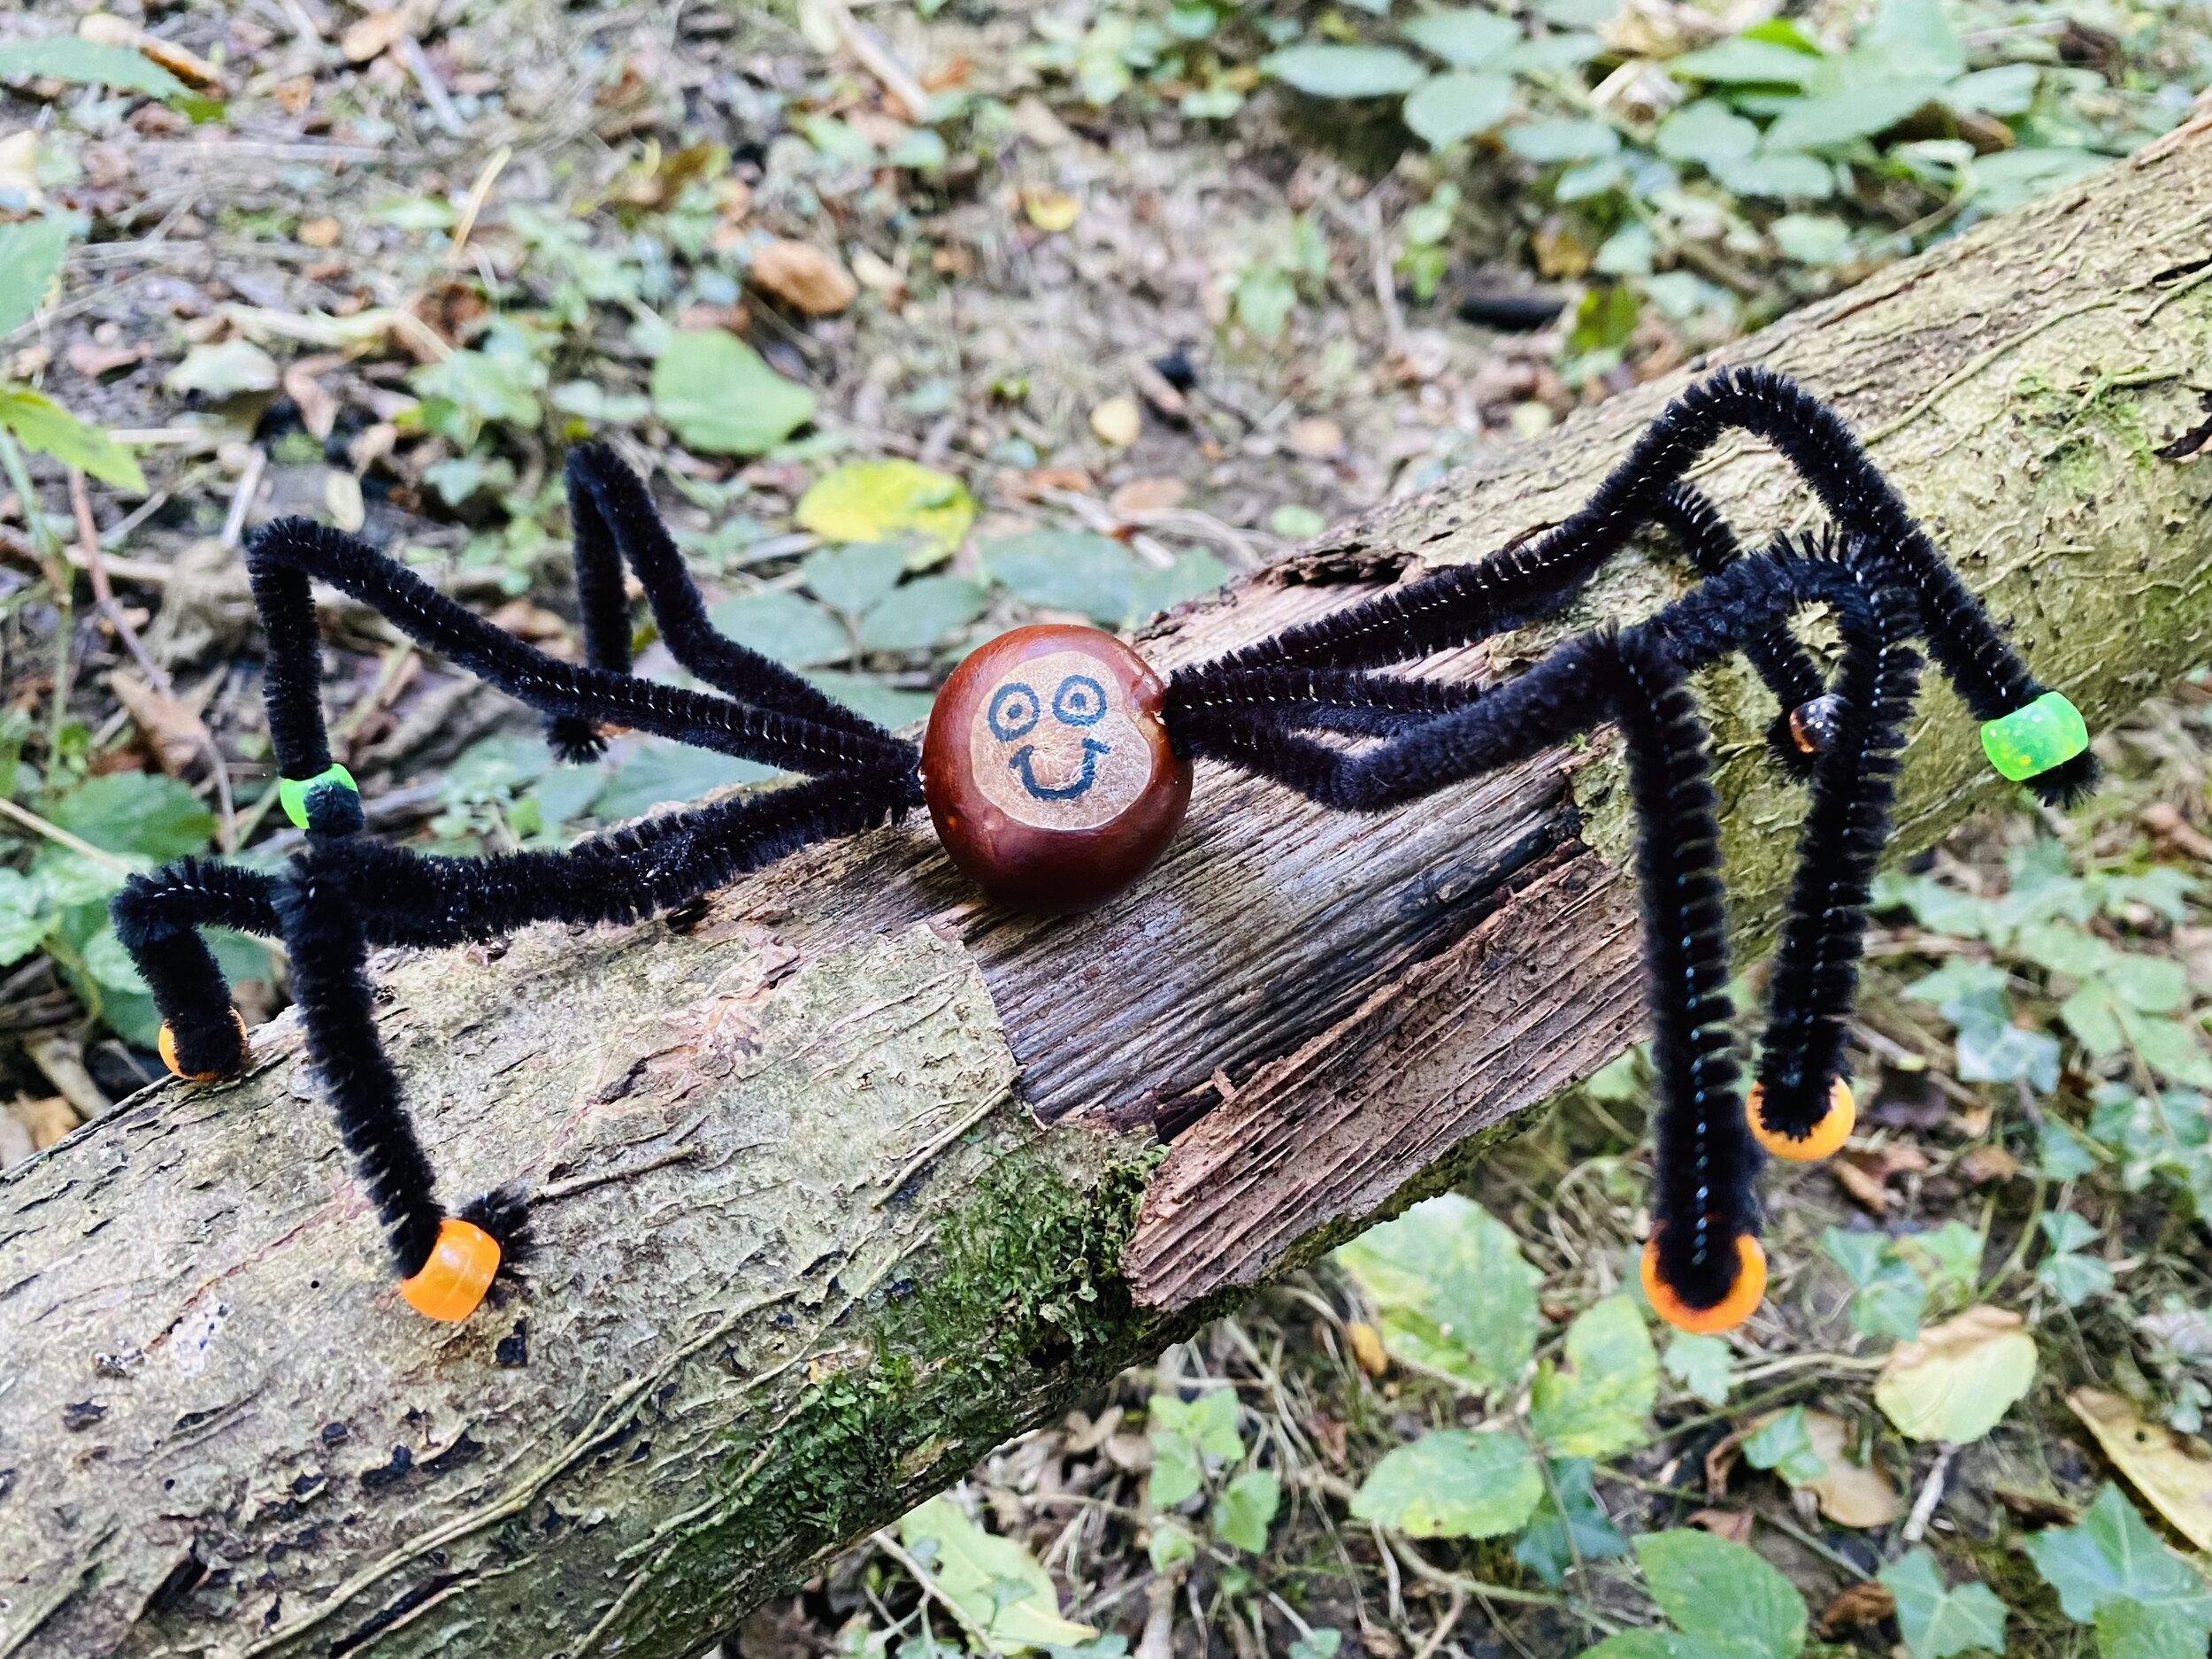
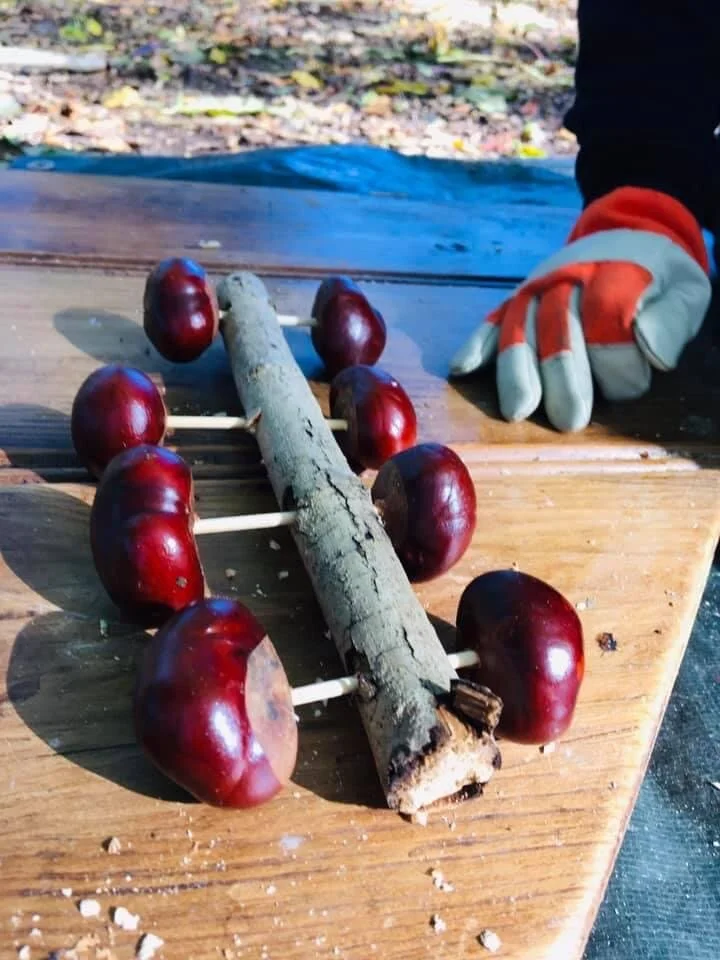
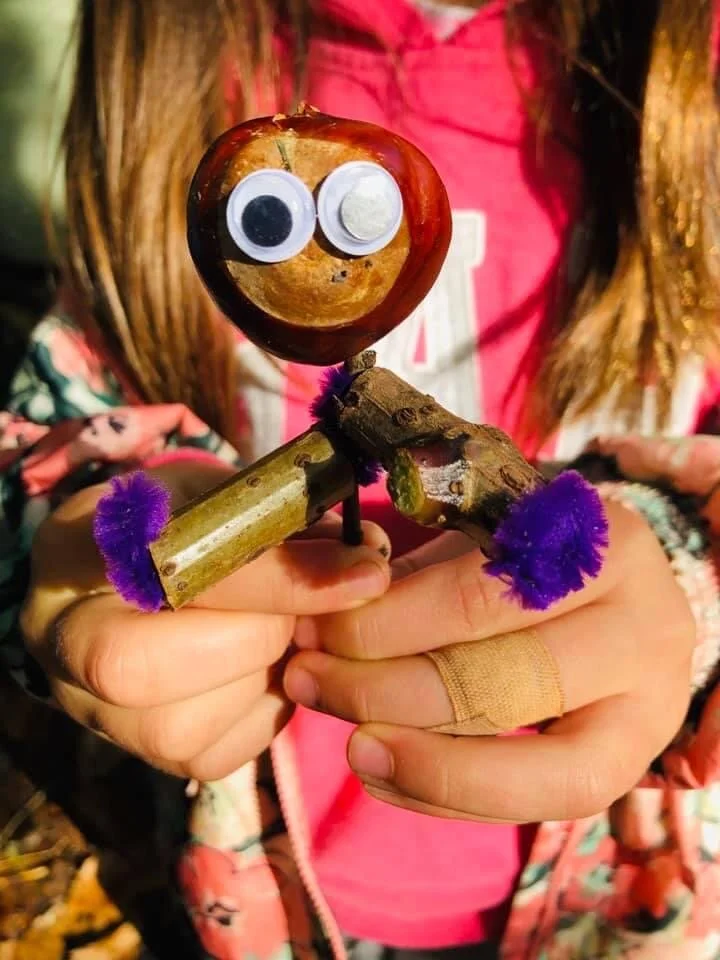
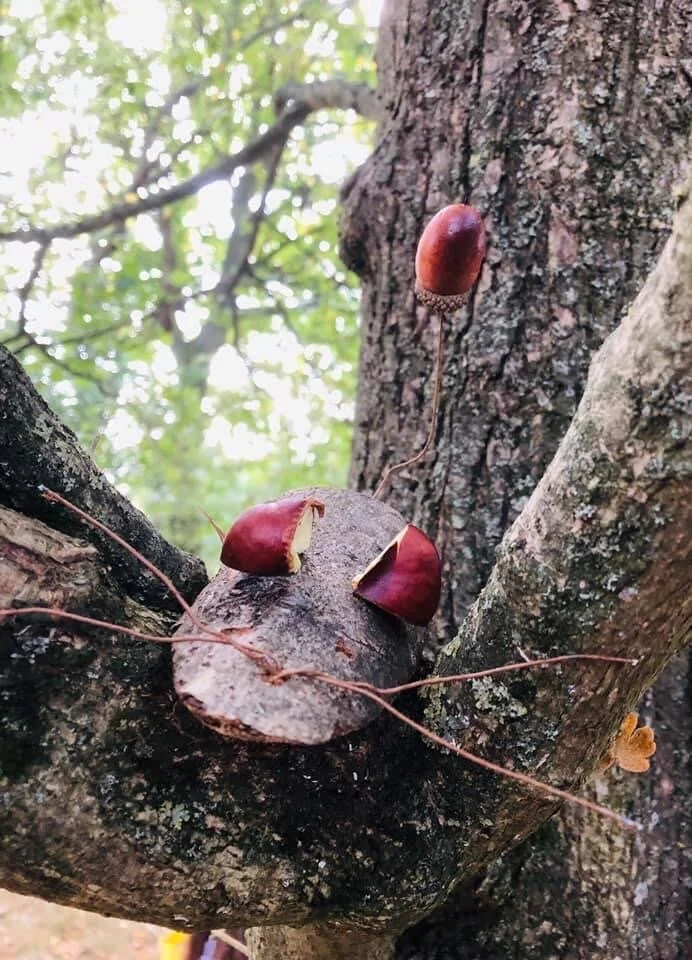
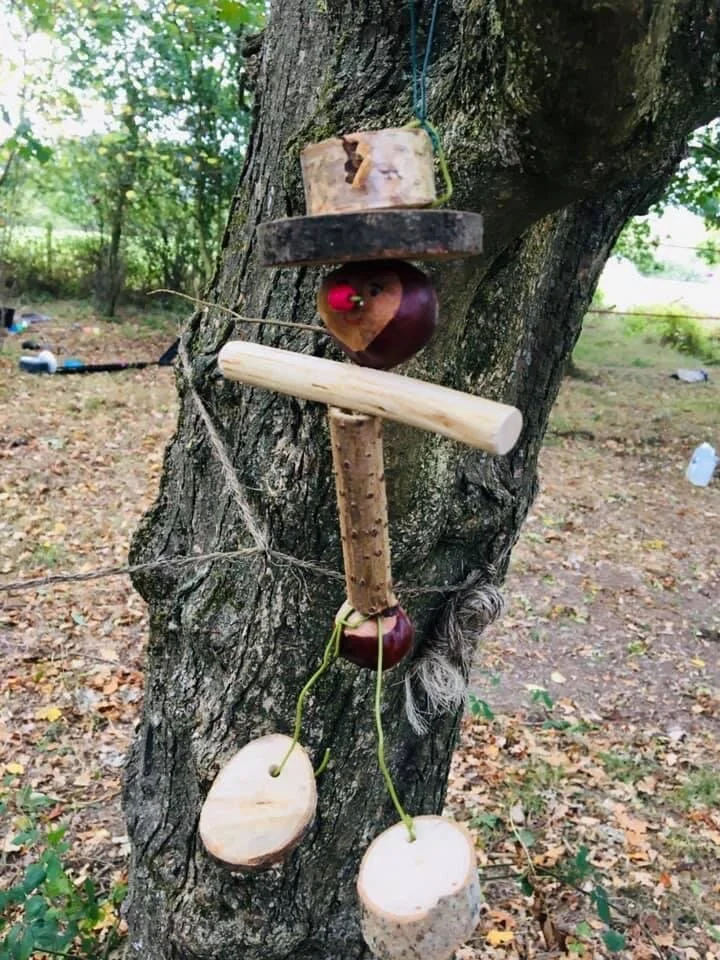
There is something irresistible about conkers. When you find a Horse Chestnut Tree in the Autumn it is almost impossible not to pick up the shiny round treasures and put them in your pocket.
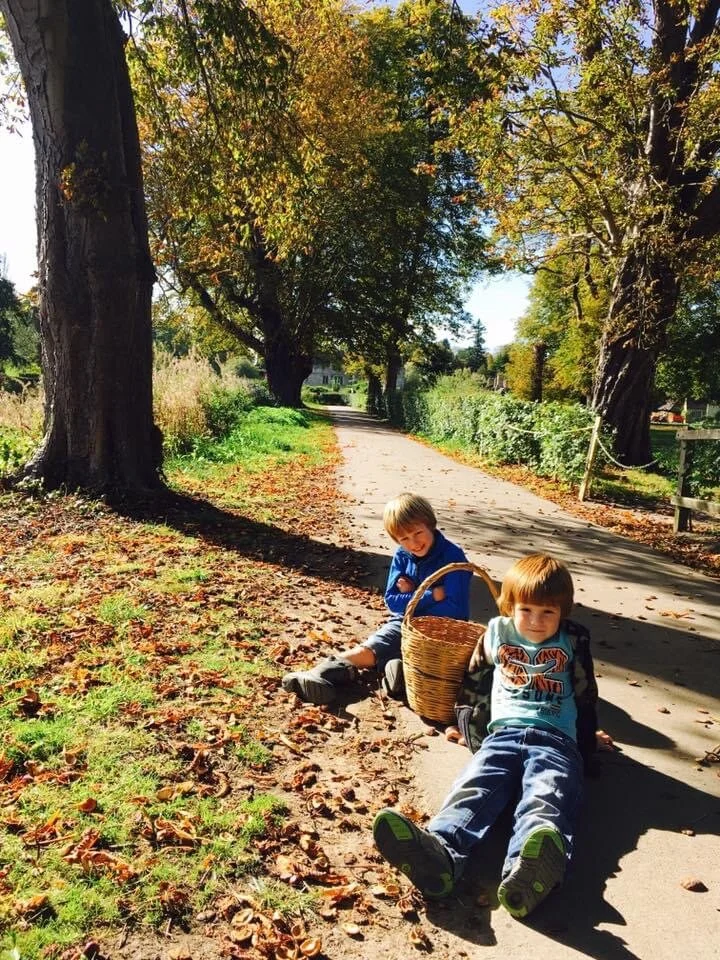

Although playing conkers has long gone out of fashion it is still a lot of fun. Many of the adult at our sessions remember soaking conkers in vinegar, lightly roasting them or putting them in the freezers in an effort to make them harder and increase the chance of winning. Although the children are usually confused at first they are generally intrigued enough to have a game!
If you are not the competitive type then you could see what else you can make from conkers. A palm drill is useful to make holes in the conkers and then they can be threaded on string or pipe cleaners. Have a look at our gallery below for inspiration.
Only three British mammals genuinely hibernate. These are the Dormouse, hedgehog and the bat. Other animals such as squirrels and badgers take it easy and spend much of the winter in their drays and sets. However, they do venture out to feed and their bodies don’t go into full shut down unlike those that hibernate.

We can celebrate these animals with activities while we ponder what it would be like to hibernate and if we would do it ourselves given the choice. You can find a few ideas below.

Make Hedgehog Bread

Make a Dormouse from an acorn and build it a mini shelter to hibernate in.

Build a hibernaculum or mini-beast hotel for insects such as mason bees, queen bumblebees and butterflies to hibernate in.
Love them or hate them no one can deny that they are a talking point and with 650 species in the UK they are hard to avoid! Why is it they seem to be out in force in the Autumn? The answer is mating season! The female spider will stay in her summer web and can often be seen in the middle while the web is glistening with raindrops or dew caught by the Autumn sunshine. The males can be found scuttling about in search of a partner. I will save you from all the gory details of a Spider’s mating habits. All I will say is the male usually stays in the female’s web until winter when he dies – unless she decide to eat him first!
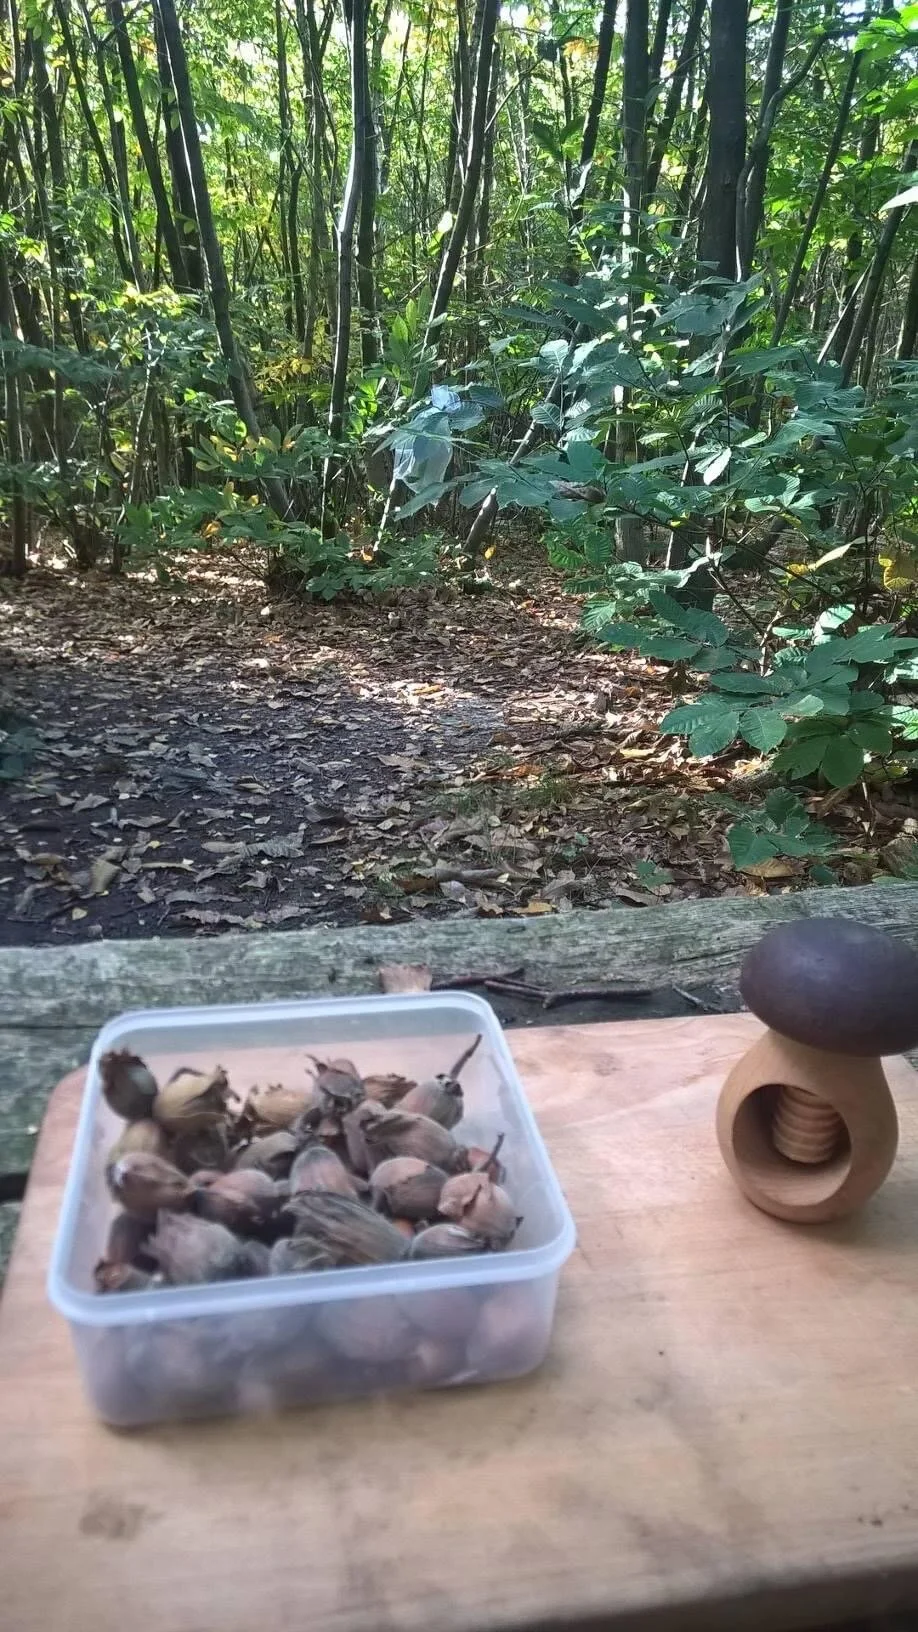
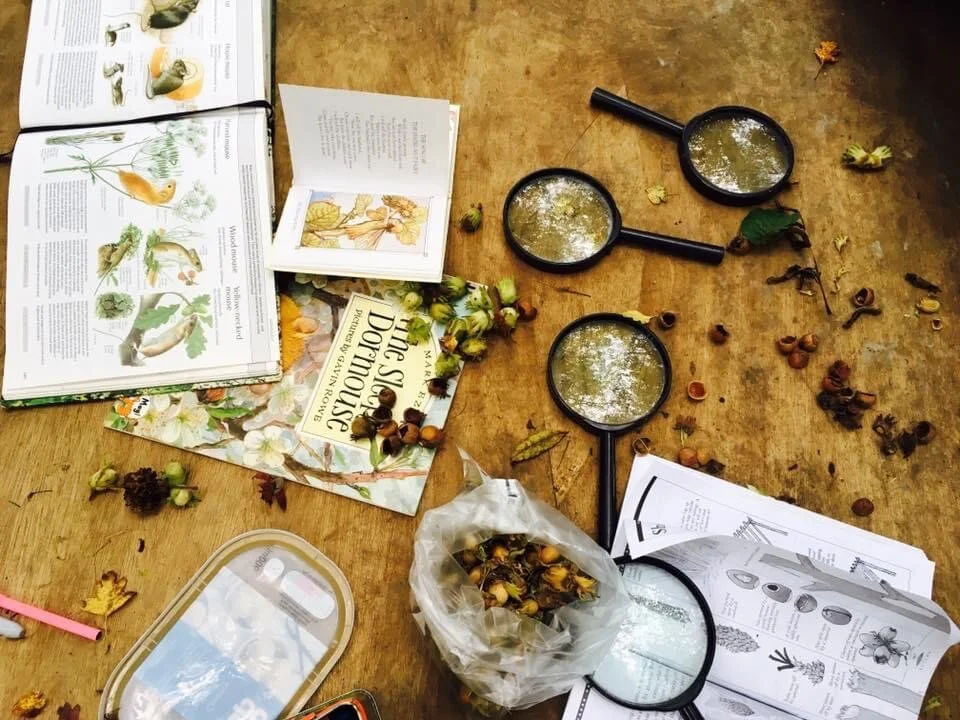
Go on a Hazelnut hunt
There is something rather magical about the Hazel tree. Red flowers give way to yellow catkins and finally nuts. How wonderful to find a source of protein literally growing on trees. If you look around the base of this twiggy tree you are liable to find lots of discarded nutshells. With a bit of detective work and a magnifying glass we can come to some conclusions about which woodland creatures have eaten the nut! Chief suspects include Squirrels, Wood Mice, Nuthatches and Hazel Weevils. If we are really lucky we might find a nut that has been nibbled by a Dormouse. The Peoples Trust for Endangered Species have produced this information sheet to help you discover more.
Roast nuts in a nut oven
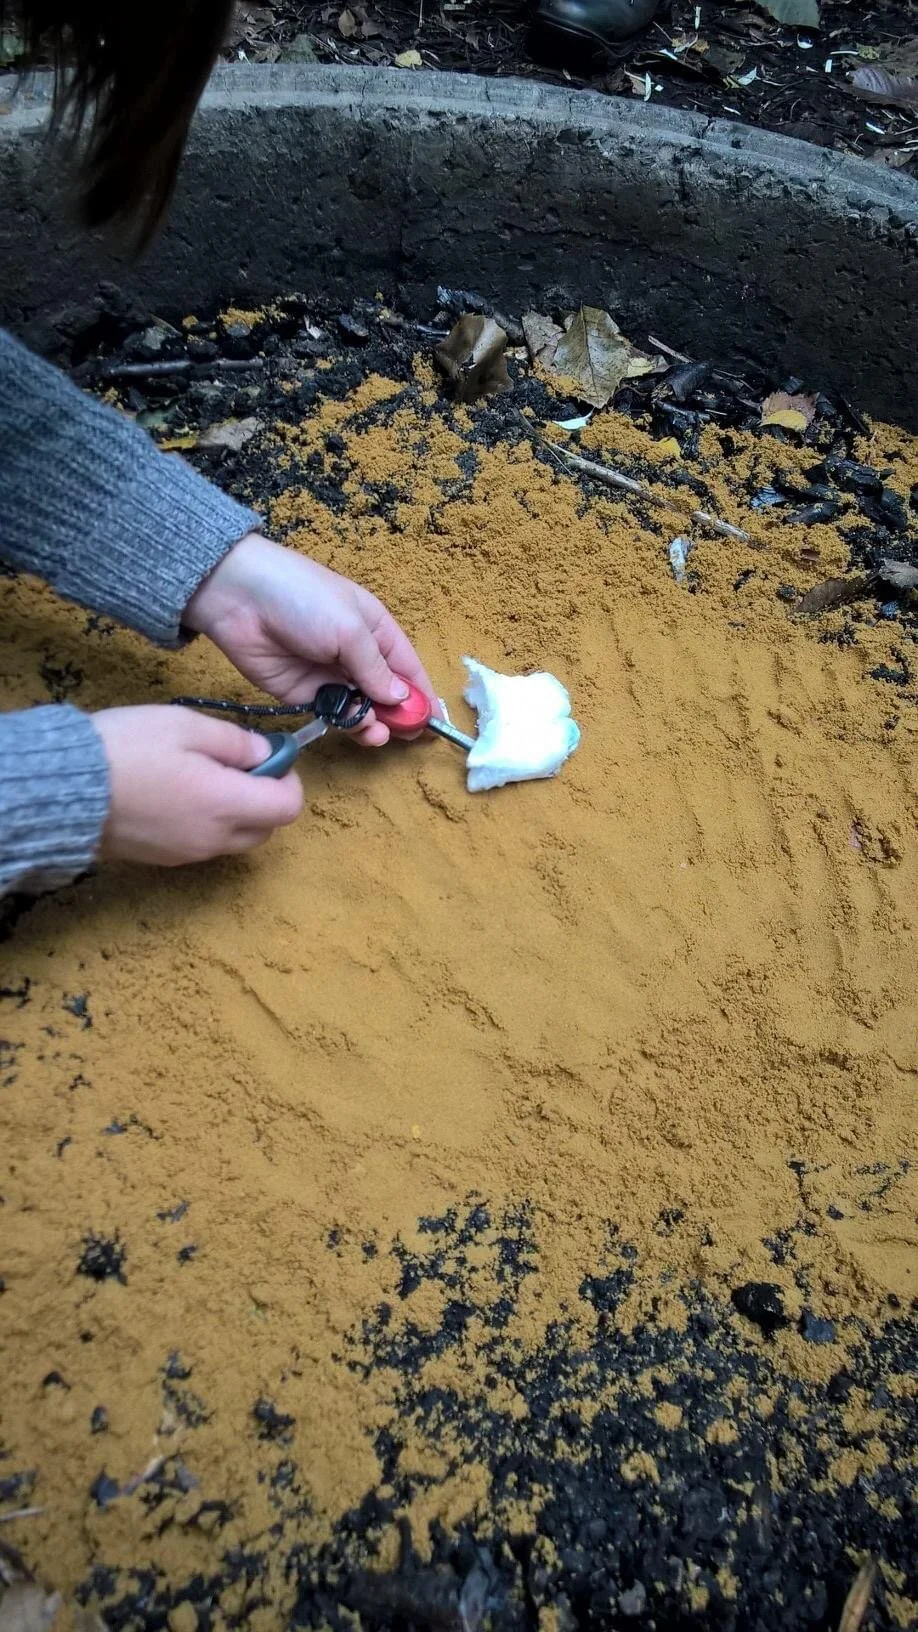
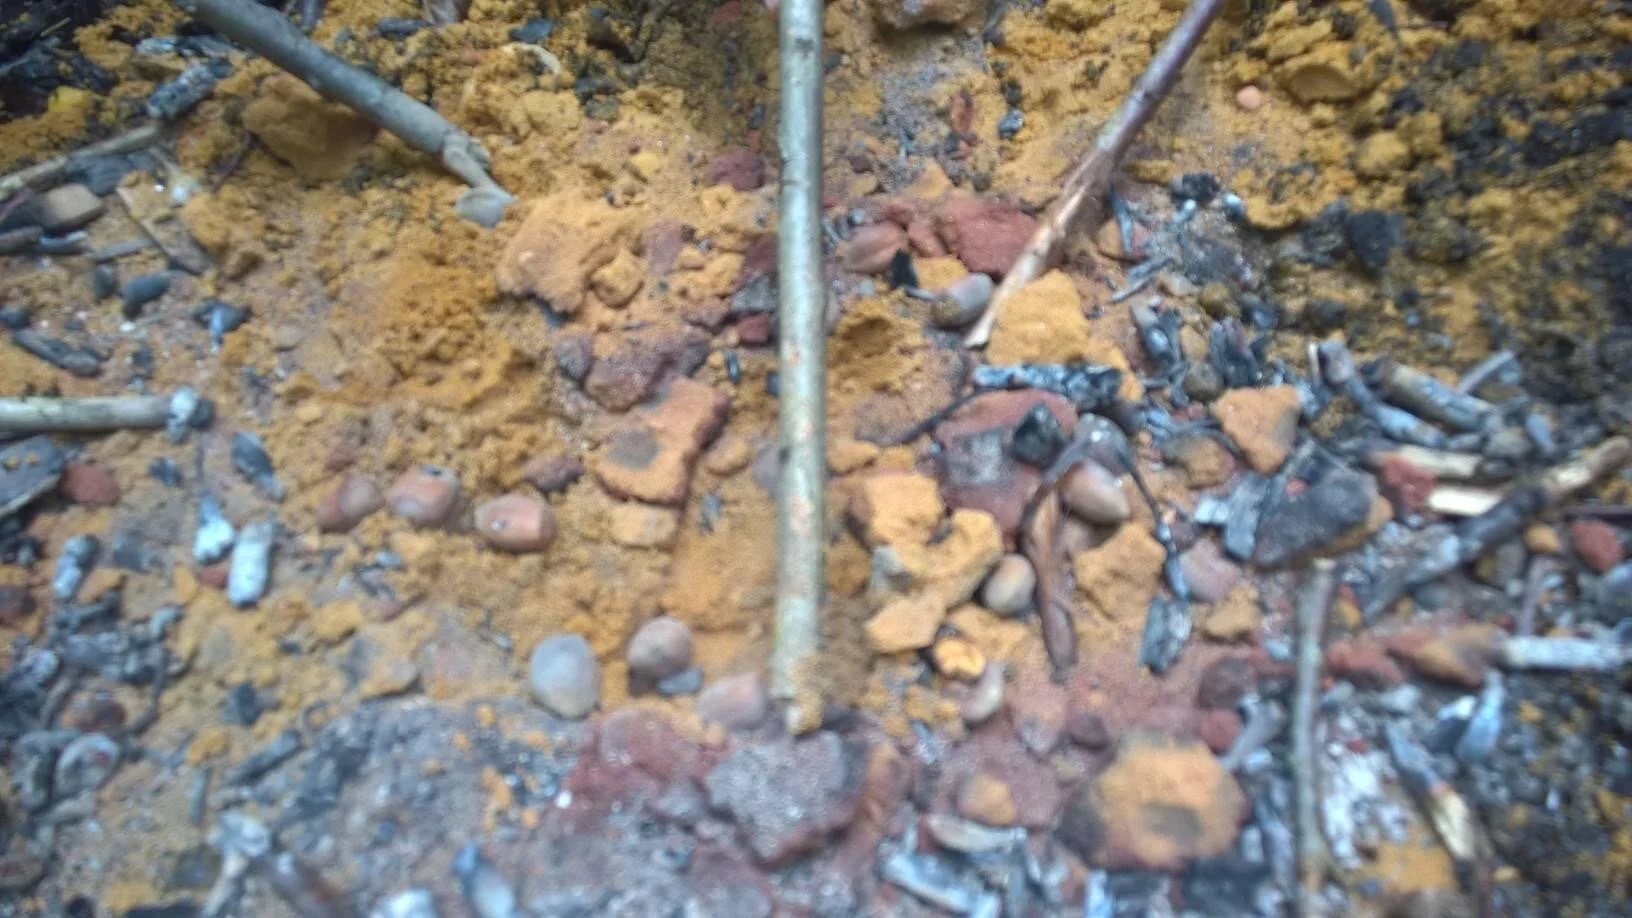
If there are any nuts left after the woodland feast we could roast them in a nut oven. This involves burying the nuts in sand and making a small fire on the top. This does bring us to an ethical dilemma however. Should we be picking the hazelnuts when they are such a valuable source of food for our woodland friends? As the Dormouse is on the endangered animals list its preferable to leave the nuts where they are. However, luckily for us nearby Kent boast several organic cobnut farms. Cobnuts are a cultivated variety of Hazelnut and are easy to buy in the Autumn. That way you can roast nuts without further jeopardising the Dormouse’s survival.
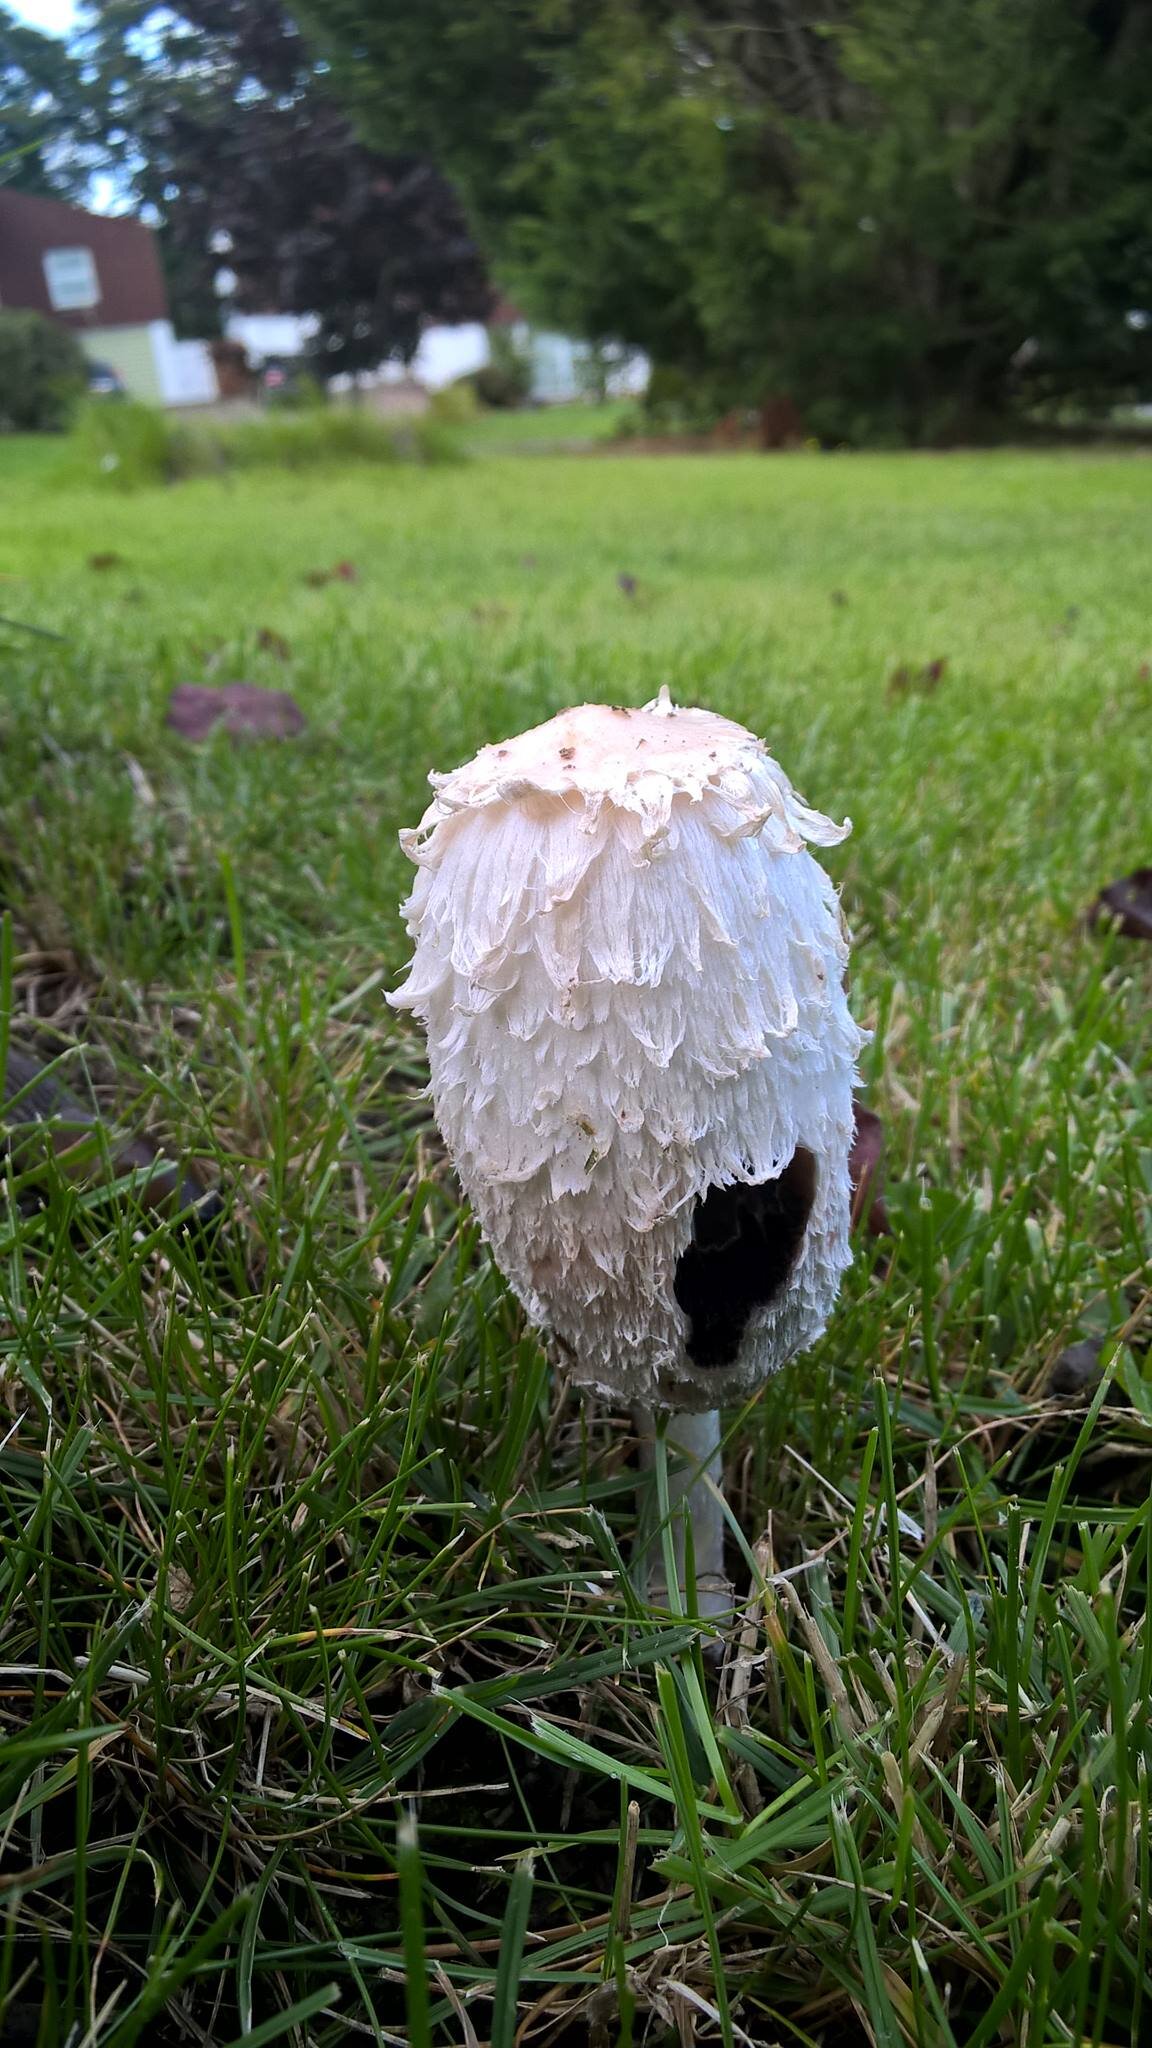
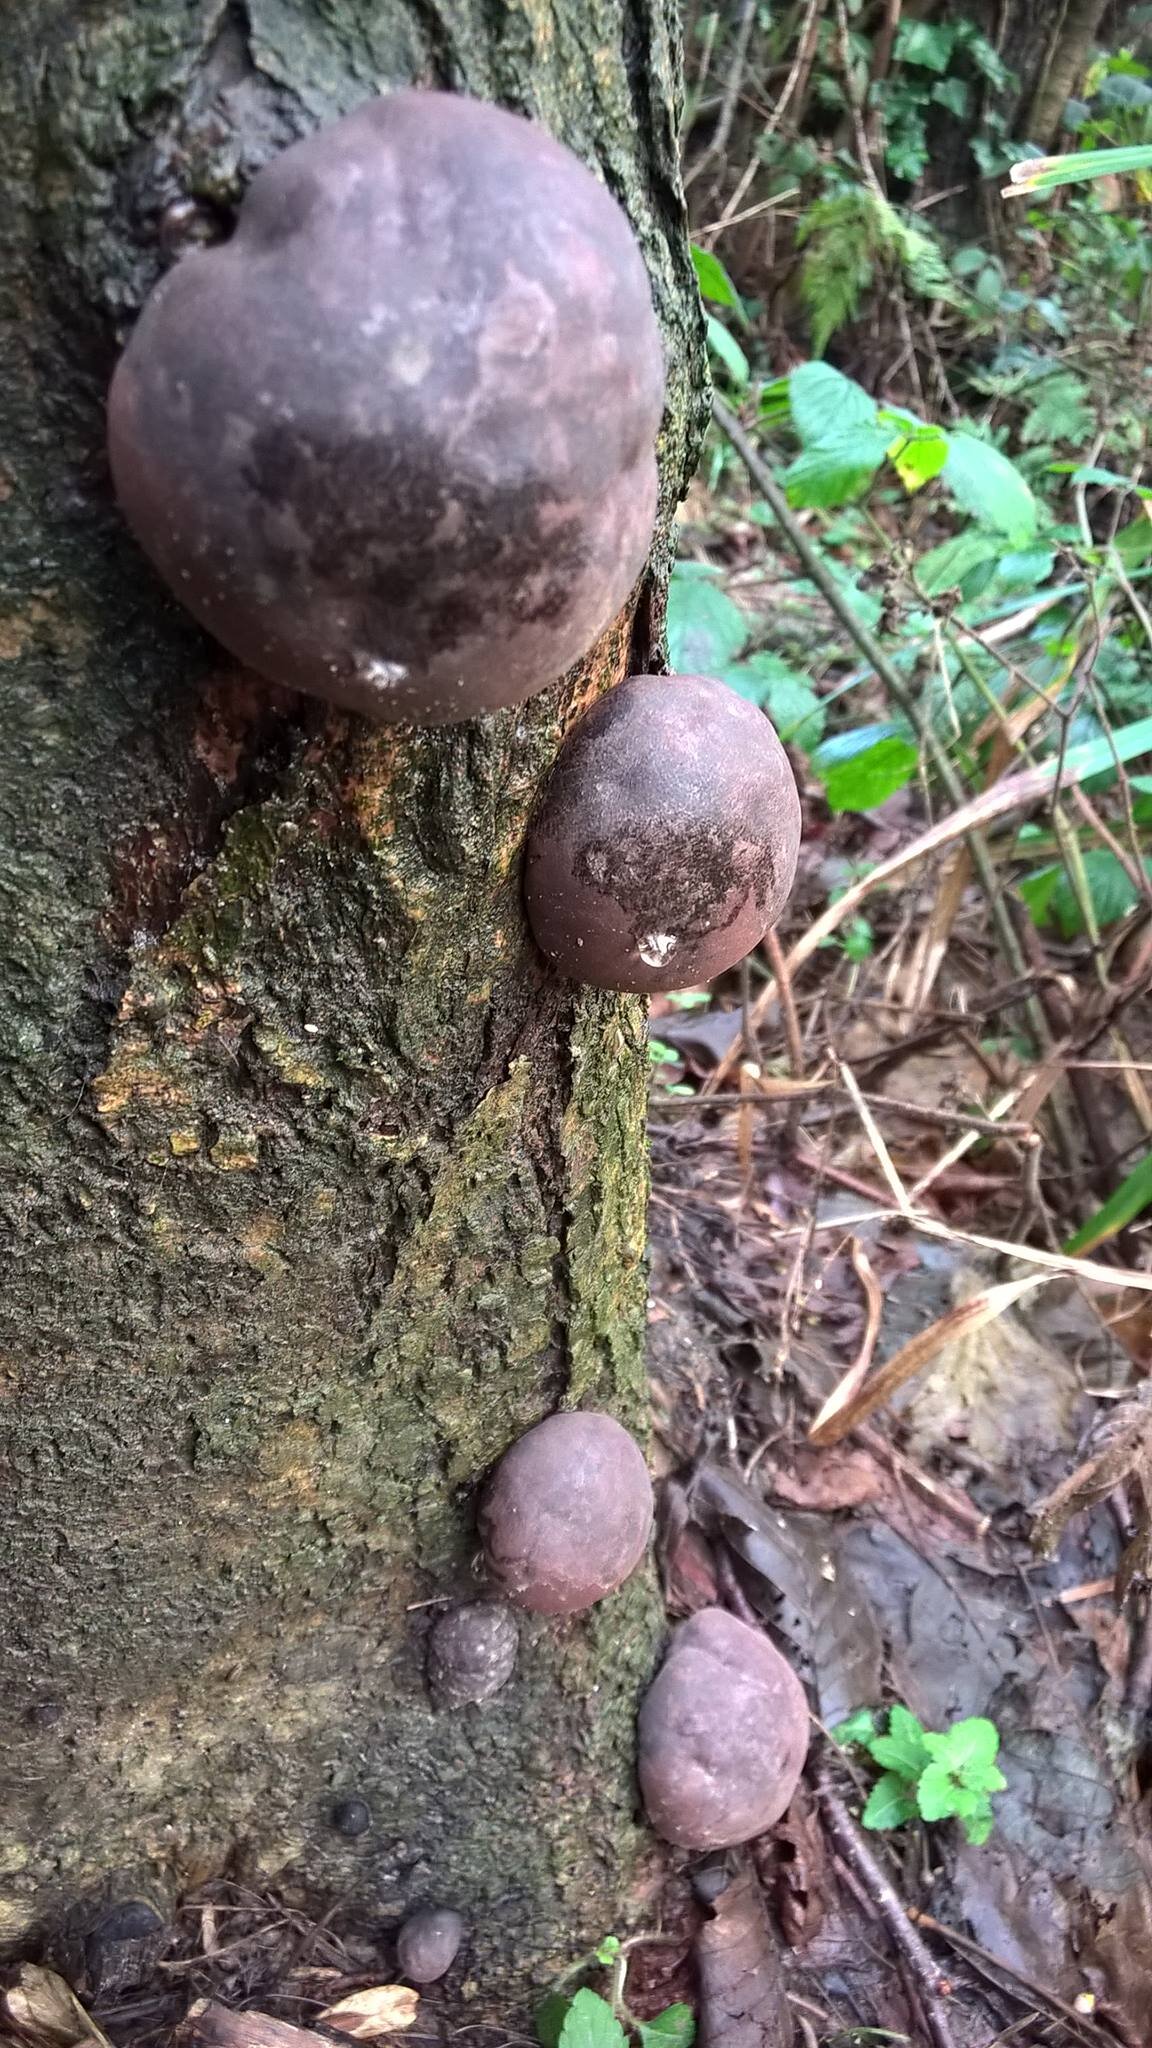
Discover some fabulous Fungi
It’s so exciting a take a walk in the woods on a rainy day and discover the strange mushrooms that seem to have been woken by the rain. Children seem to revel in the fact that some are poisonous and once safety rules have been establish there is so much to discover for all ages.
Very young children can recognise different colours and shapes of the fungus they find. They can imagine fairies sitting on top of a Fly Agaric or dancing around the Fairy Ring Champignon. We like to give our Autumn events a magical twist and the fungi provides the perfect back drop!
Older children can explore the life cycle of fungus by making spore prints or watching a puffball blow out its spores. We can demonstrate how the Fly Agaric got its spots or paint with the ink extracted from Shaggy Ink Caps. King Alfred’s Cakes are great for fire craft due to their ability to burn like coal.

Then there is the concept of symbiotic and parasitic relationships to explore not to mention that rumour that trees may actually communicate through the web of mycelium (the vegetative part of a fungus) underneath the woodland floor!
The Woodland Trust offer a Fungi Hunt Spotter Sheet and an Autumn Fungi Hunt Identification Sheet. Why not take a copy next time you go for a walk in the woods and see what you can find?
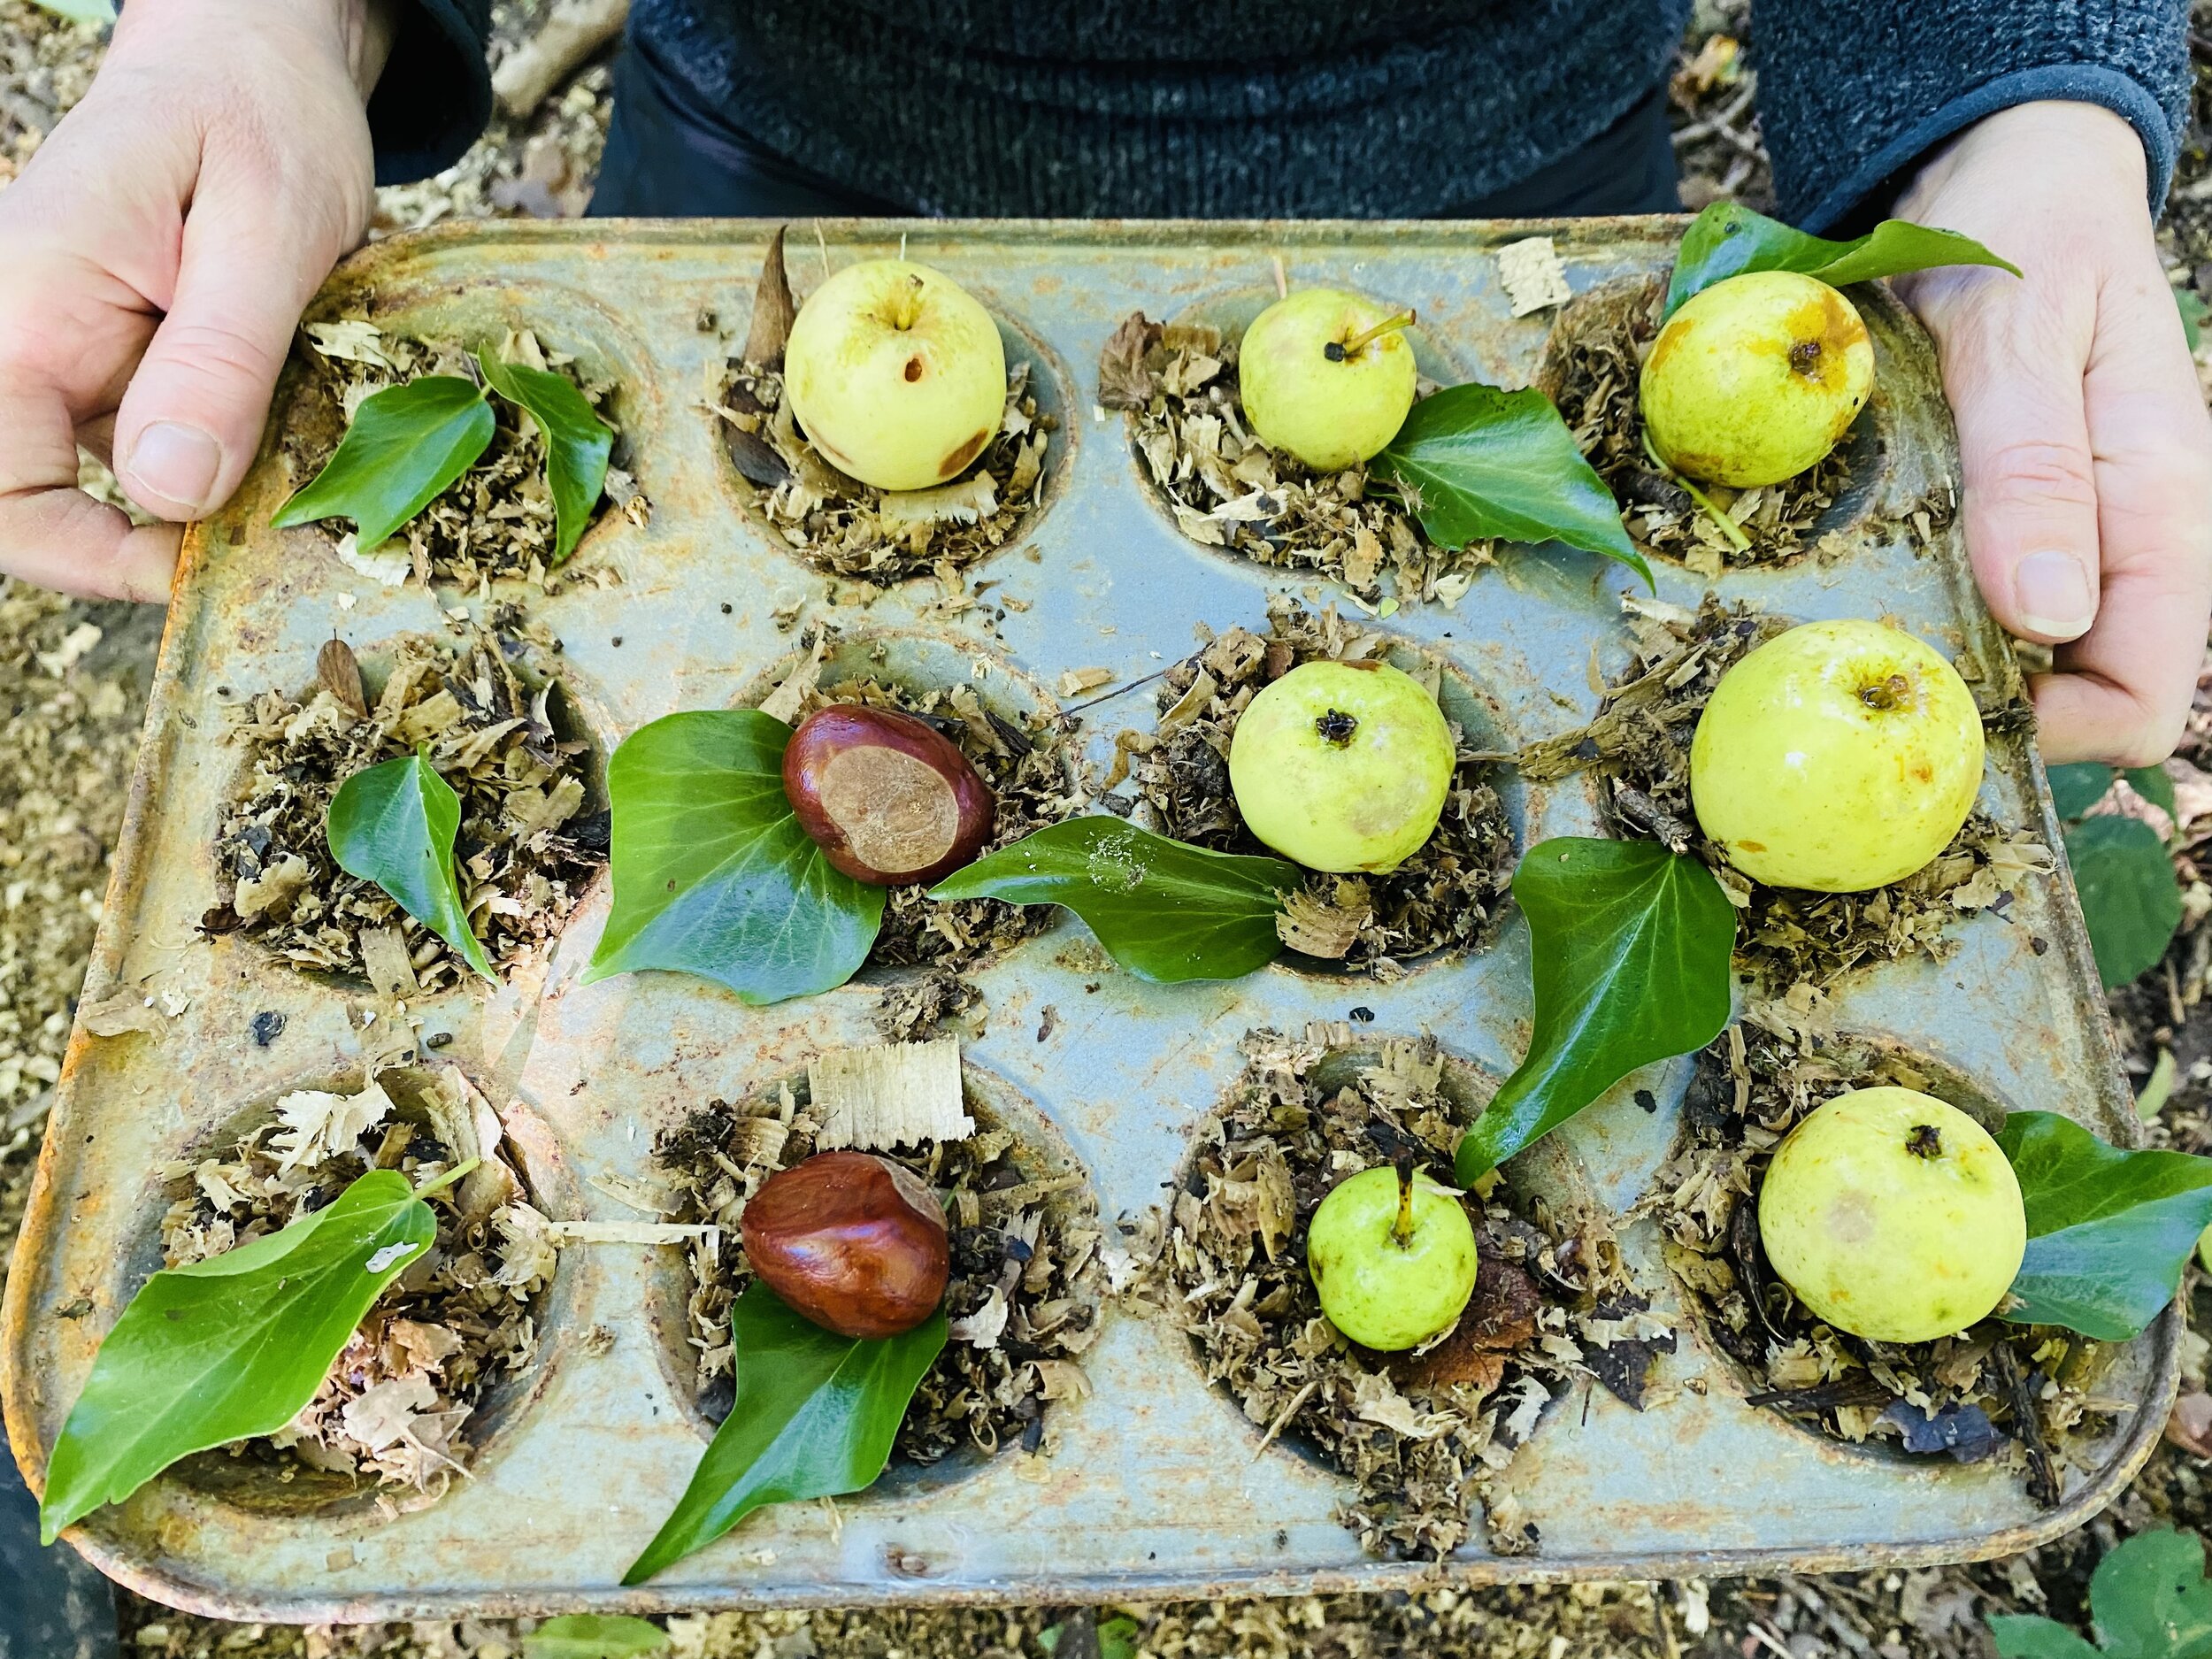
Crab apple trees are common in woodland and several of the woods we use for our sessions have prominent crab apple trees. They stand out in the Spring when they are covered in blossom and they are easy to identify this time of year by the sea of round yellow apples on the ground.

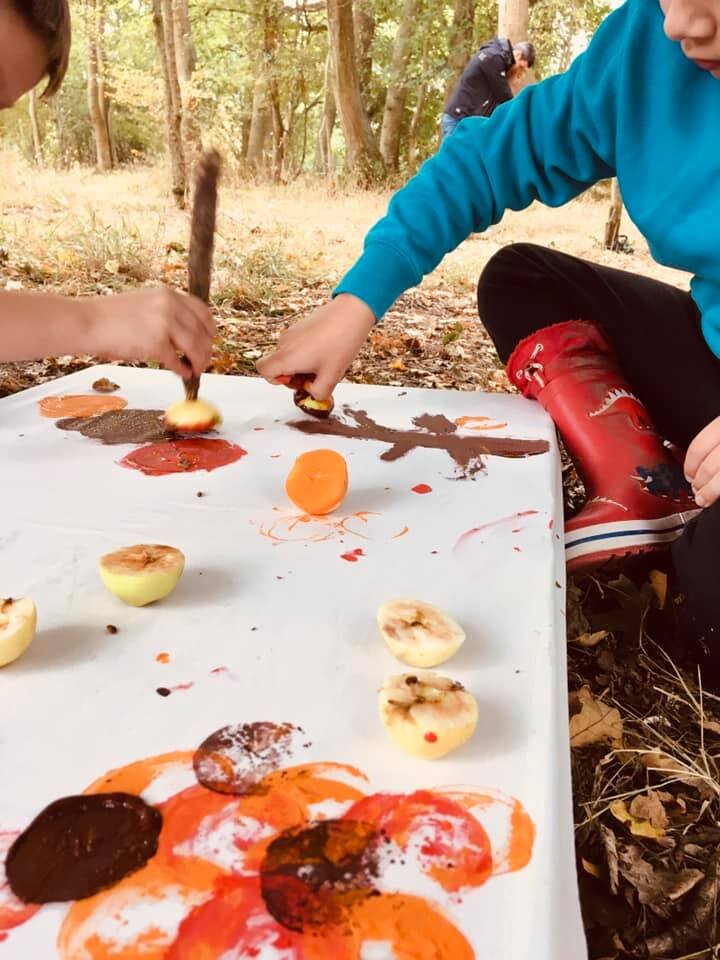
These apples get their name because they are sour - like a crabby person! They might seem of little value, but every cultivated variety of apple descended from the crab apple. We use them in the mud kitchen, we roll them down drainpipes, race them against pine cones and conkers, and we use them as stamps to make apple prints.


We also like to use them to make Crab Apple Cordial. Adding sugar makes the cordial sweet with a delicate apple flavour. Although the apples will be around into November, they are at their best right now so it is the perfect time to give the recipe below a try.
How to Make Crab Apple Cordial
To make Crap Apple Cordial you need to fill a pan with washed crab apples. Cover these with cold water, bring to the boil and then simmer until soft. Next strain the crab apples and retain the liquid. You then need to add 3/4 of a cup of sugar for every cup of liquid. This should be returned to the pan and heated through until the sugar has dissolved.
In the woods we like to add more water to the pan and drink the warm cordial around the camp fire straight away. However, if you pour it into a sterilised bottle and put it in the fridge it will keep for a couple of months.

Below you can find all our Forest School inspired Easter activities, previously published on our blog, in one place.

Sugared Primroses

Easter Wreath

Compass Easter Egg Hunt

Wild Easter Afternoon Tea

Easter Tree

Egg Dying

Birds Nest Challenge

Cress Heads

Egg Blowing and Wild Omlettes
You can make a really white air drying dough using 200g of Baking Powder, 100g of Corn Flour and 150mls of water. We have included the dry ingredients in Pack Three so you just need to add water.
Put all the ingredients in a pan and gently heat through stirring continuously. The dough will start to come together. It can then be turned out onto a board and kneaded when cool enough.
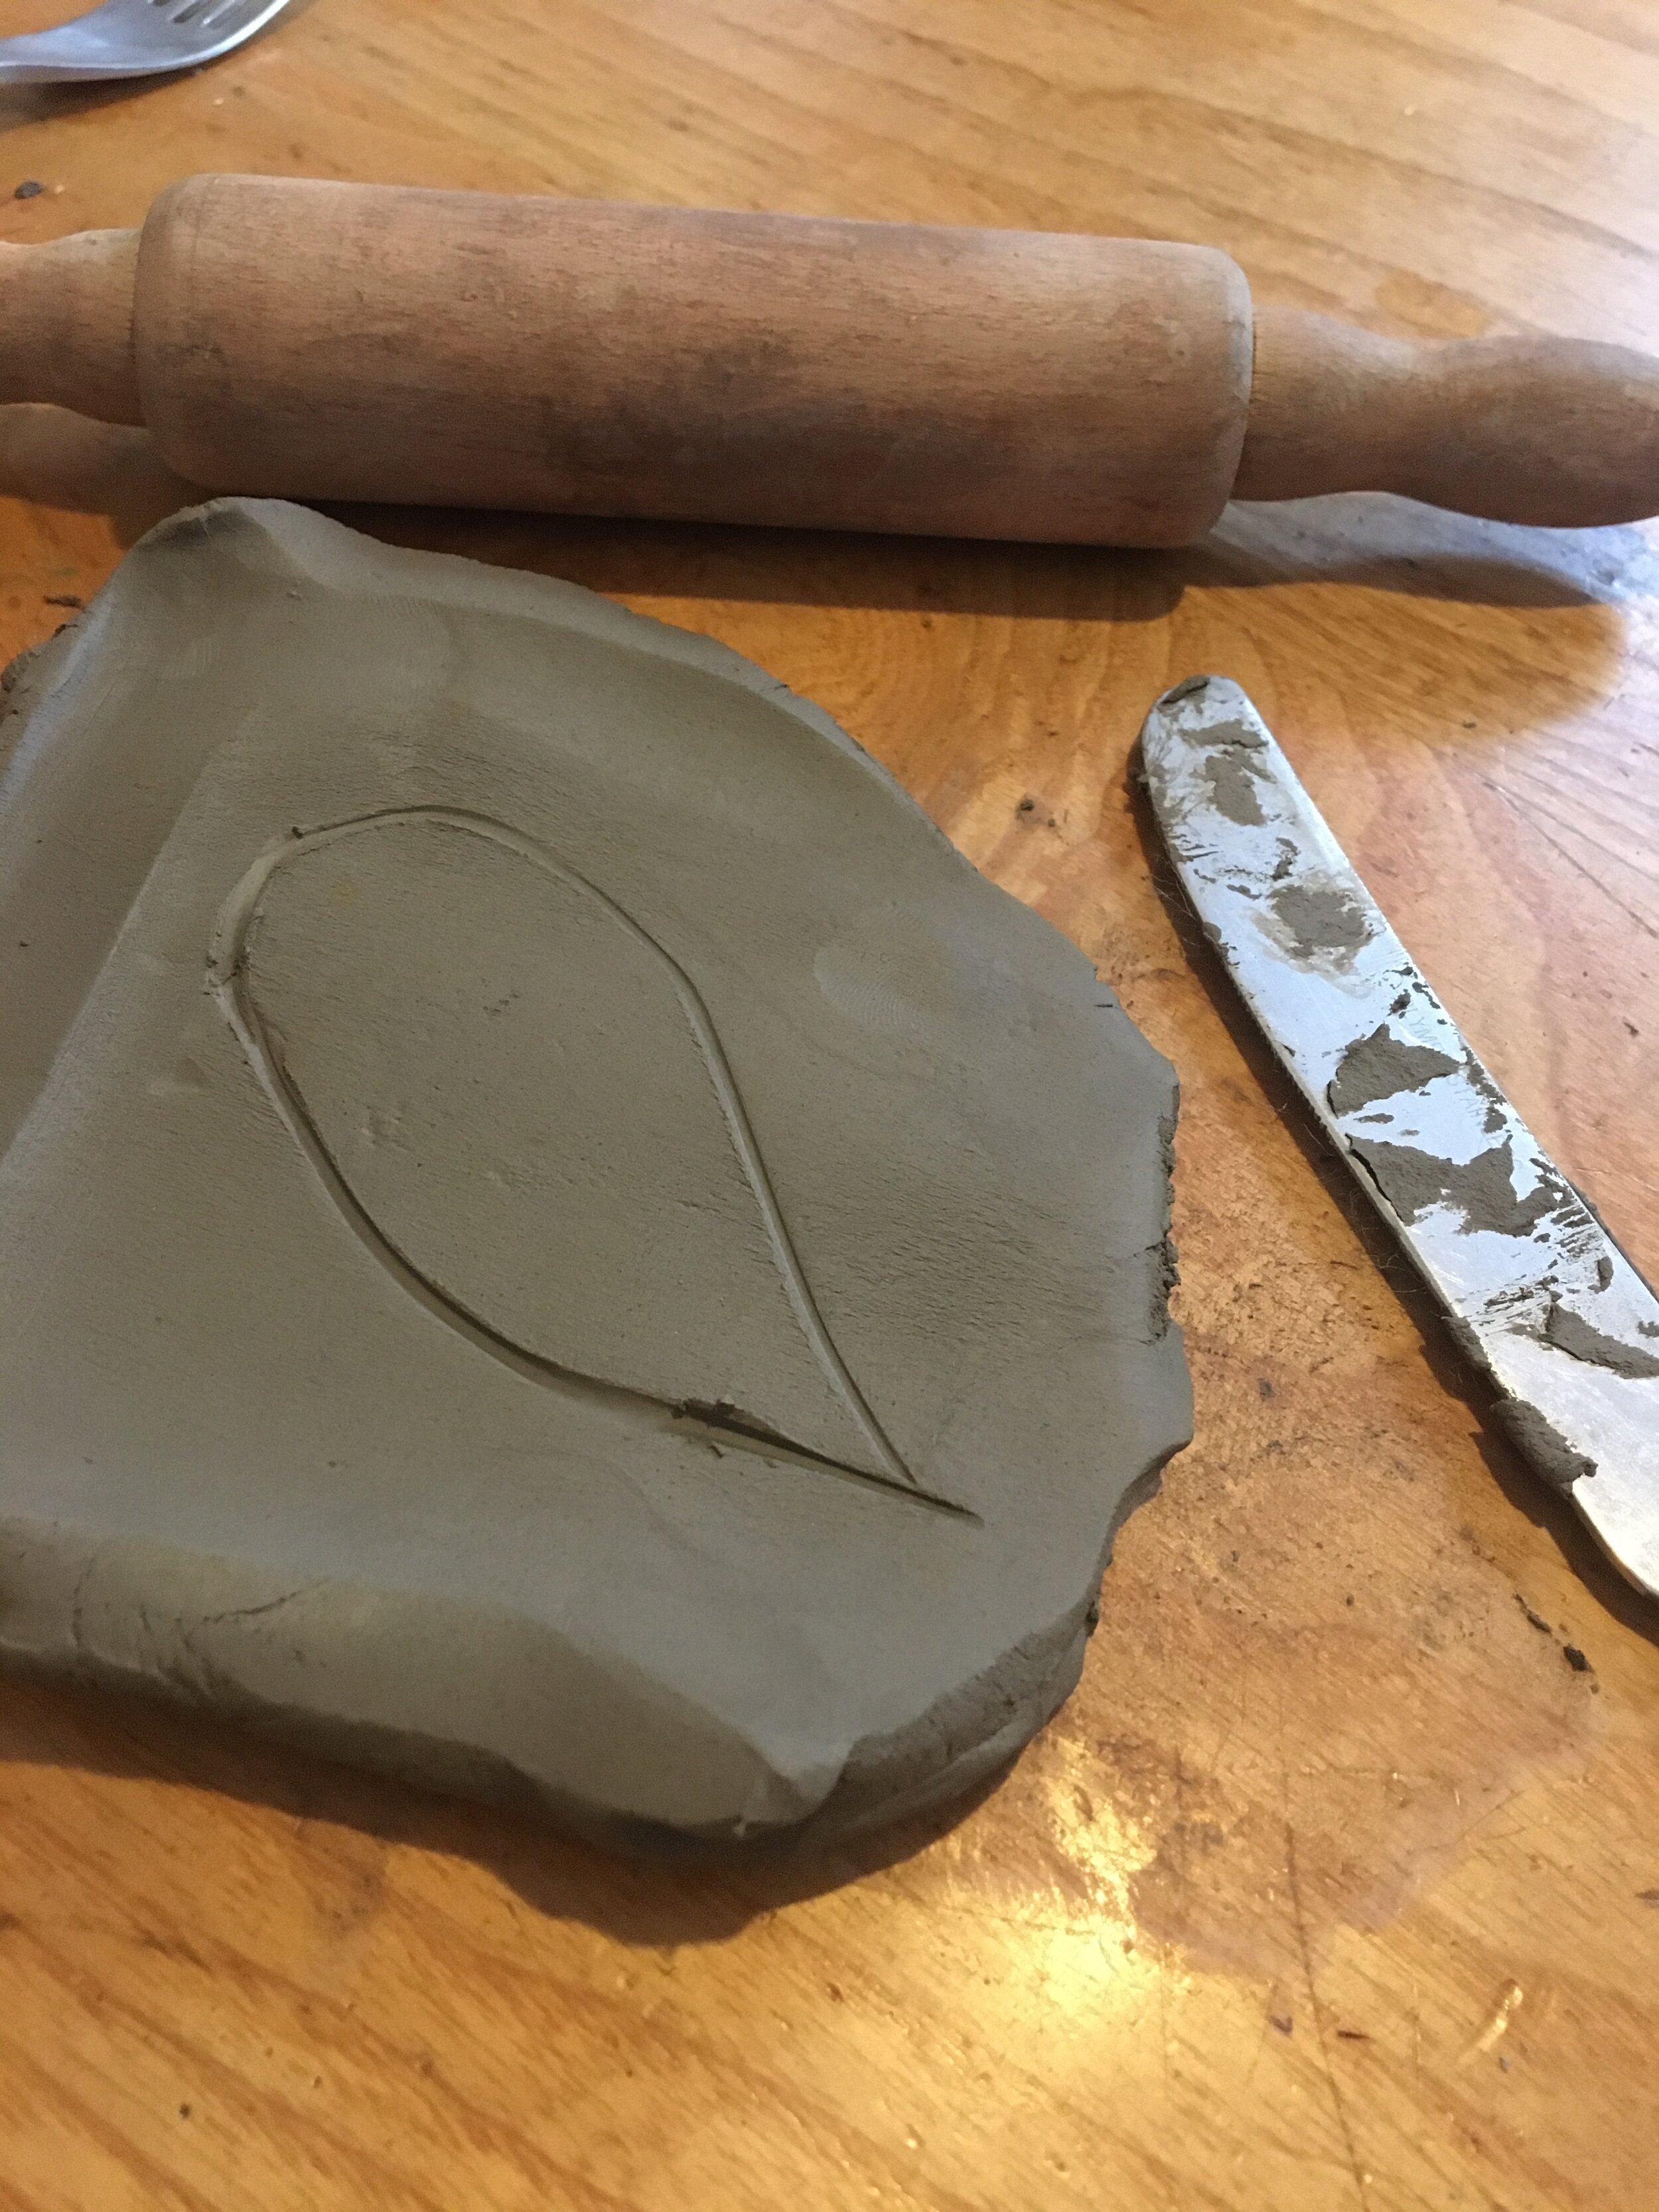
One of the things we love to do is make impressions in clay of things we find in the woods. When you are on a walk you could look out for things that have interesting shapes and textures. What signs of Spring can you find?
To make an impression of the things that you have found just roll out the clay, put the item on the surface and gentle roll it in. Then you can take it out and see what kind of impression has been left behind. We had a lot of fun experimenting with different things. When you make an impression you like you can cut around it using a cookie cutter.
The shapes can then be left in a warm place to dry, turning occasionally. We found the best thickness to roll the dough was around 5 mm. If the dough was very thick then cracks appeared as it dried.
You can use the blue cloth included in the pack to roll the clay out on. This prevents it from sticking. There is also a straw which you can use to make a hanging hole in the shapes. If you don’t have a rolling pin then a bottle will work fine.

You could paint your finished shapes, but the bright white dough looks beautiful left natural too.
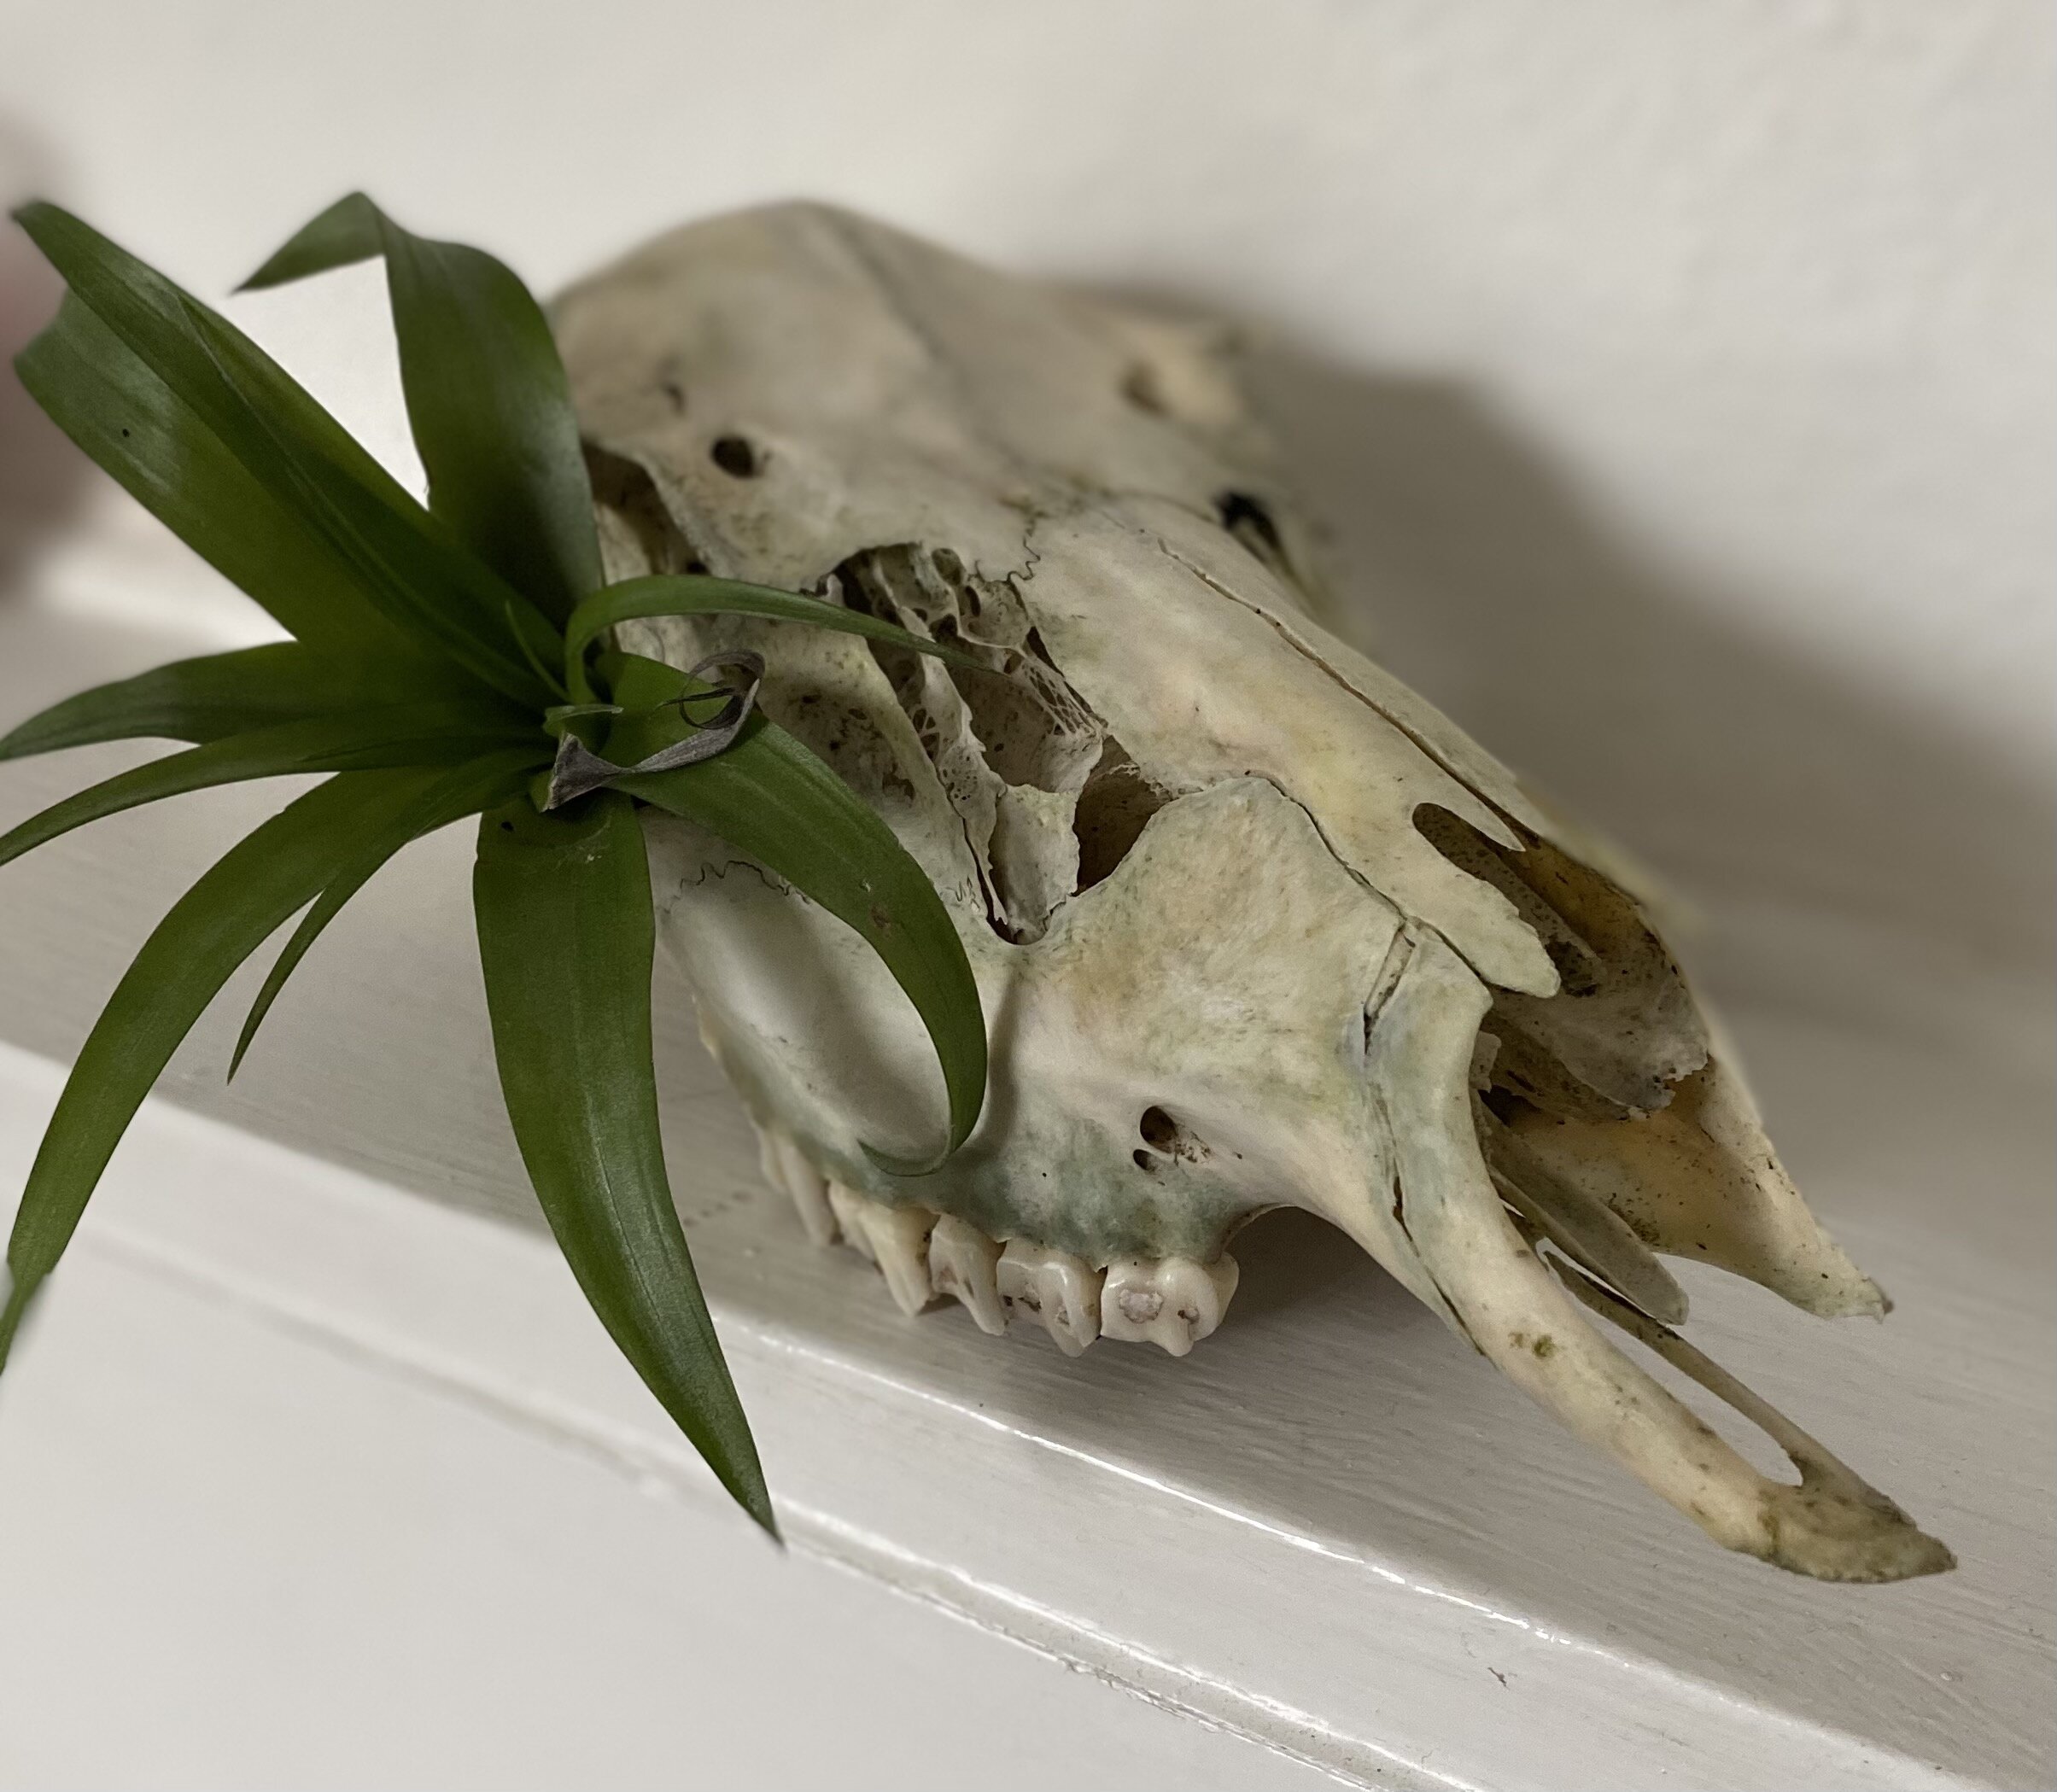
In Pack Three you will find a plant, but this plant is not growing in soil. This curious little creature is an Air Plant or Tillandsia.
These types of plants are native to Central America where they use their roots to cling to rocks, trees or other plants. They do not need roots to absorb nutrients, rather taking what they need from the air.
They do however, need water and sunlight to survive and to give your Air Plant the best chance you should soak it for several hours after you have unpacked it. Repeat this once a week.
Once you have done this you can go about deciding how to mount your Air Plant. One way of doing this is to look out for things you could mount your plant on while on a walk in the woods or at the beach. You can use a little wire (there is some in the pack) to help keep your plant in place.
Another idea is to make a Terrarium and the pack contains a glass jar and some gravel for this. The Air Plant can be placed into the gravel along with any other bits and pieces you might like to include.
If you look after your Air Plant it might flower one day.
At Forest School the focus is usually on natural materials. Often we use things we might find in the woods supplemented with other natural craft supplies such as Beeswax or Clay.
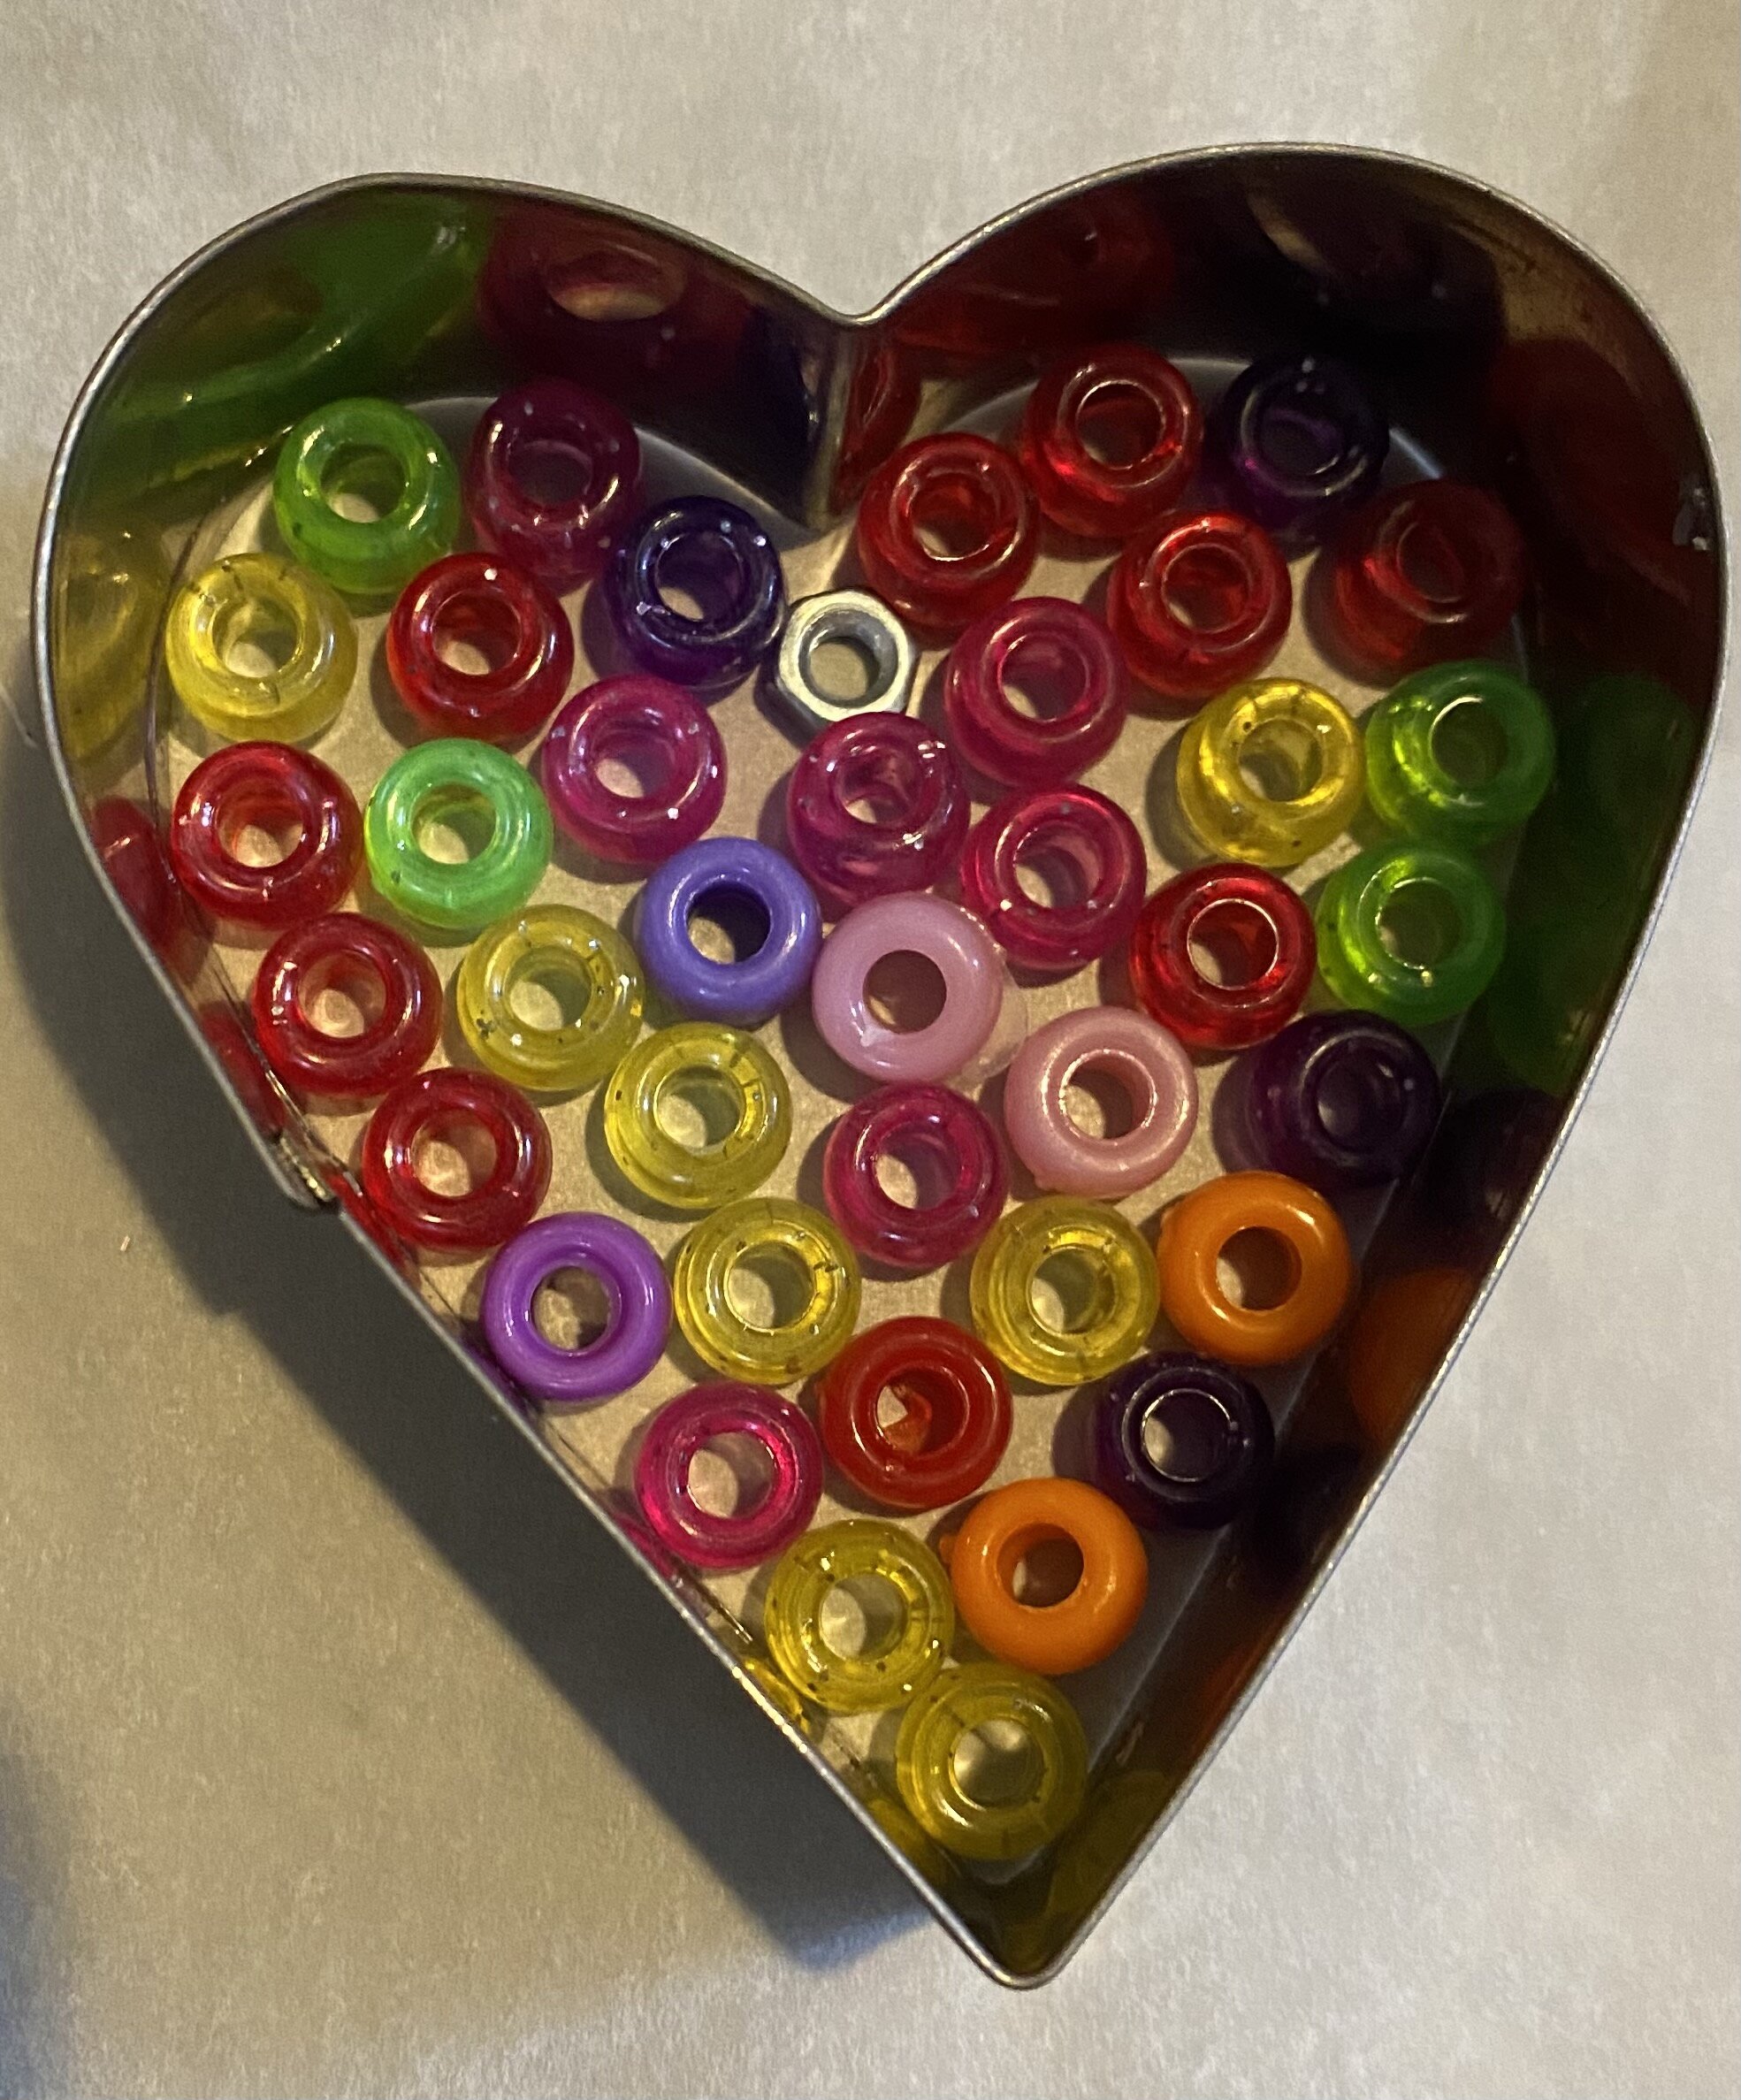
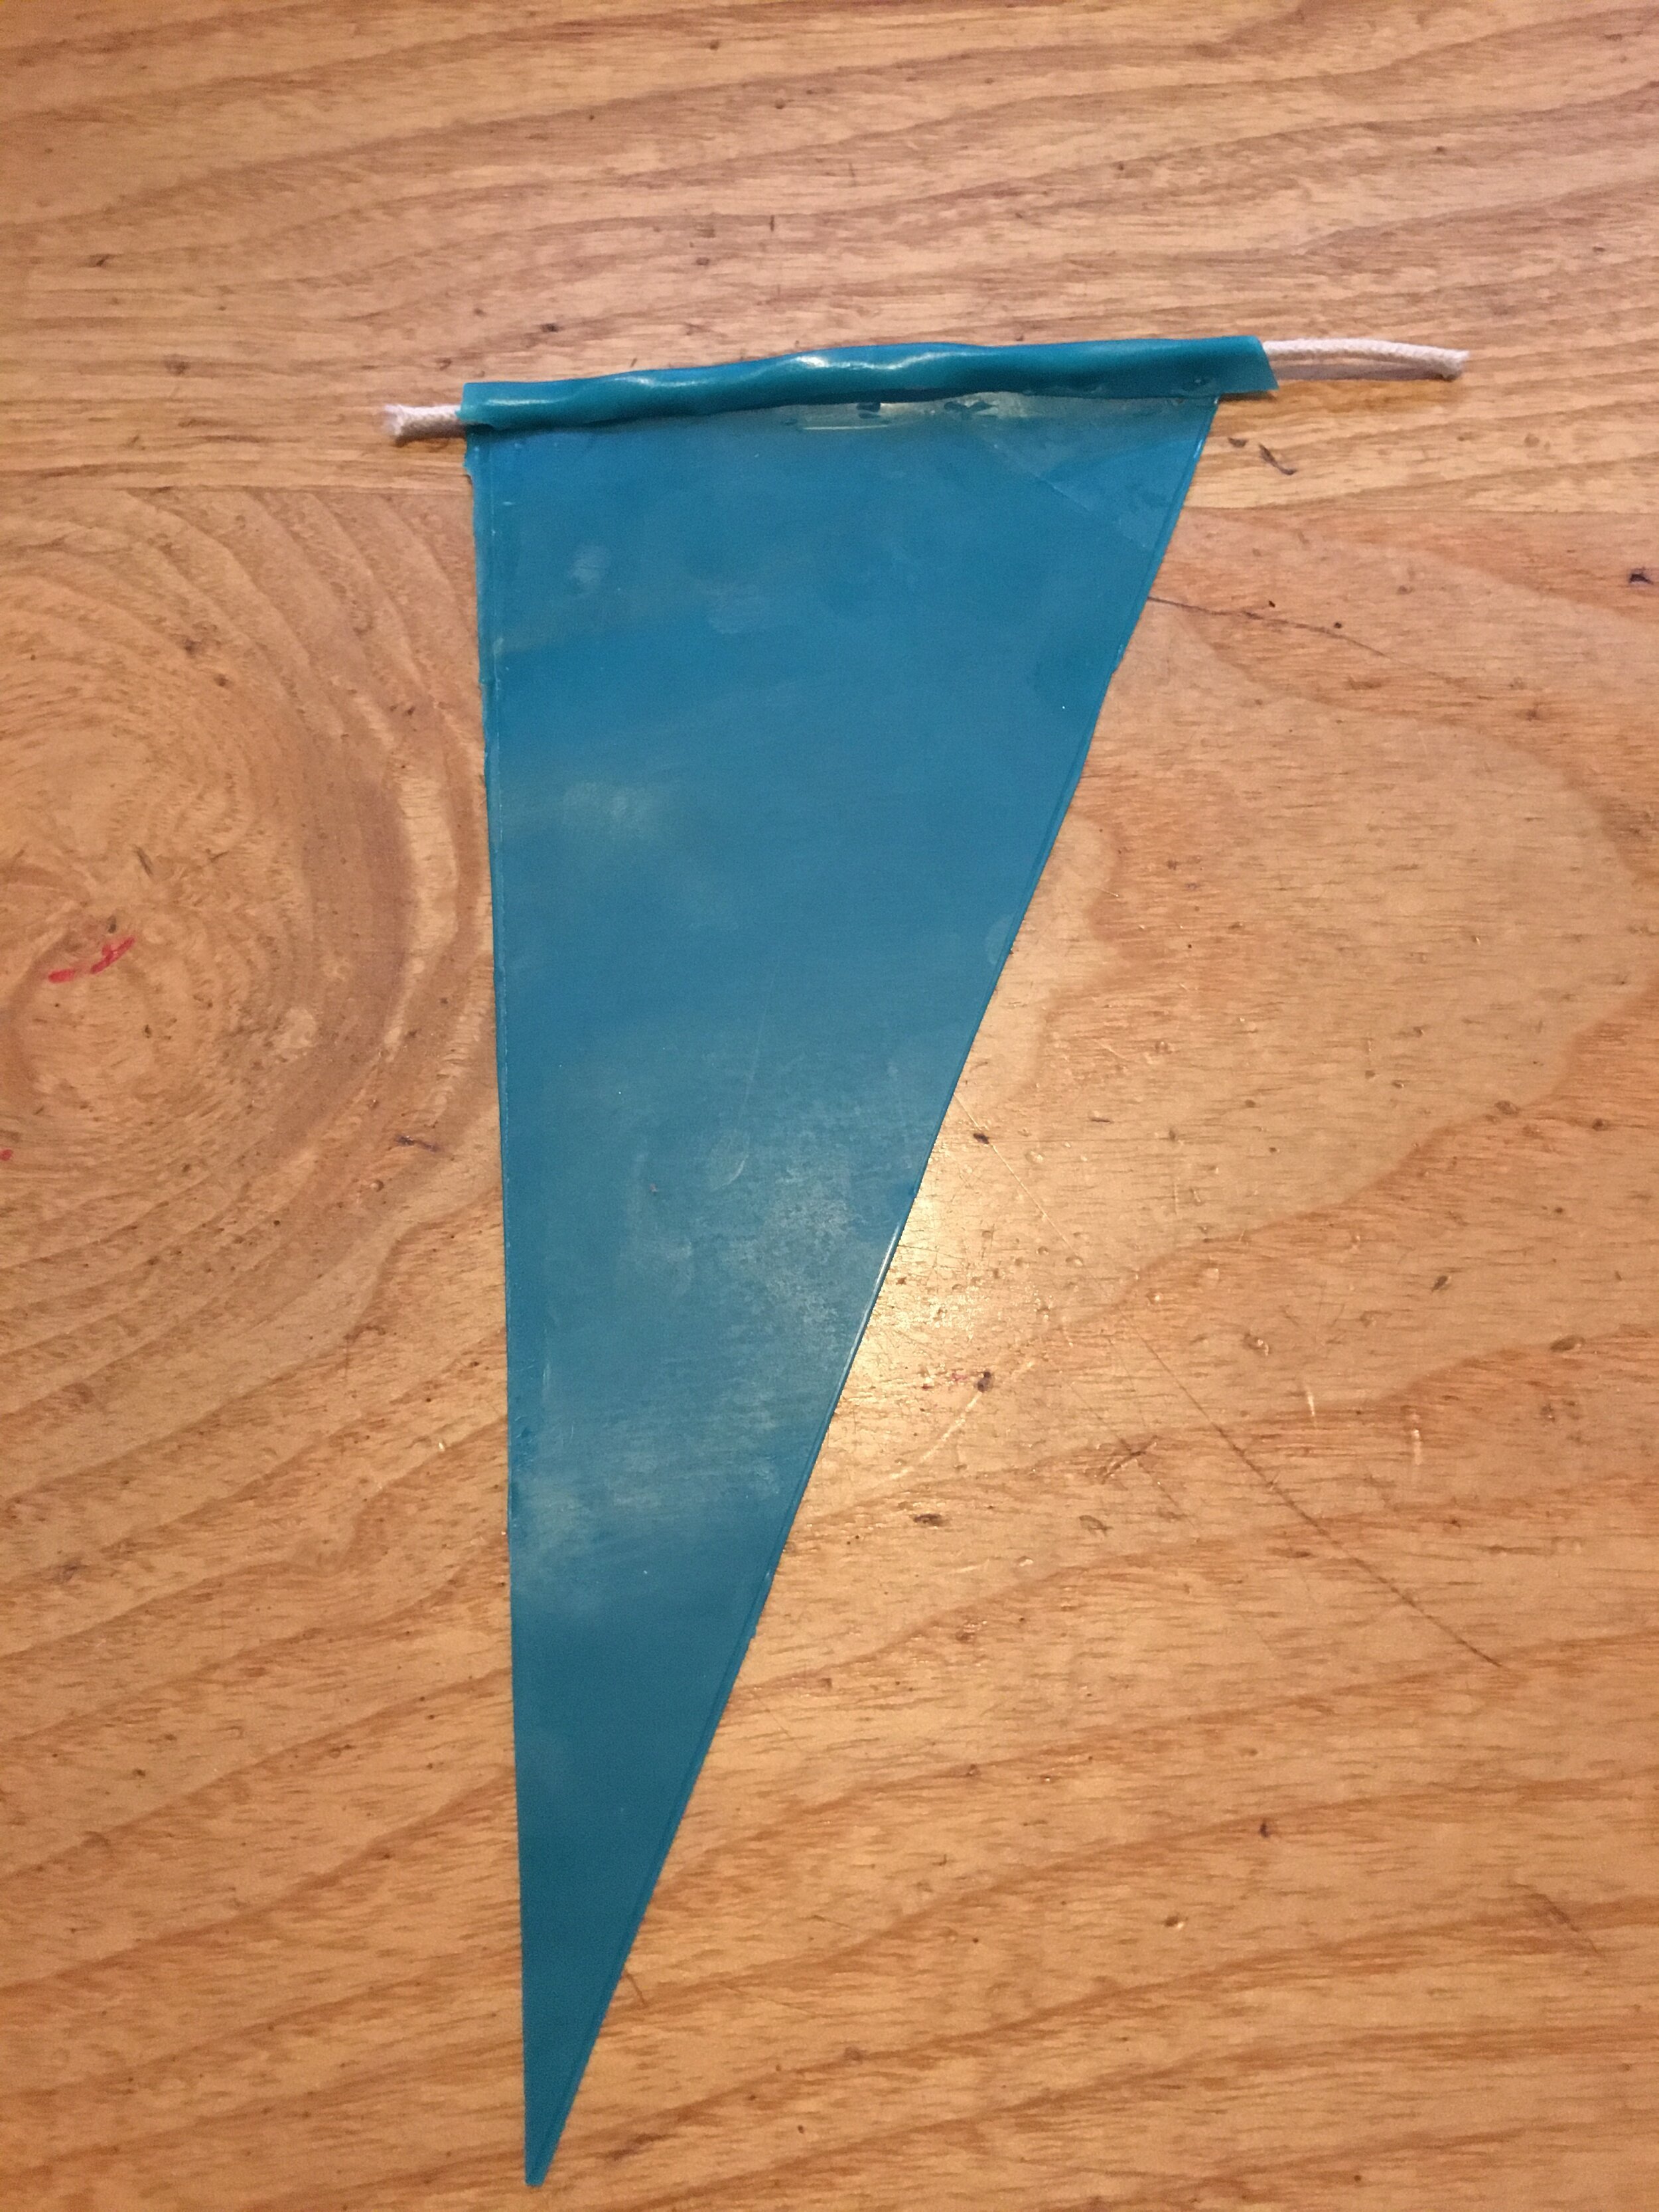
However, we do try and reuse the man made resources that find their way into our lives whenever we can. This ethos has led us to come up with this beautiful upcycled suncatcher.

You can make your own suncatcher using the resources provided in Pack Three. There is wire for threading on the beads, buttons and bottle tops that are also included. You can have a hunt around the house for any other bits you would like to add. Old keys, springs and washers all add to the effect.

You will also need a good stick to attach your strings of objects too, so keep your eyes peeled when you are on a walk.
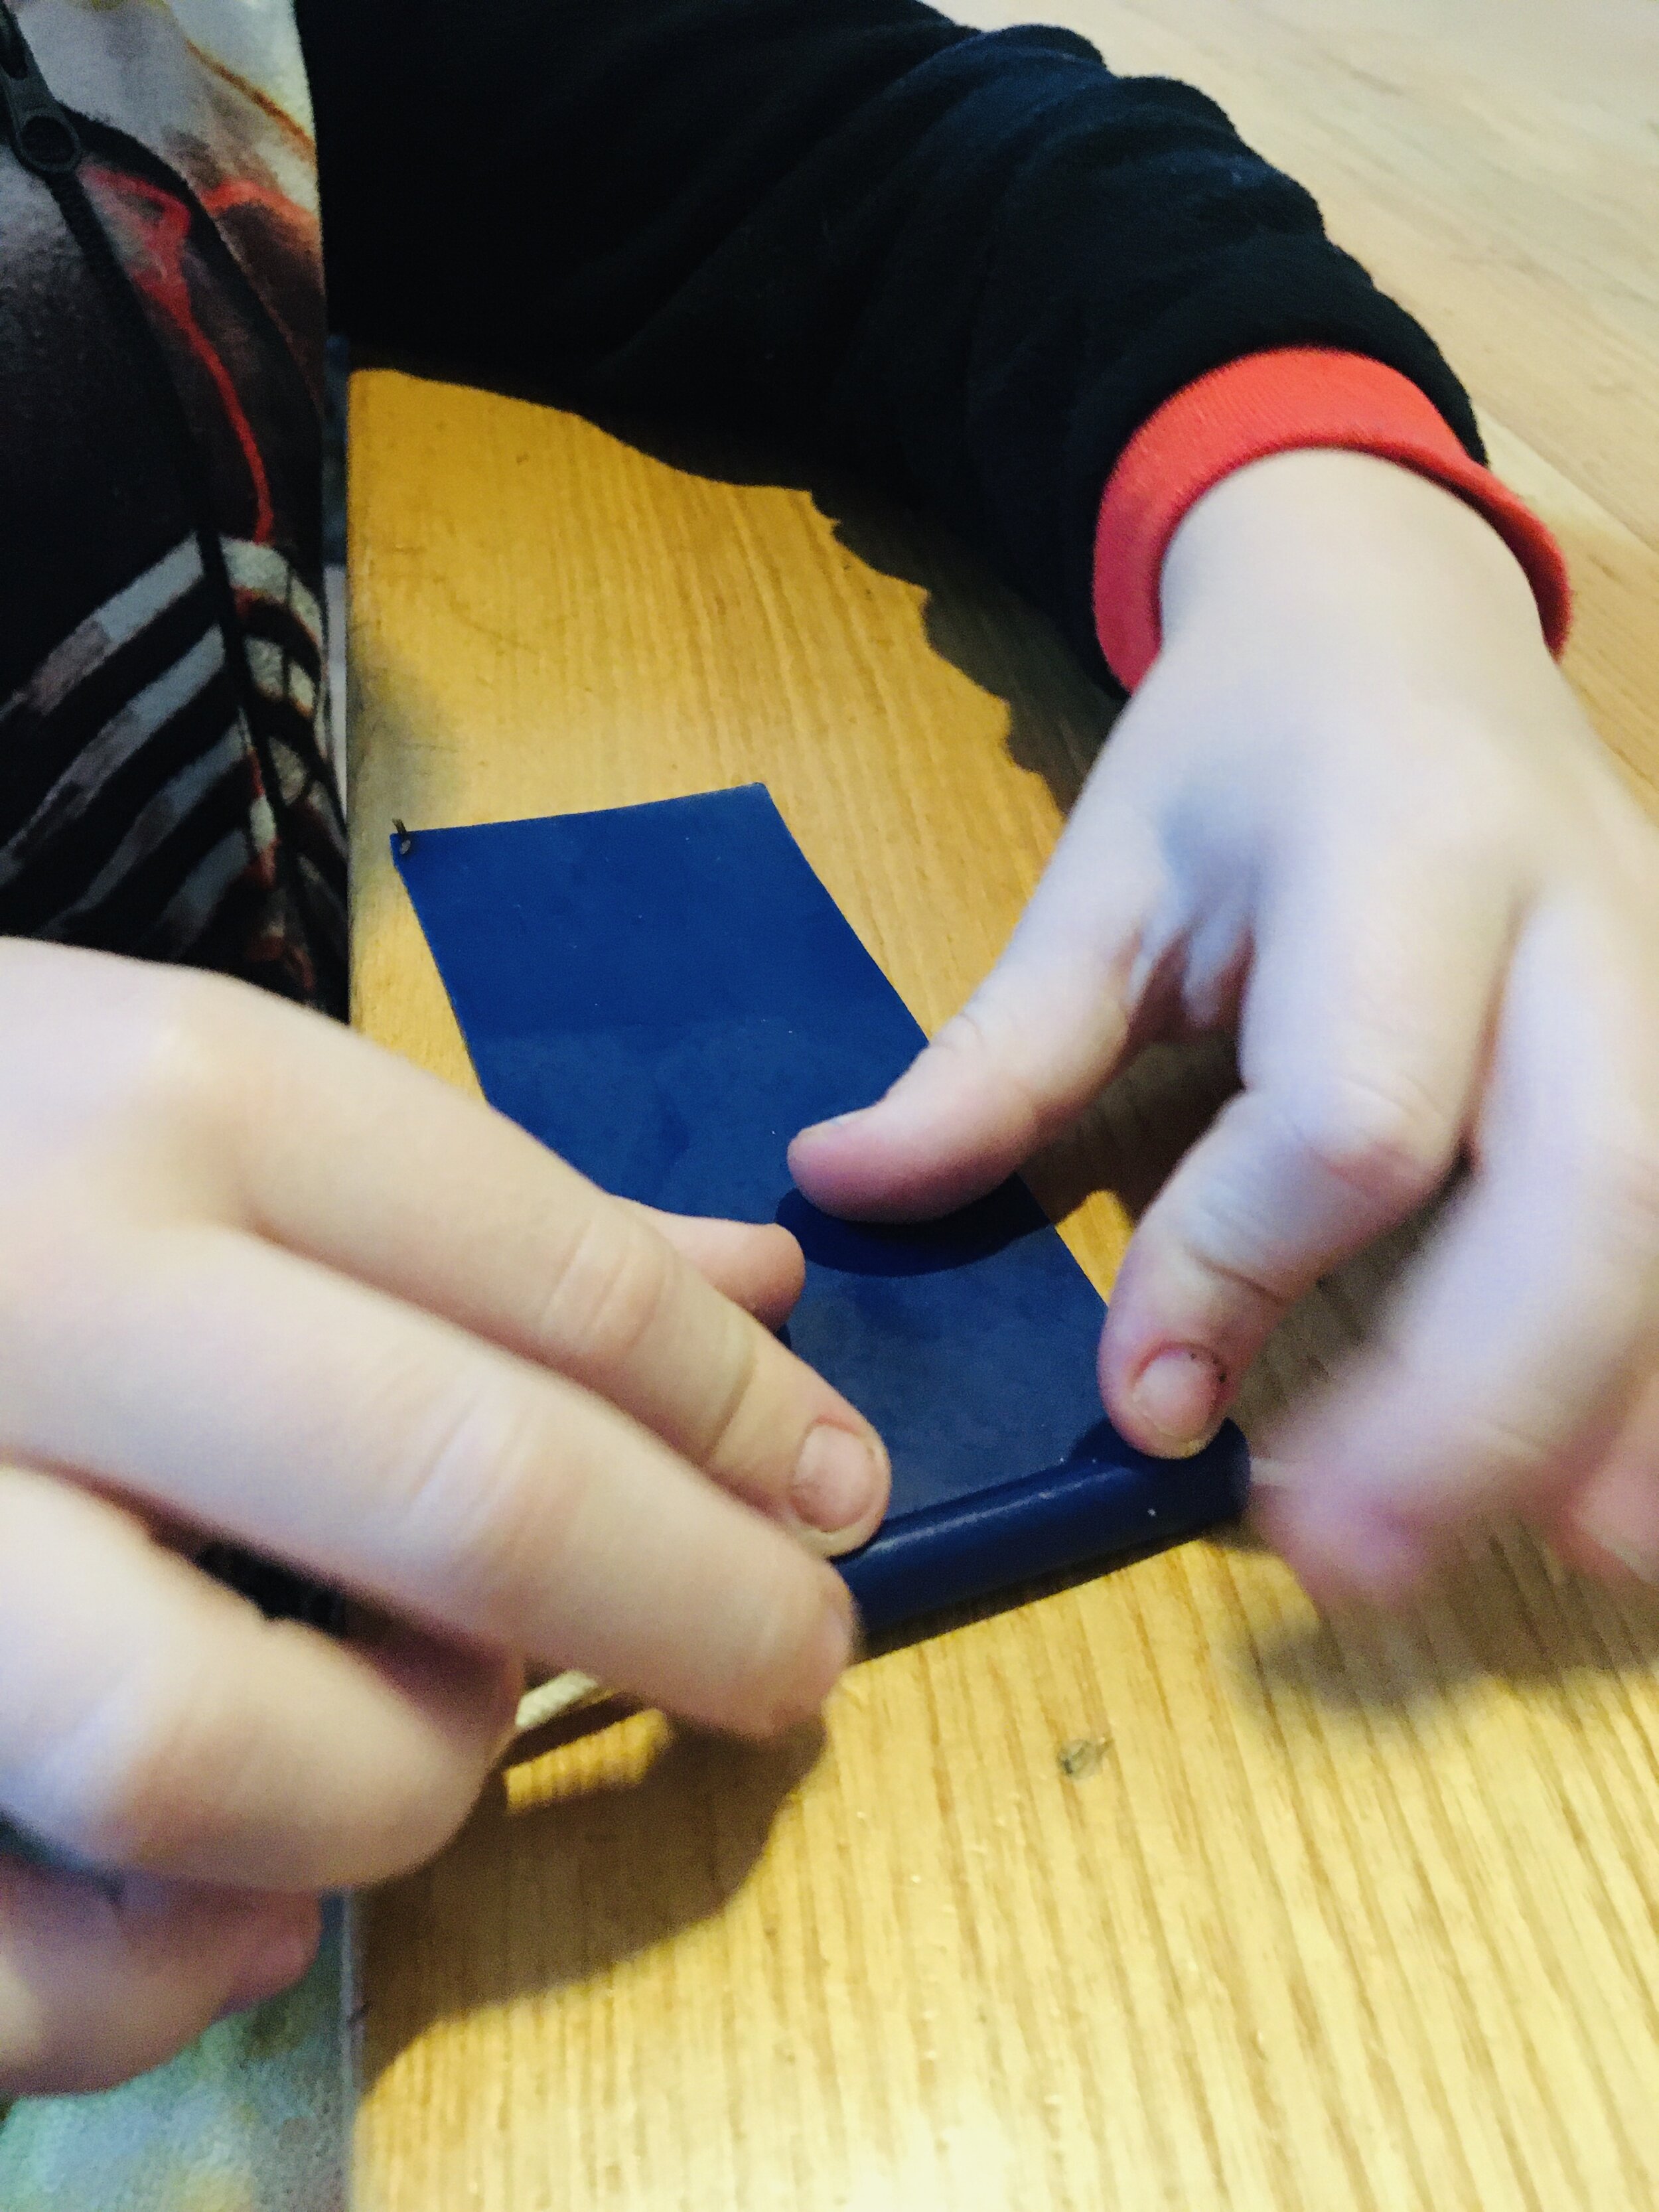
We have also included everything you need to create your own decorations to add to your suncatcher. These shapes were formed using beads melted inside a metal cookie cutter in the oven. This is easier and not as stinky as you might expect!

To do this your simply put a piece of baking paper (included in the pack) on an oven tray and put the cookie cutter on top. Fill the cookie cutter with plastic beads (from the small bag) and move these around so the holes are all facing upwards. We found this a bit fiddly, but the plastic needle contained in Pack Two was great for moving the beads about. A metal nut (found in the bigger bag of beads) should be placed in the middle as this will form the hole to hang the decoration by. Once ready the tray should be placed in the oven at 180 Degrees Celsius for about twenty minutes or until the beads have melted. Remove the tray from the oven and allow the cookie cutter to cool before popping the shape out.
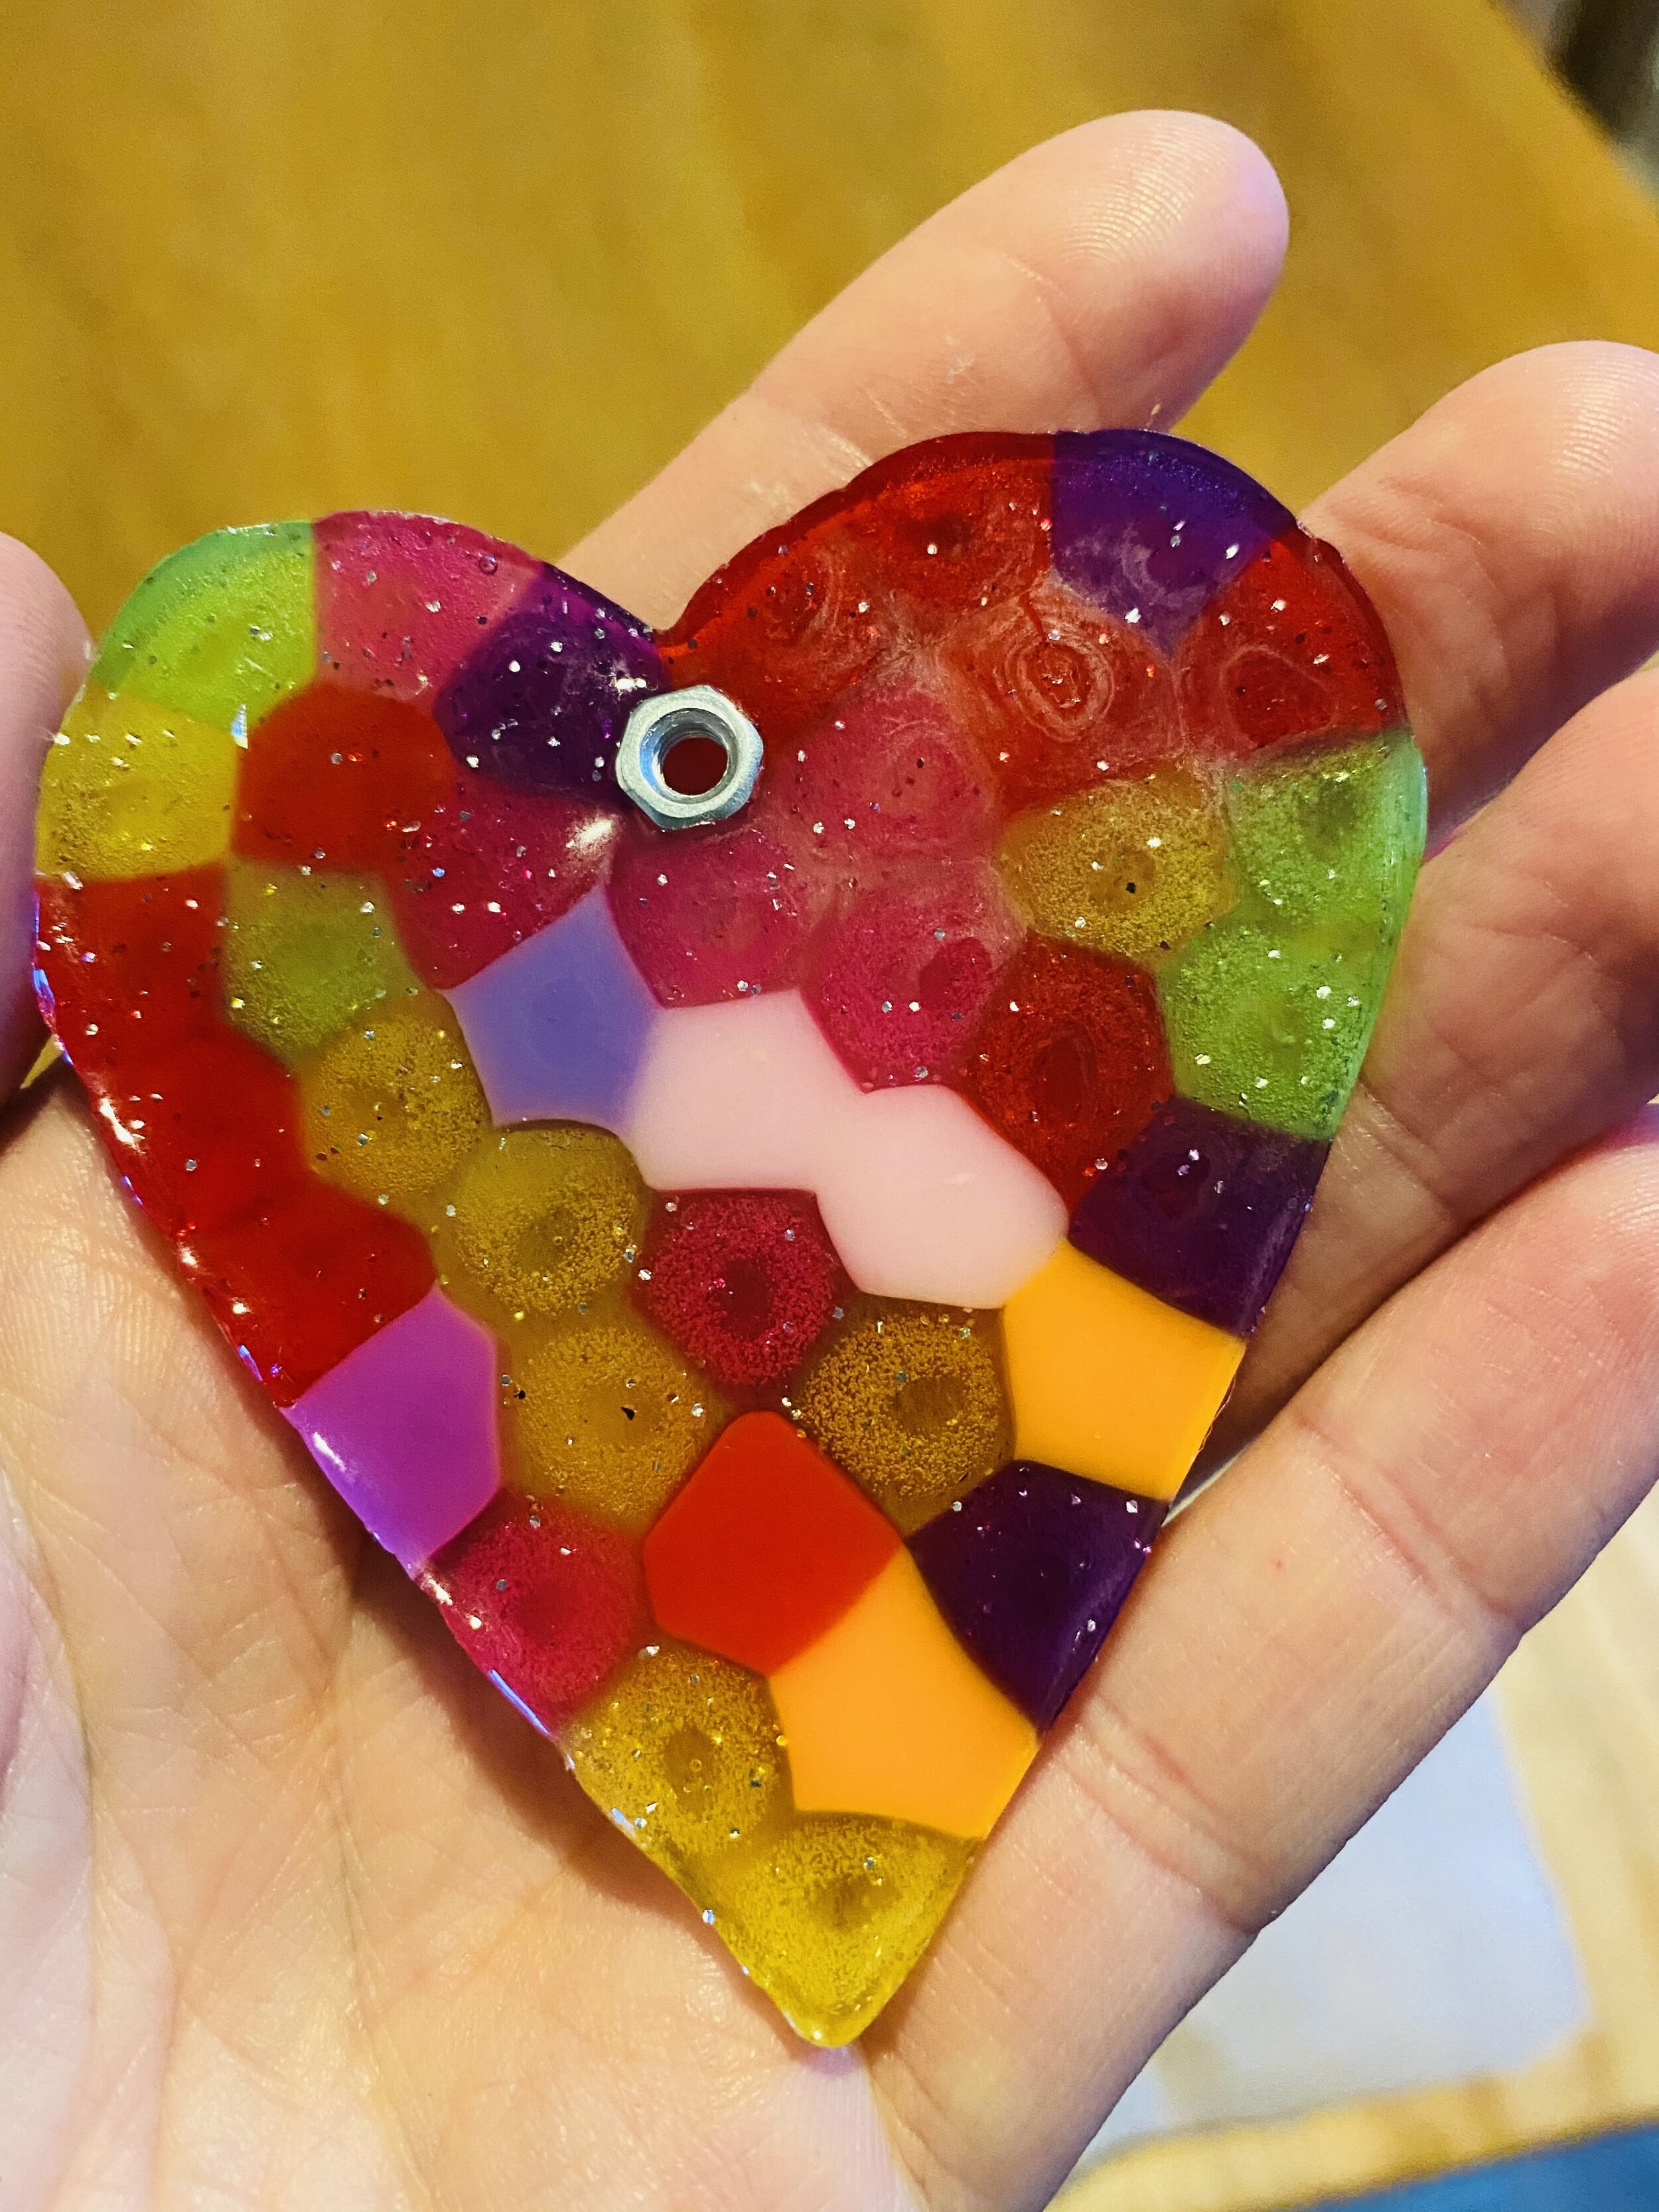
When your Suncatcher is finished ,you can hang it in a window or other sheltered sunny spot and watch it glisten in the Spring sunshine.
Shhhh! Do you believe in Fairies? We do! We often find signs in the woods that fairies might live there, but we have still never found a real life fairy! Then of course there are the Elves, not to mention the cheeky Troll that lived in the tree by our fire circle!
We spend a lot of time thinking about what the Woodland Fairies might look like. One of our favorite Fairy spotting books is the Fairy Wonderland Handbook, by Melissa Spencer. This book suggests the Woodland Fairy wears dresses made of beautiful flowers. Rather like Cicely Mary Barkers depiction of Flower Fairies.
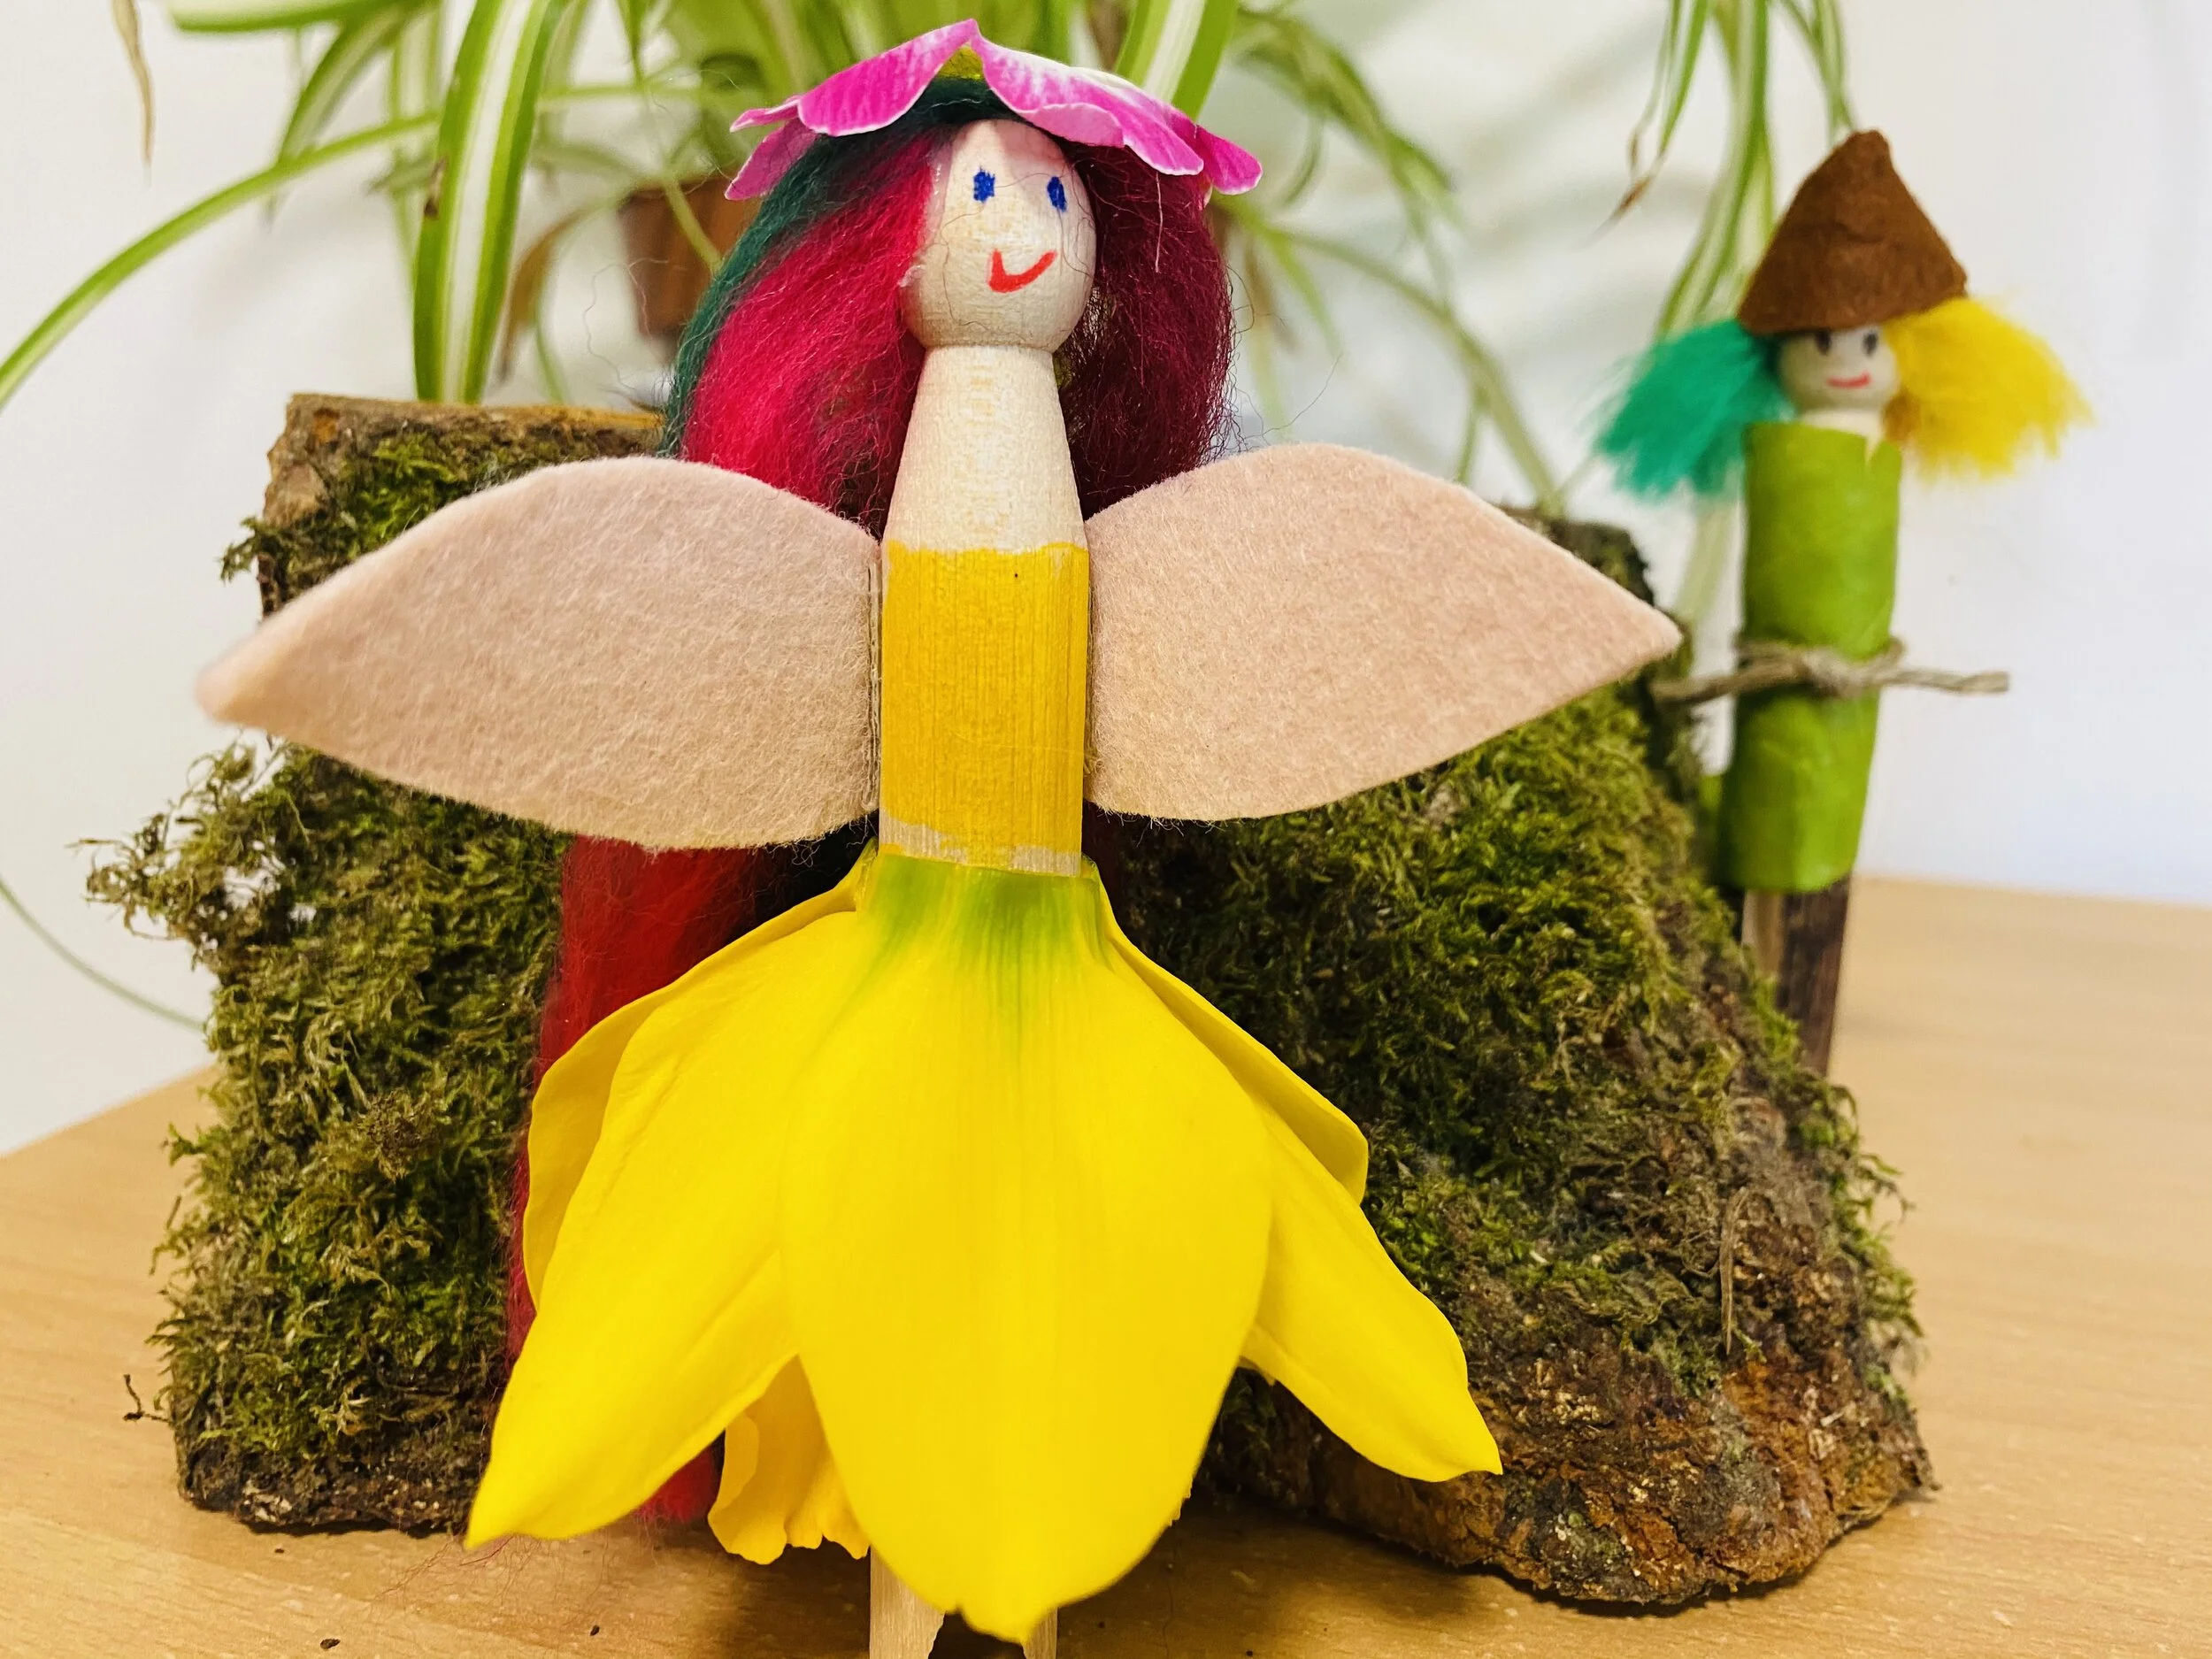
You can have a go at making your own Fairy, Elf or Cheeky Troll. In Pack Three we have included an old fashioned clothes peg. We have already attached the hair to this, but you might want to give your doll a little hair cut! You can also use felt tip pens to give your doll a face.
Next decide how you would like your Fairy, Elf or Troll to be dressed. We made our fairy by cutting wings out of the felt provided in the pack.. This was then attached to the peg using strong double sided tape. You will find a small piece of this tape in the pack as well. A Primrose made a great hat and was secured with a bit more tape.
Daffodils make fantastic Fairy skirts. You just need to snip off the stem and slide the fairy into the hole. You could experiment with different fairy fashions, such as tying on rose petals to make a dress.

We made our elf a hat using the felt and some double sided tape. Then we found a green leaf for a shirt and held it in place with a belt made of string. The peg was coloured in using a felt tip pen to make his trousers..

Once you have made your Fairy or Elf you could make it a Fairy garden or a house made of sticks. We would love to see a picture of your finished Fairies and Elves.
We have been having lots of fun testing out biscuit recipes that incorporate flowers. This is such a fun way to celebrate the Spring and would be lovely for a picnic.
We have shared two of our favourite recipes below and have included cookie cutters and dried Lavender in our third pack to get you started.
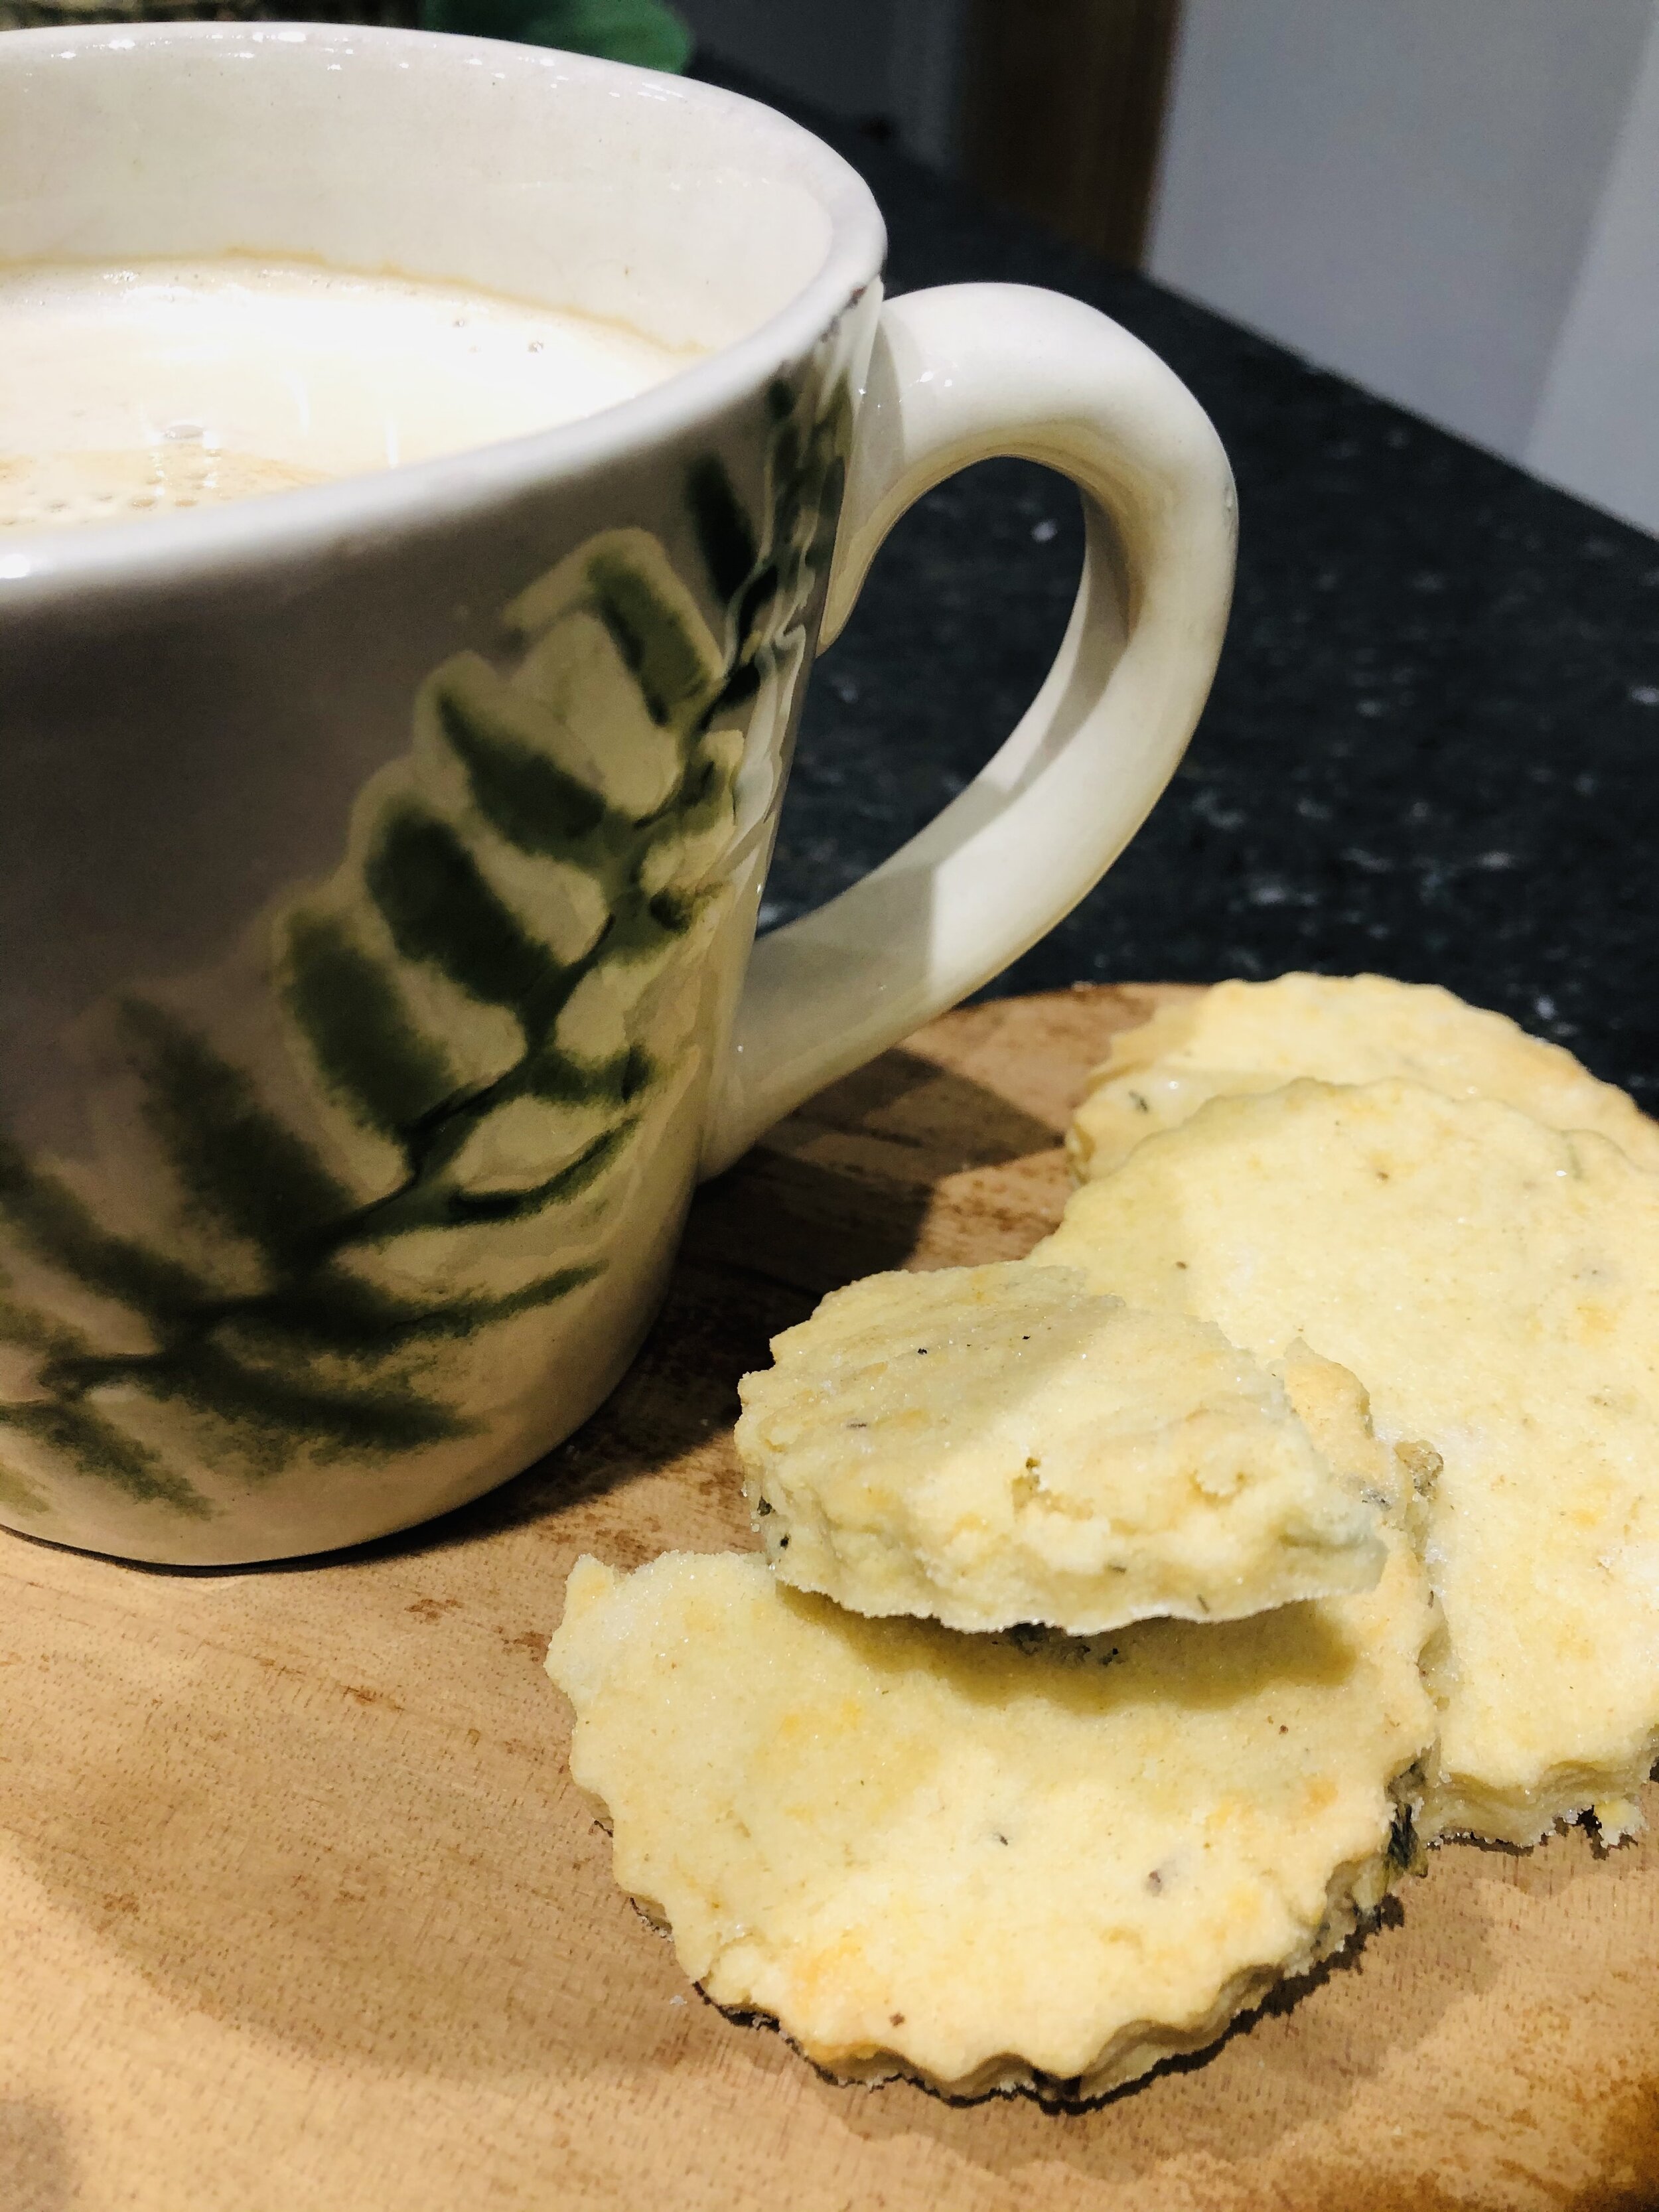
Lavender Shortbread
We used this recipe from Wallflower Kitchen. The dough was a little dry so we added extra milk.
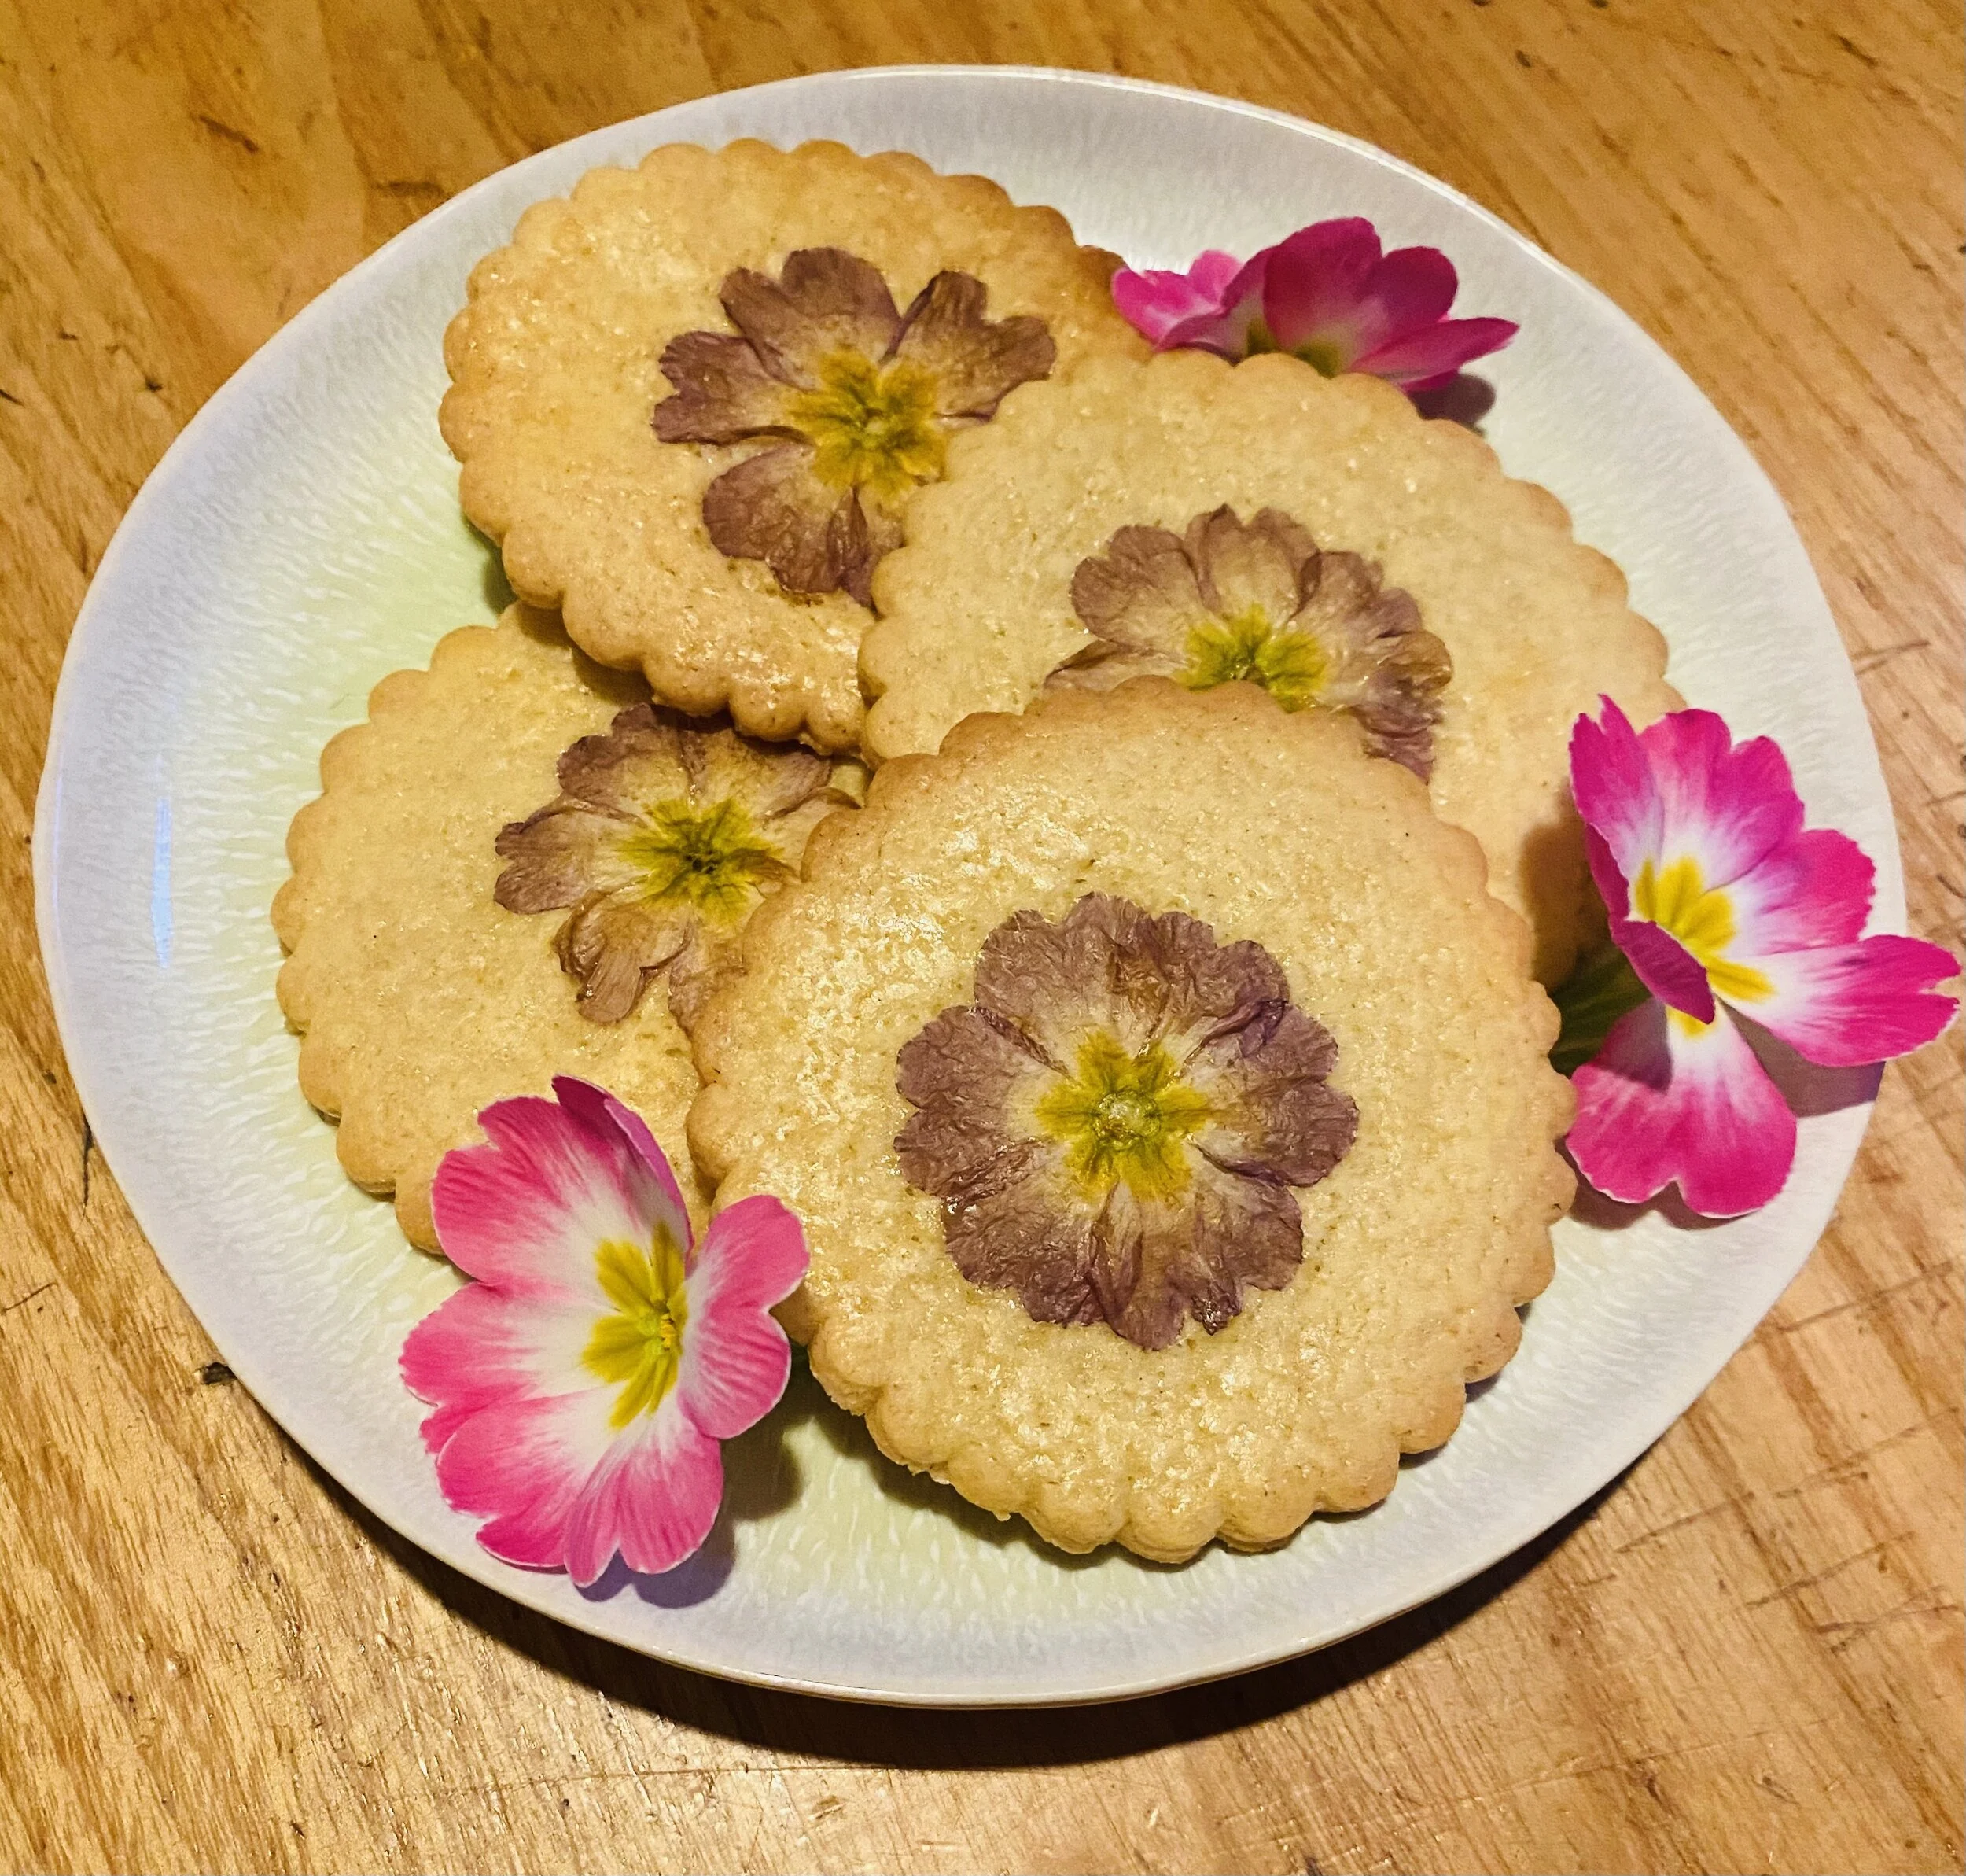
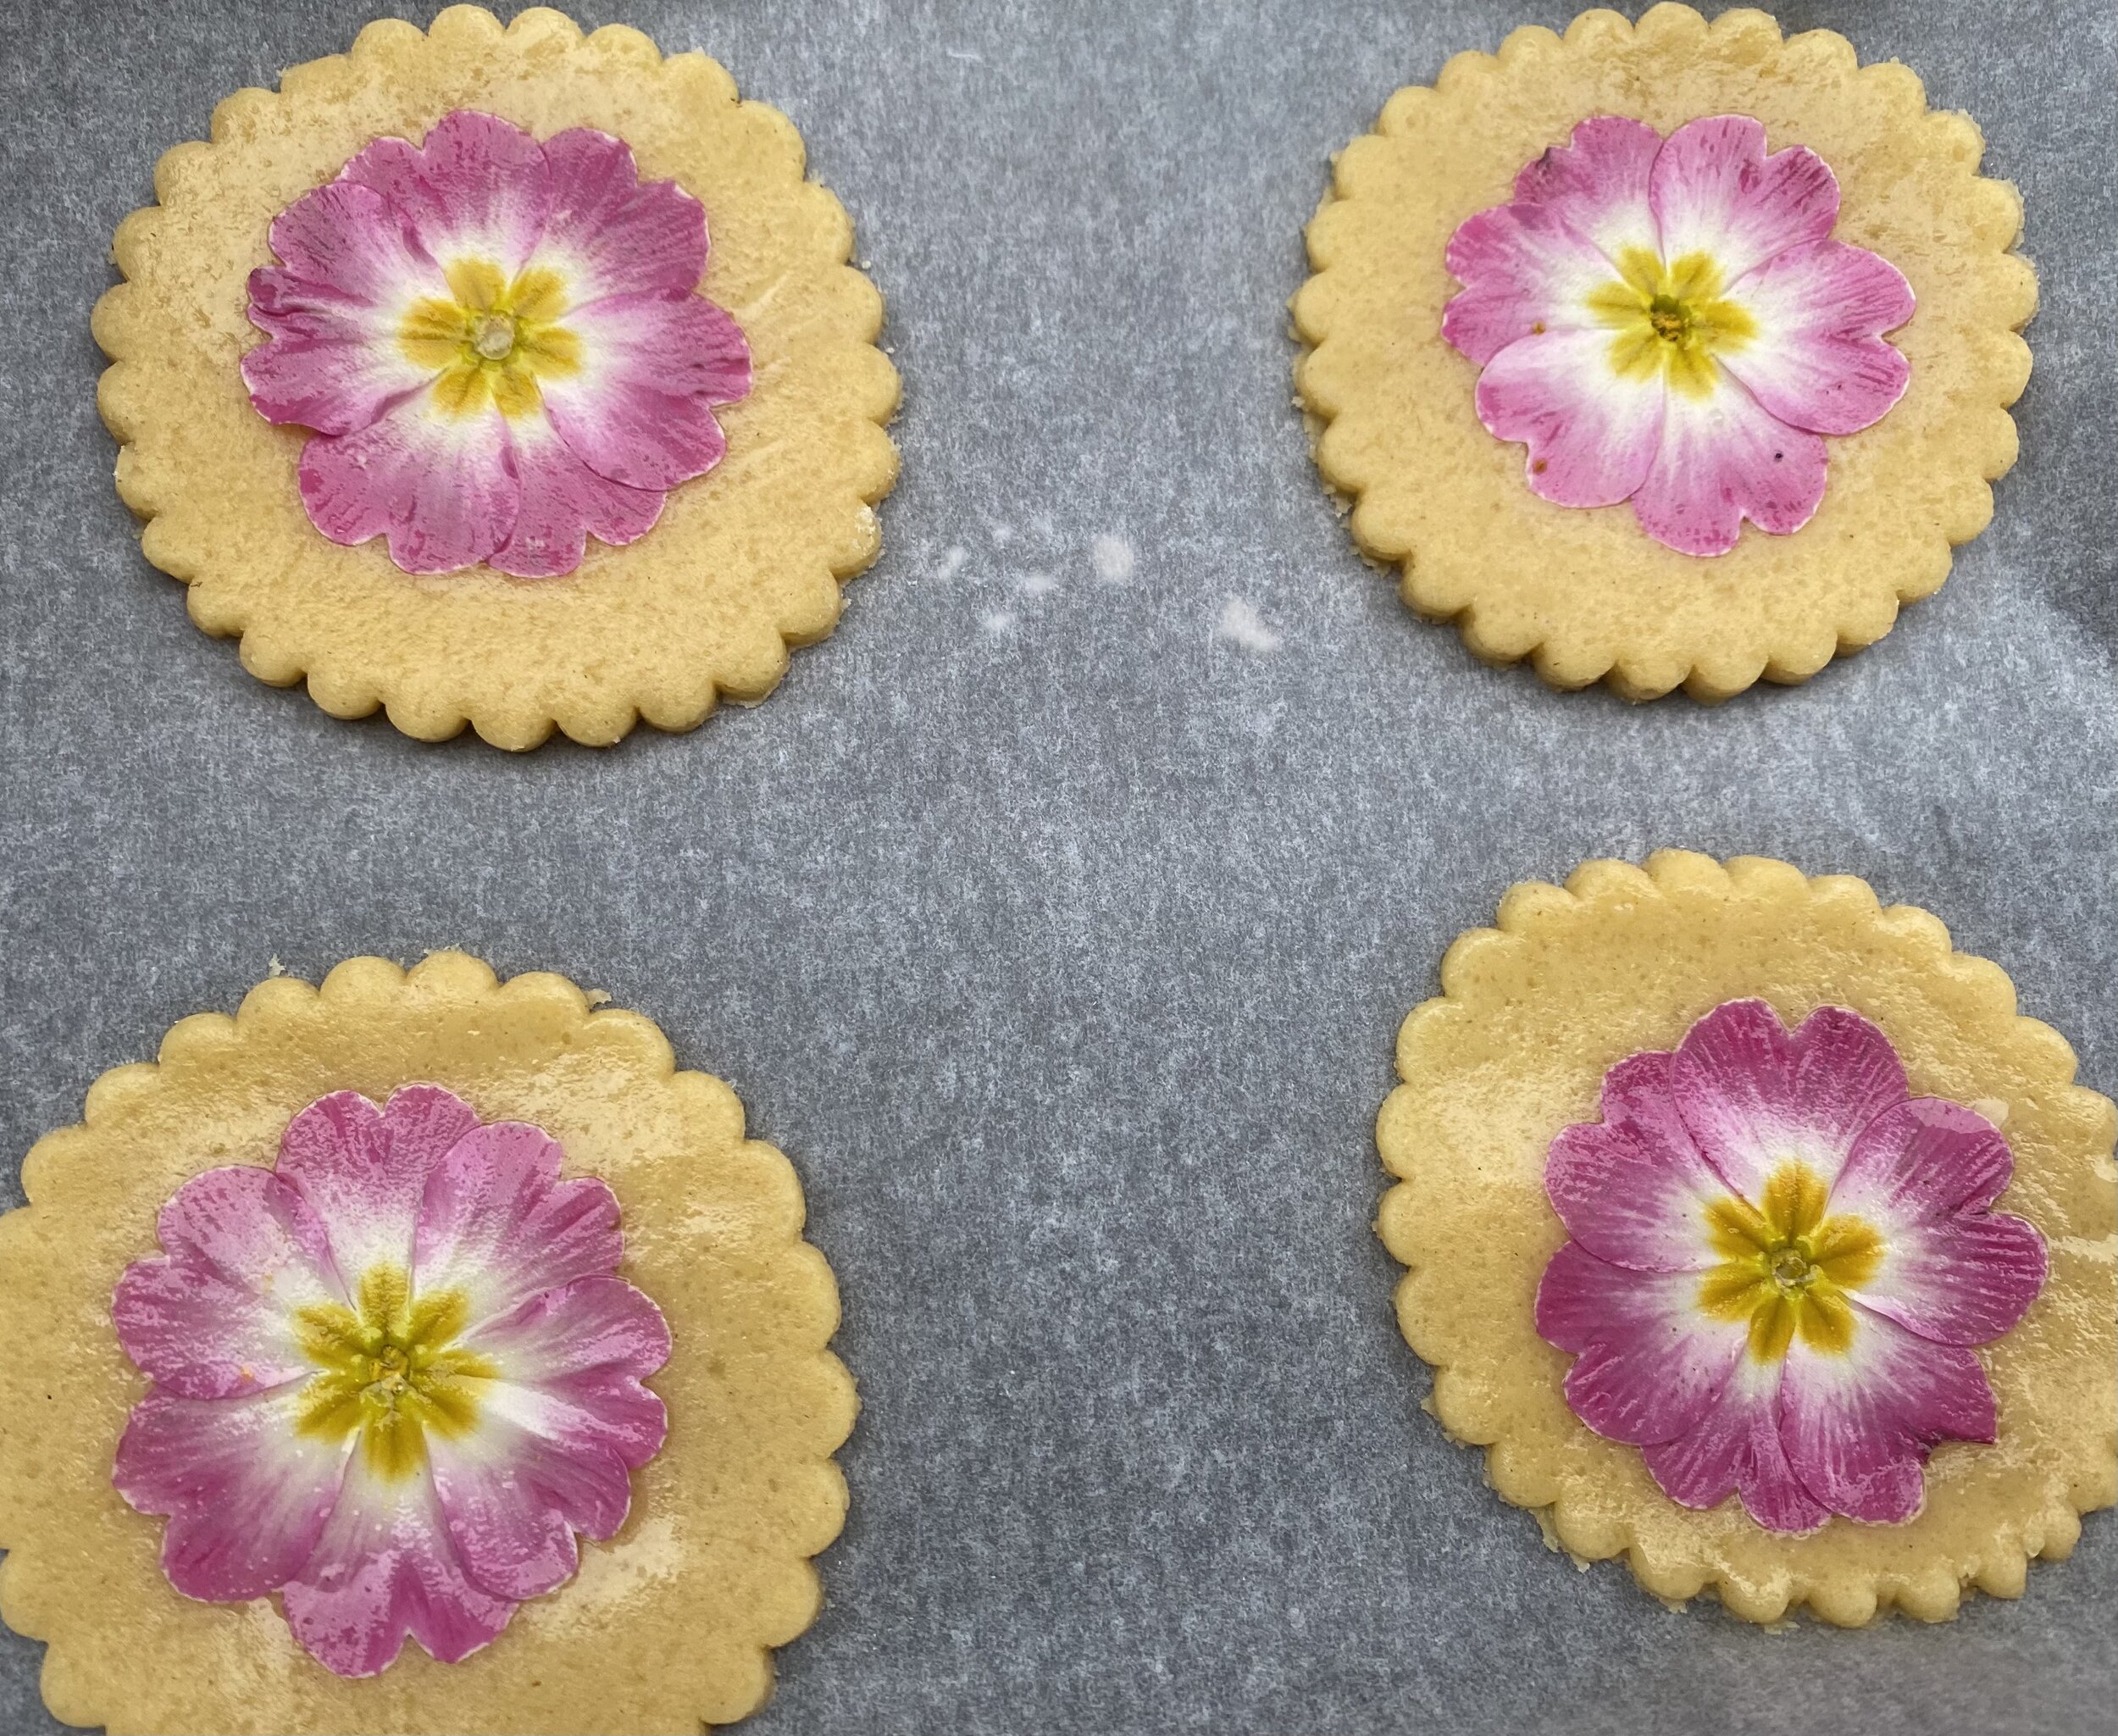
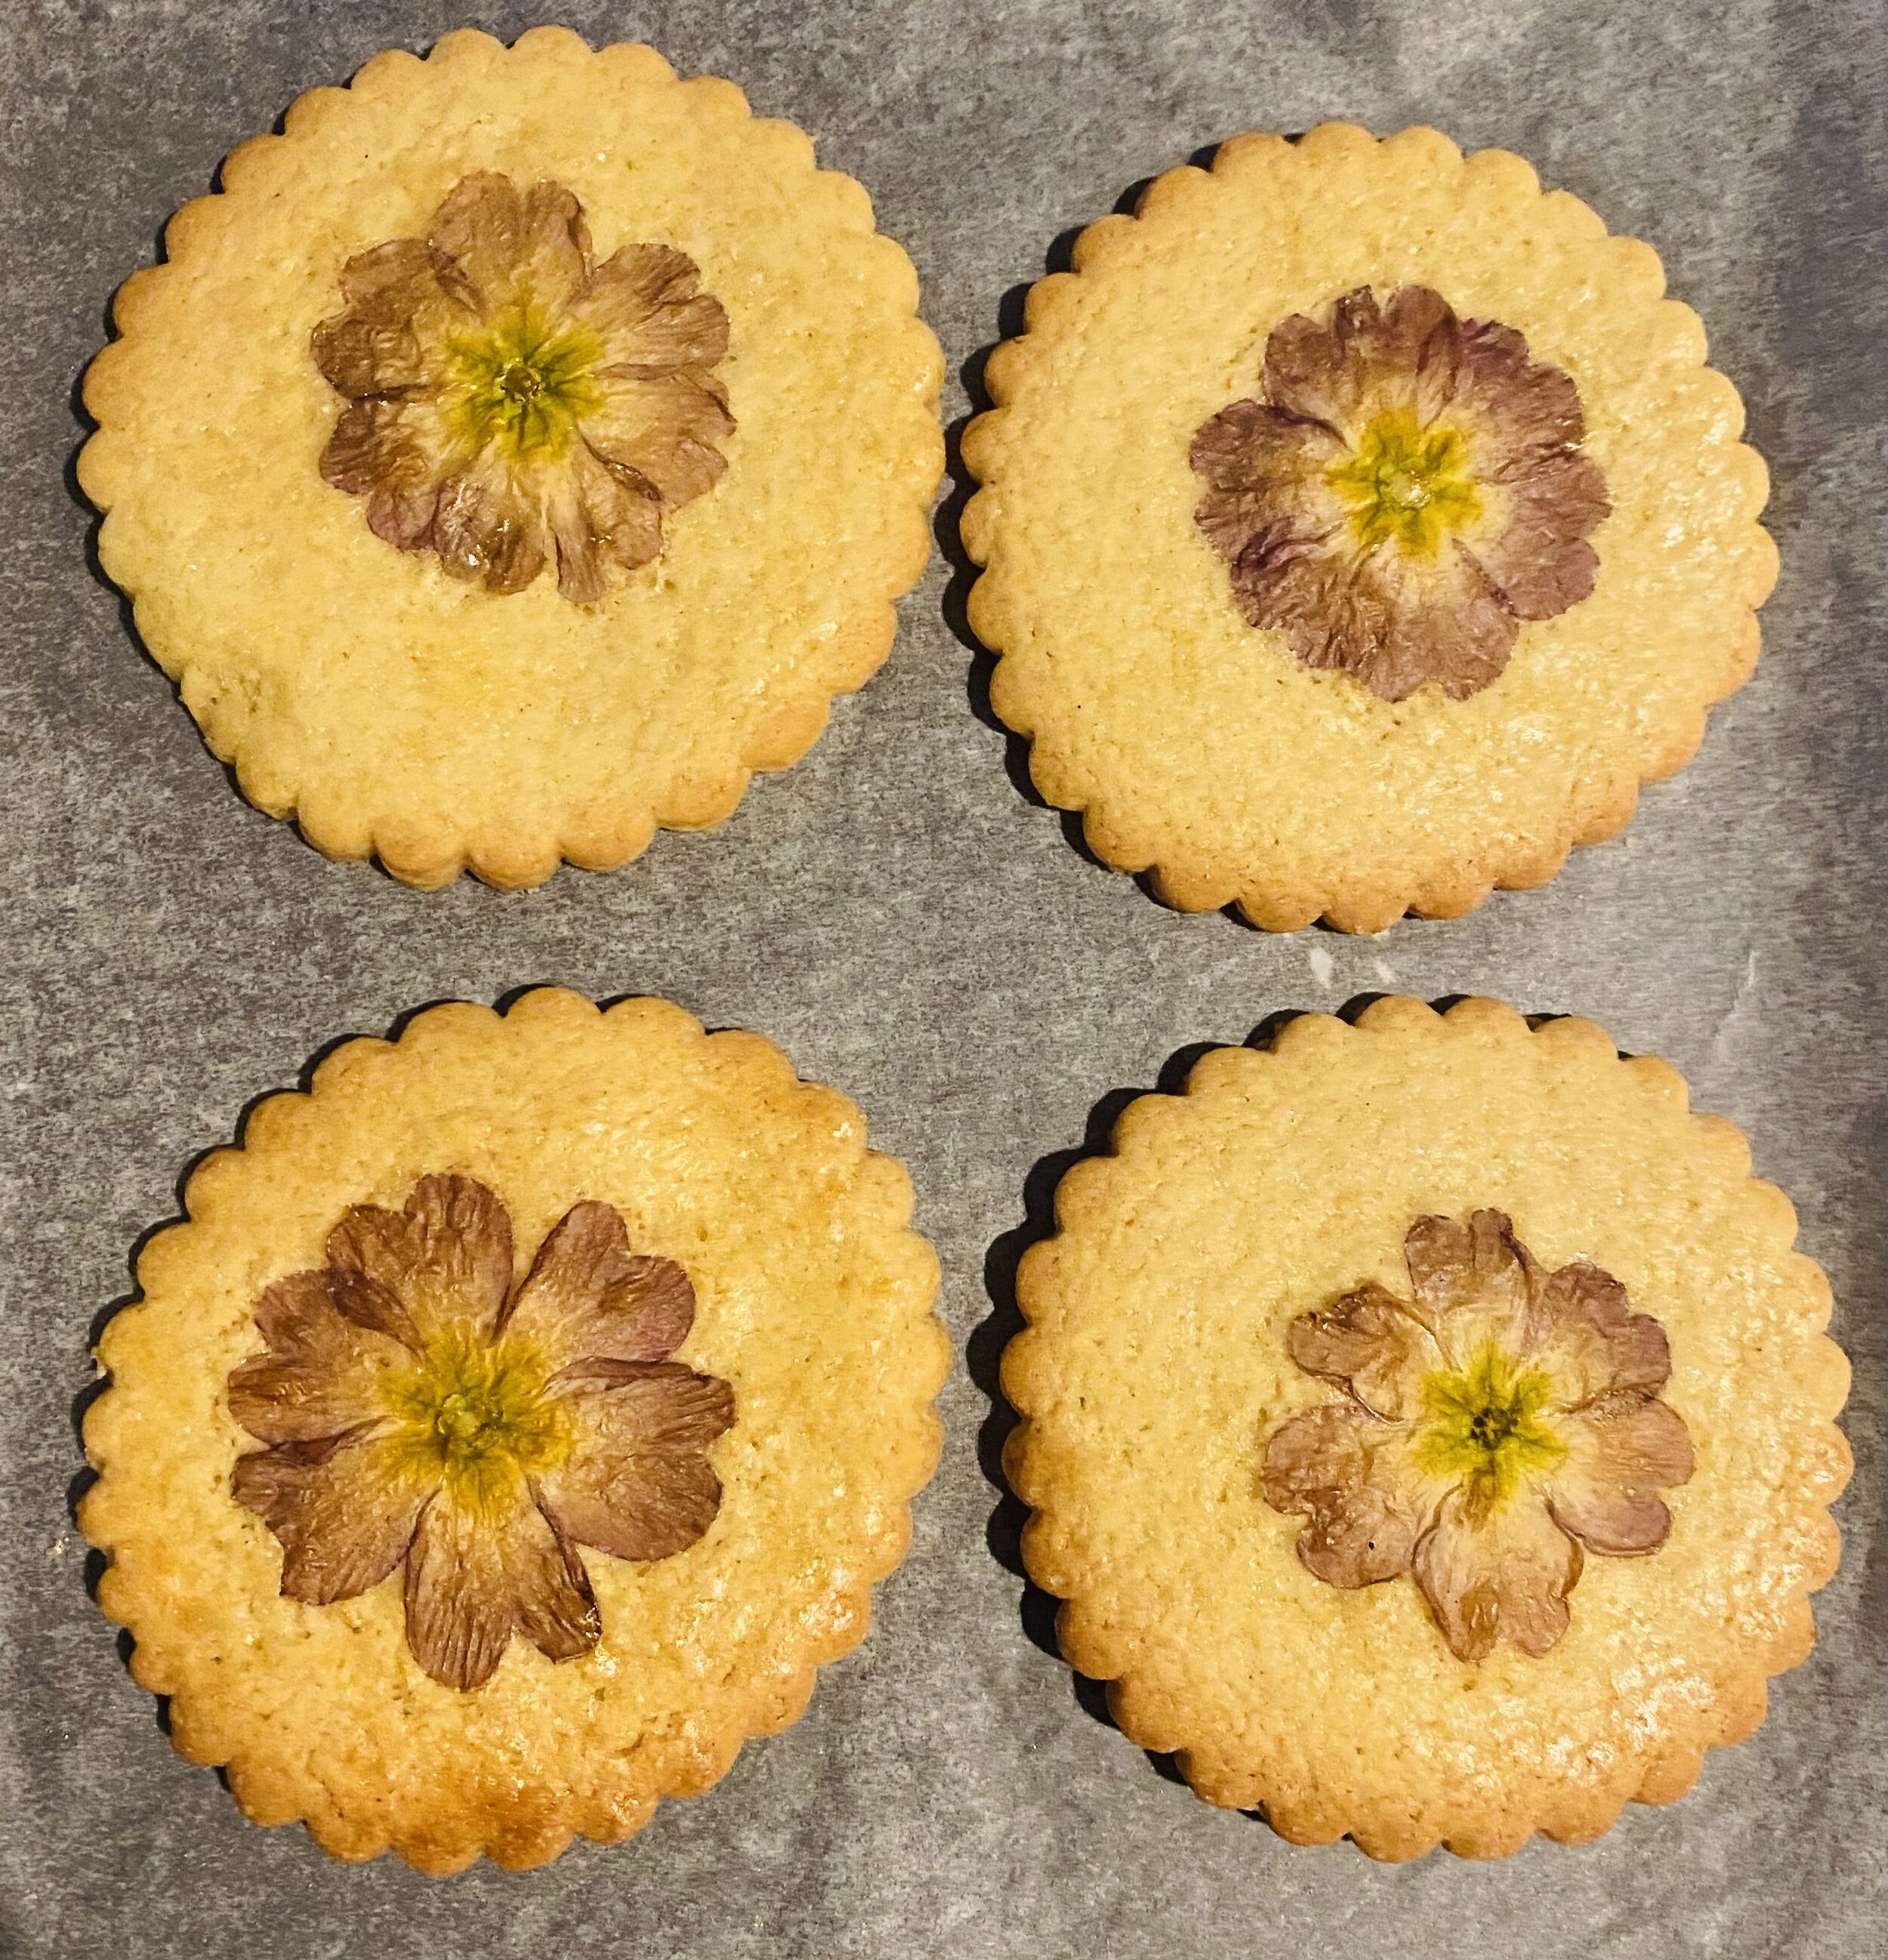
Primrose Biscuits
For these biscuits we started with a batch of Basic Biscuit Dough. We then selected some flowers to decorate them with. You can use any edible flower, but we have chosen to use Primroses as they are abundant right now and thrive in the wet Sussex soil. Yellow Primroses work fine, but do tend to blend in with the buttery colour of the biscuits. We chose to use pink cultivated Primroses from the garden. The colour does fade as the flowers are cooked so the vibrant pink worked well.
As a side note all flowers from the Primula family are edible so don’t worry too much if you can’t tell your Primroses from your Polyanthus.
When the dough is rolled out, place the flowers on top and then roll them gently with the rolling pin to push them in. The biscuits can then be put on a baking tray. Before the biscuits are cooked the flowers should be brushed with egg white as this will stop them burning. We kept an eye on out biscuits and removed them from the oven when they were golden but pale, so the flowers had full impact.
Happy baking!
We have been making the most of the cold snap this week to test out some ideas for making lanterns from snow and ice. These are perfect for creating a mini Winter Wonderland in the garden, lighting up a porch or illuminating a snow man! Below are four of our favourites.
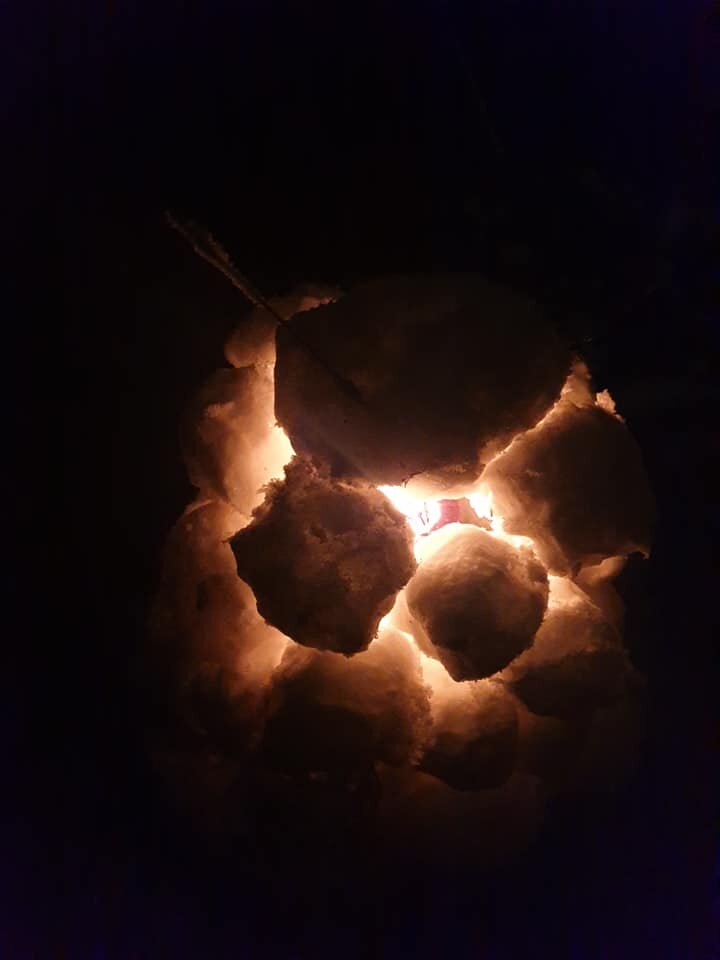
The Snow Lantern.
This is essentially a hollow mound of snowballs. The light from the candle inside shines beautifully through the gaps in the snow.
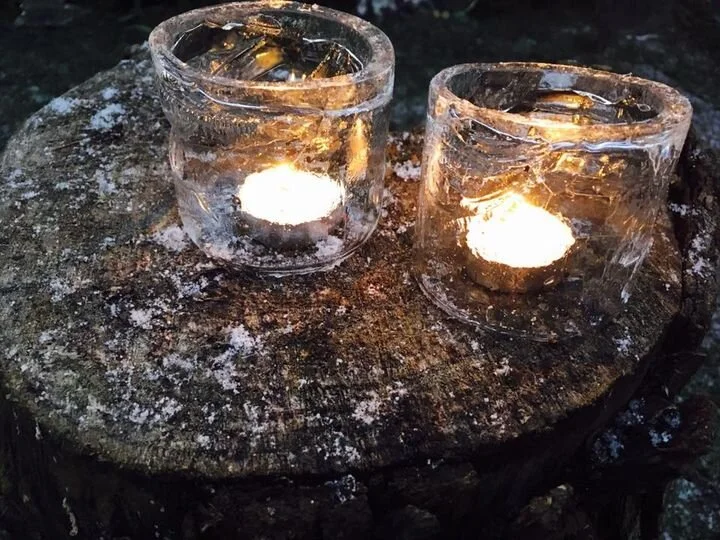
The Ice Lantern
You can find out how to make these in our Top Five Ice Activities.

The Tea Light Holder
Simply fashion a tea light holder from snow! Make sure the candle is pushed far enough inside to protect it from the wind.

The Balloon Lantern
Balloons filled with water stained with food colouring were left outside long enough to freeze the outer shell. The balloon was peeled off and the water inside tipped out.
Kev has kindly made Bullroarers to be included in our January pack for every recipient over three years old.
These are ready to use, but can be coloured with pens or paint.
If you don’t know what a Bullroarer is then check out our post from last Summer using the button below or have a look at Kev’s video.
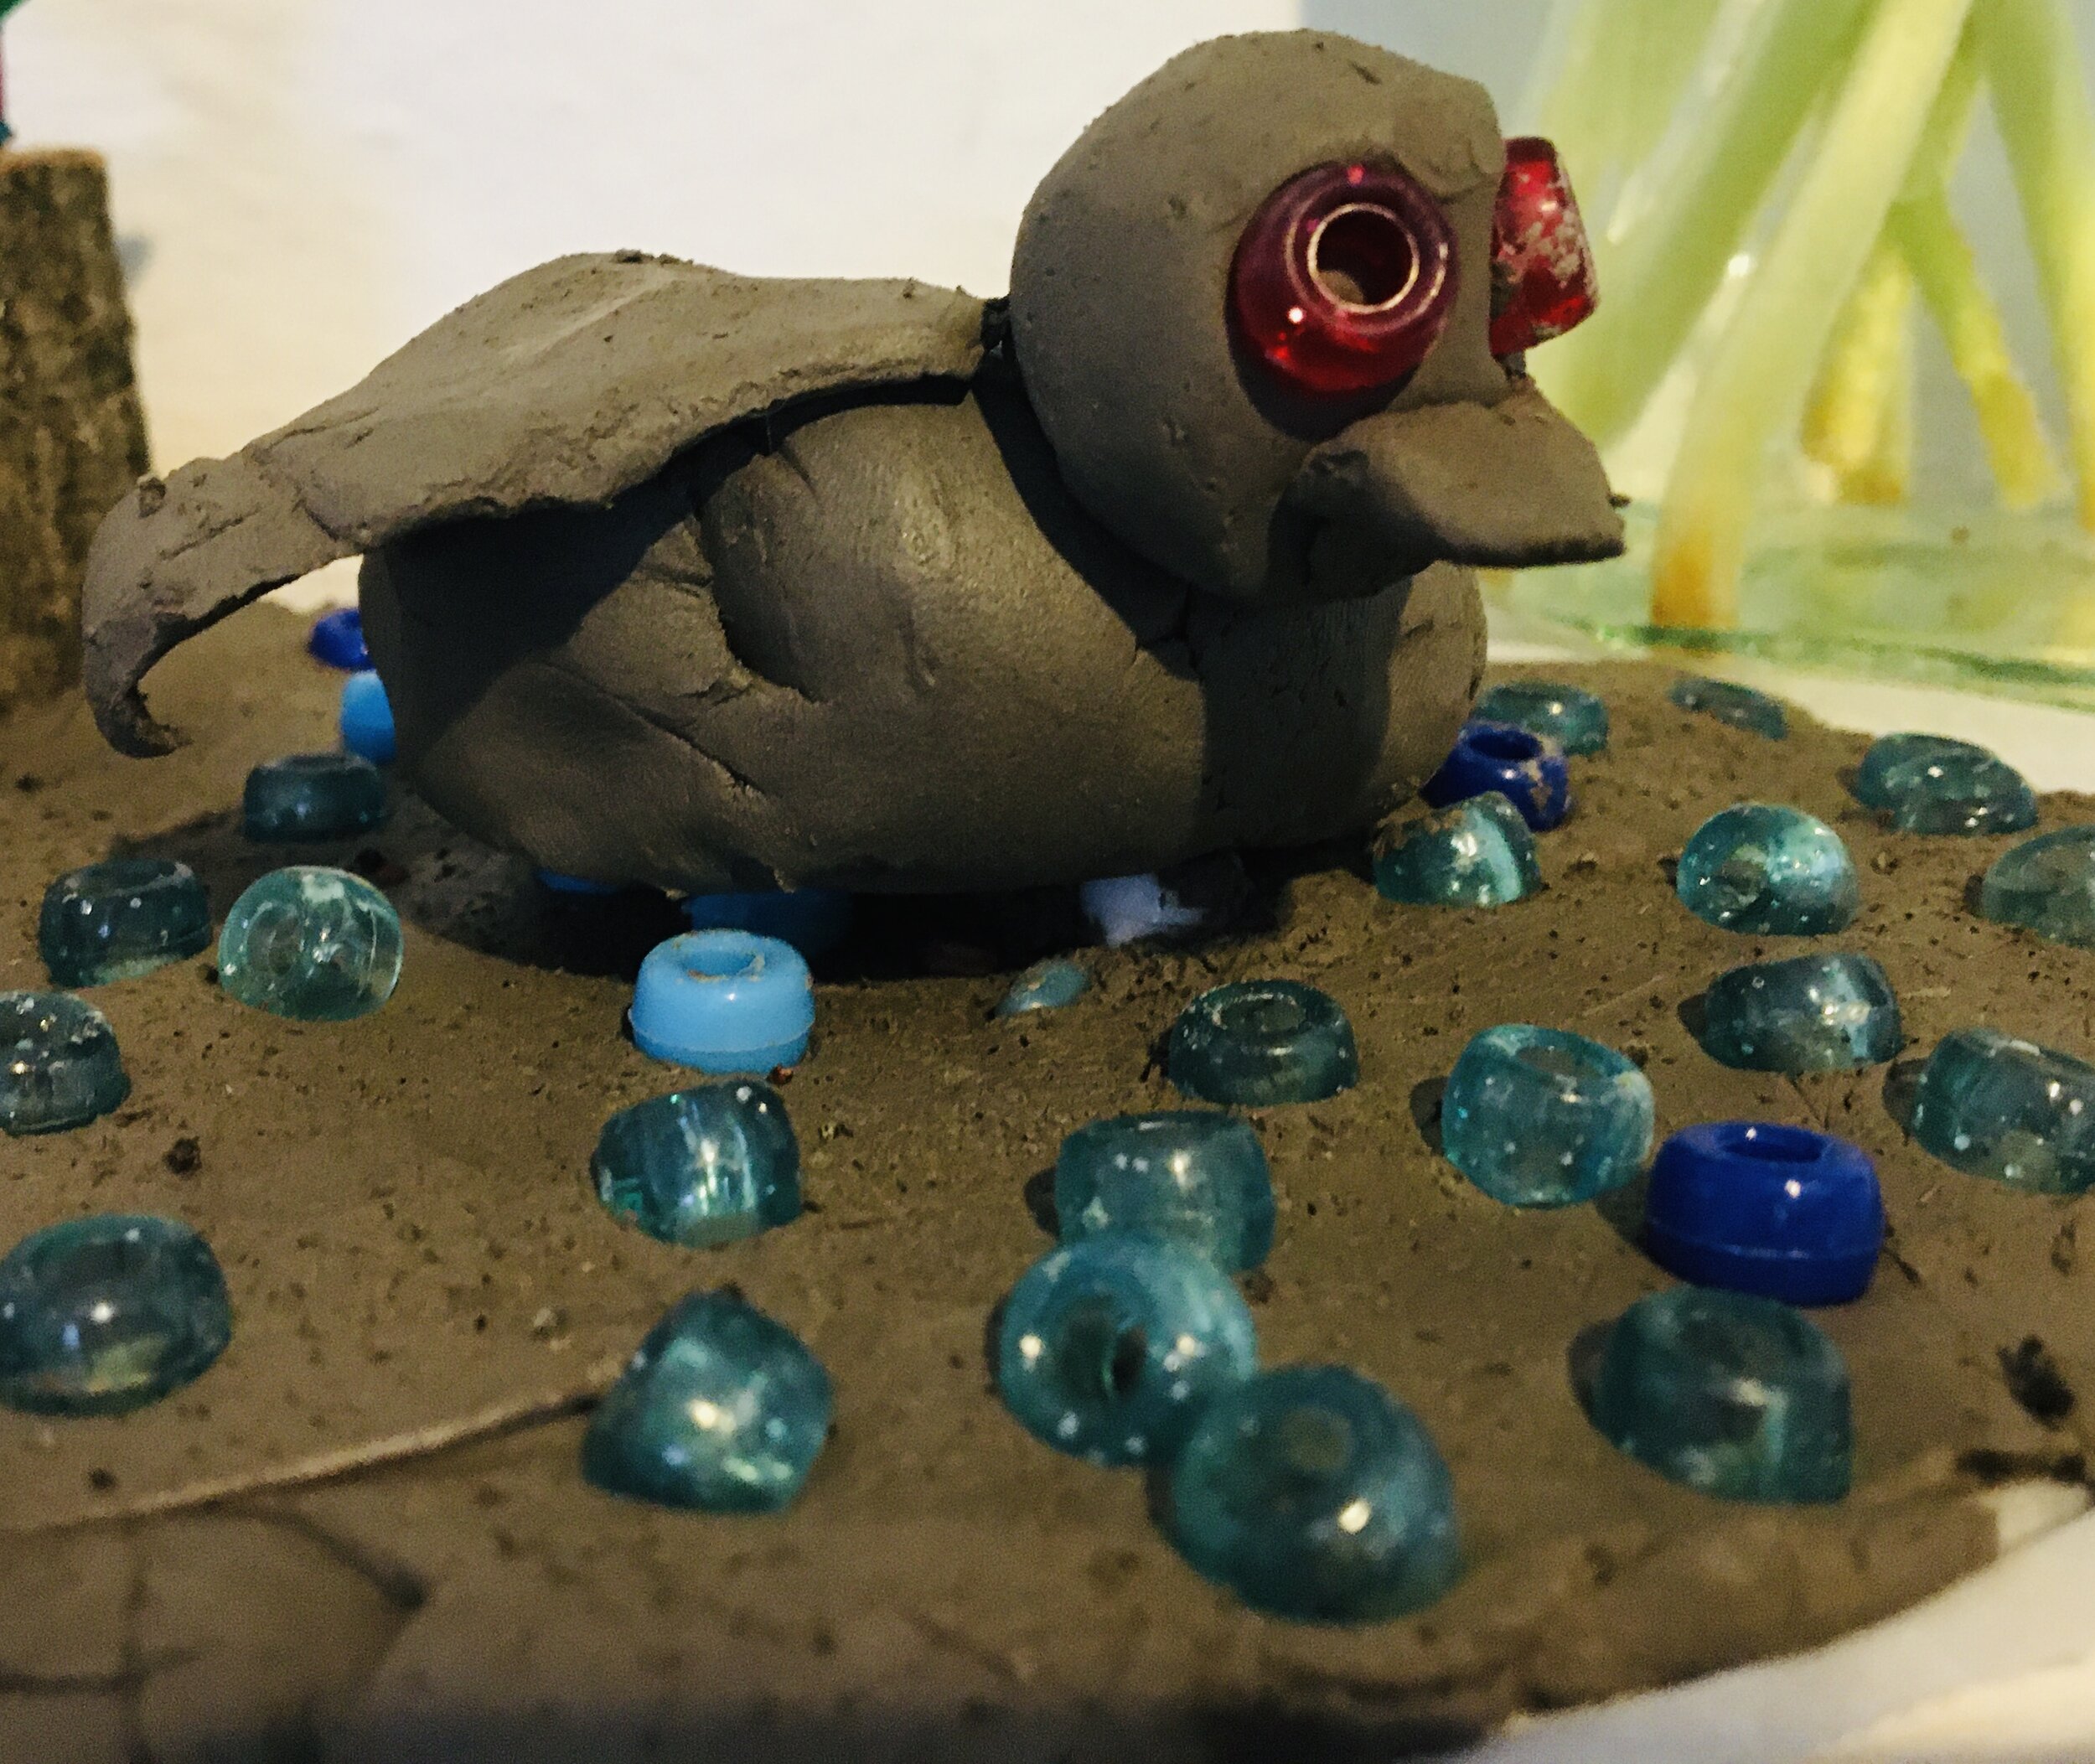
Natural clay is one of our favourite resources in the woods. It is such a great medium for children to express themselves, can be used as part of many themes and will return to nature if dropped or left in the woods.
With this in mind we have included a packet of clay in our January Pack. The clay can be used to create literally anything. However, as we usually focus on birds this month we decided to have a go at making clay birds. In the pack we have included beads, feathers and a few natural things to get you started.
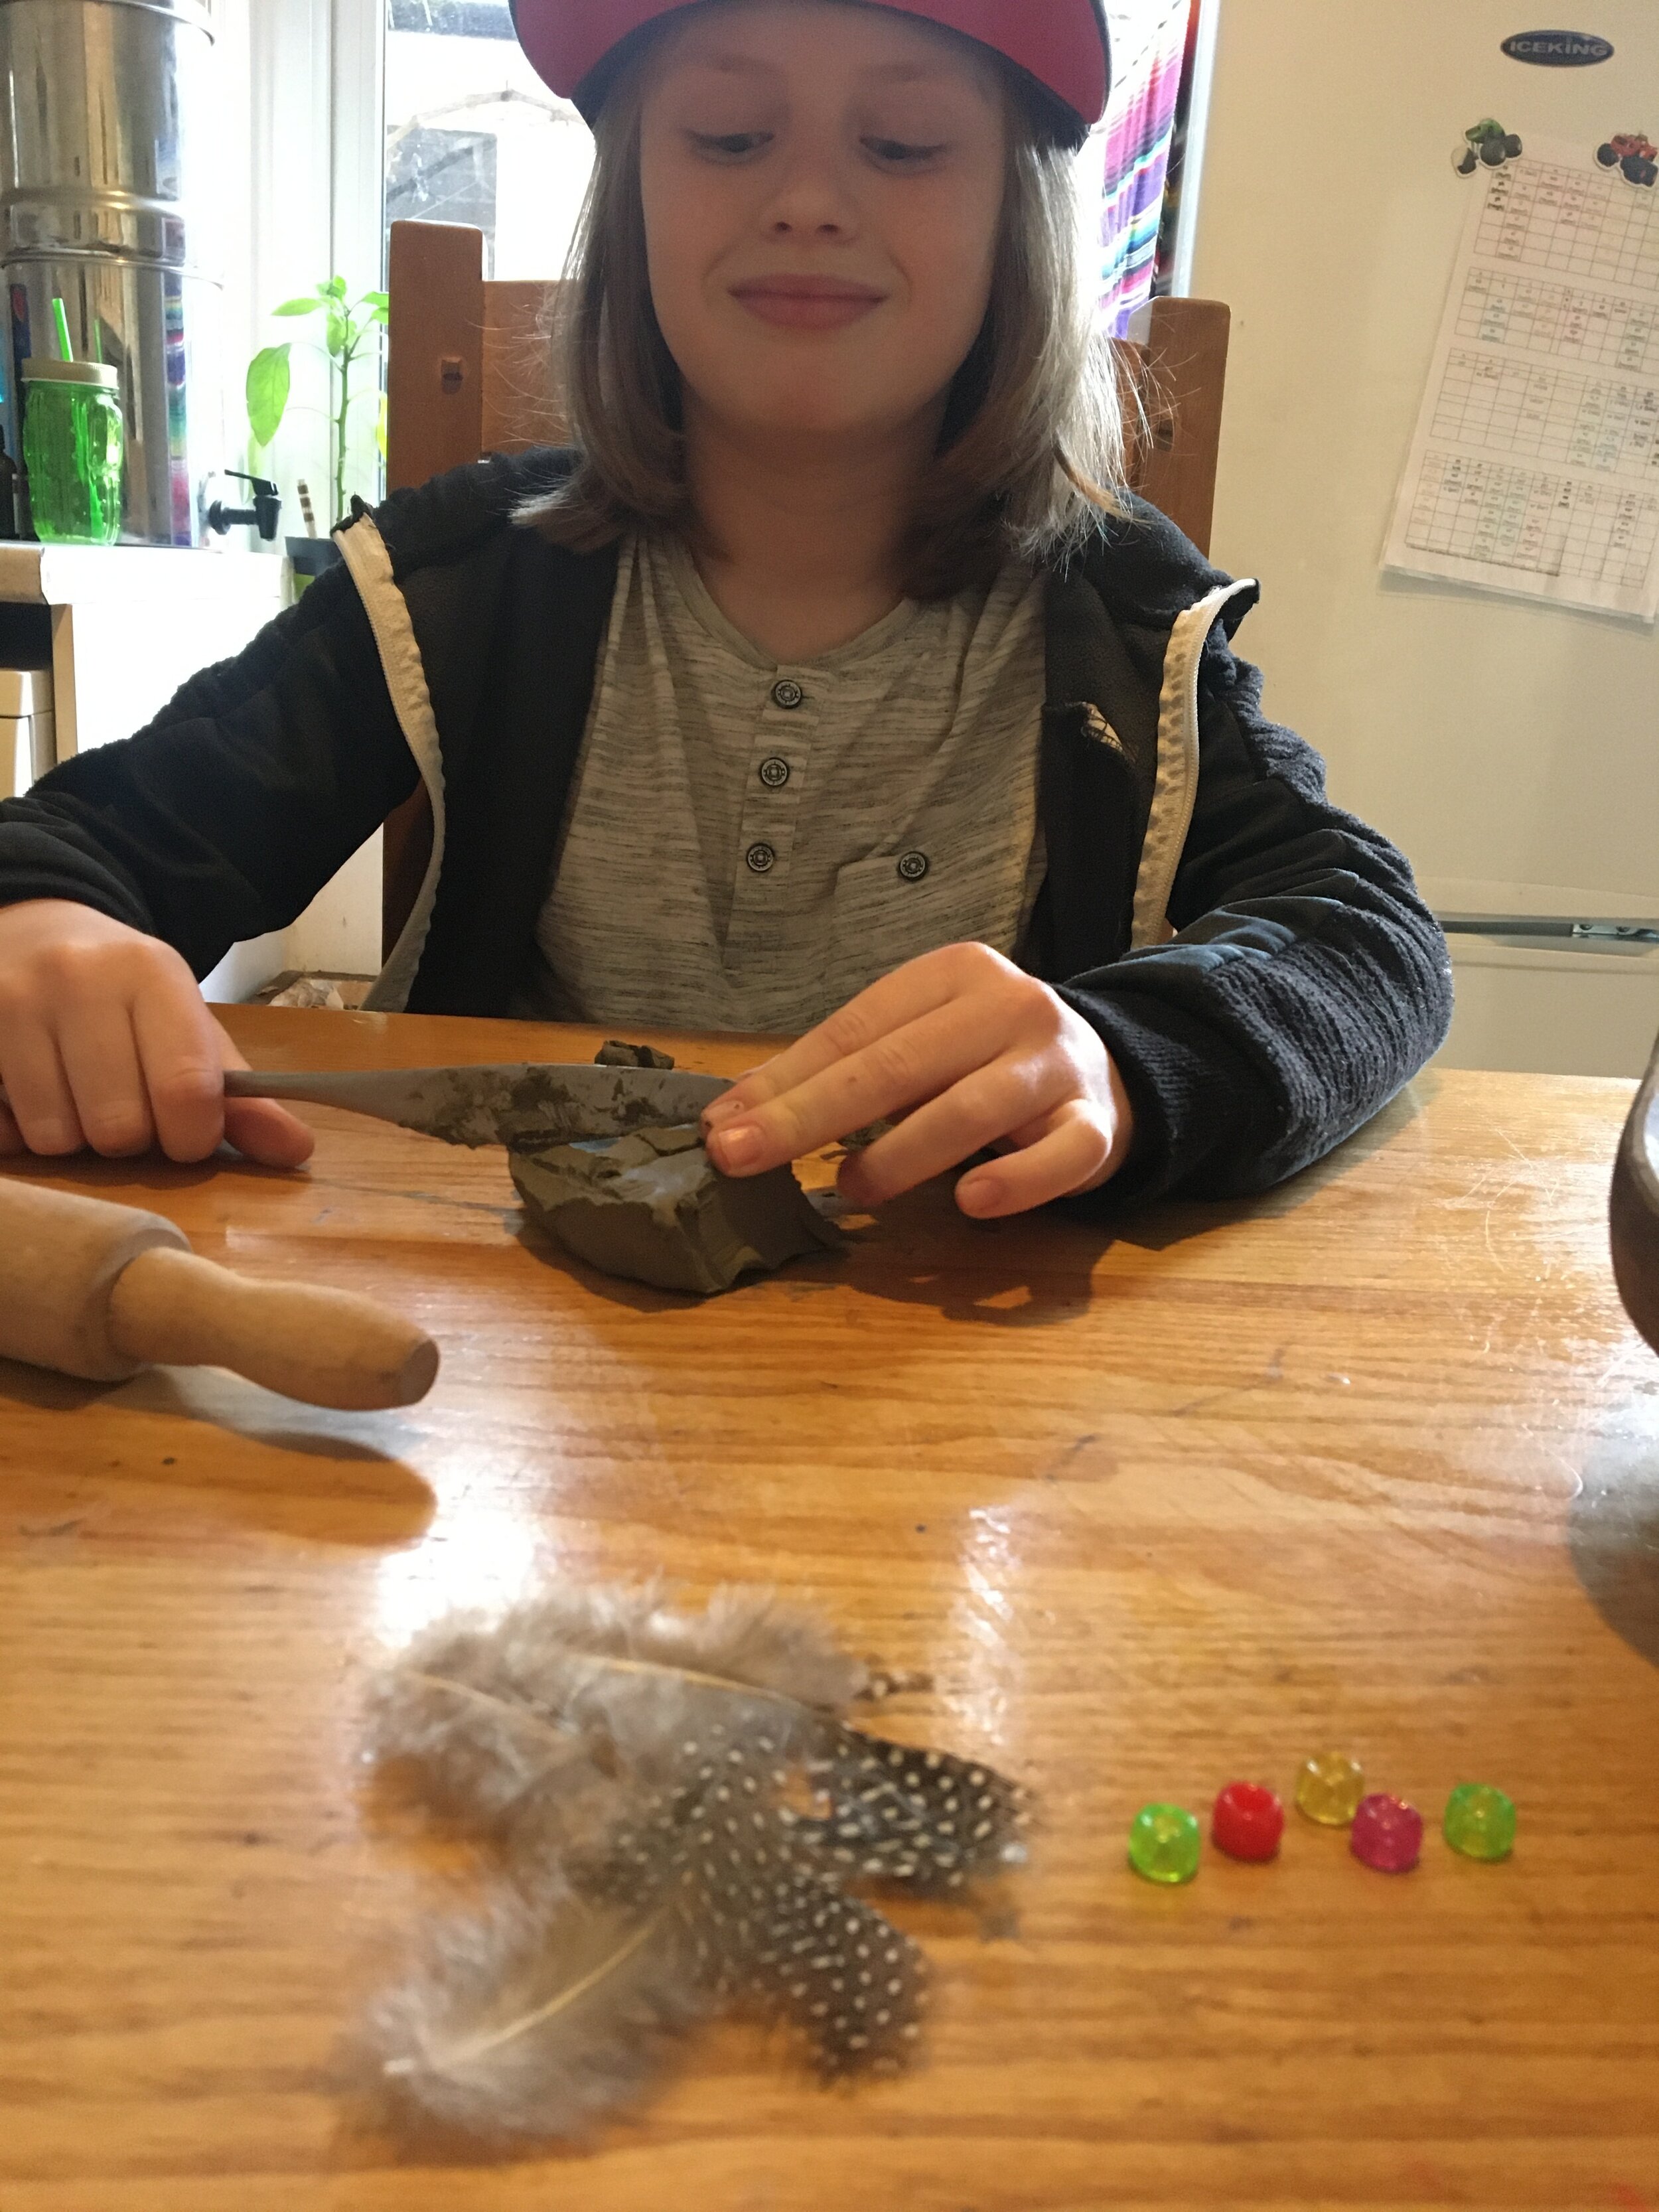
Clay could be rolled and cut to make a flat bird or sculpted to make a three dimensional bird.
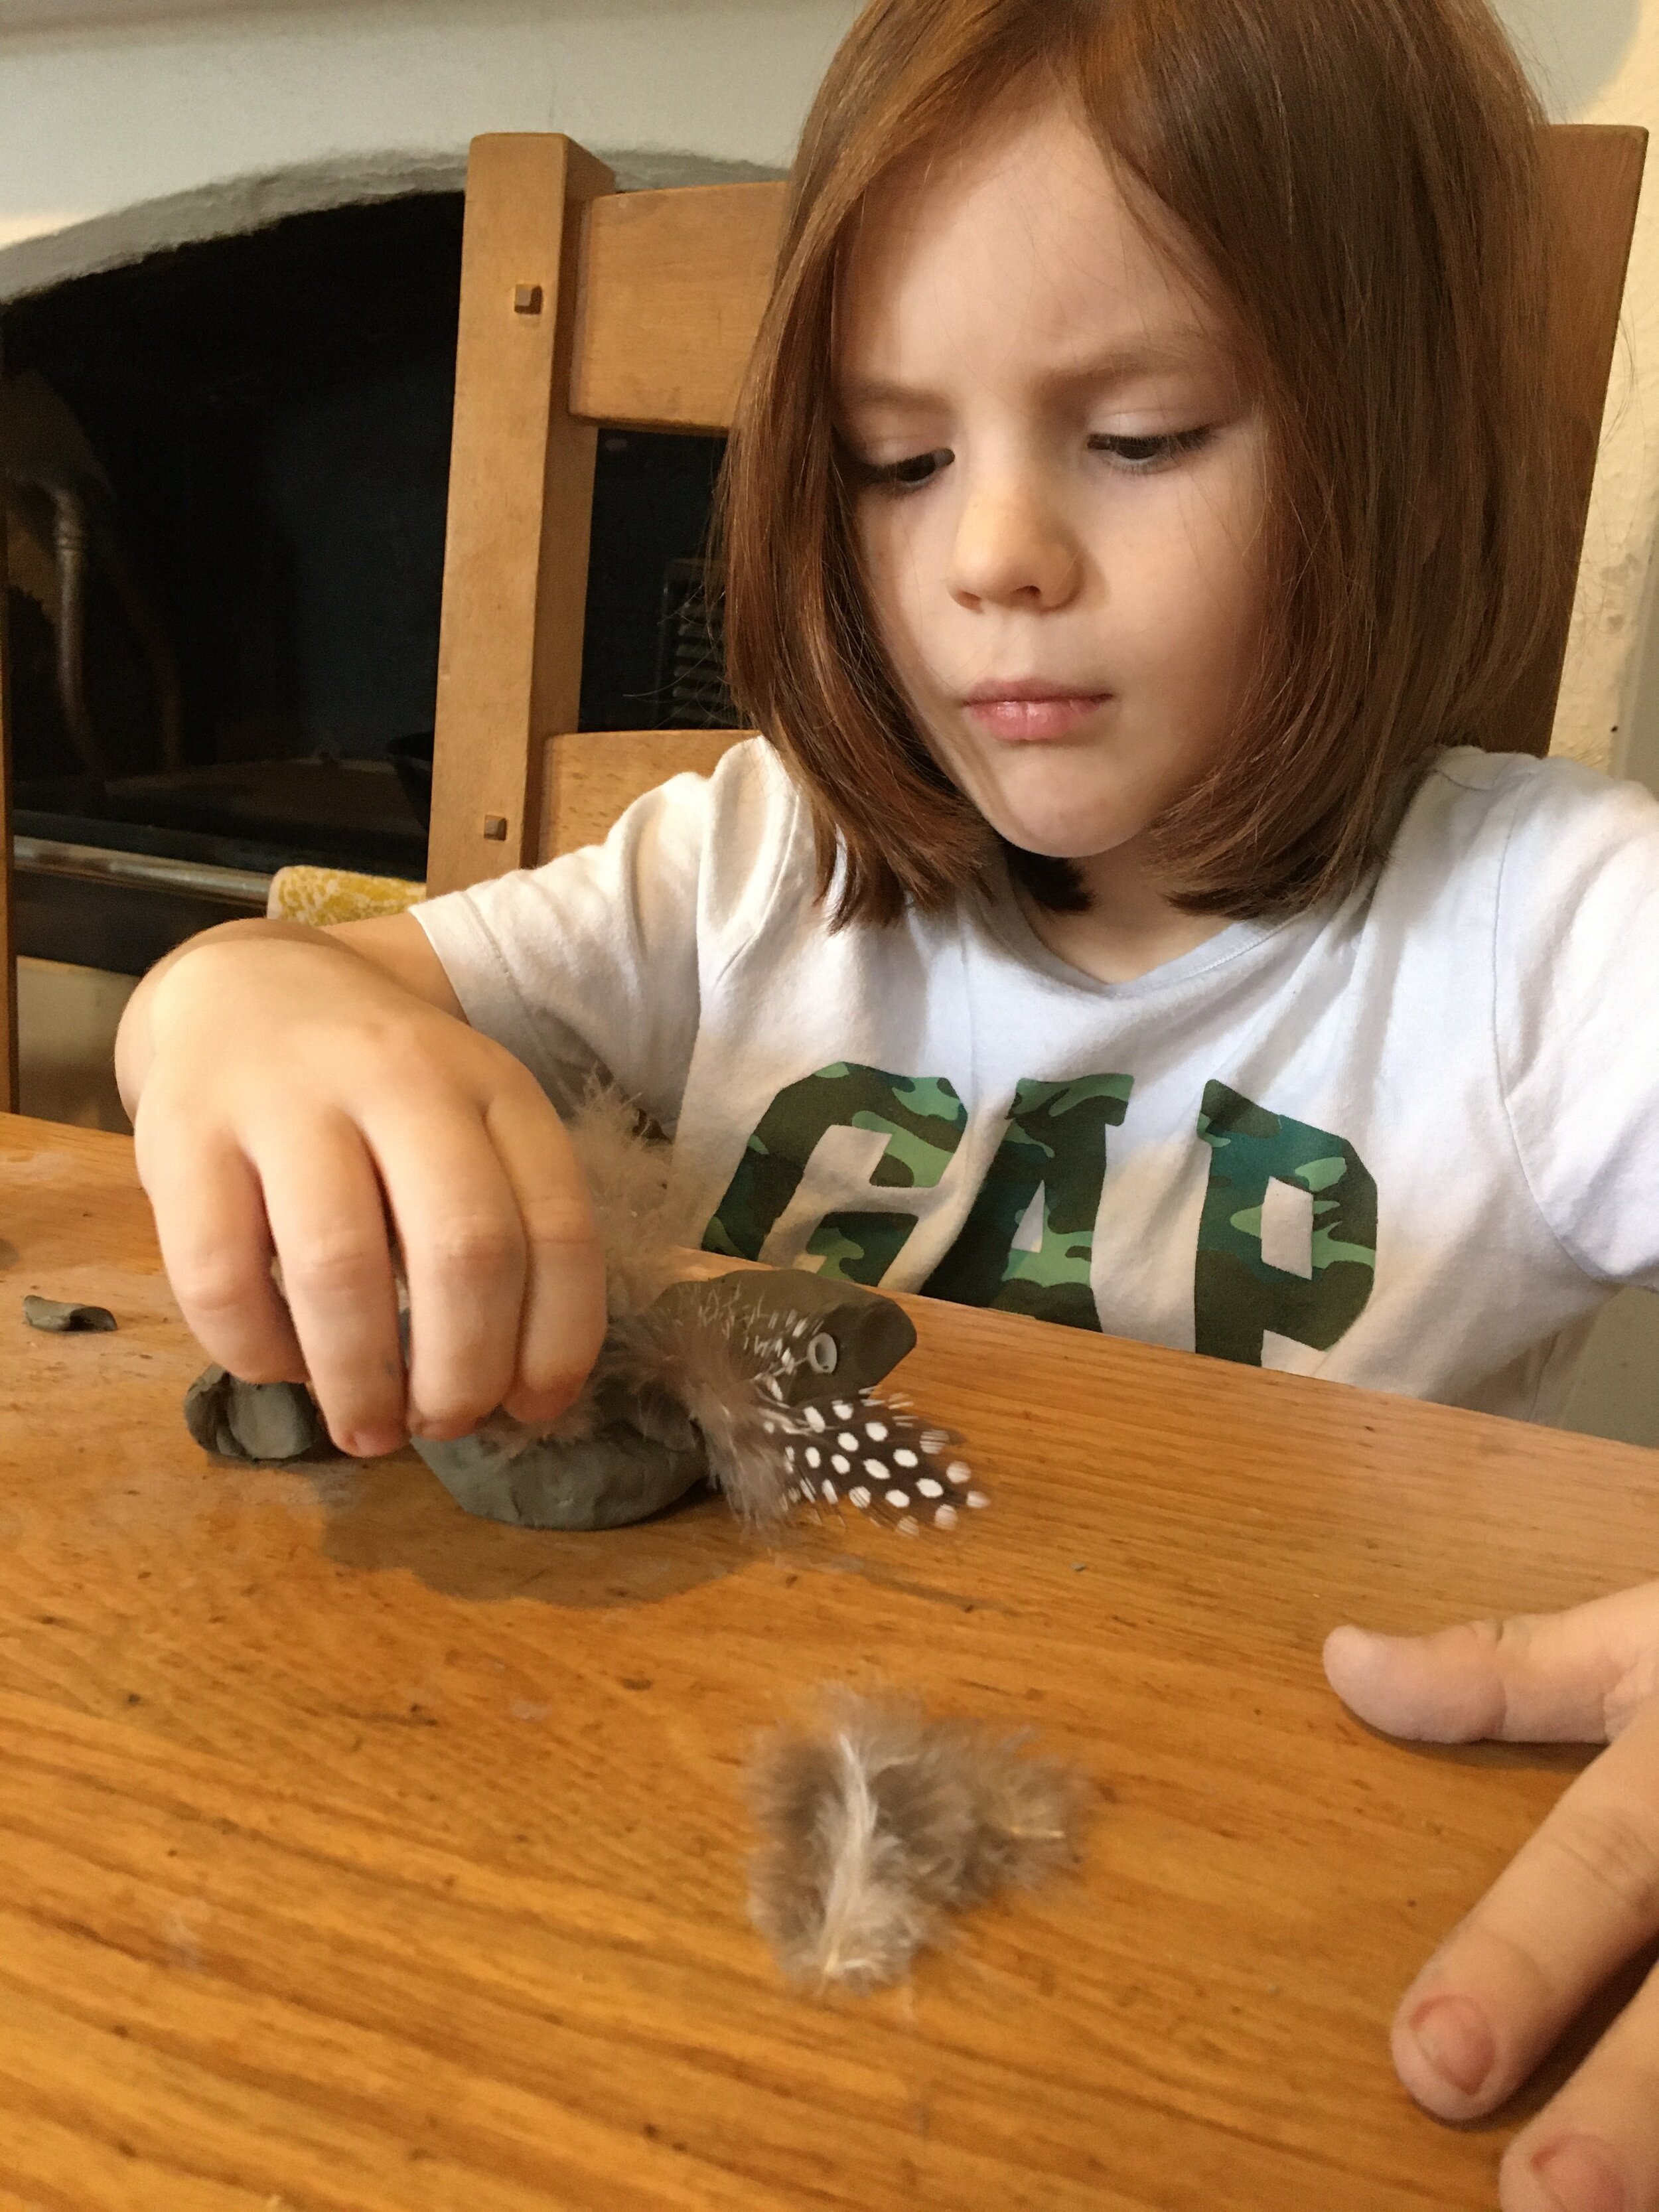
You could find things to add texture to the clay,.
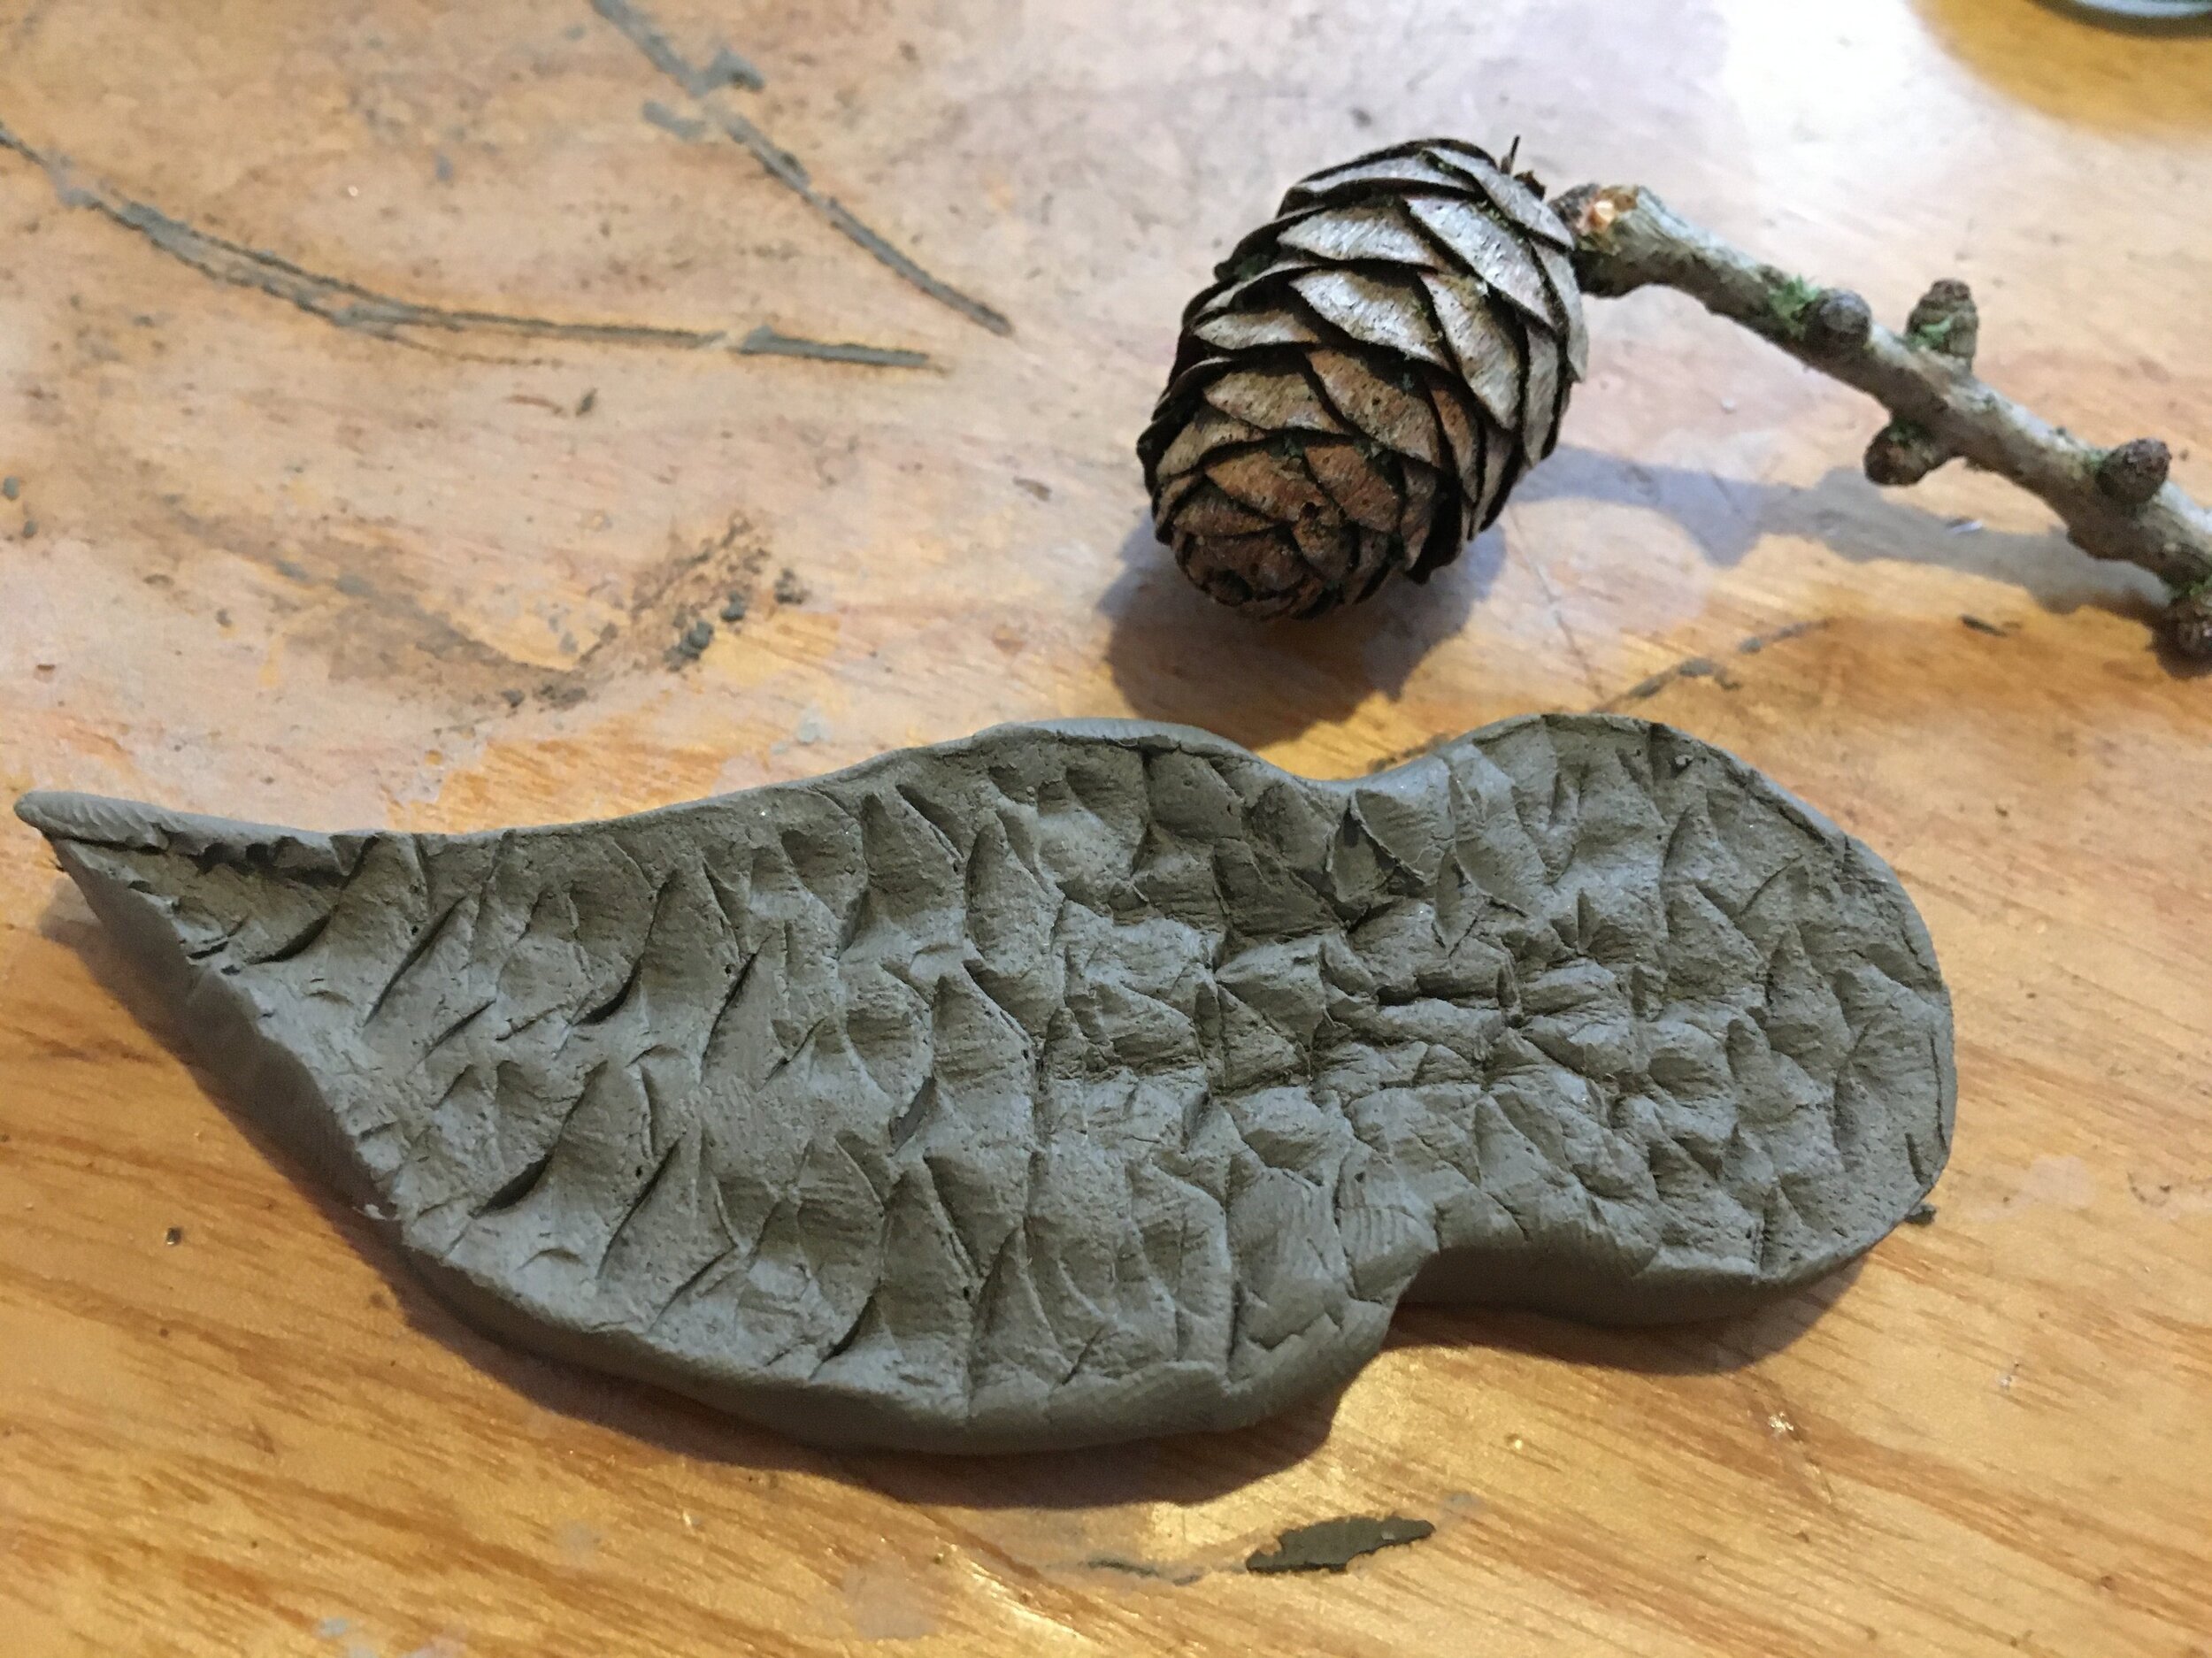
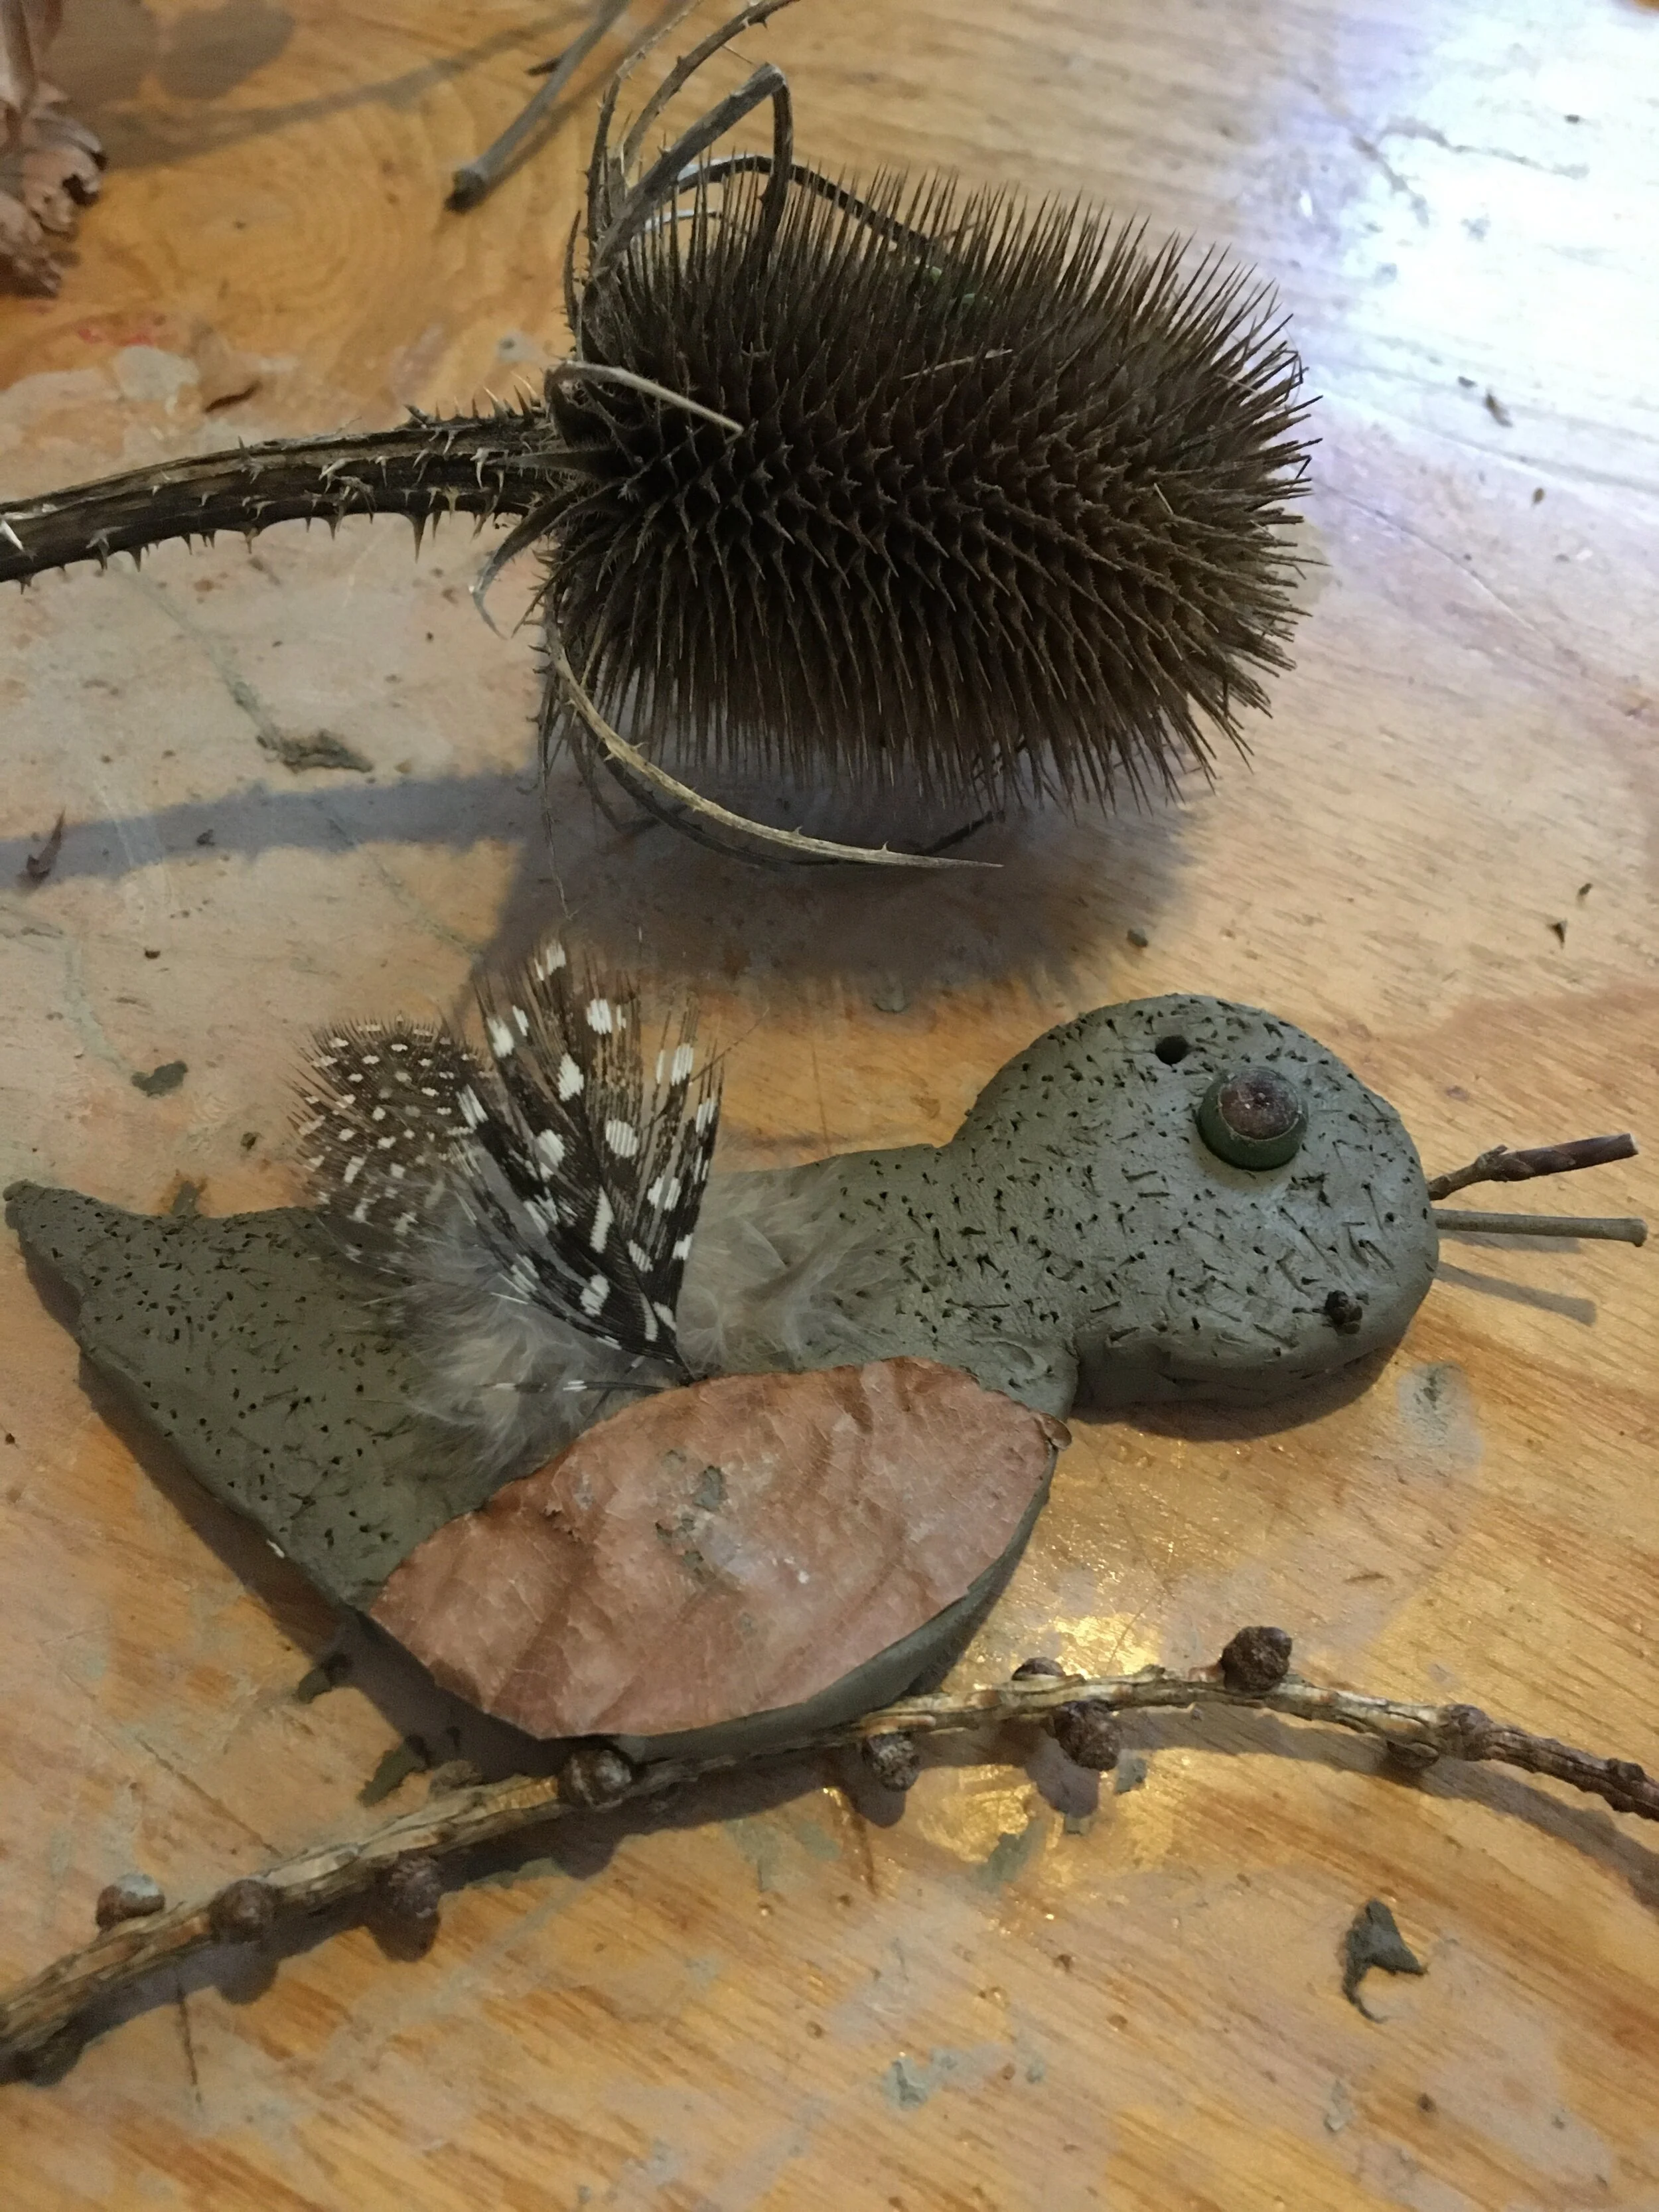
You could use the clay, feathers and natural materials to add features to your creations.
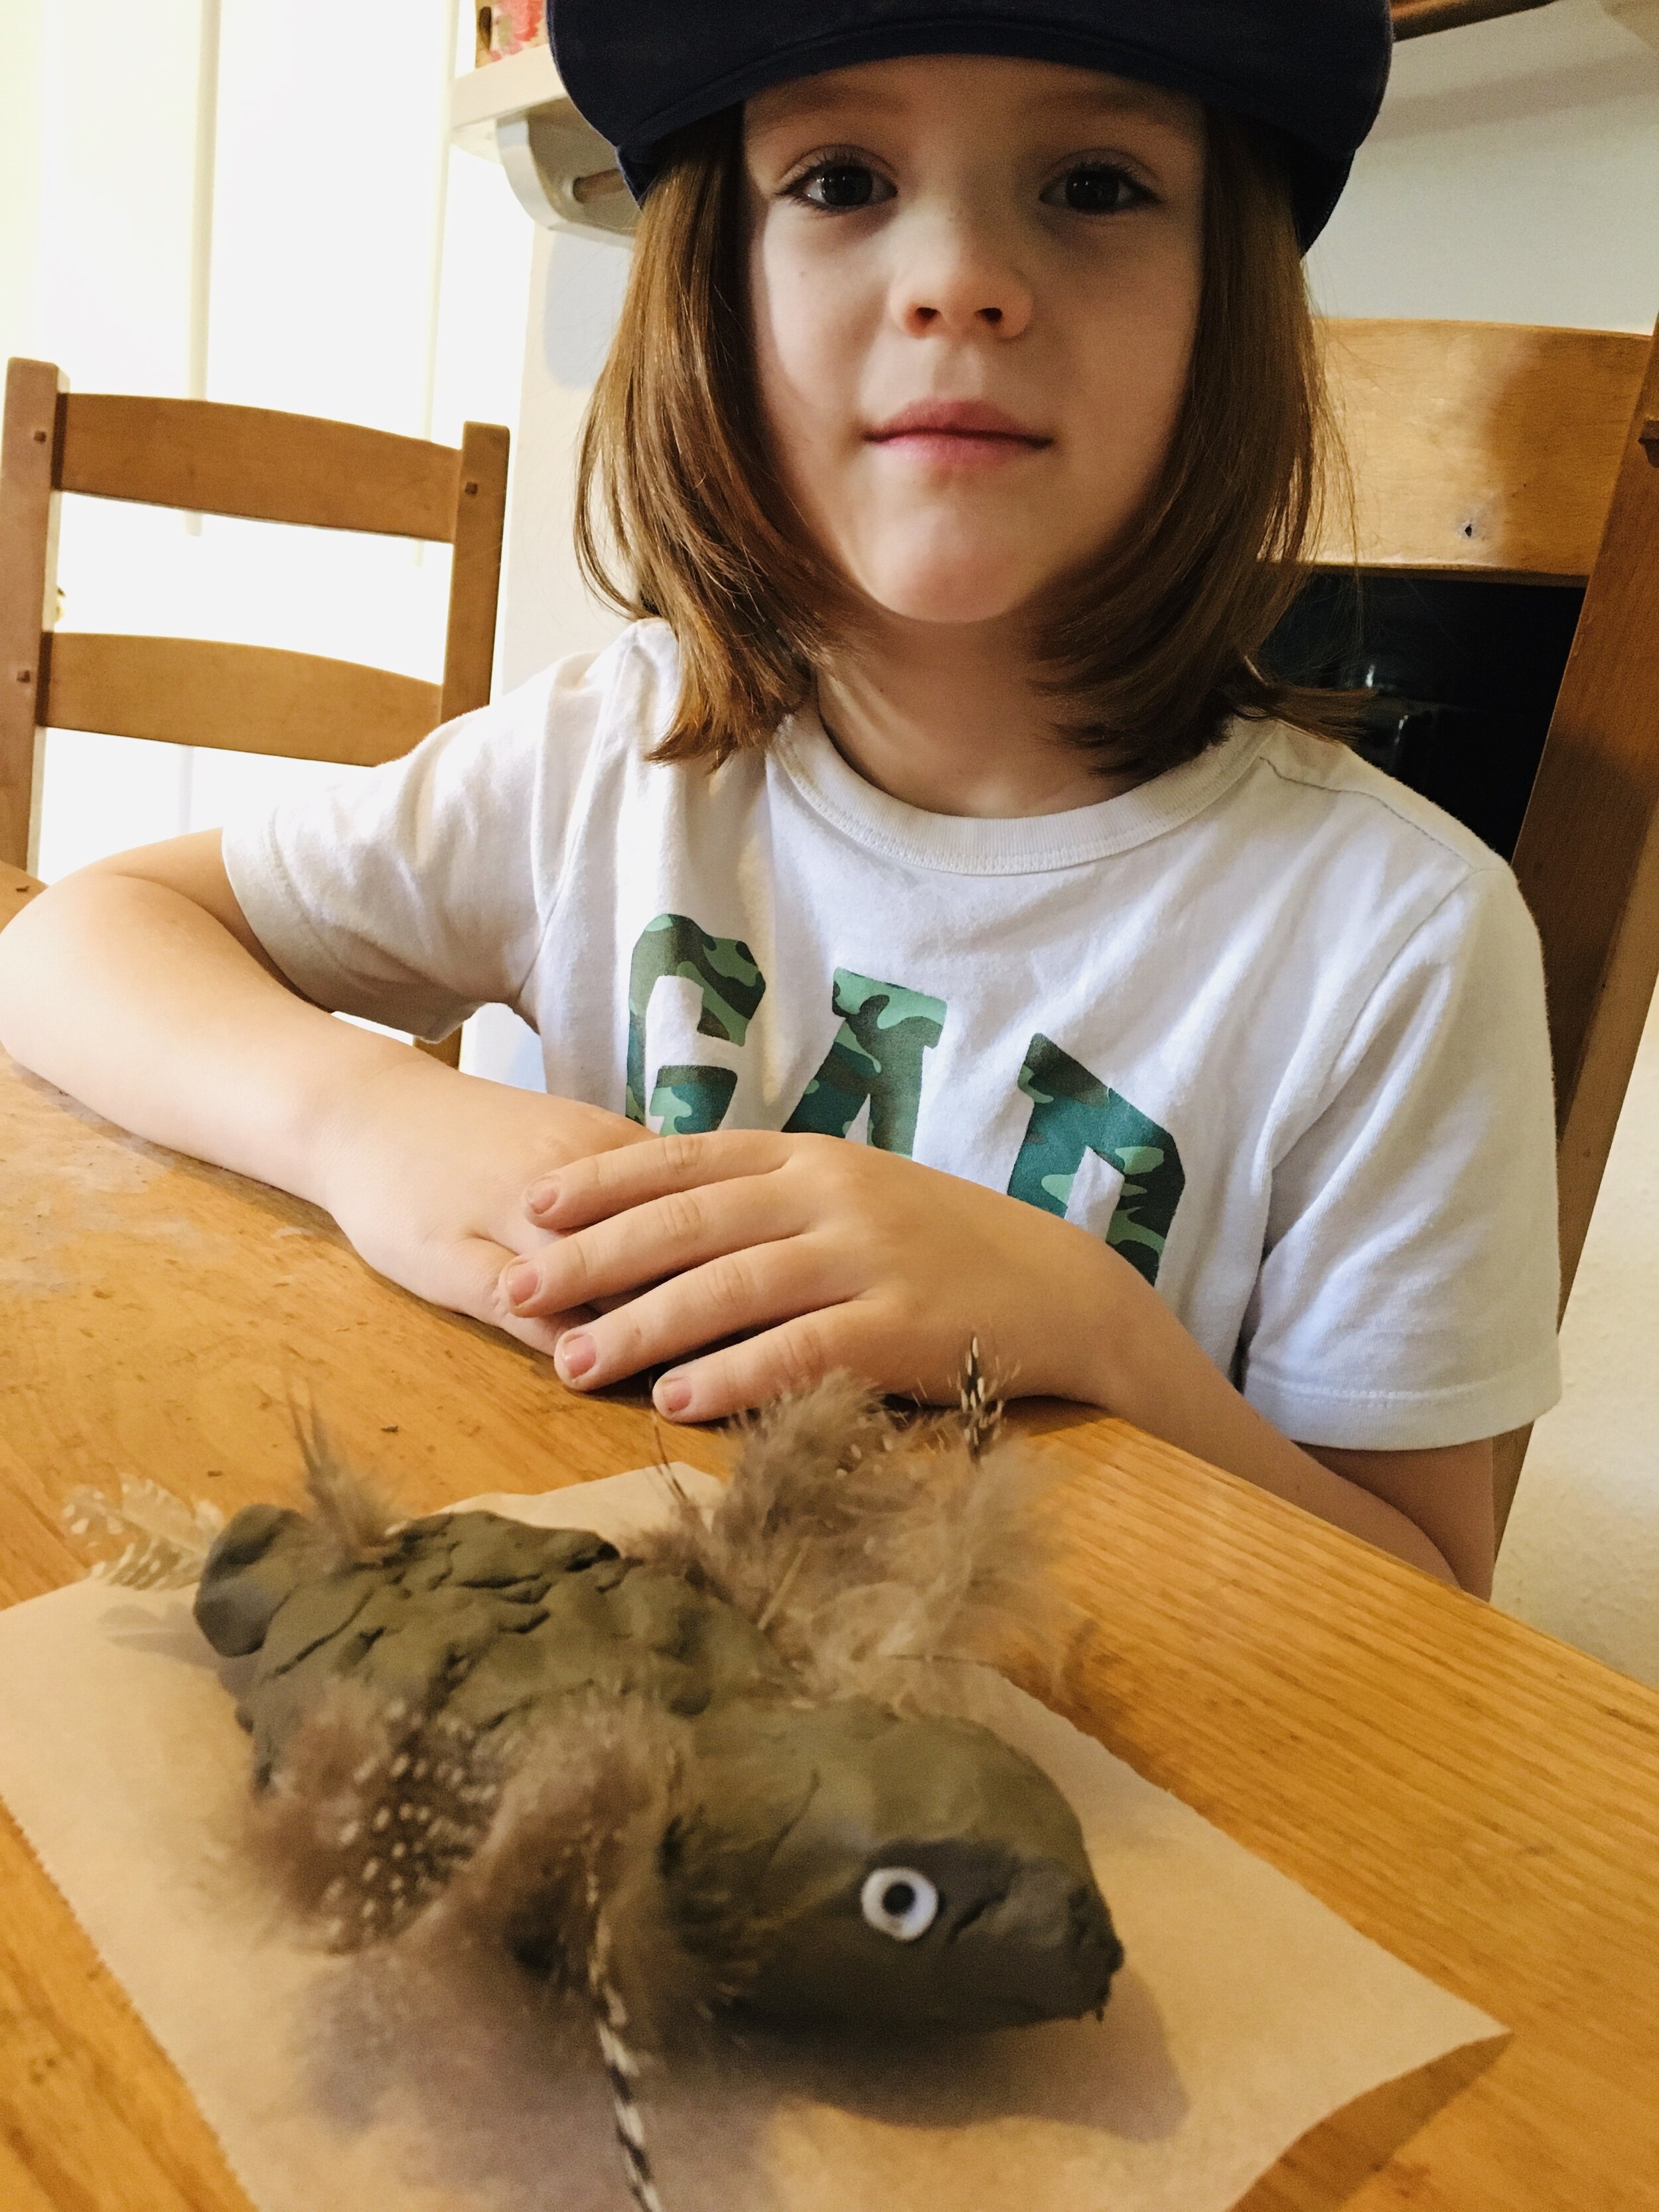

We would love to see your pictures of whatever you make!
The 1st to the 2nd of February marks Imbolc. This is an old Pagan festival celebrating the coming of Spring. The date is also significant in the Christian calendar as Candlemas and is the day the years candles are blessed.
It has always felt quite natural in the woods to recognise that Spring is on its way, To quietly celebrate the returning of the light, signs of new growth and the hope that brings.
One of our favourite ways of doing this is to create an Earth Candle. We dig a hole and add a wick, light a fire and melt wax and then pour it into the hole. Once the wax has set the candle is lit. The candle in the ground seems a fitting way to celebrate the coming of the light and give the earth a little nudge to wake up.
The children often decorate the ground around the candle with things to represent new life.

This ritual seems even more relevant this year when we are looking for light, new growth and hope more than ever. We wanted to create a similar activity that could be done at home. We have, therefore included a candle rolling kit in our January pack.

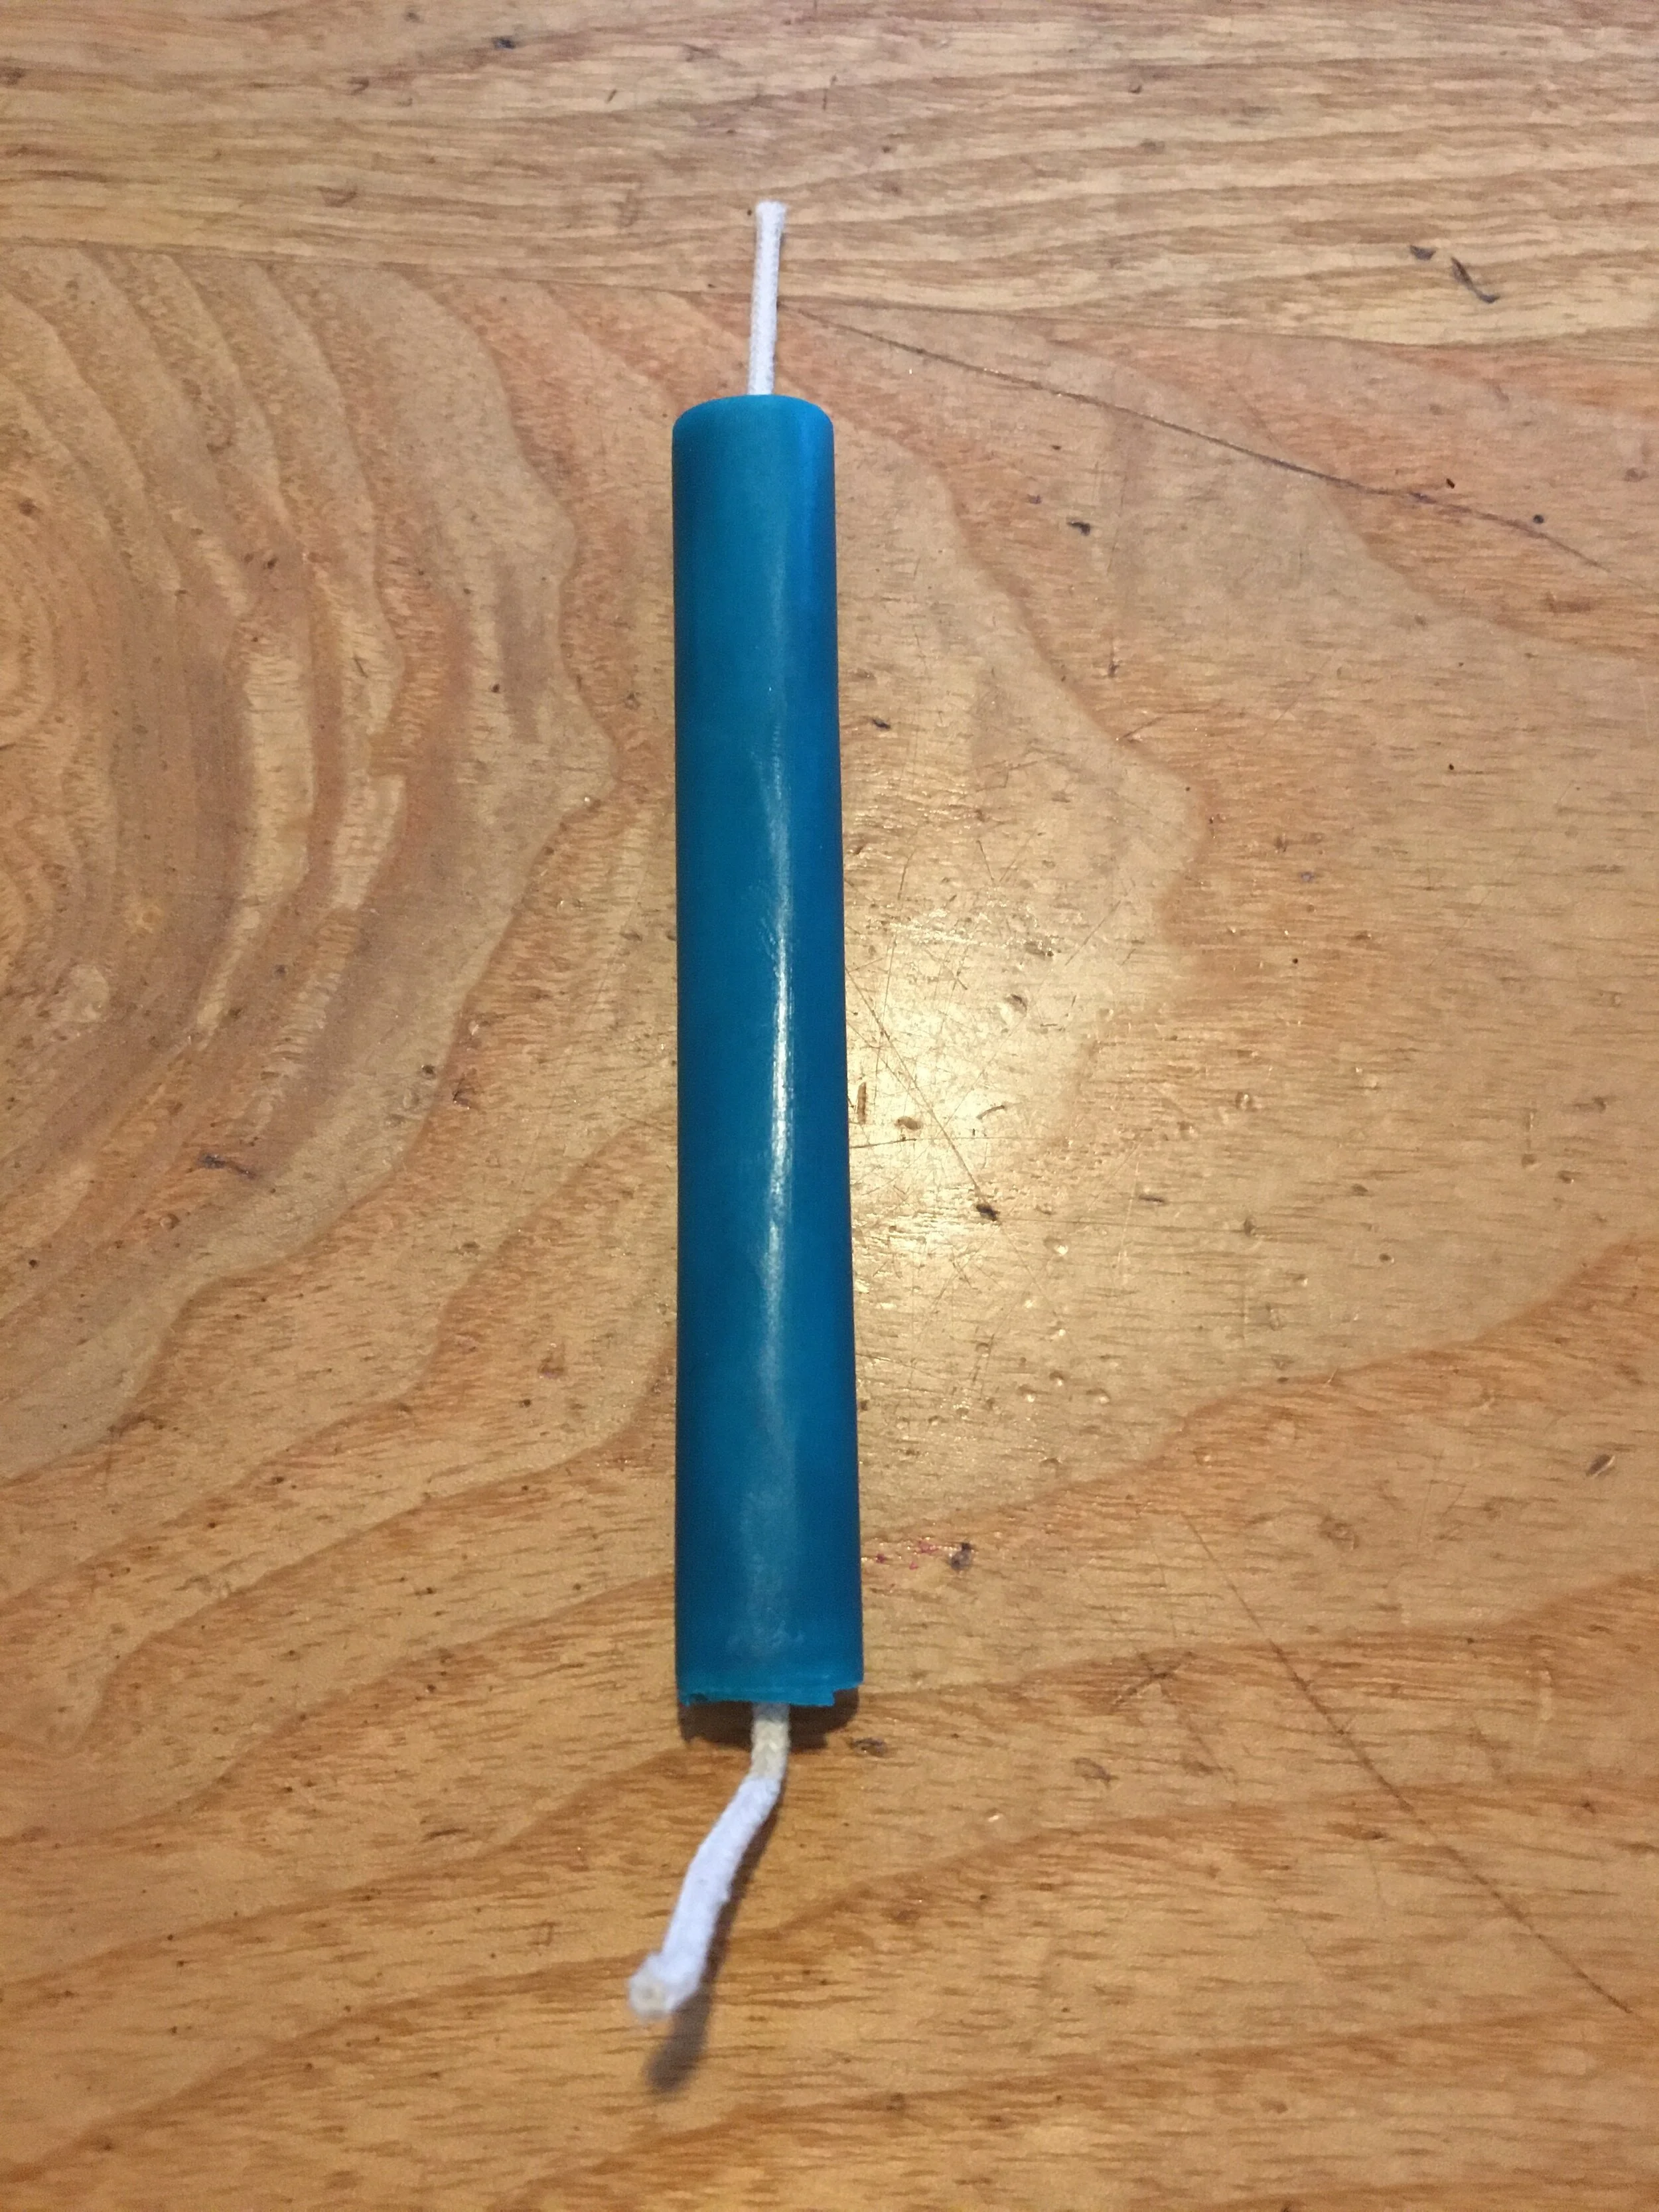
Candle rolling uses beeswax sheets rolled around a wick. As the wax doesn’t need to be melted this is the perfect way for children to make candles.
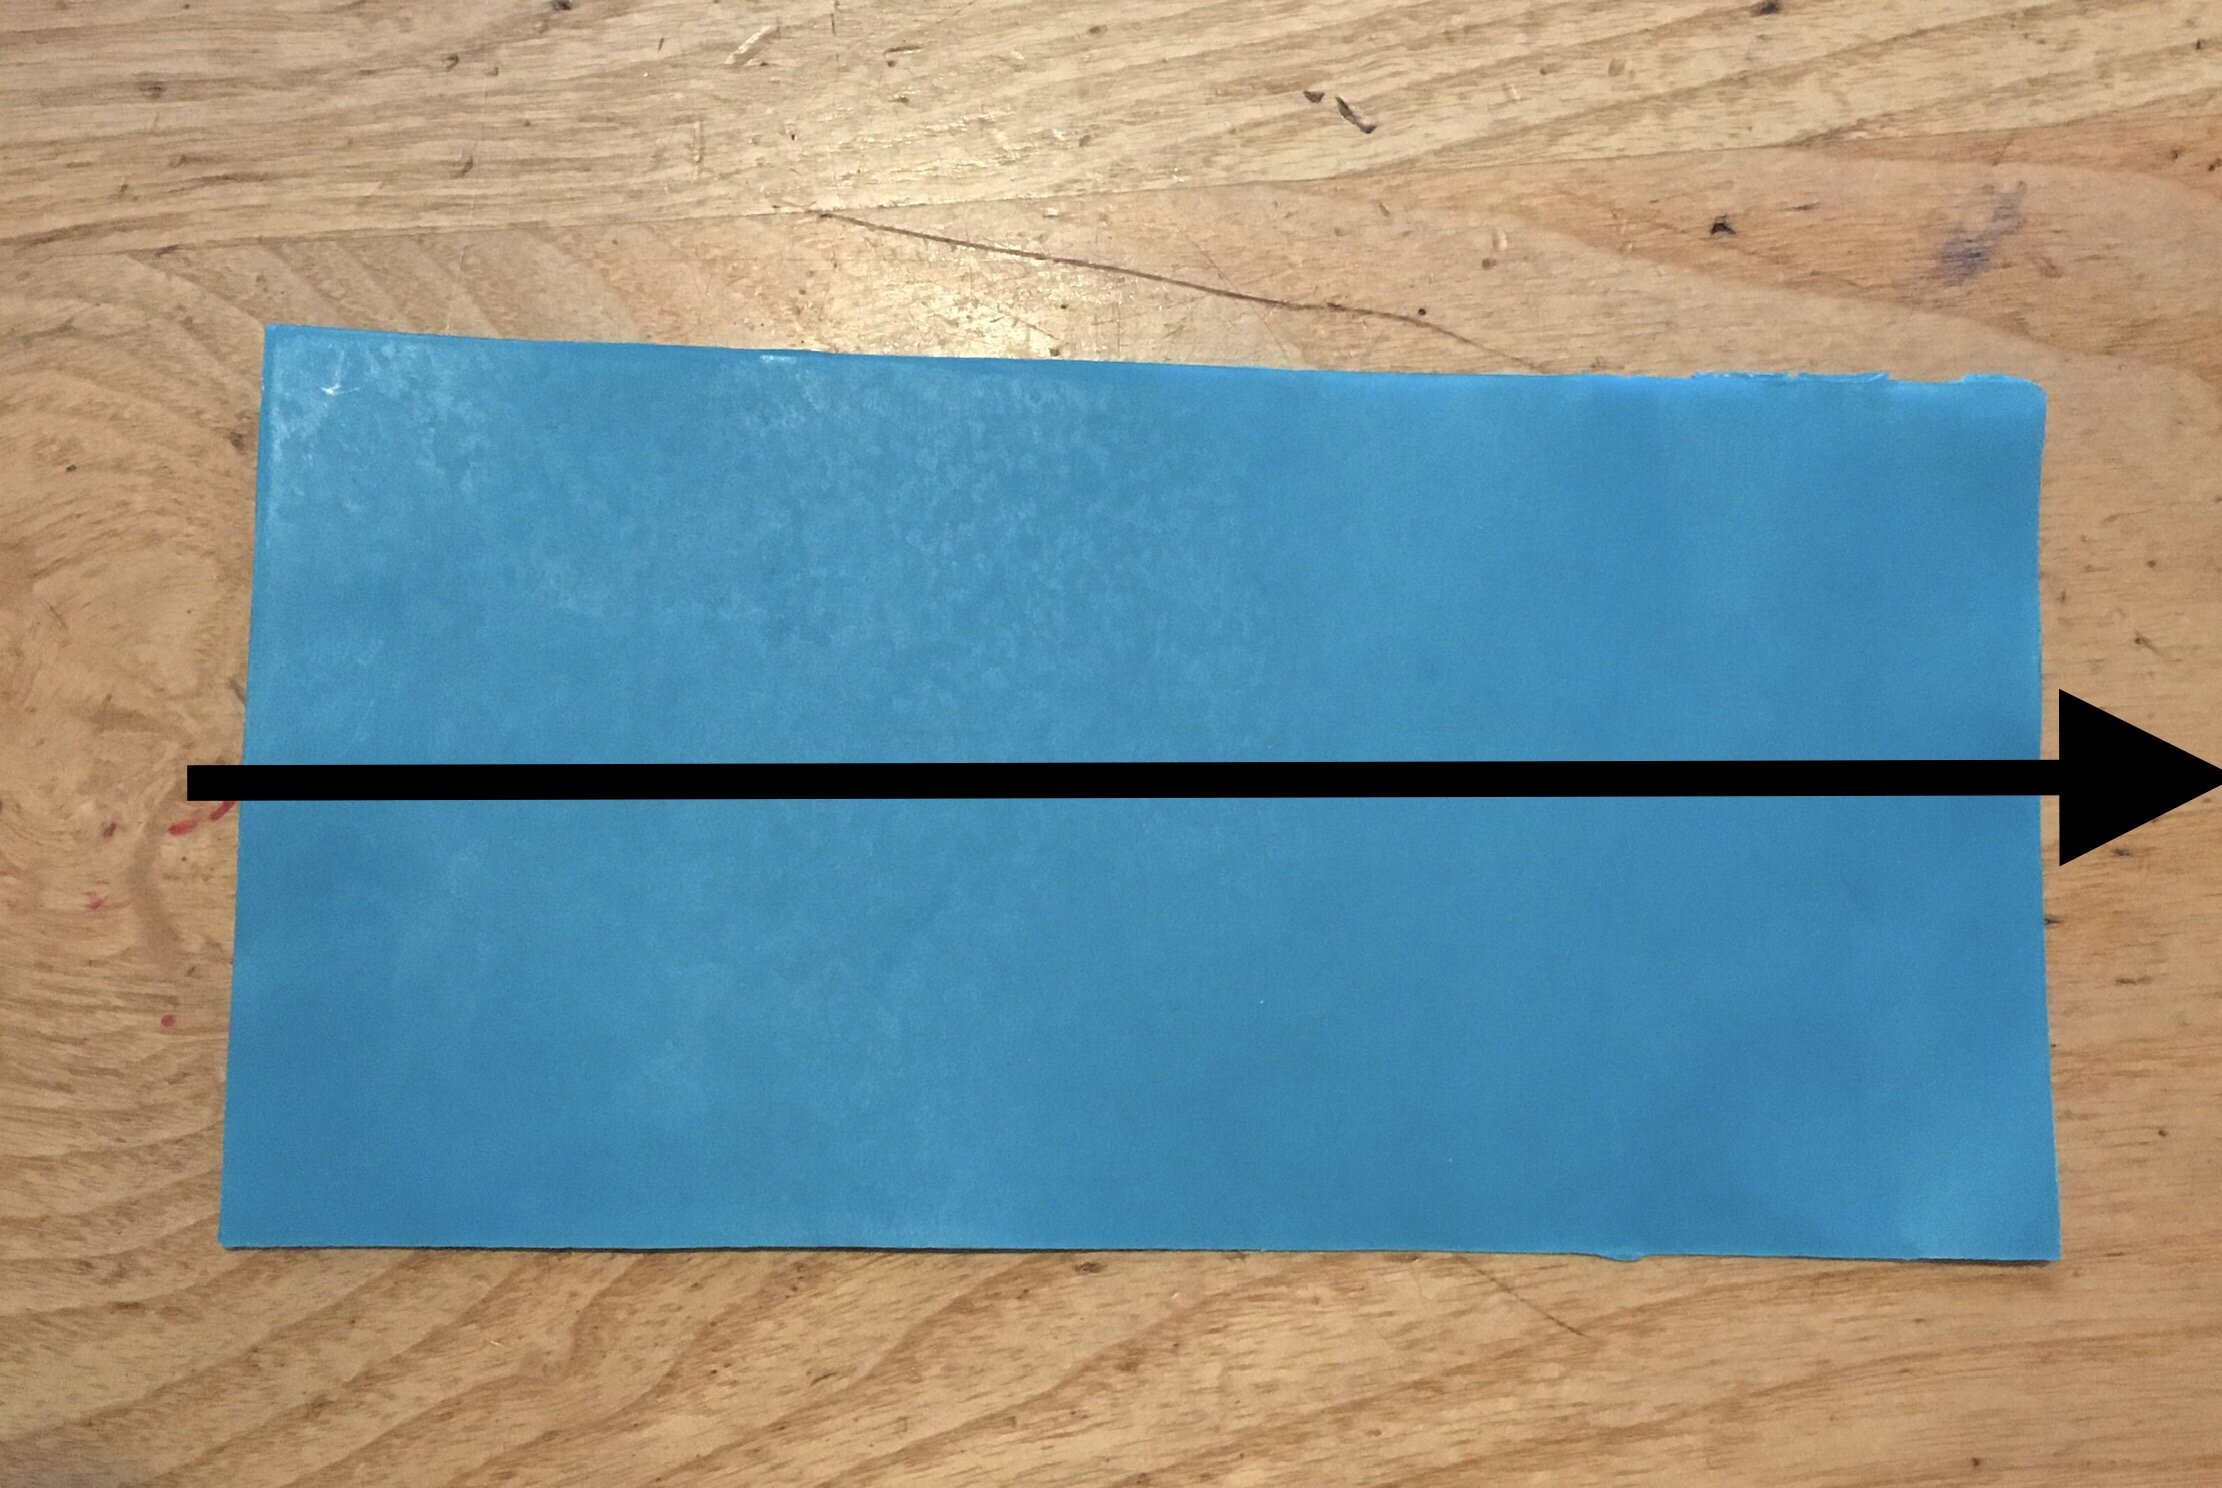
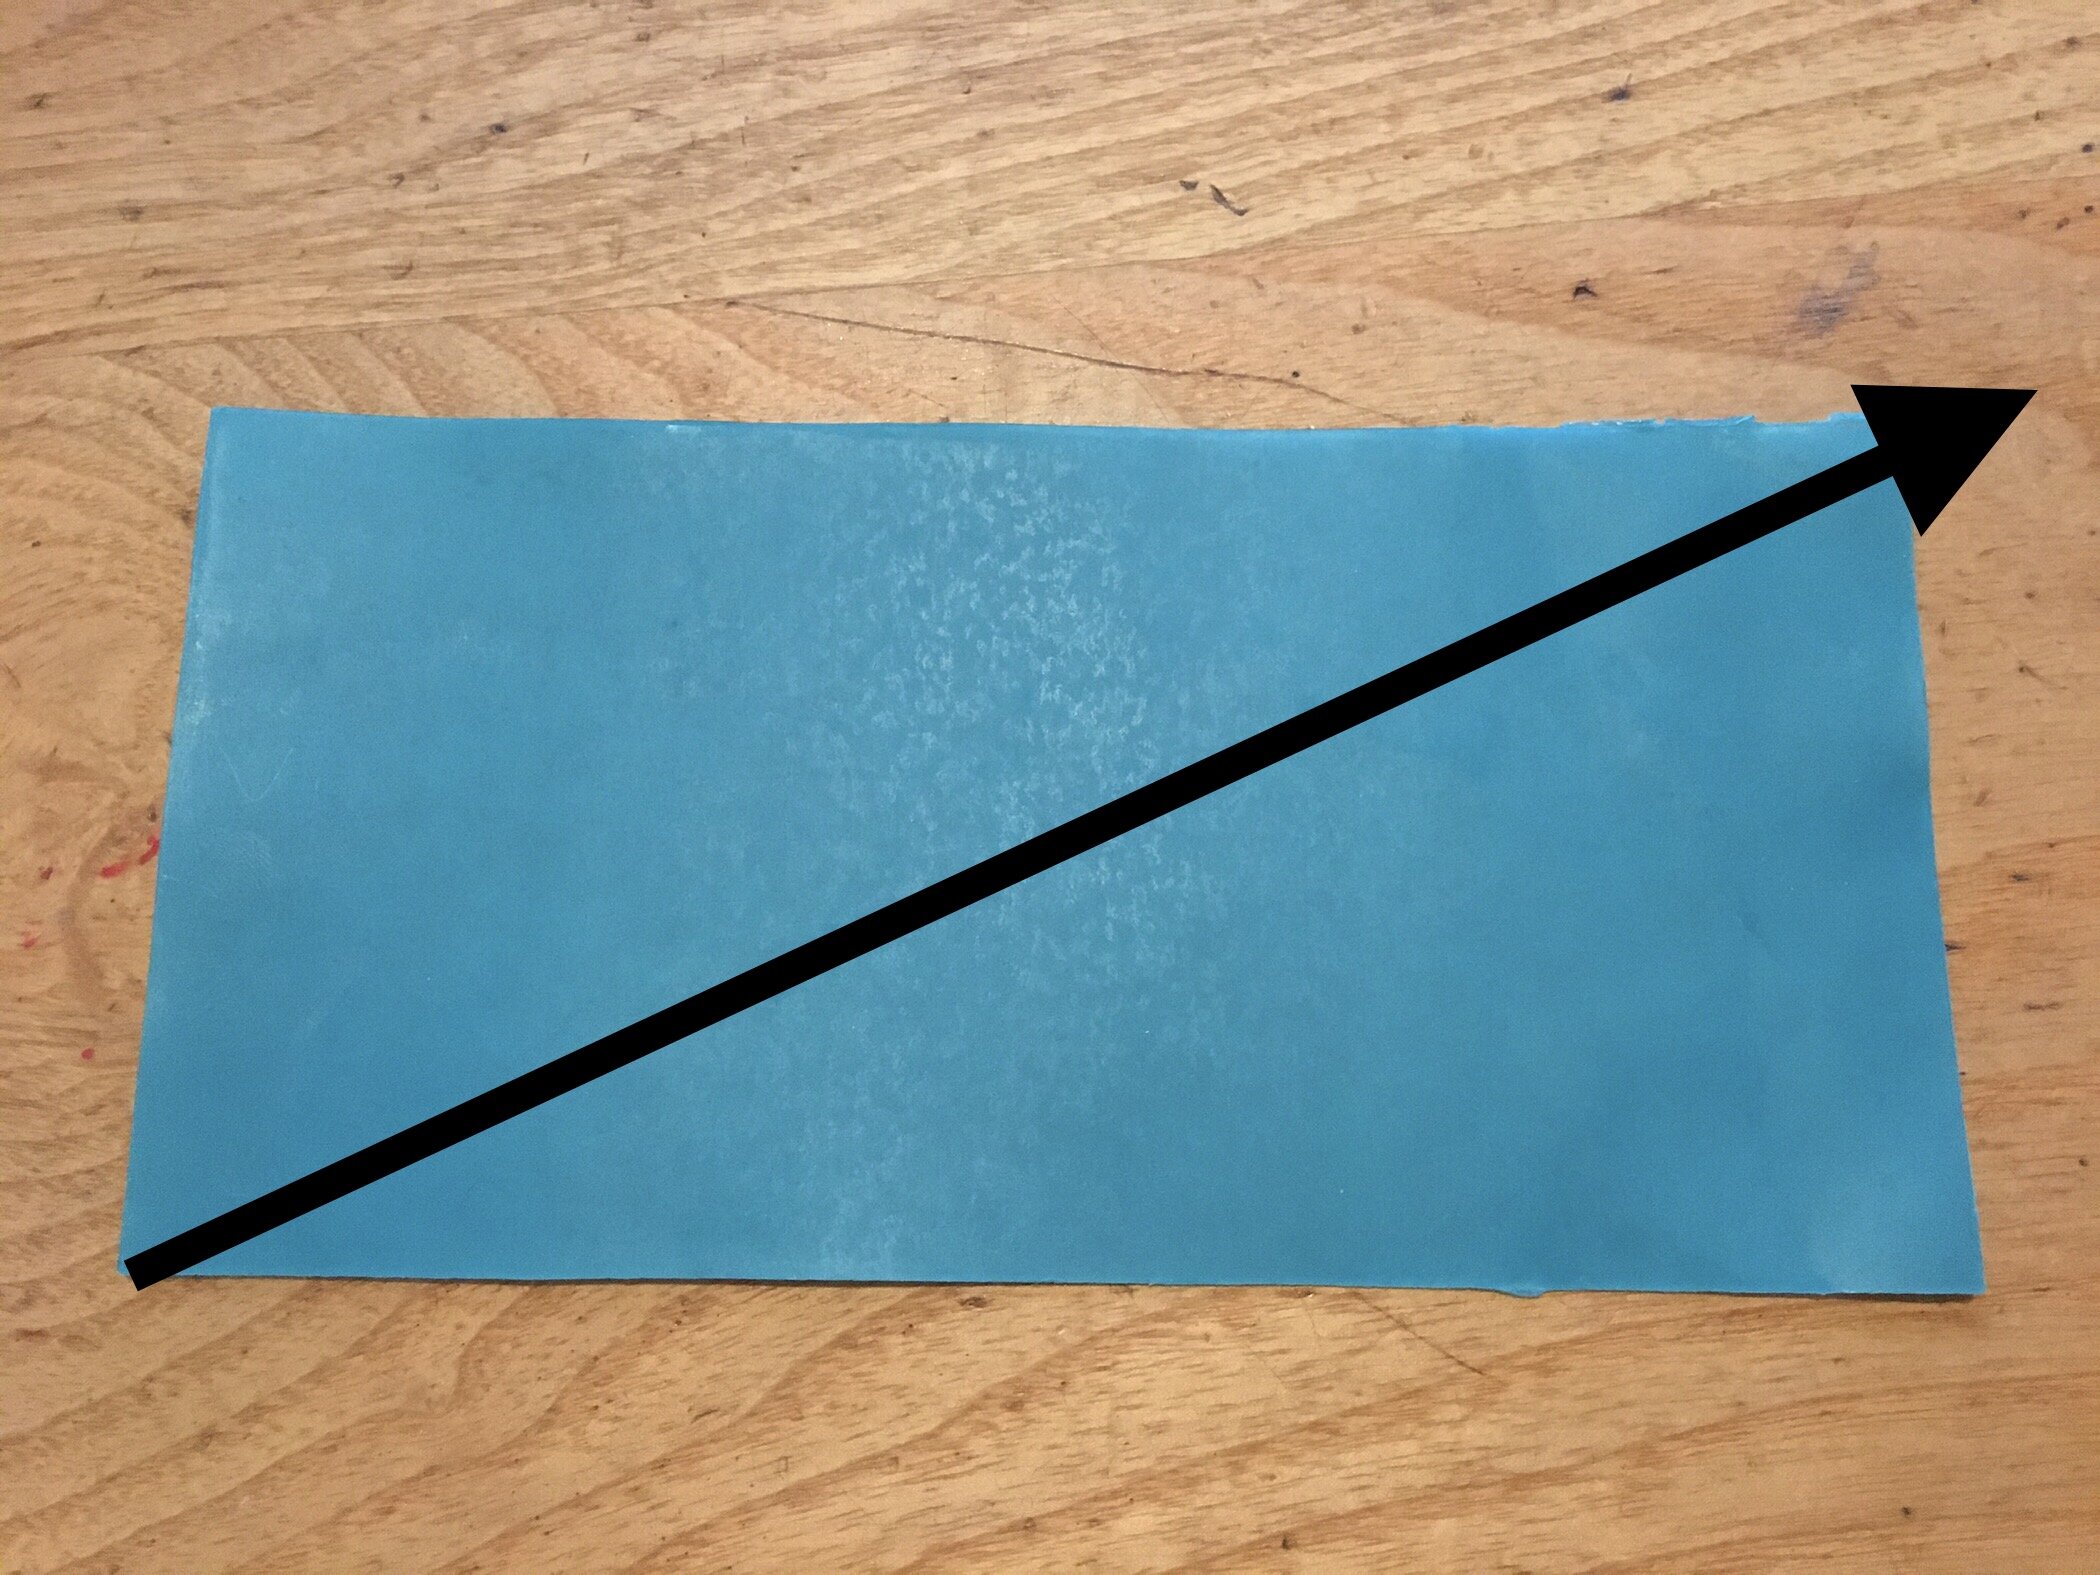
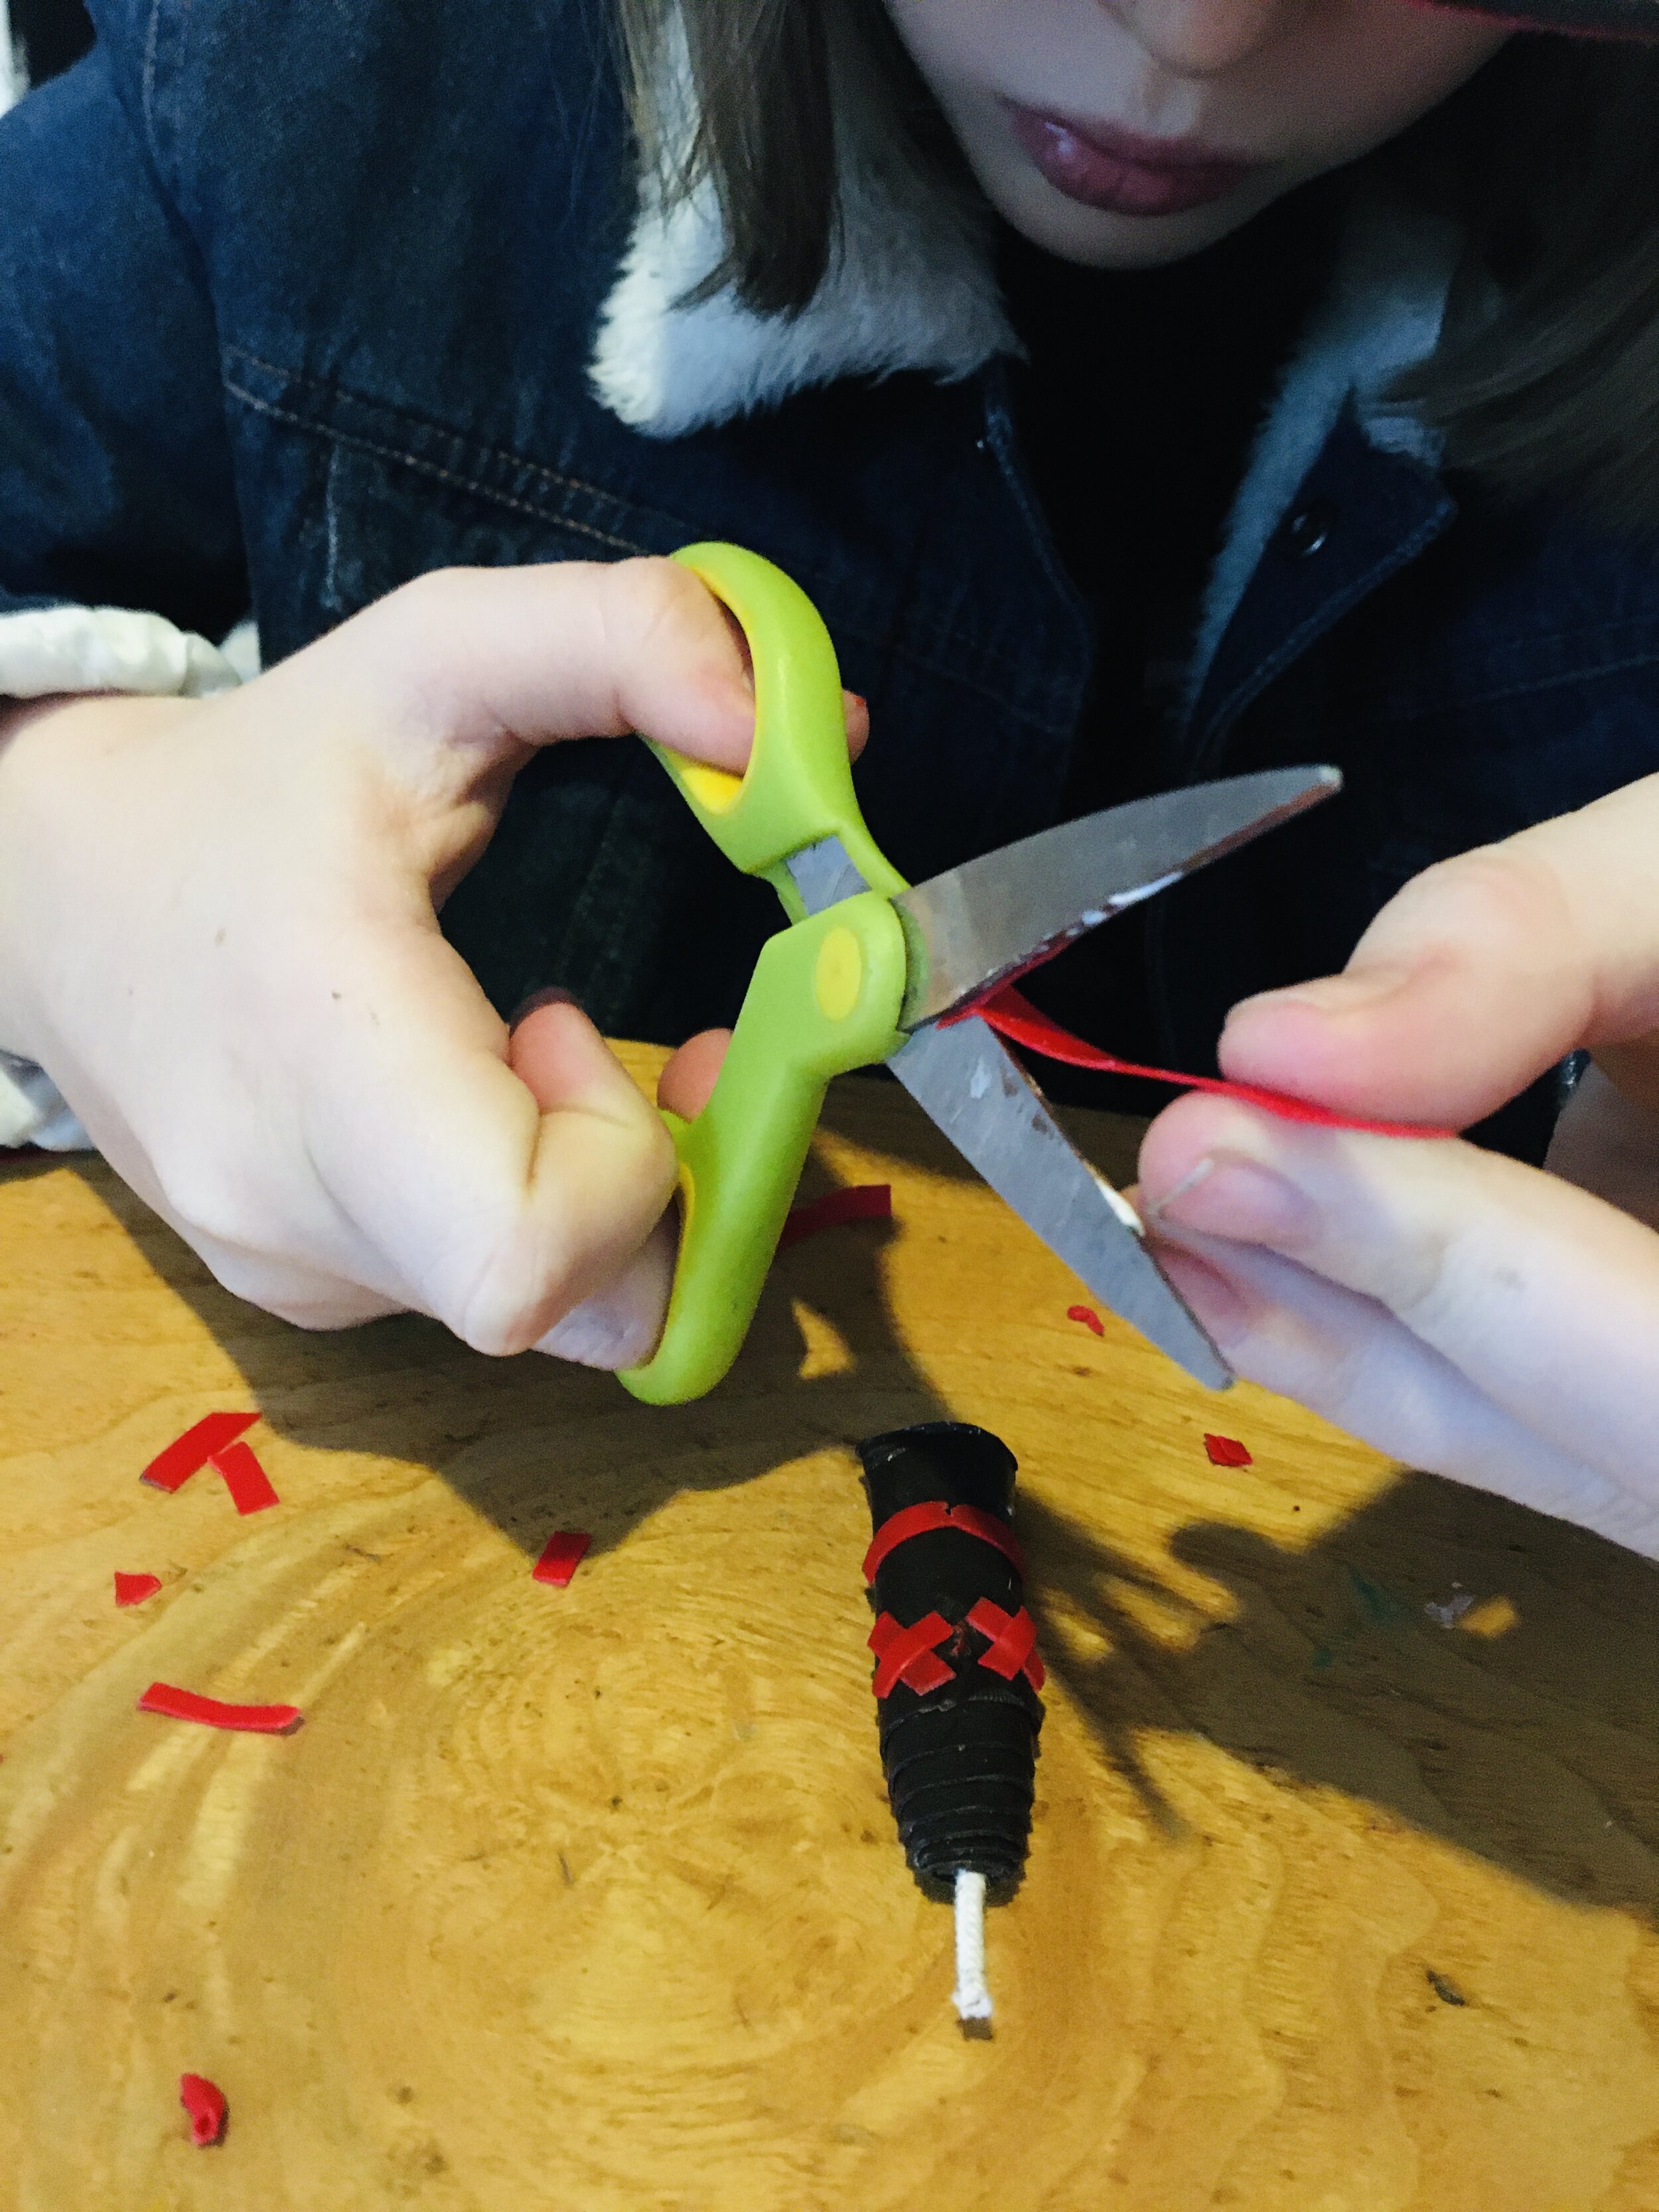
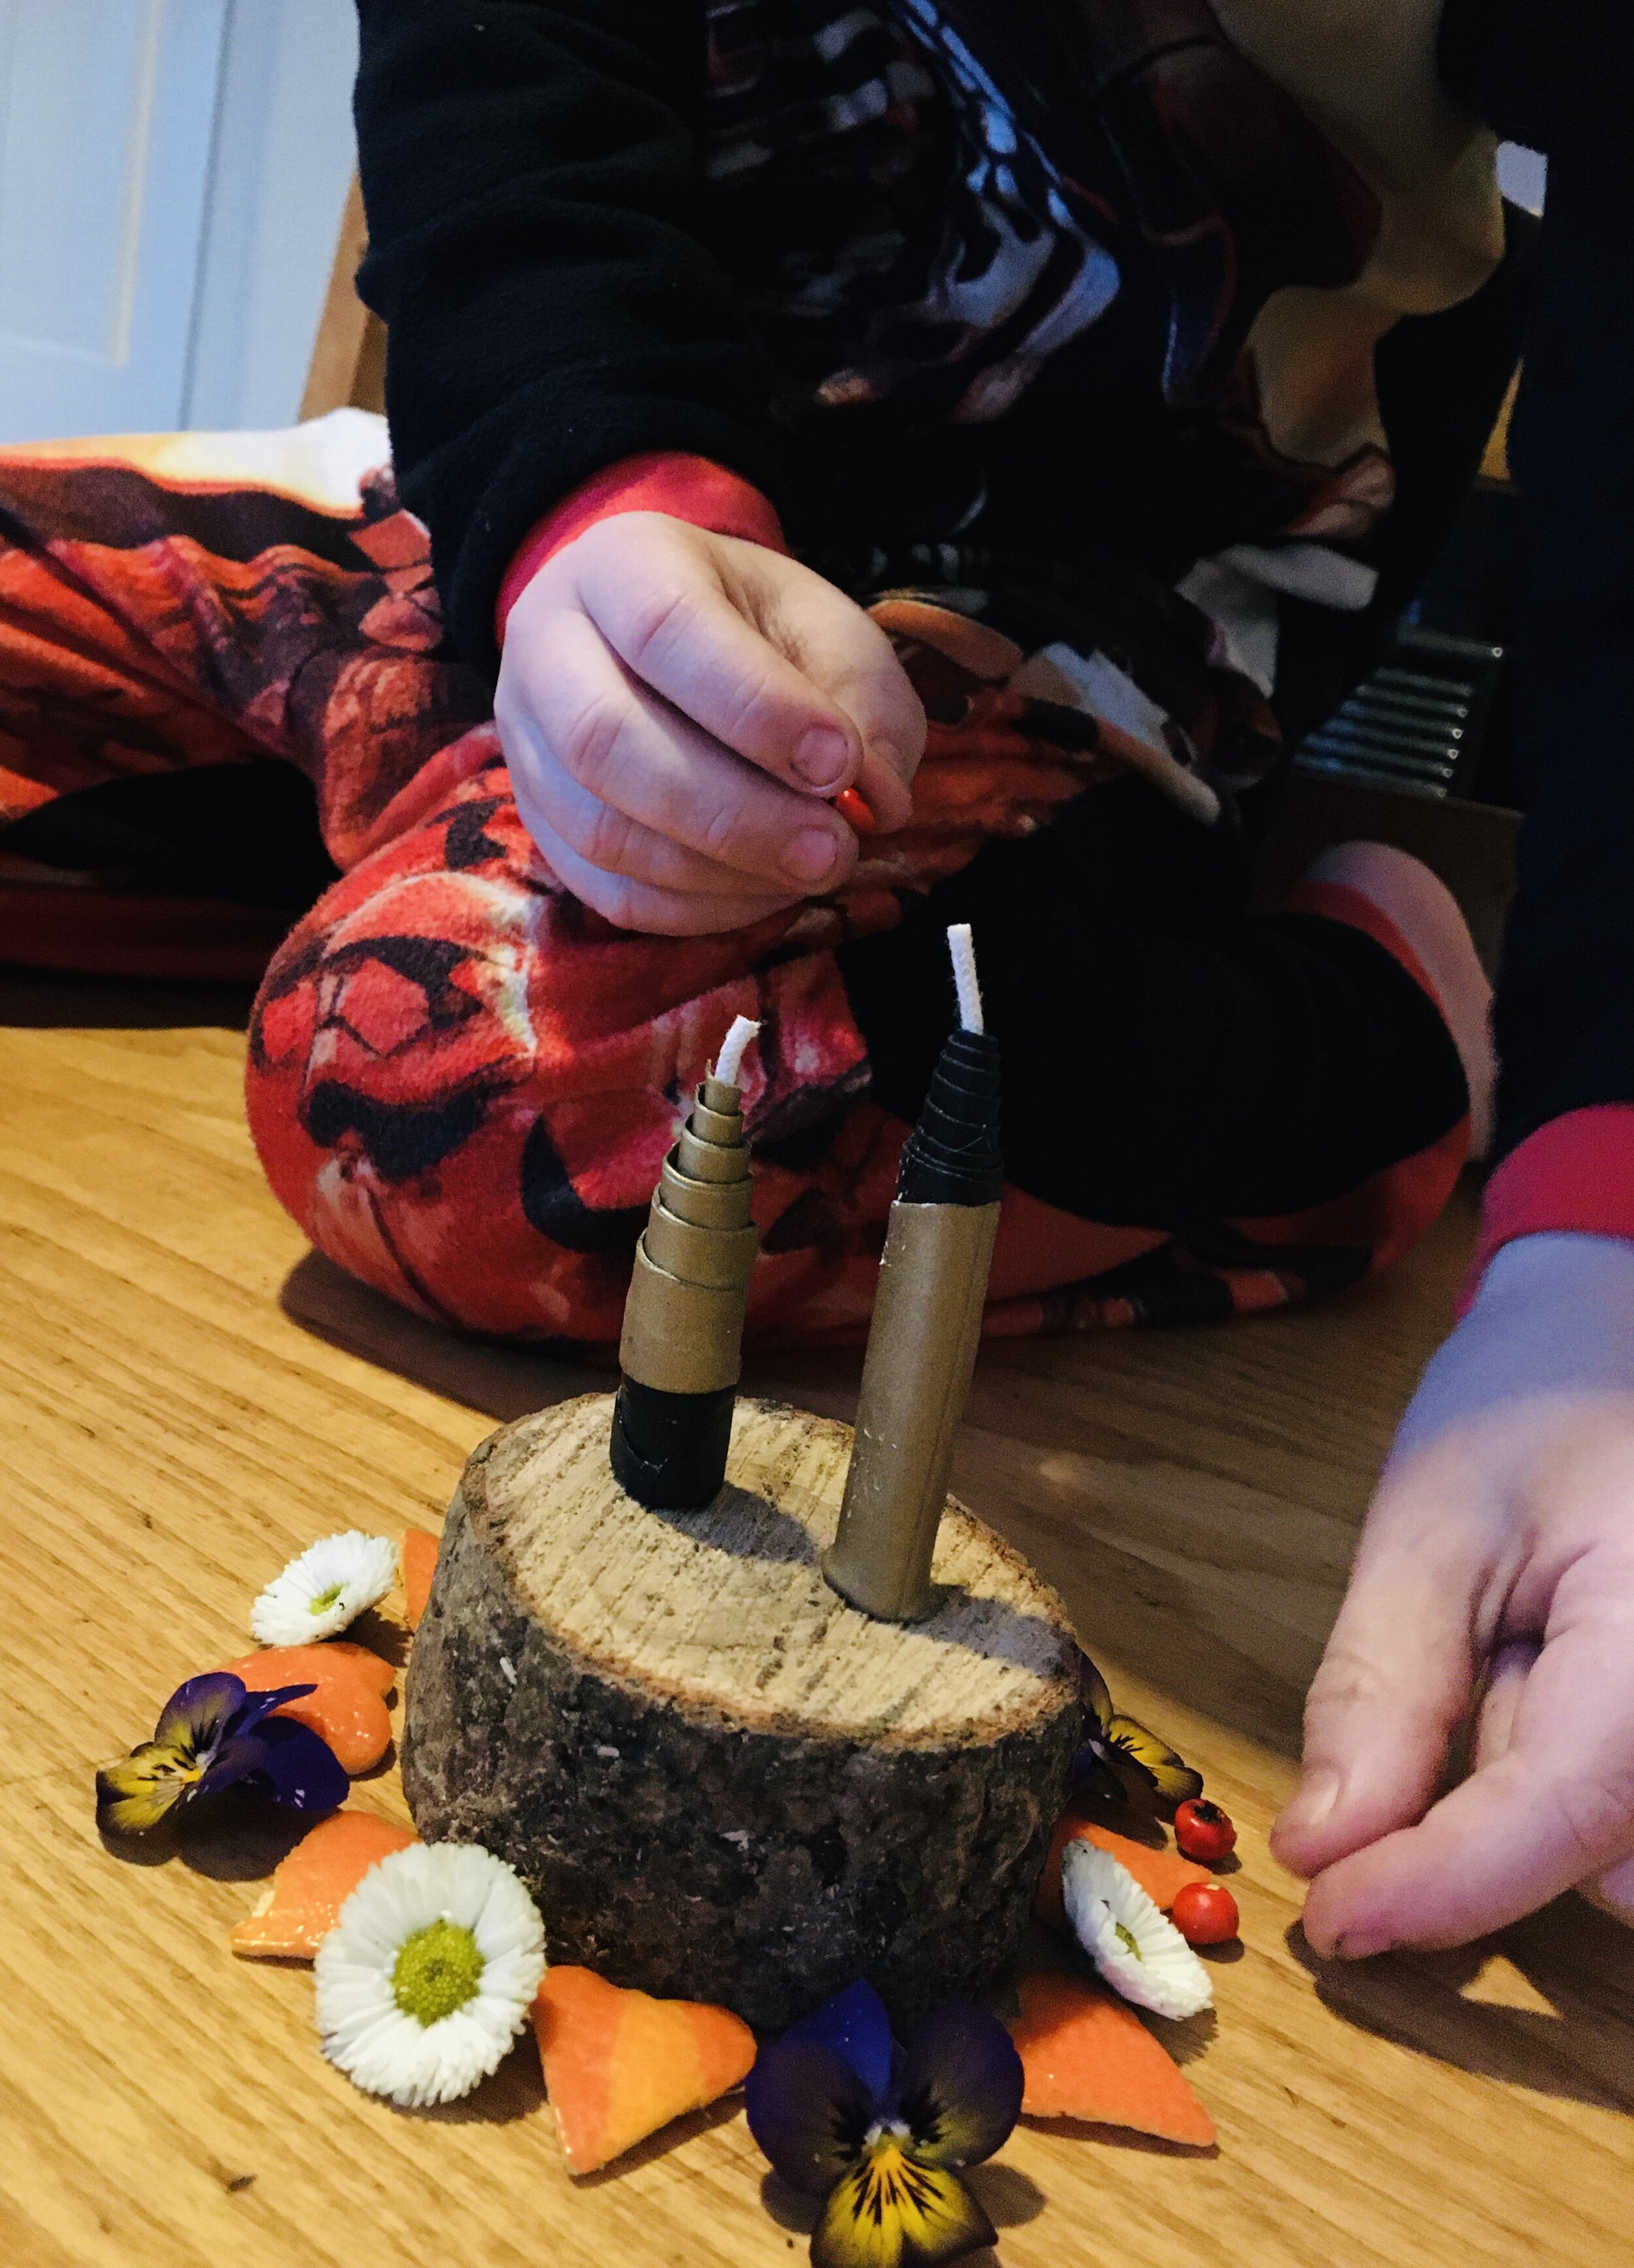
The pack contains two sheets of wax in two colours. One sheet is 5cm wide and the other is 10cm wide. You can chose to make a 5cm tall candle and a 10cm tall candle by leaving the sheets whole. You could choose to cut the 10cm sheet in two horizontally and make three 5cm tall candles. Alternatively you could cut the 10cm sheet into two triangles and make two 10cm tall waterfall effect candles as pictured above.
Once the wax is ready you take the wick and lay it across the width of the wax close to the edge. Fold the wax over the wick and push it down around it. Warm hands will make the wax pliable.
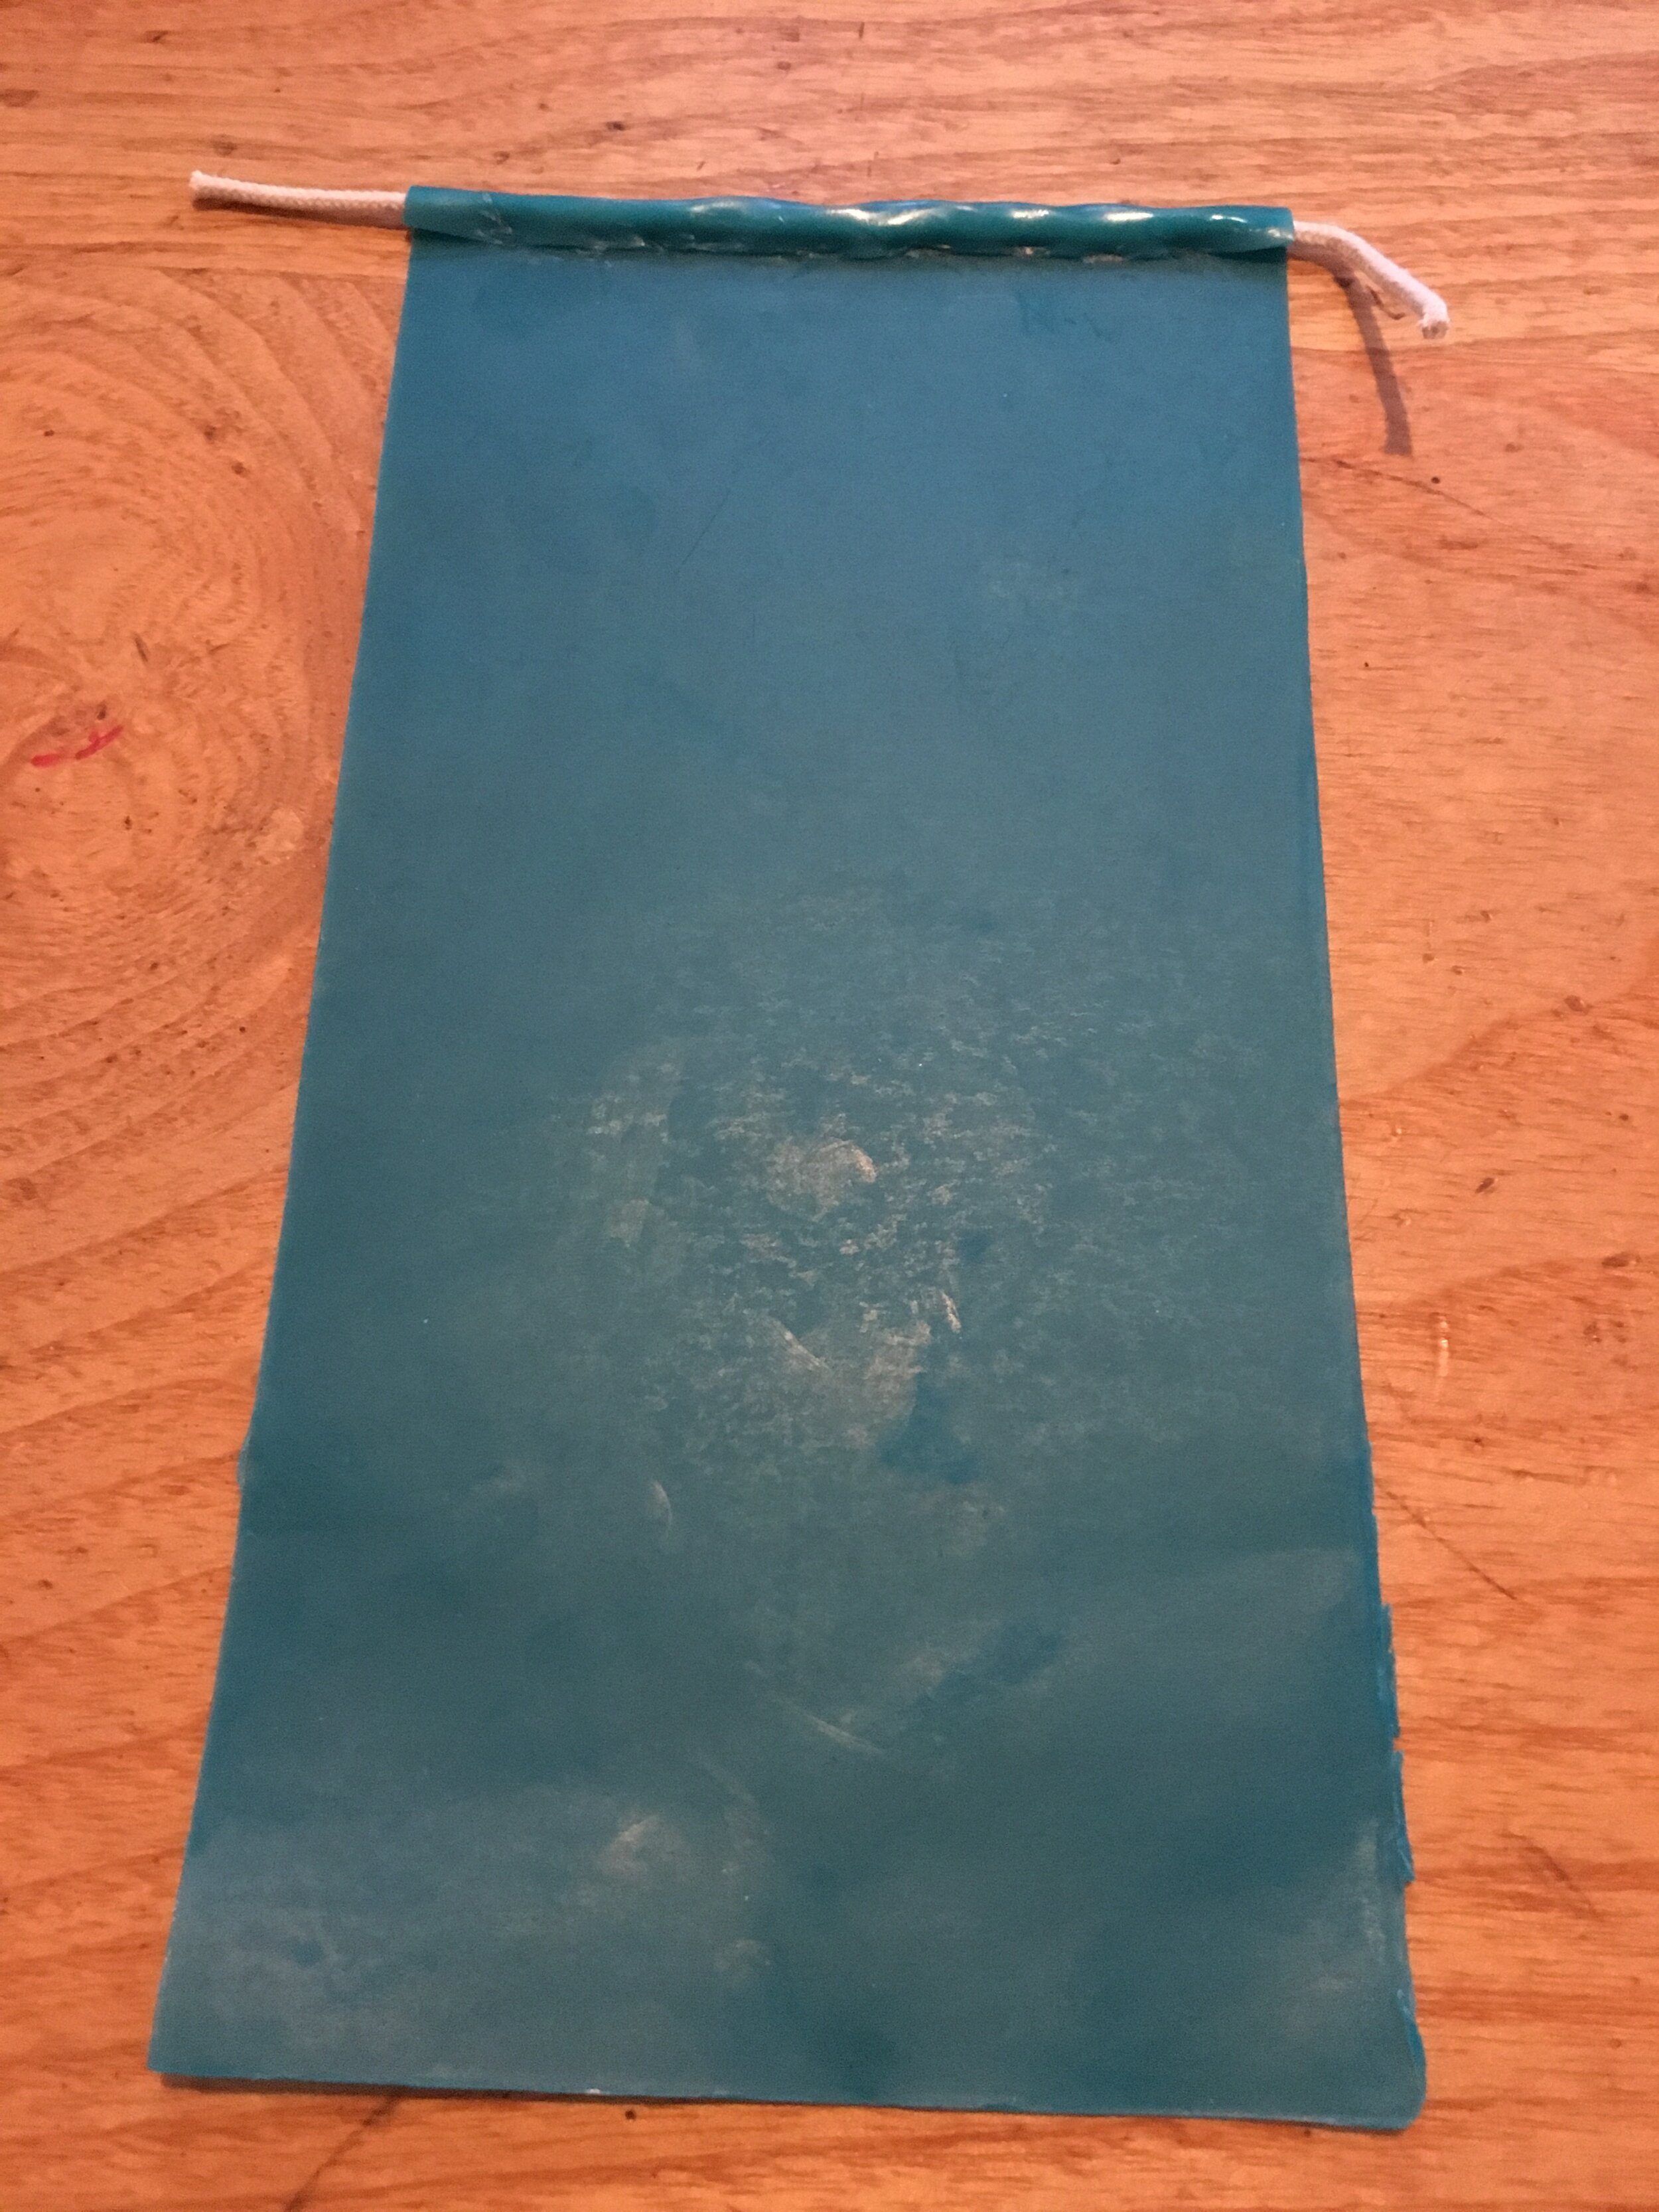
The wick can then be rolled so the wax wraps around it. The wick is then cut off at the bottom and trimmed at the top to finish off the candle.
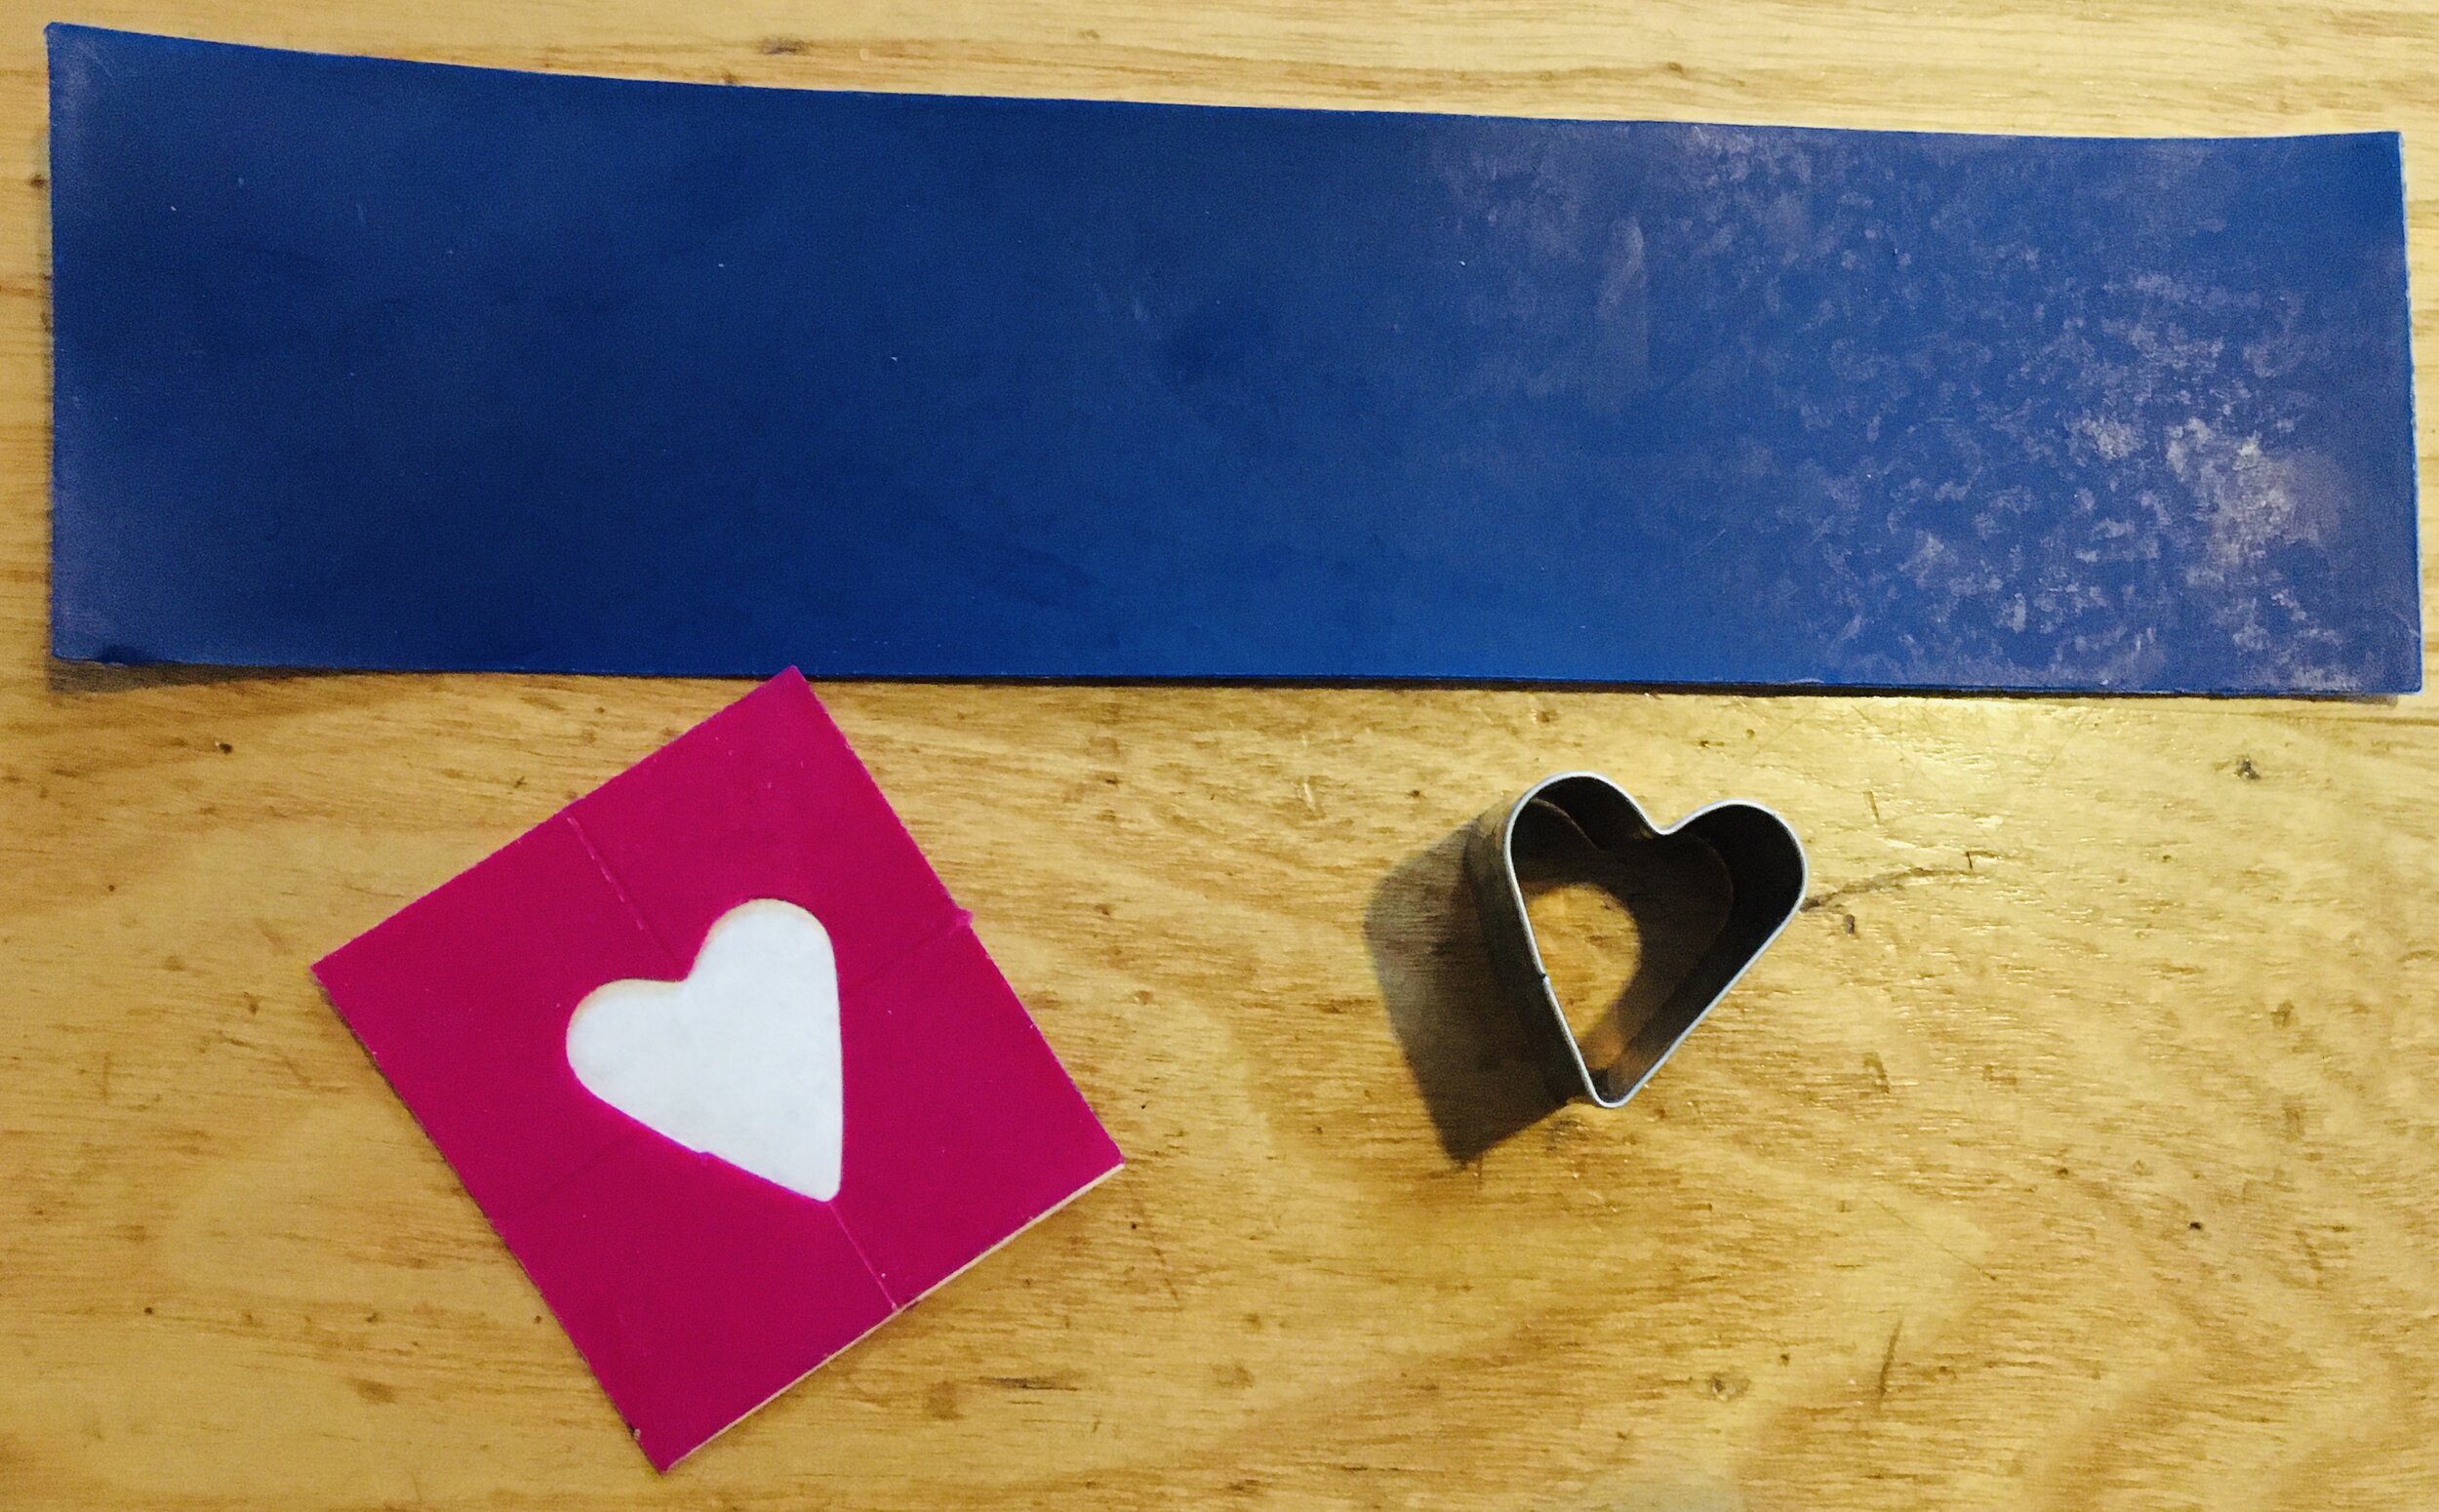
You could choose to reserve some of the wax for decorating the candles. We found small cookie cutters worked well on the wax. We cut out shapes and used warm hands to attach them to the main candle. It is also possible to use scissors to cut out shapes.
Once the candles are finished you could seek out something natural to stand them on. A flat pebble, a log or a piece of bark would do the job.
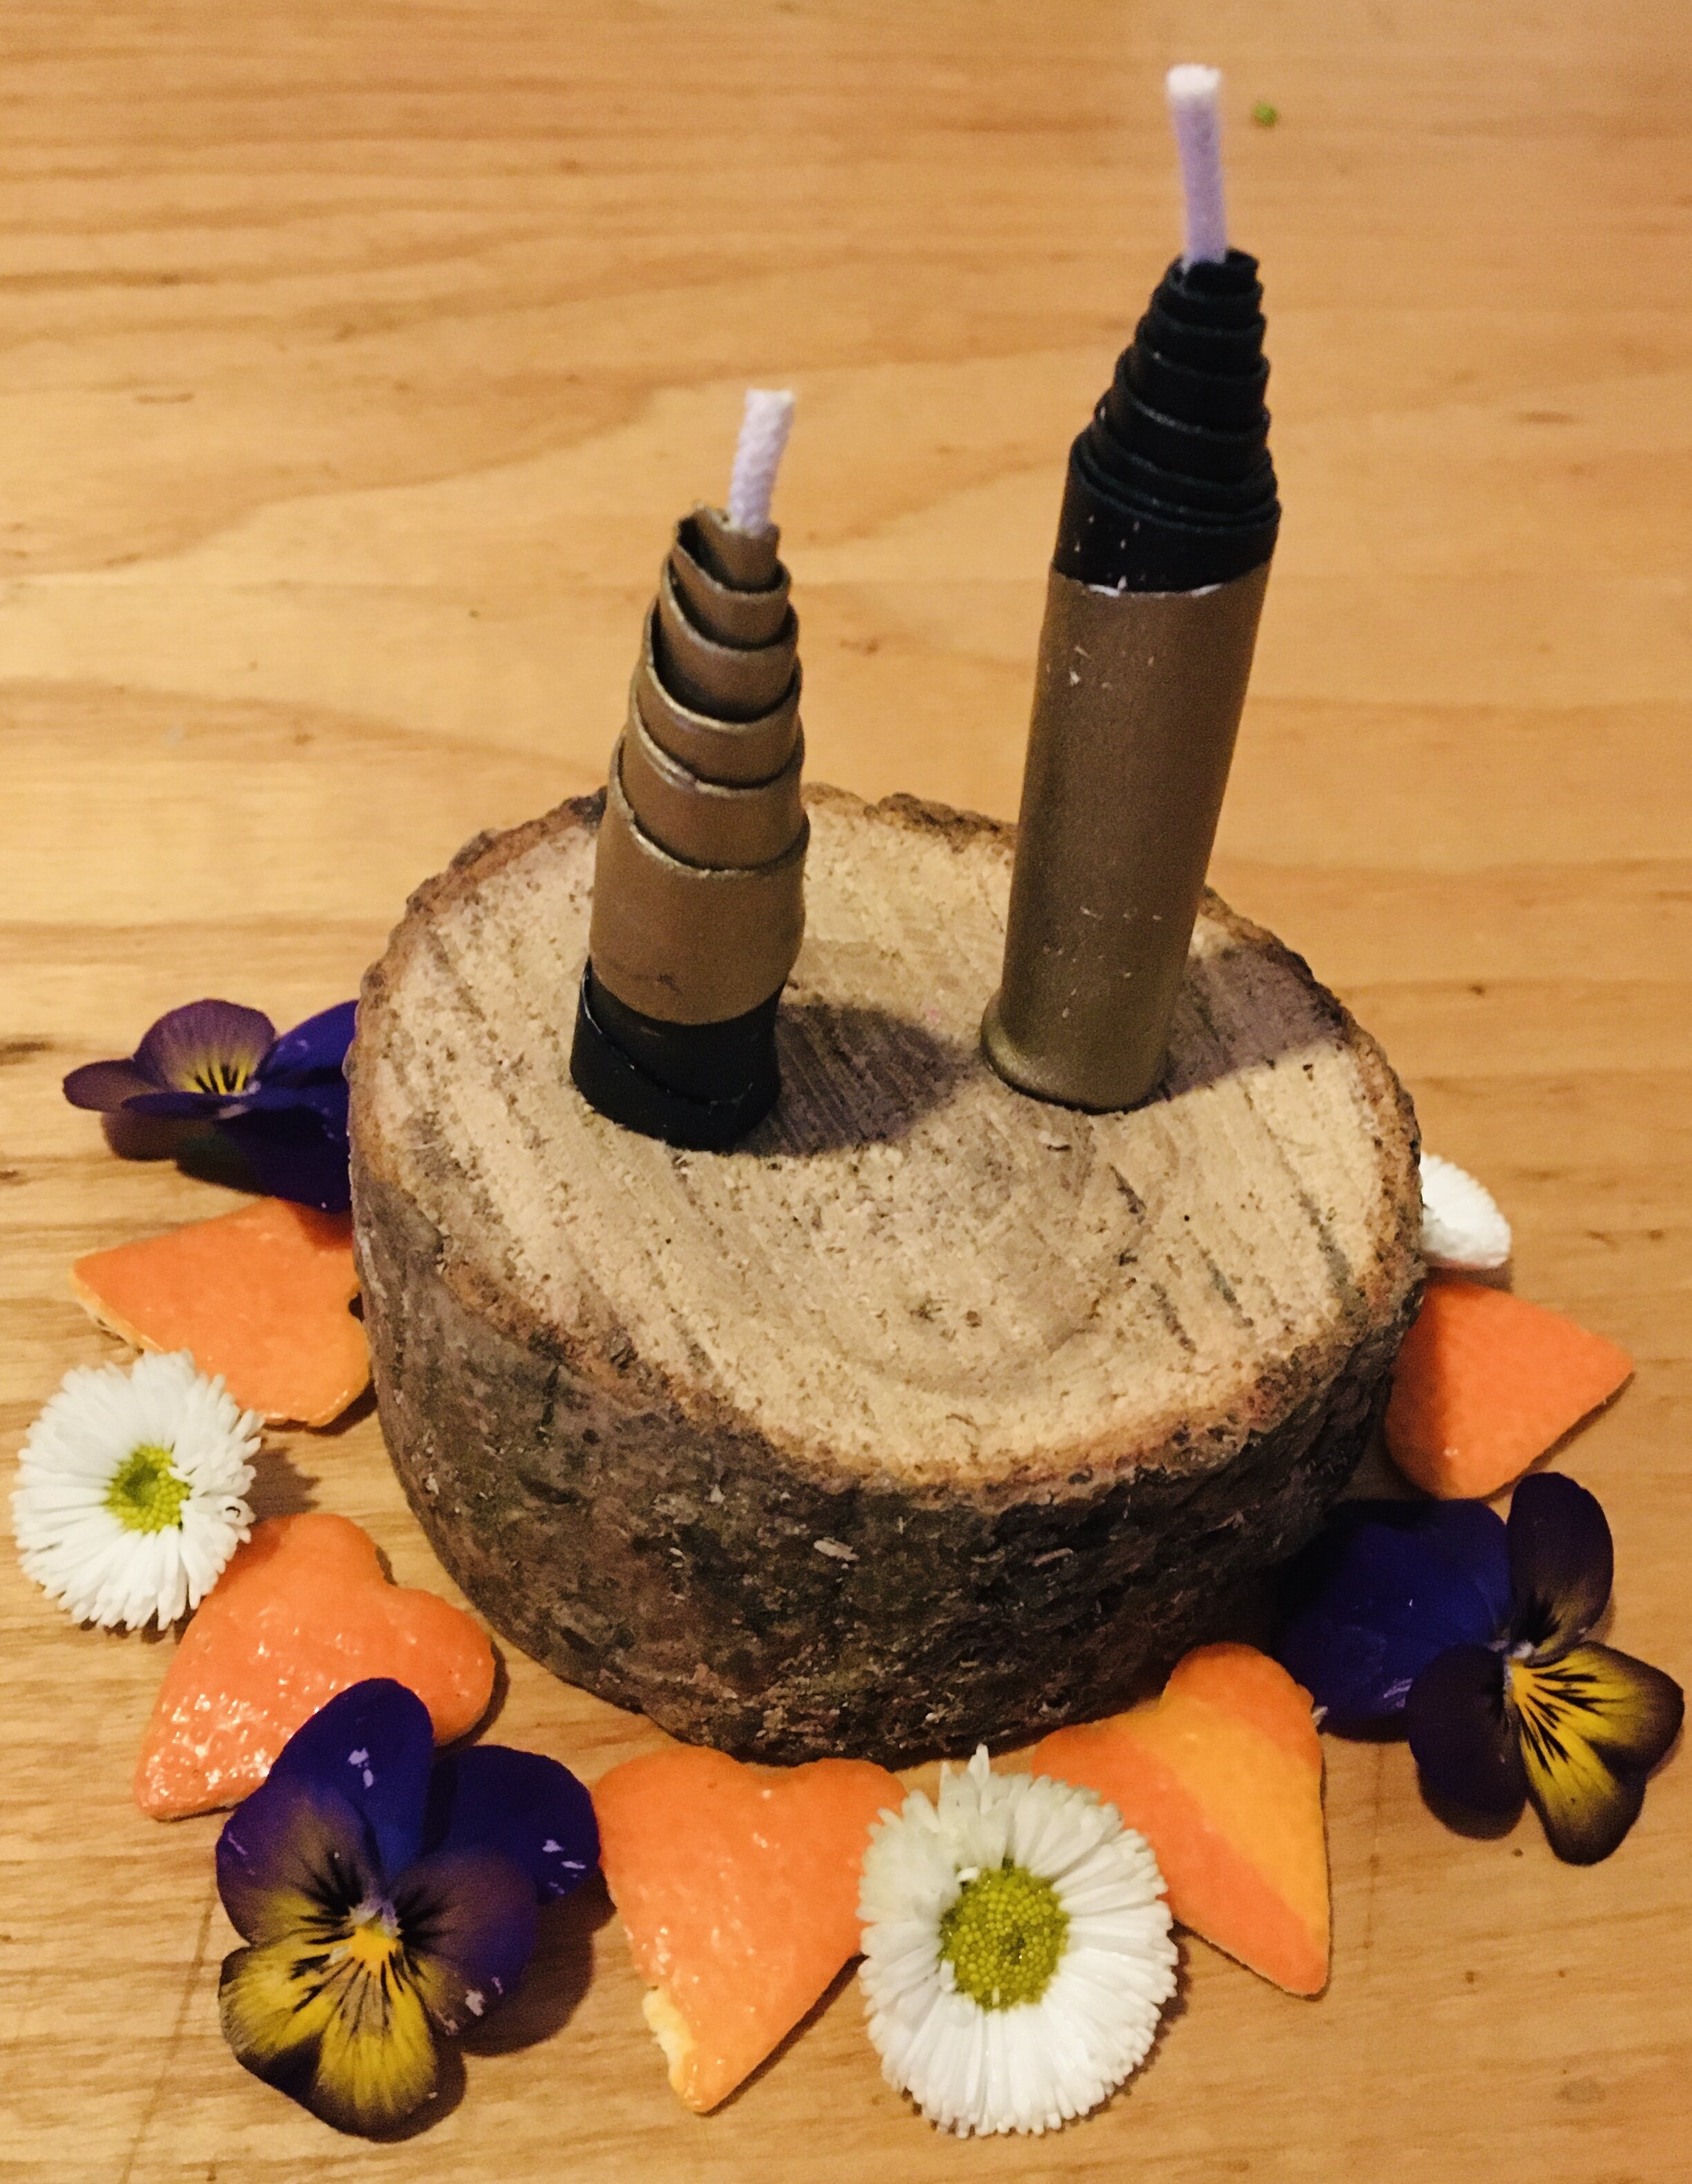
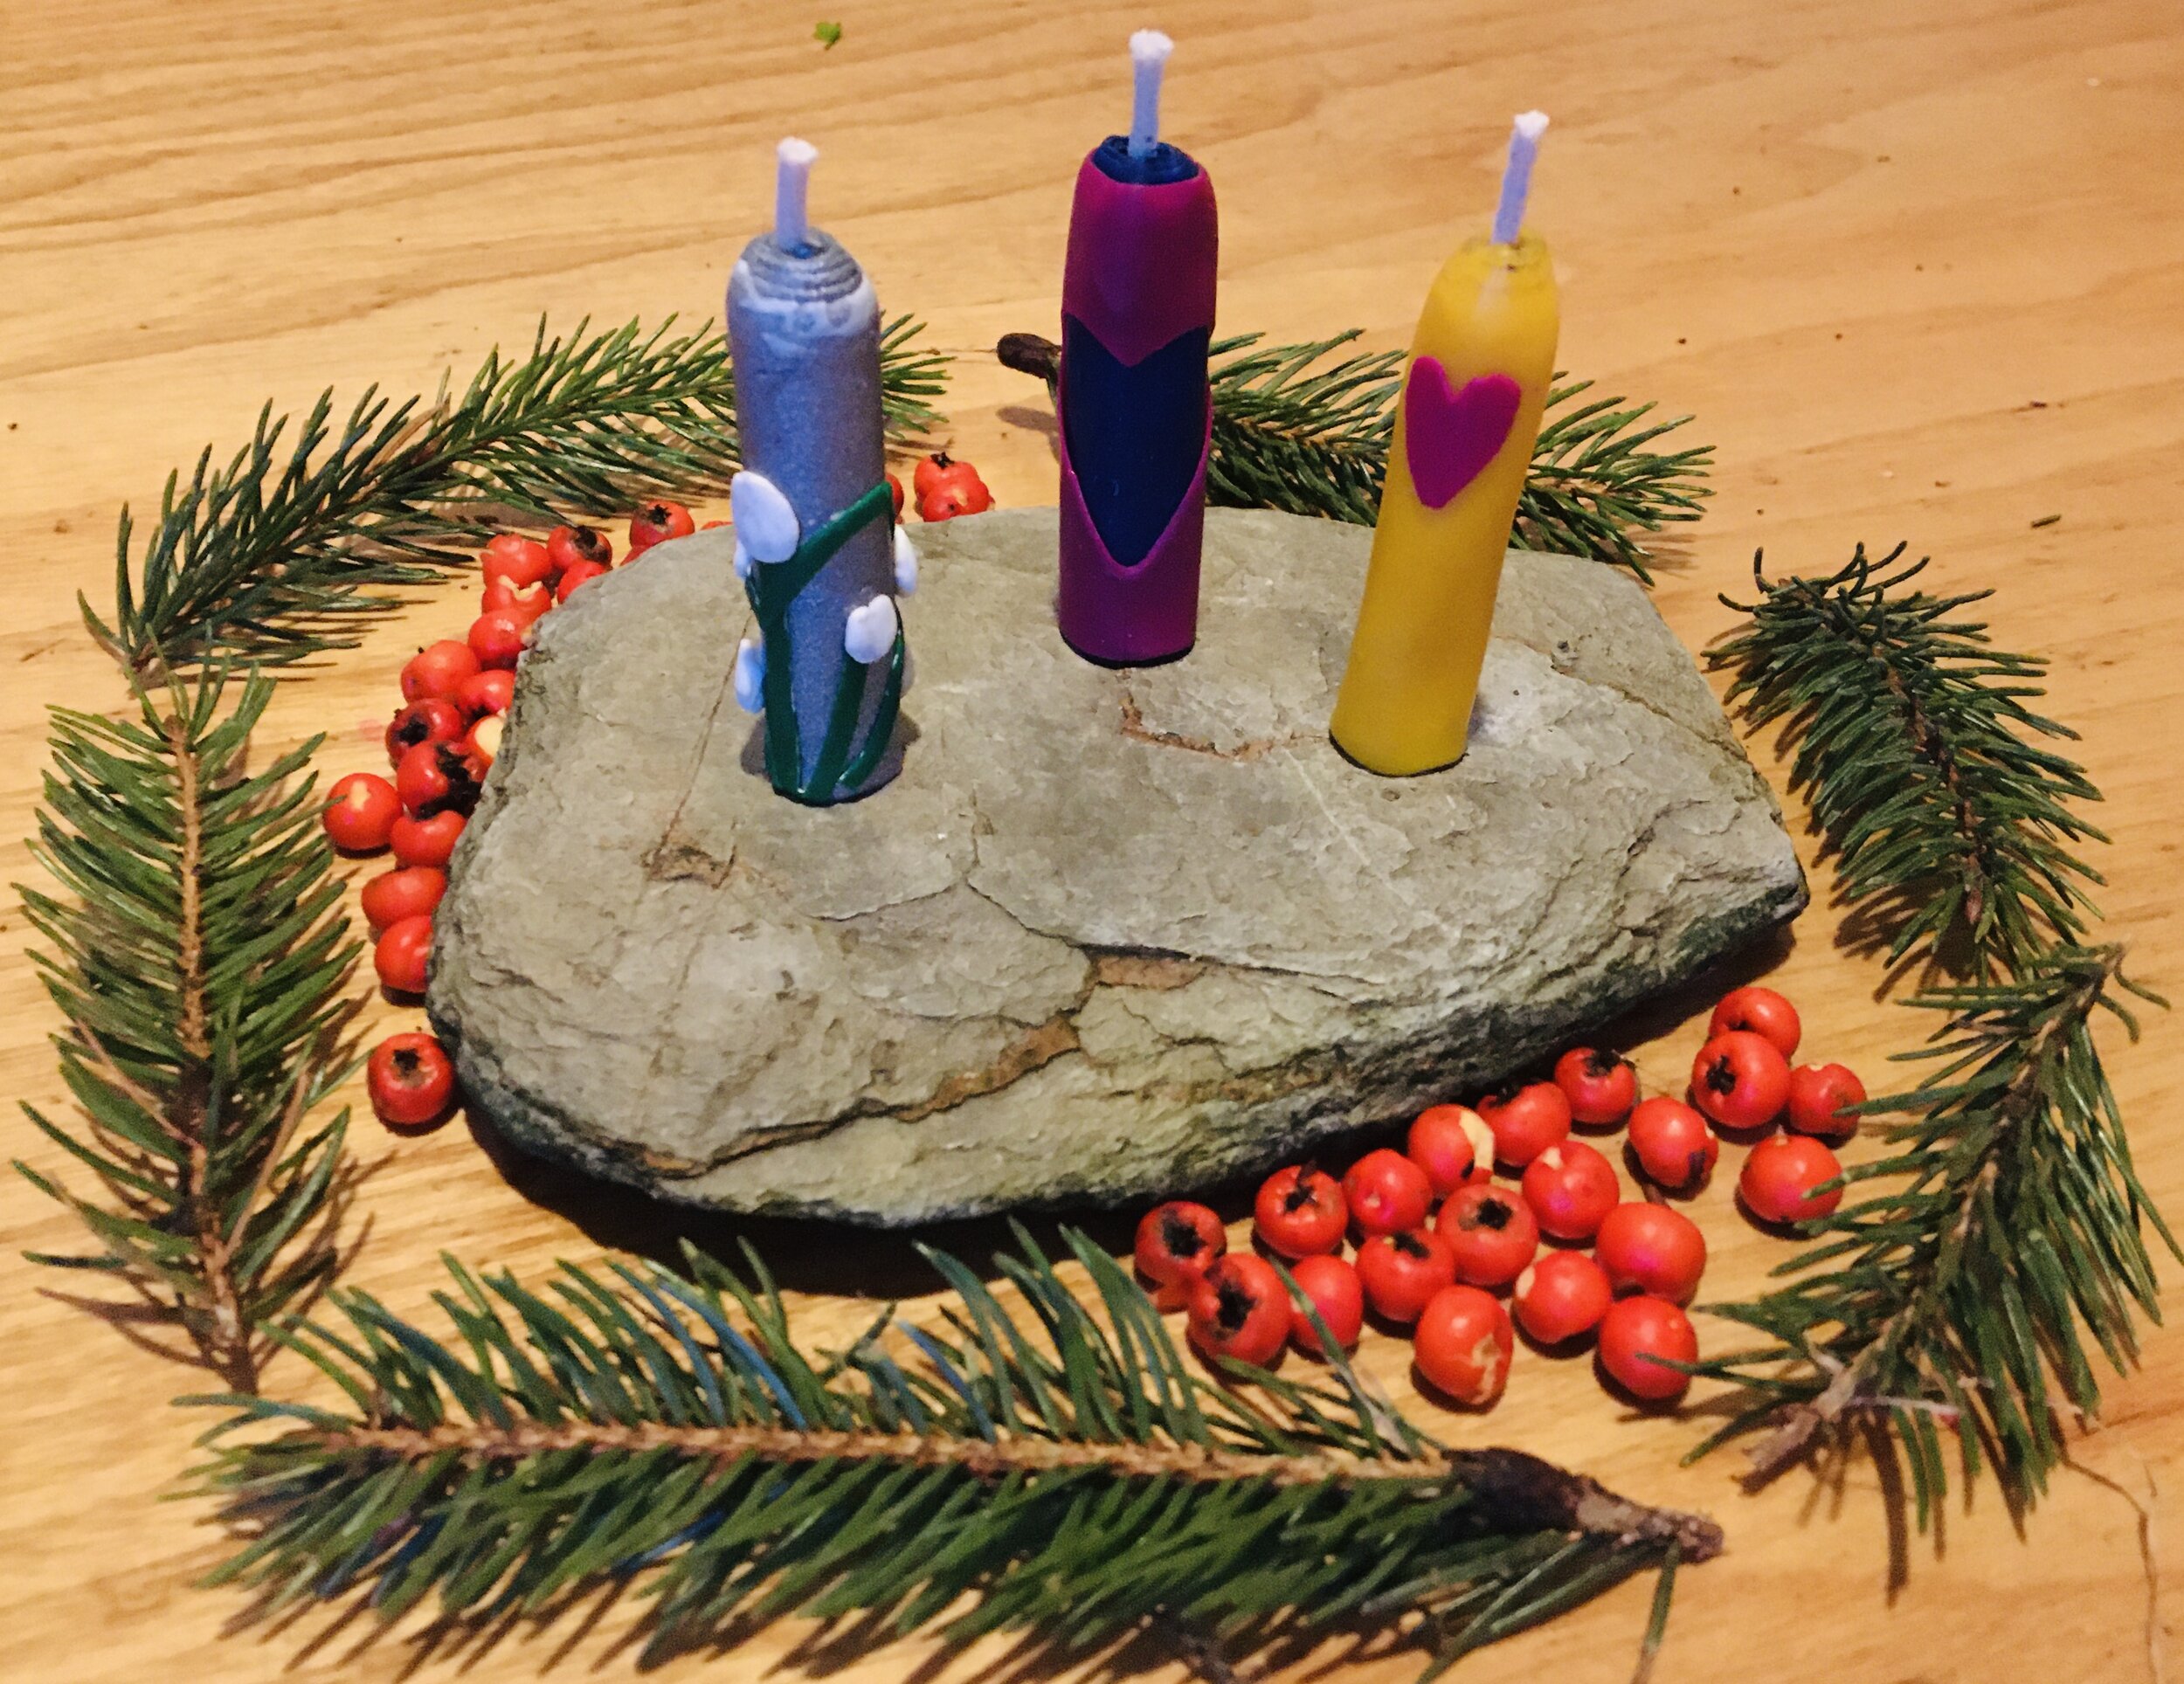
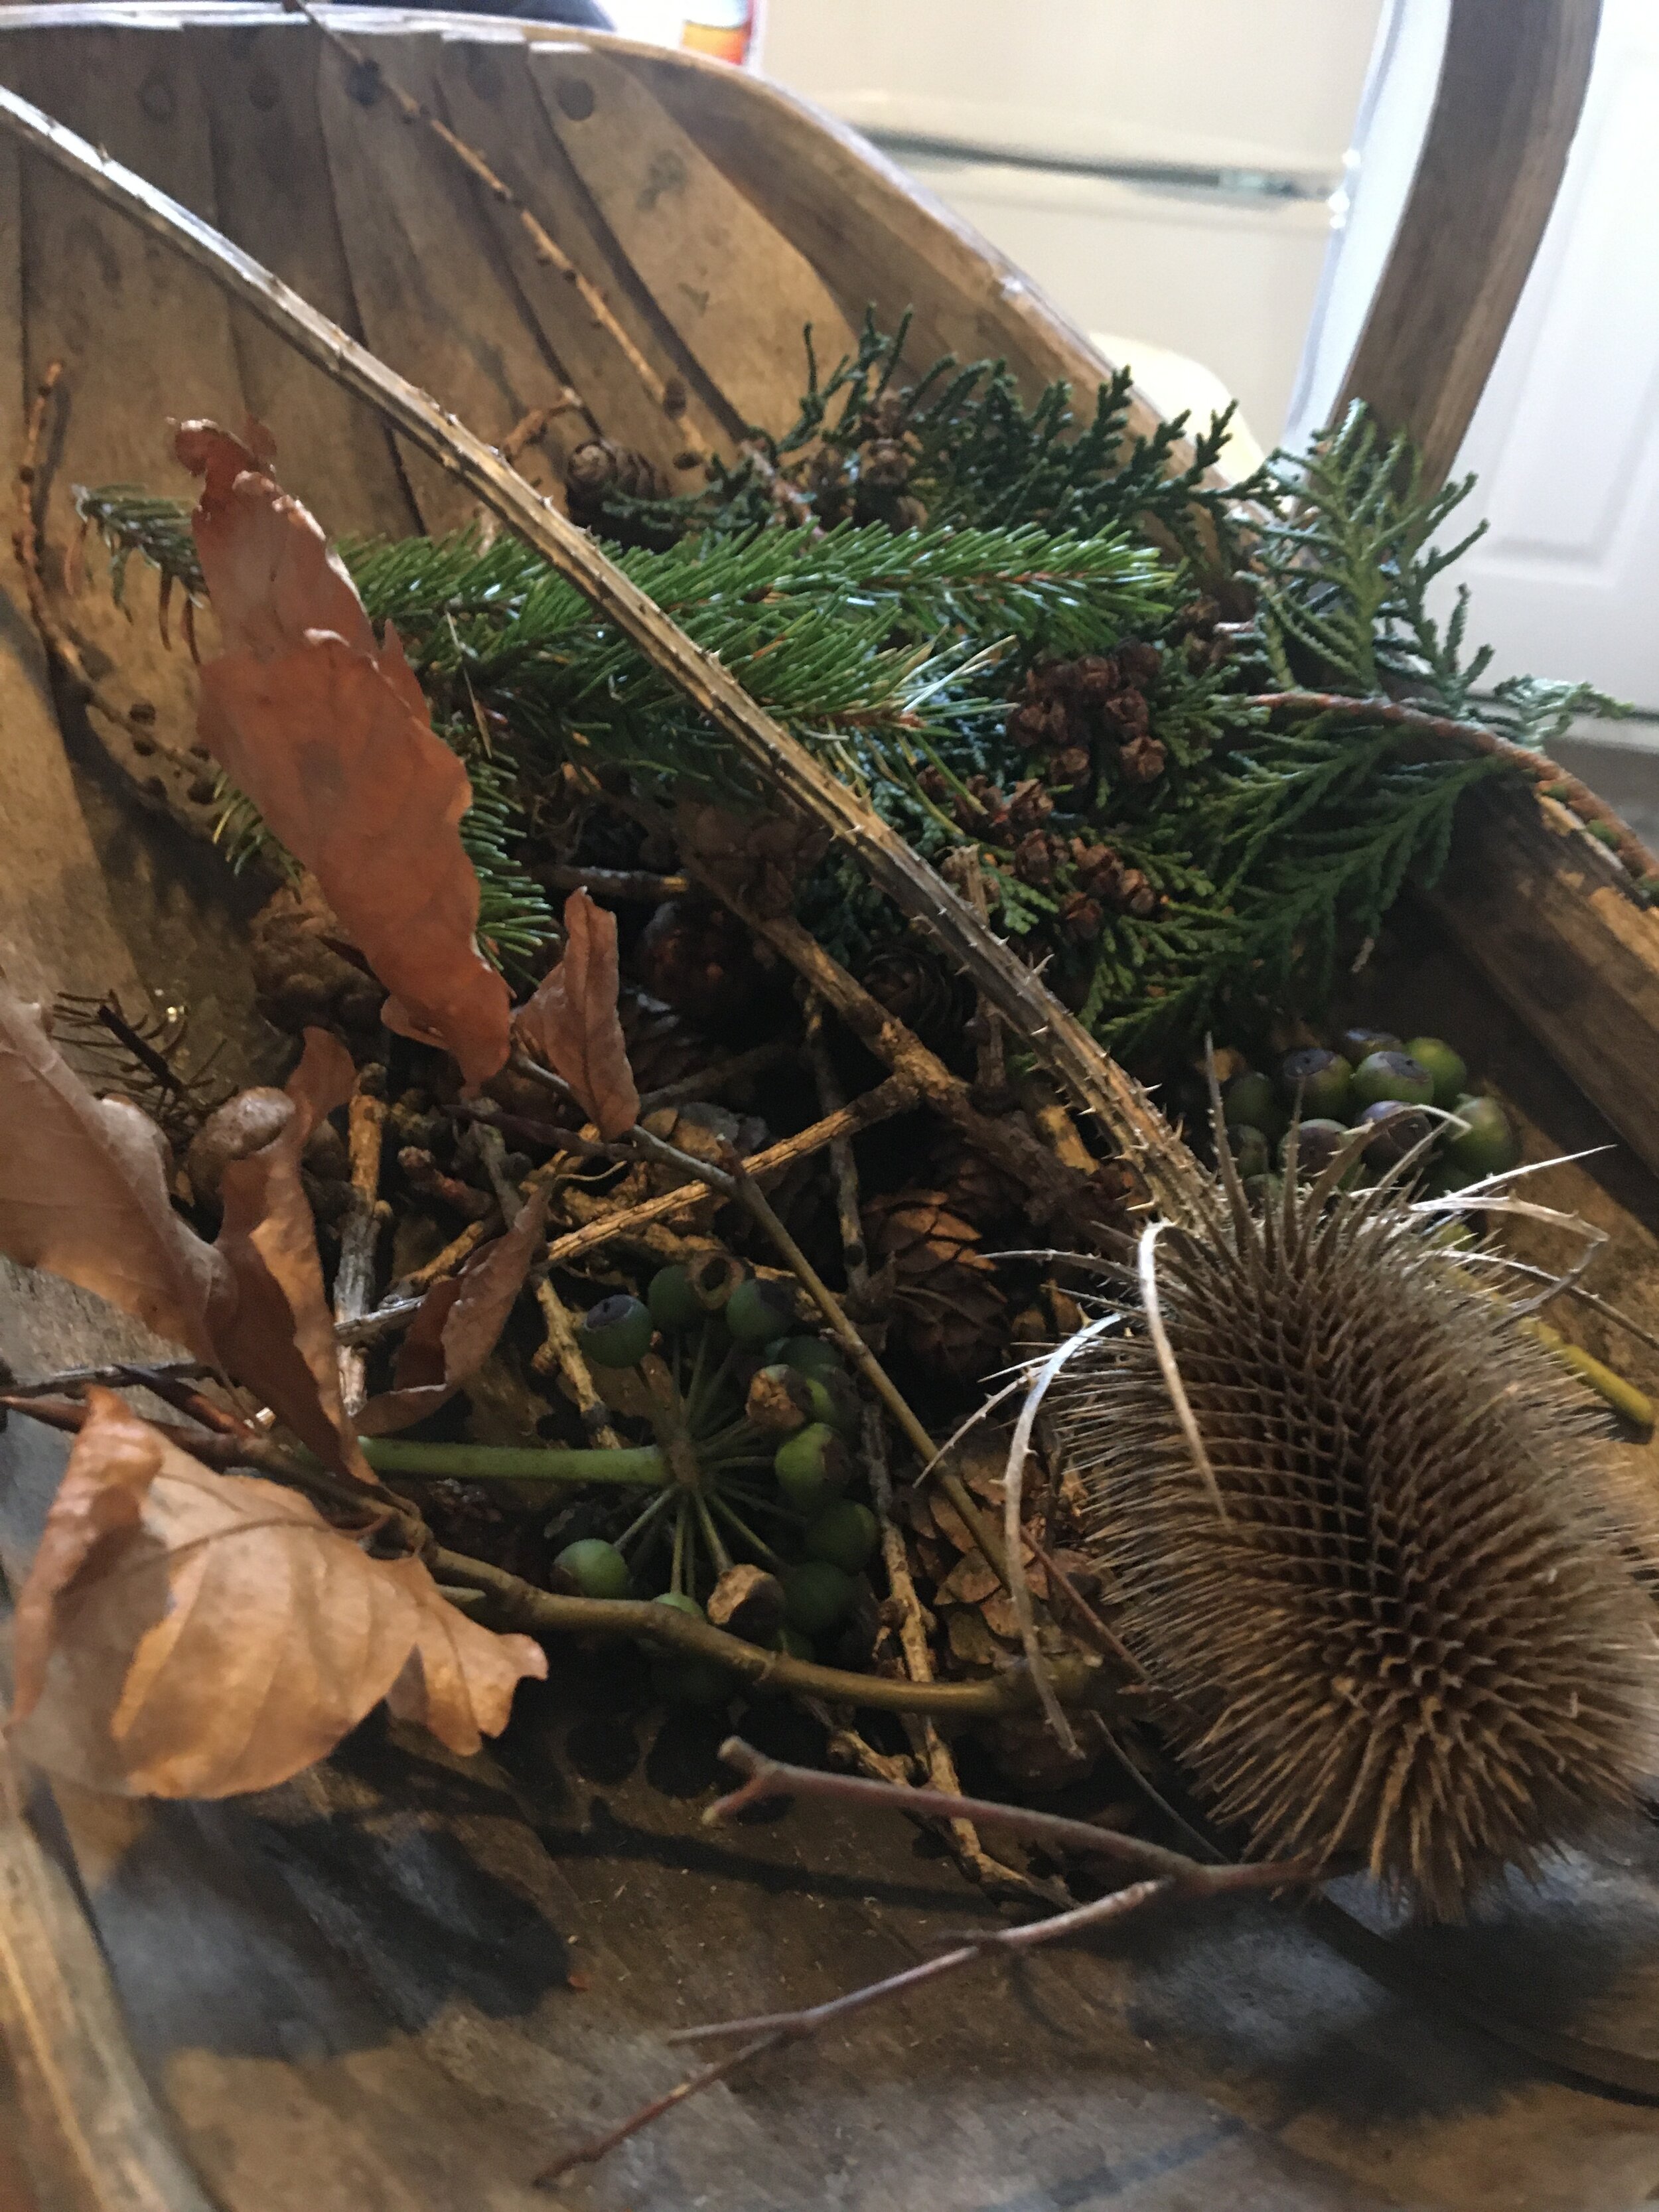
You could then collect things from the house, garden or on a walk to decorate around the candles.

We really enjoyed doing this activity and finished it off by lighting the candles and having a go at toasting some mini marshmallow over the flames. We have included some in the January pack so you can try this too. Be warned though they do catch fire VERY easily!

Even on a good year January, is a month to spend time at home and look after ourselves and each other. Usually around this time we extend our love and kindness to our feathered friends and pay special attention to the garden birds. Putting out food regularly and making sure there is a source of clean water that hasn’t turned to ice, can keep us connected to nature when we might prefer to be indoors.
The birds usually repay us by keeping us entertained as we watch them from the window. Putting out a variety of food and types of feeders can increase the diversity of birds you attract to your garden and thus increasing the fun!
With that in mind we have shared five different types of bird feeders you can make at home. Most of the resources to make these are contained in our January Care Package or can be obtained easily.

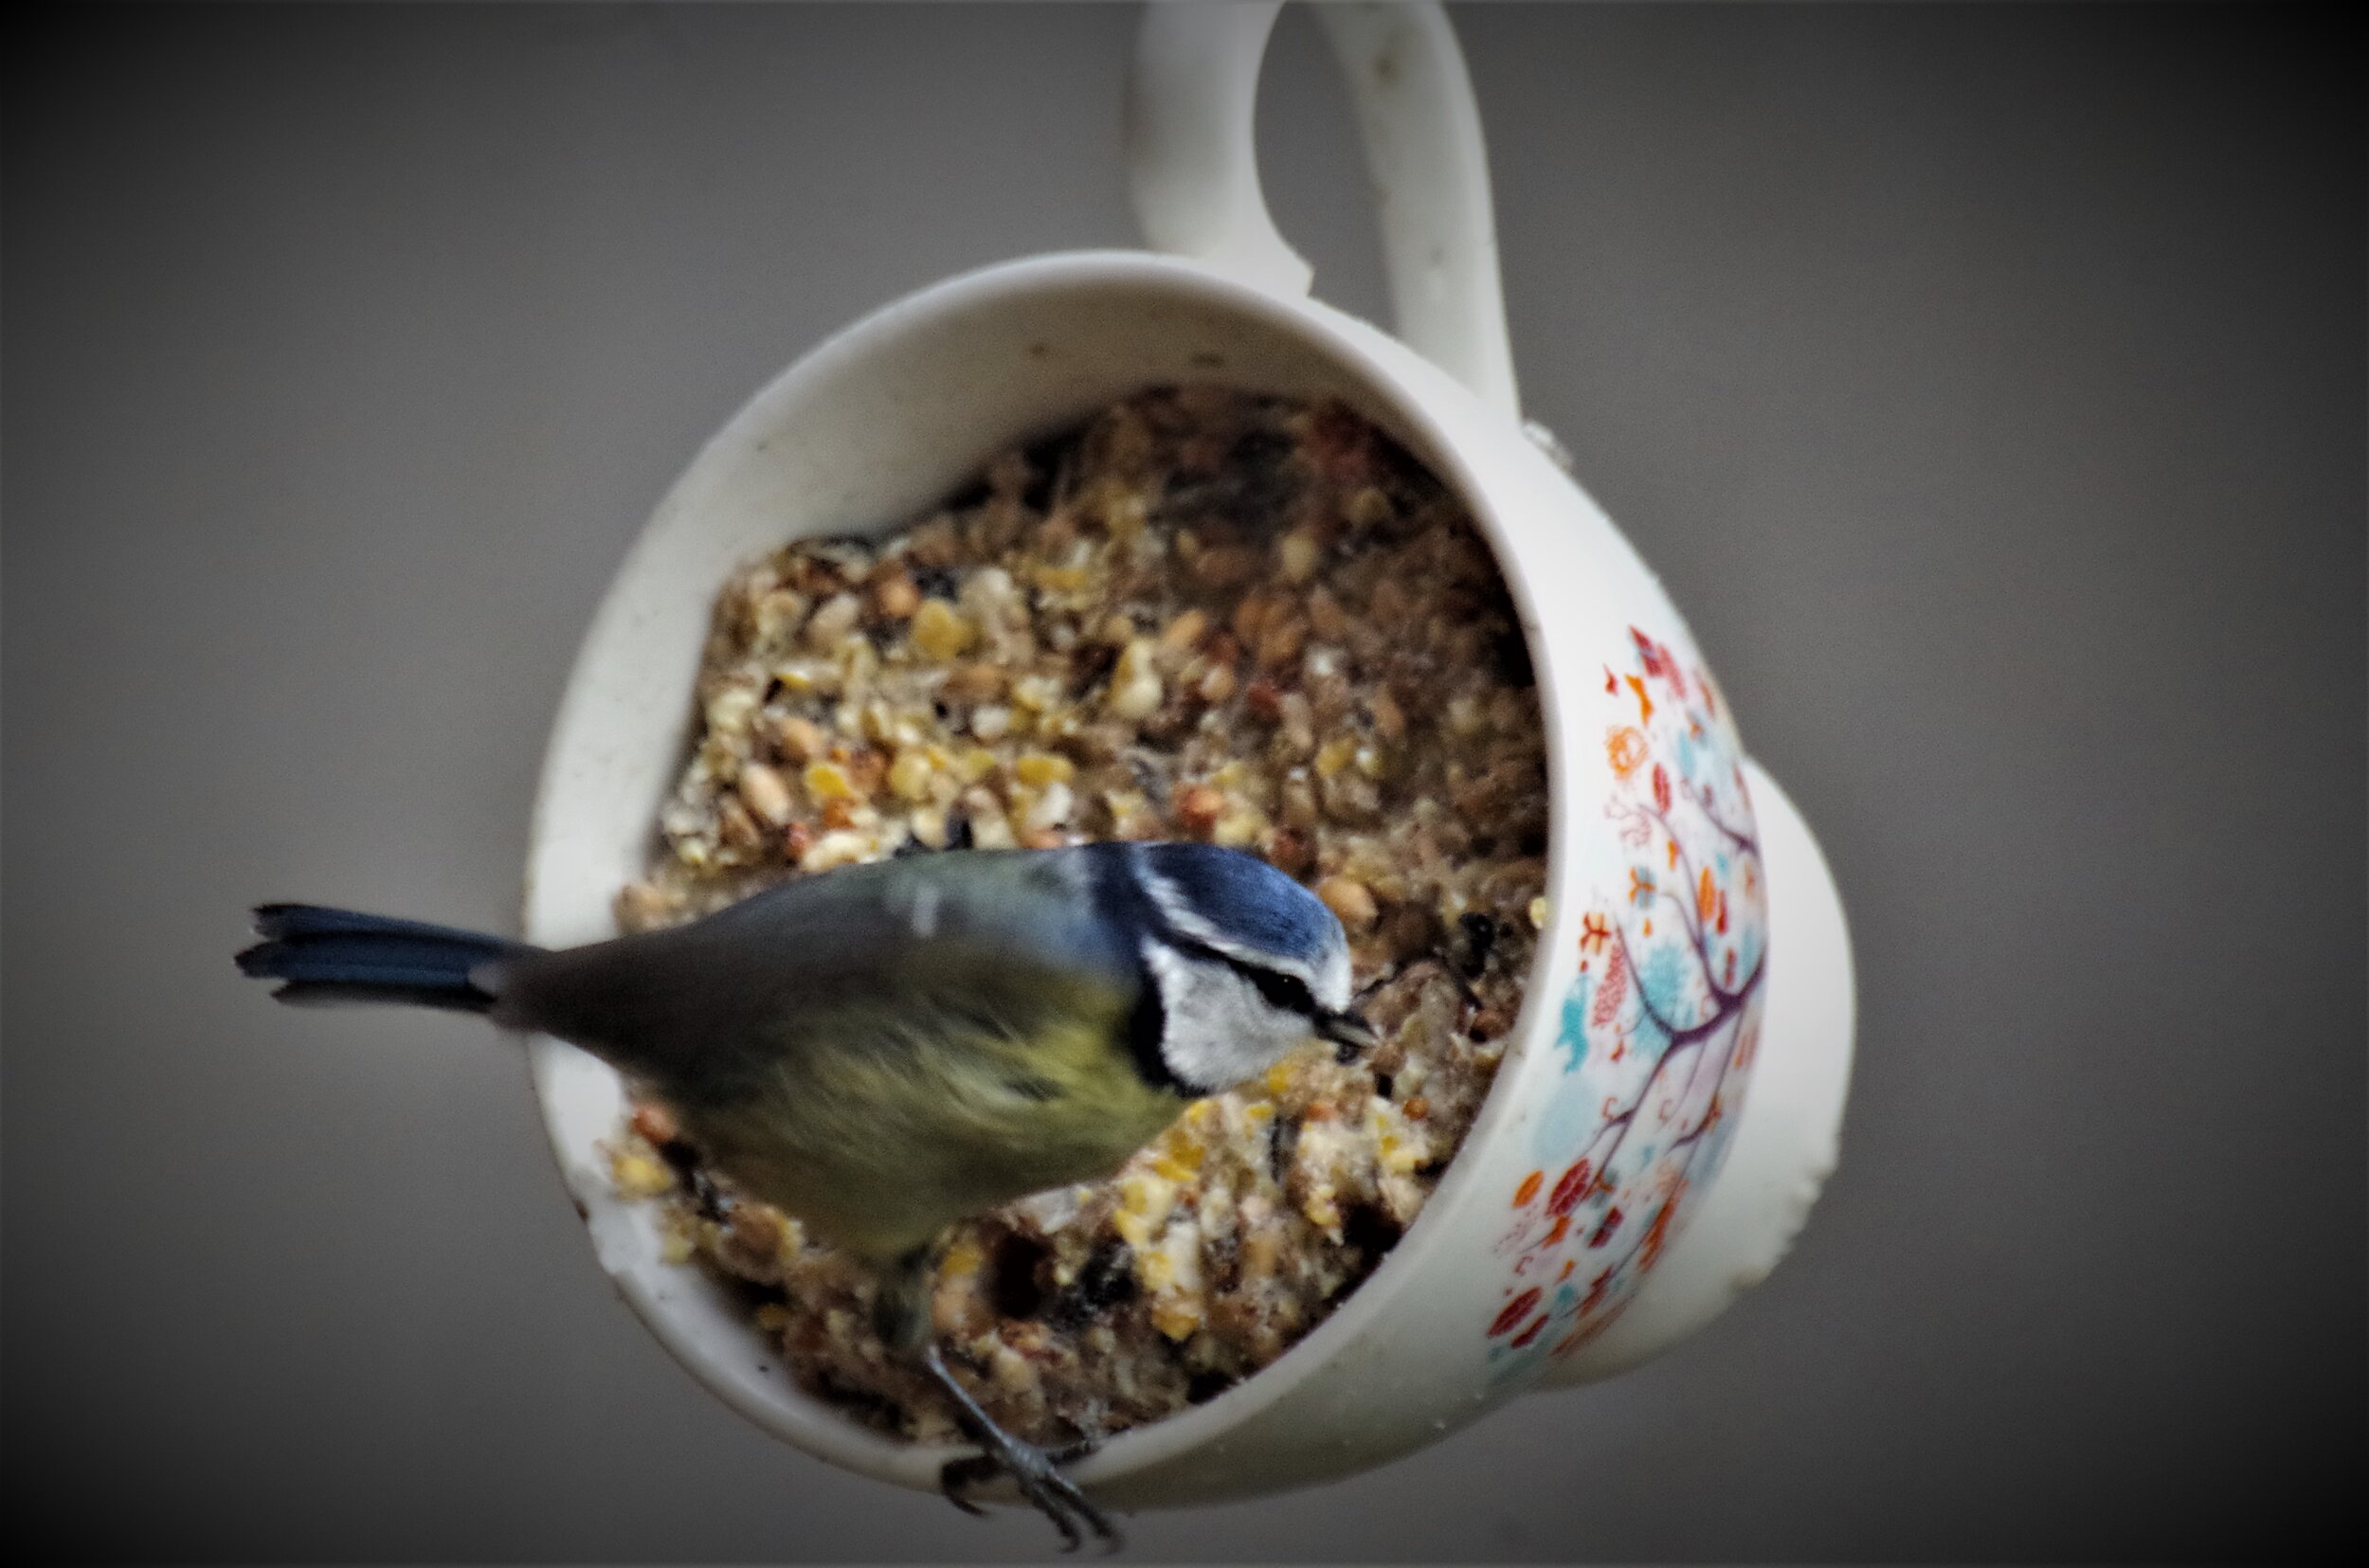
This is a great way to reuse chipped mugs. To make this you will need an old mug, string and bird seed, which are all contained in the January pack you will also need a block of lard or veggie alternative.
Put the lard in a pan and heat until it has melted. Gradually stir in some bird seed until you are happy with the consistency. Then spoon the mixture into the cup. You can push a stick into the lard as it is setting to make a perch. You will find one in the January pack or you can forage for your own. Allow the mixture to set then tie a string to the cup handle and hang outside.
Any excess mixture can be used to fill hollowed oranges as explained below.

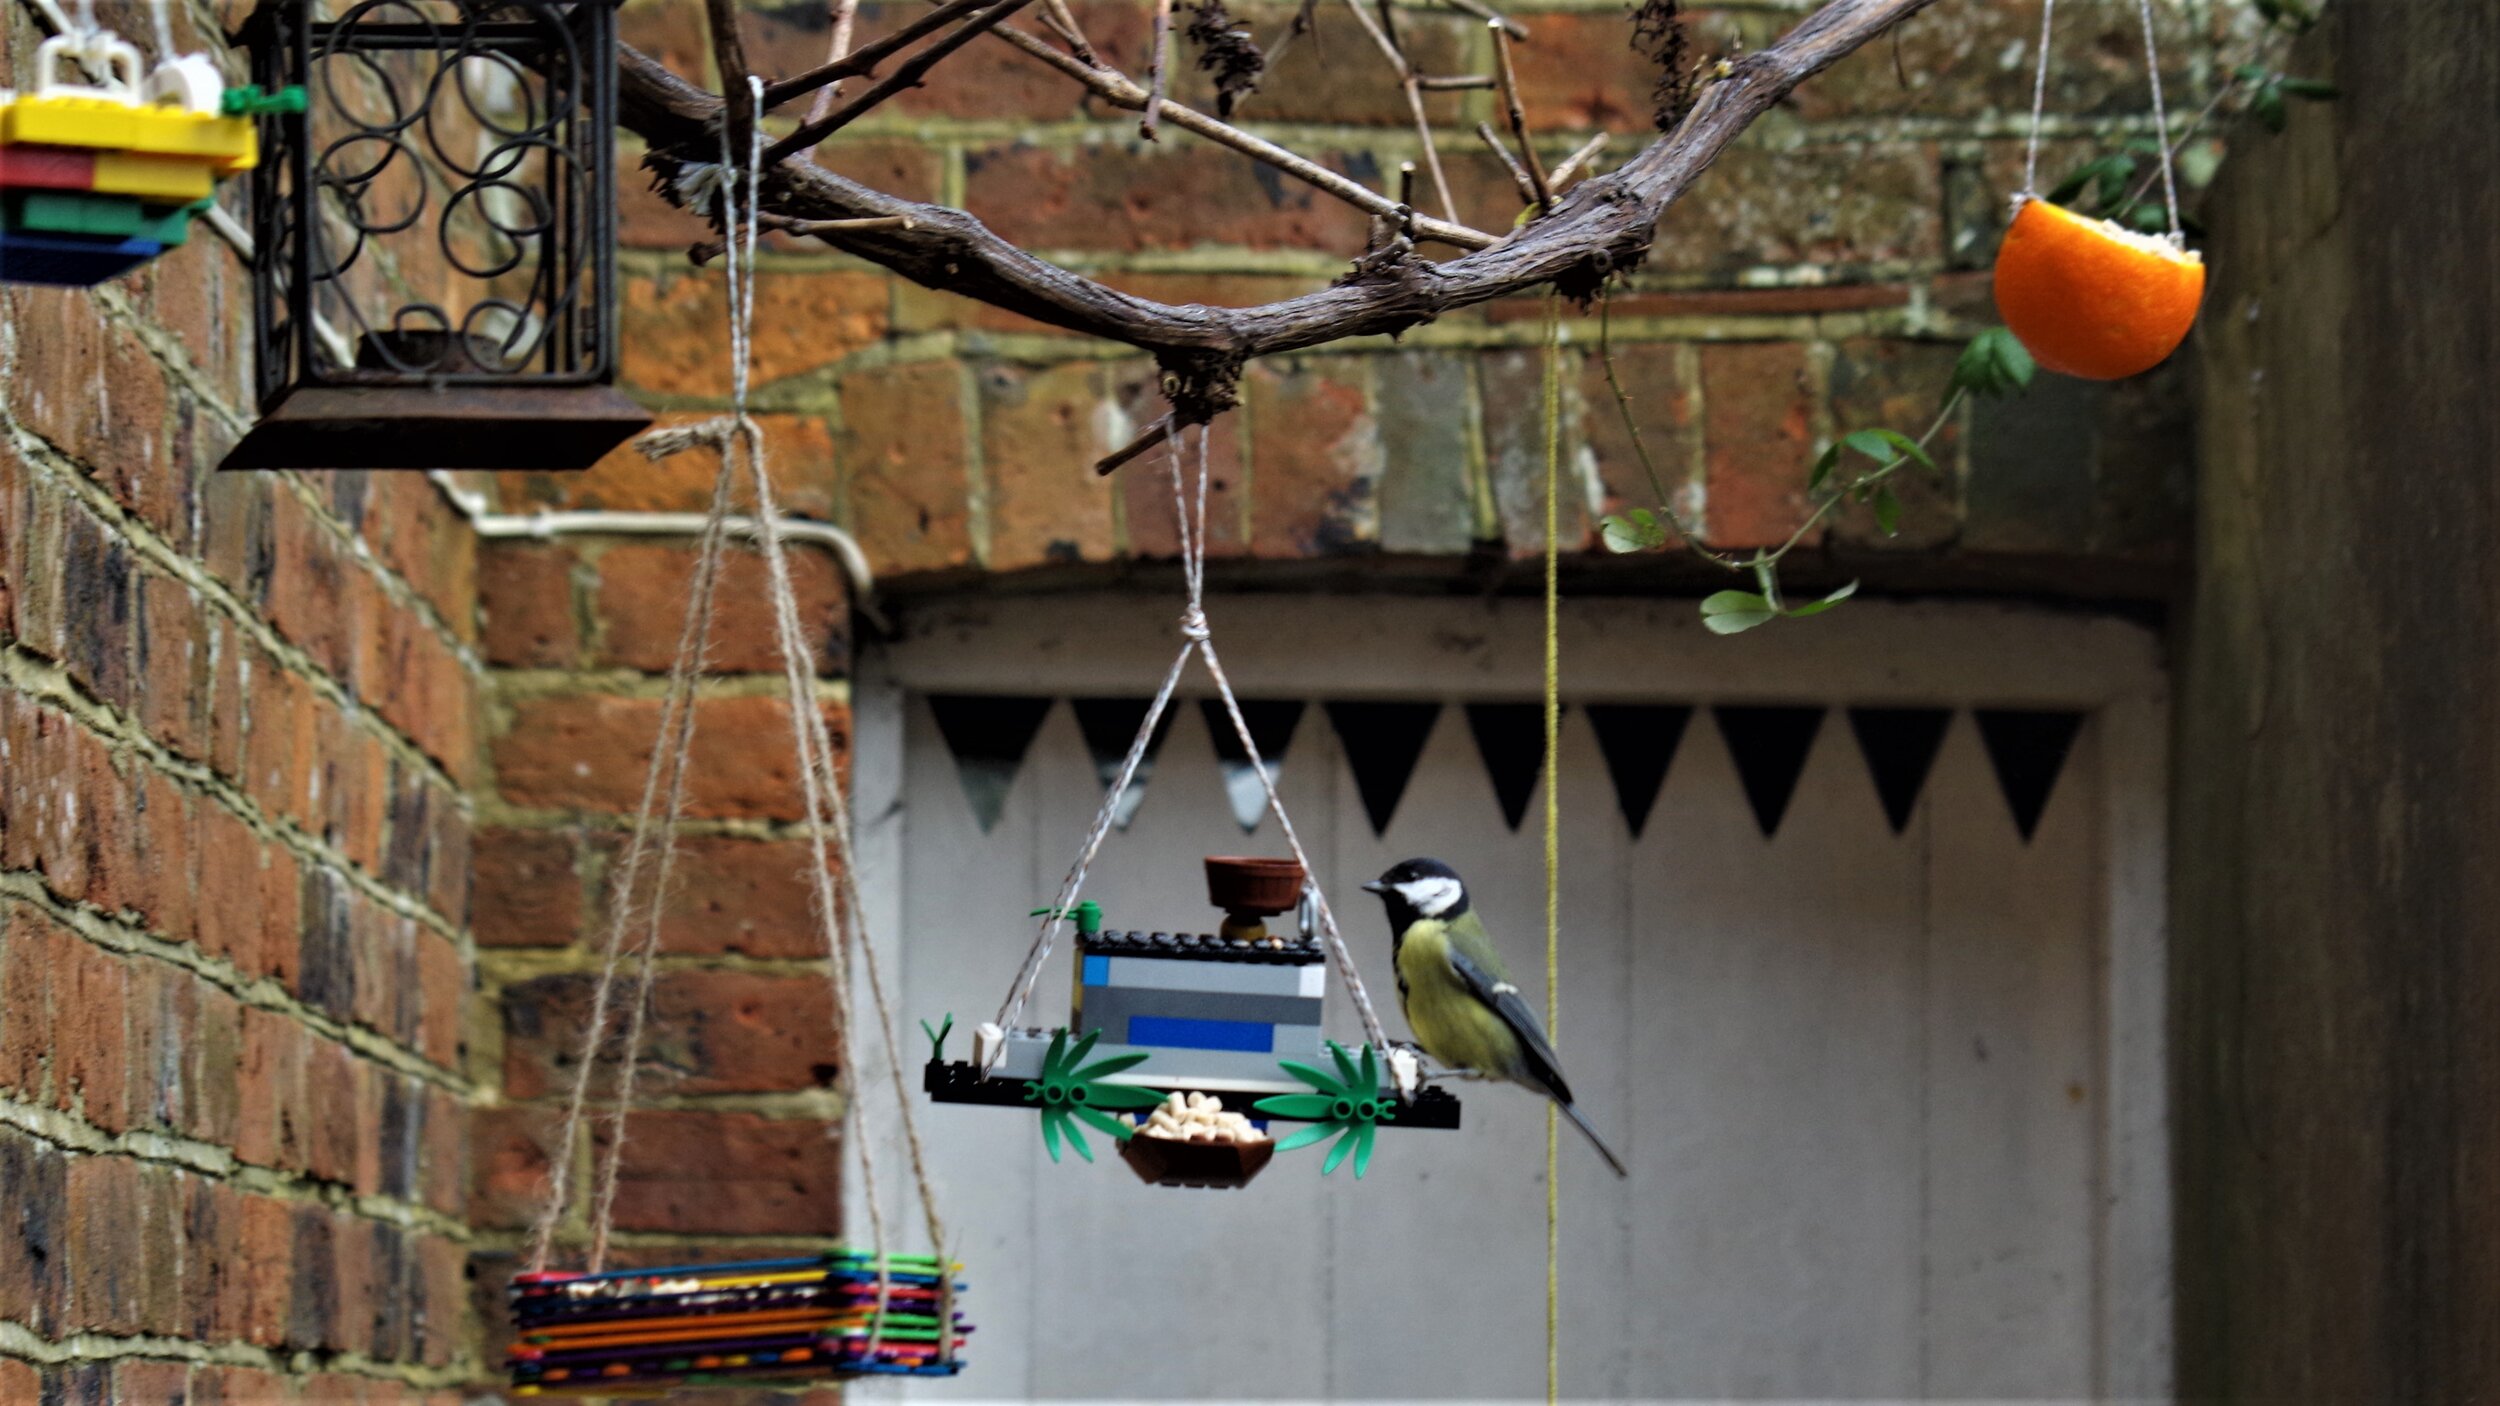
If (by chance) you have a large amount of Lego in your house you could use some of it to make a bird feeder. We had great fun doing this and it really turned into a STEM challenge as we tried to answer questions and over come problems. Where should the food go? Will it hold enough food? How can the food be kept dry if it rains? Where will the birds perch? Where should the string attach? How can we make it strong enough to withstand a windy day?
You can use the bird seed and the string from the January pack to have a go at this. Just add Lego!
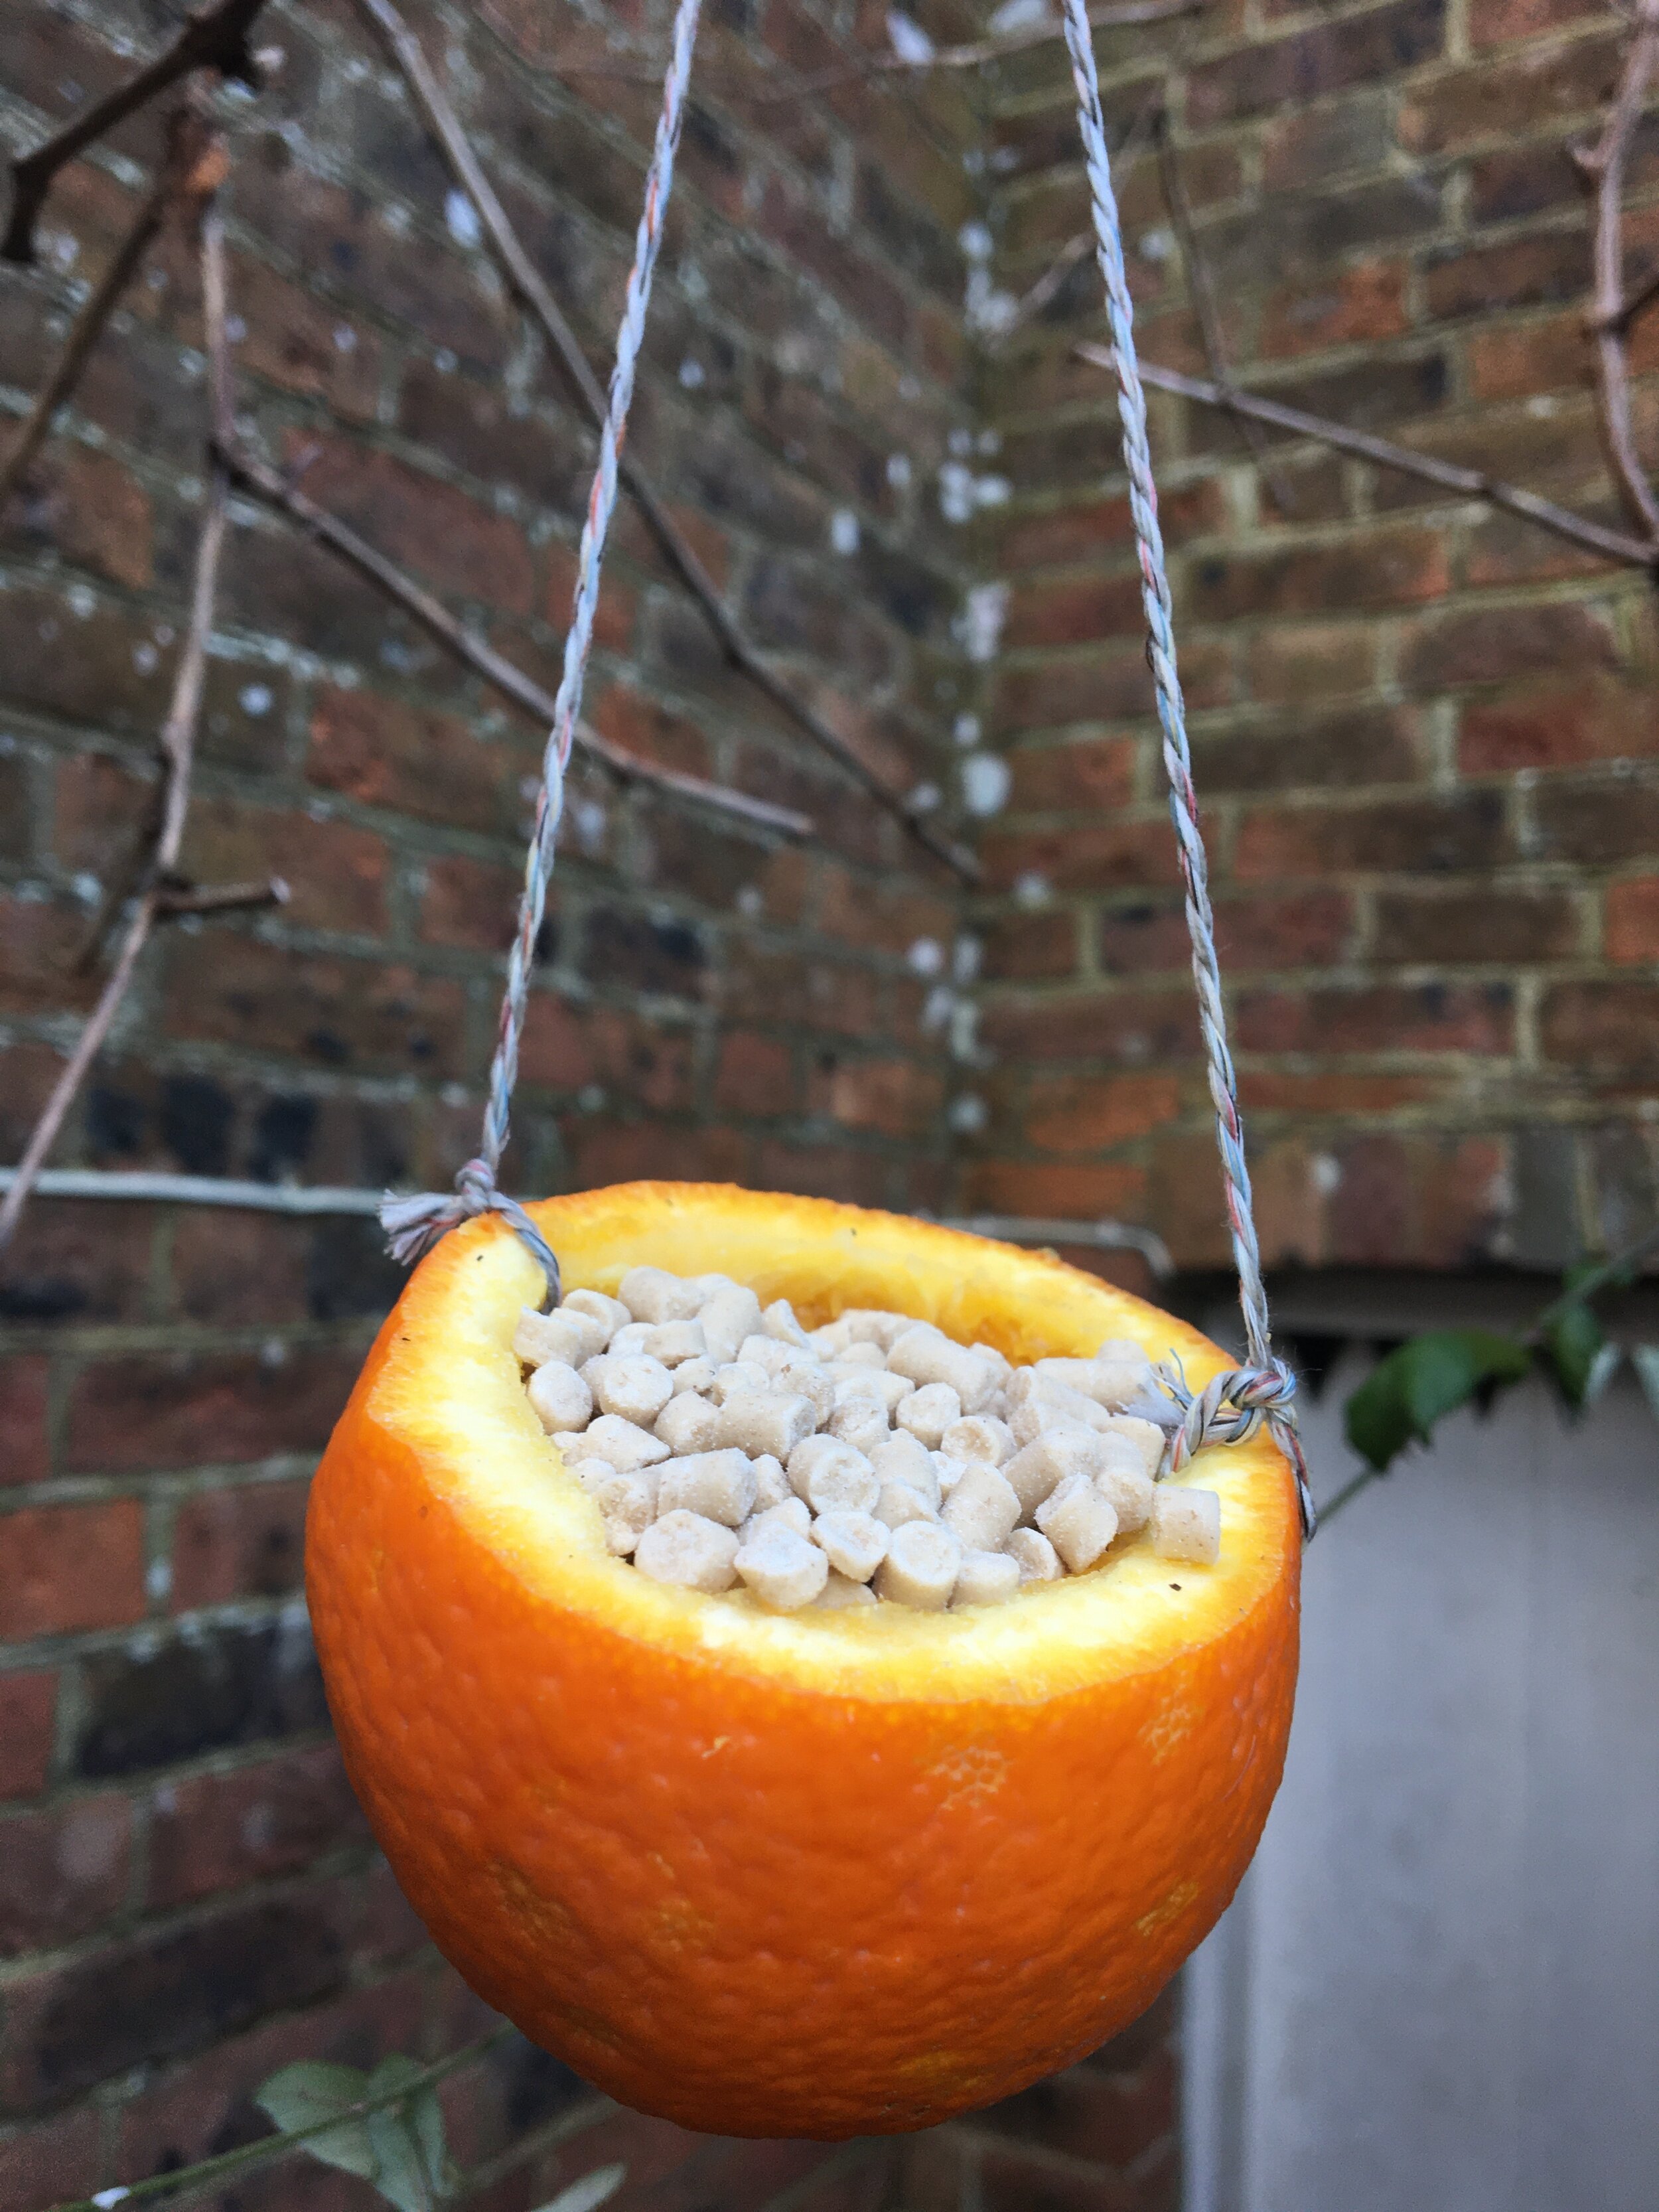
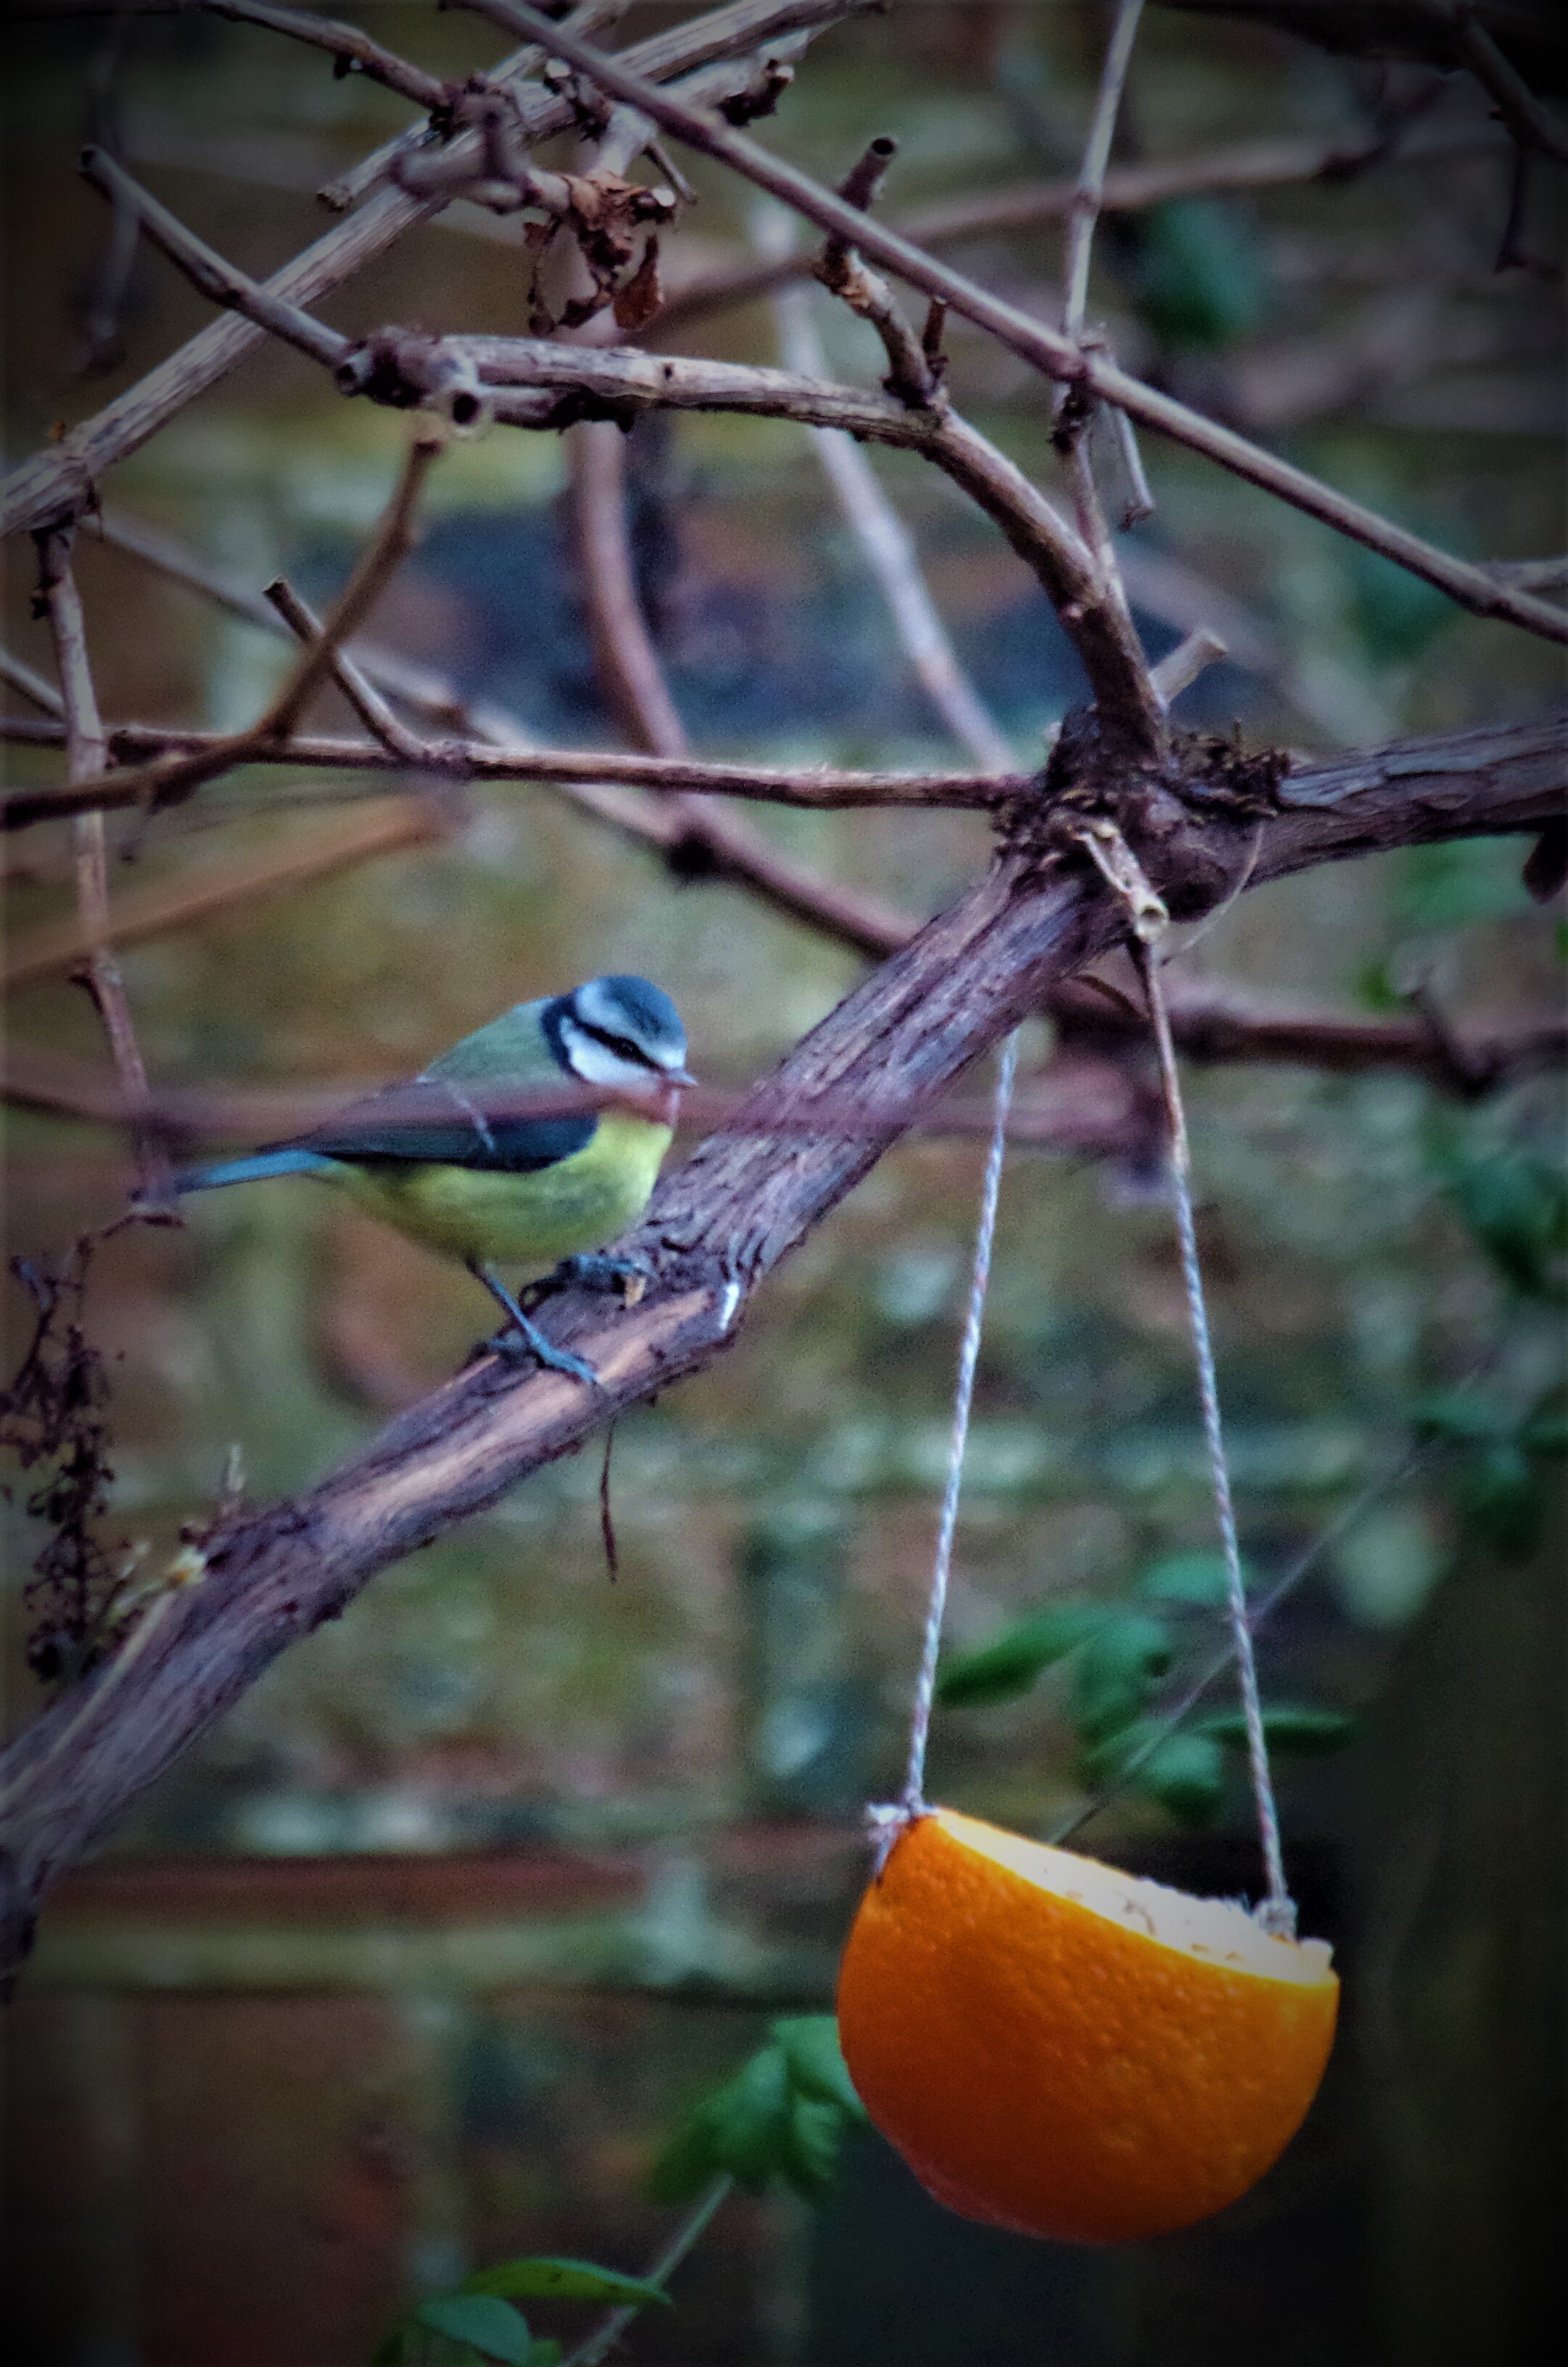
A hollowed out orange is simple and effective. The skin can be pieced on both sides and a string threaded through for hanging. There is a handy needle in the January pack for doing this. The orange can then be filled with the lard and bird seed mixture as described above or filled with loose bird seed.

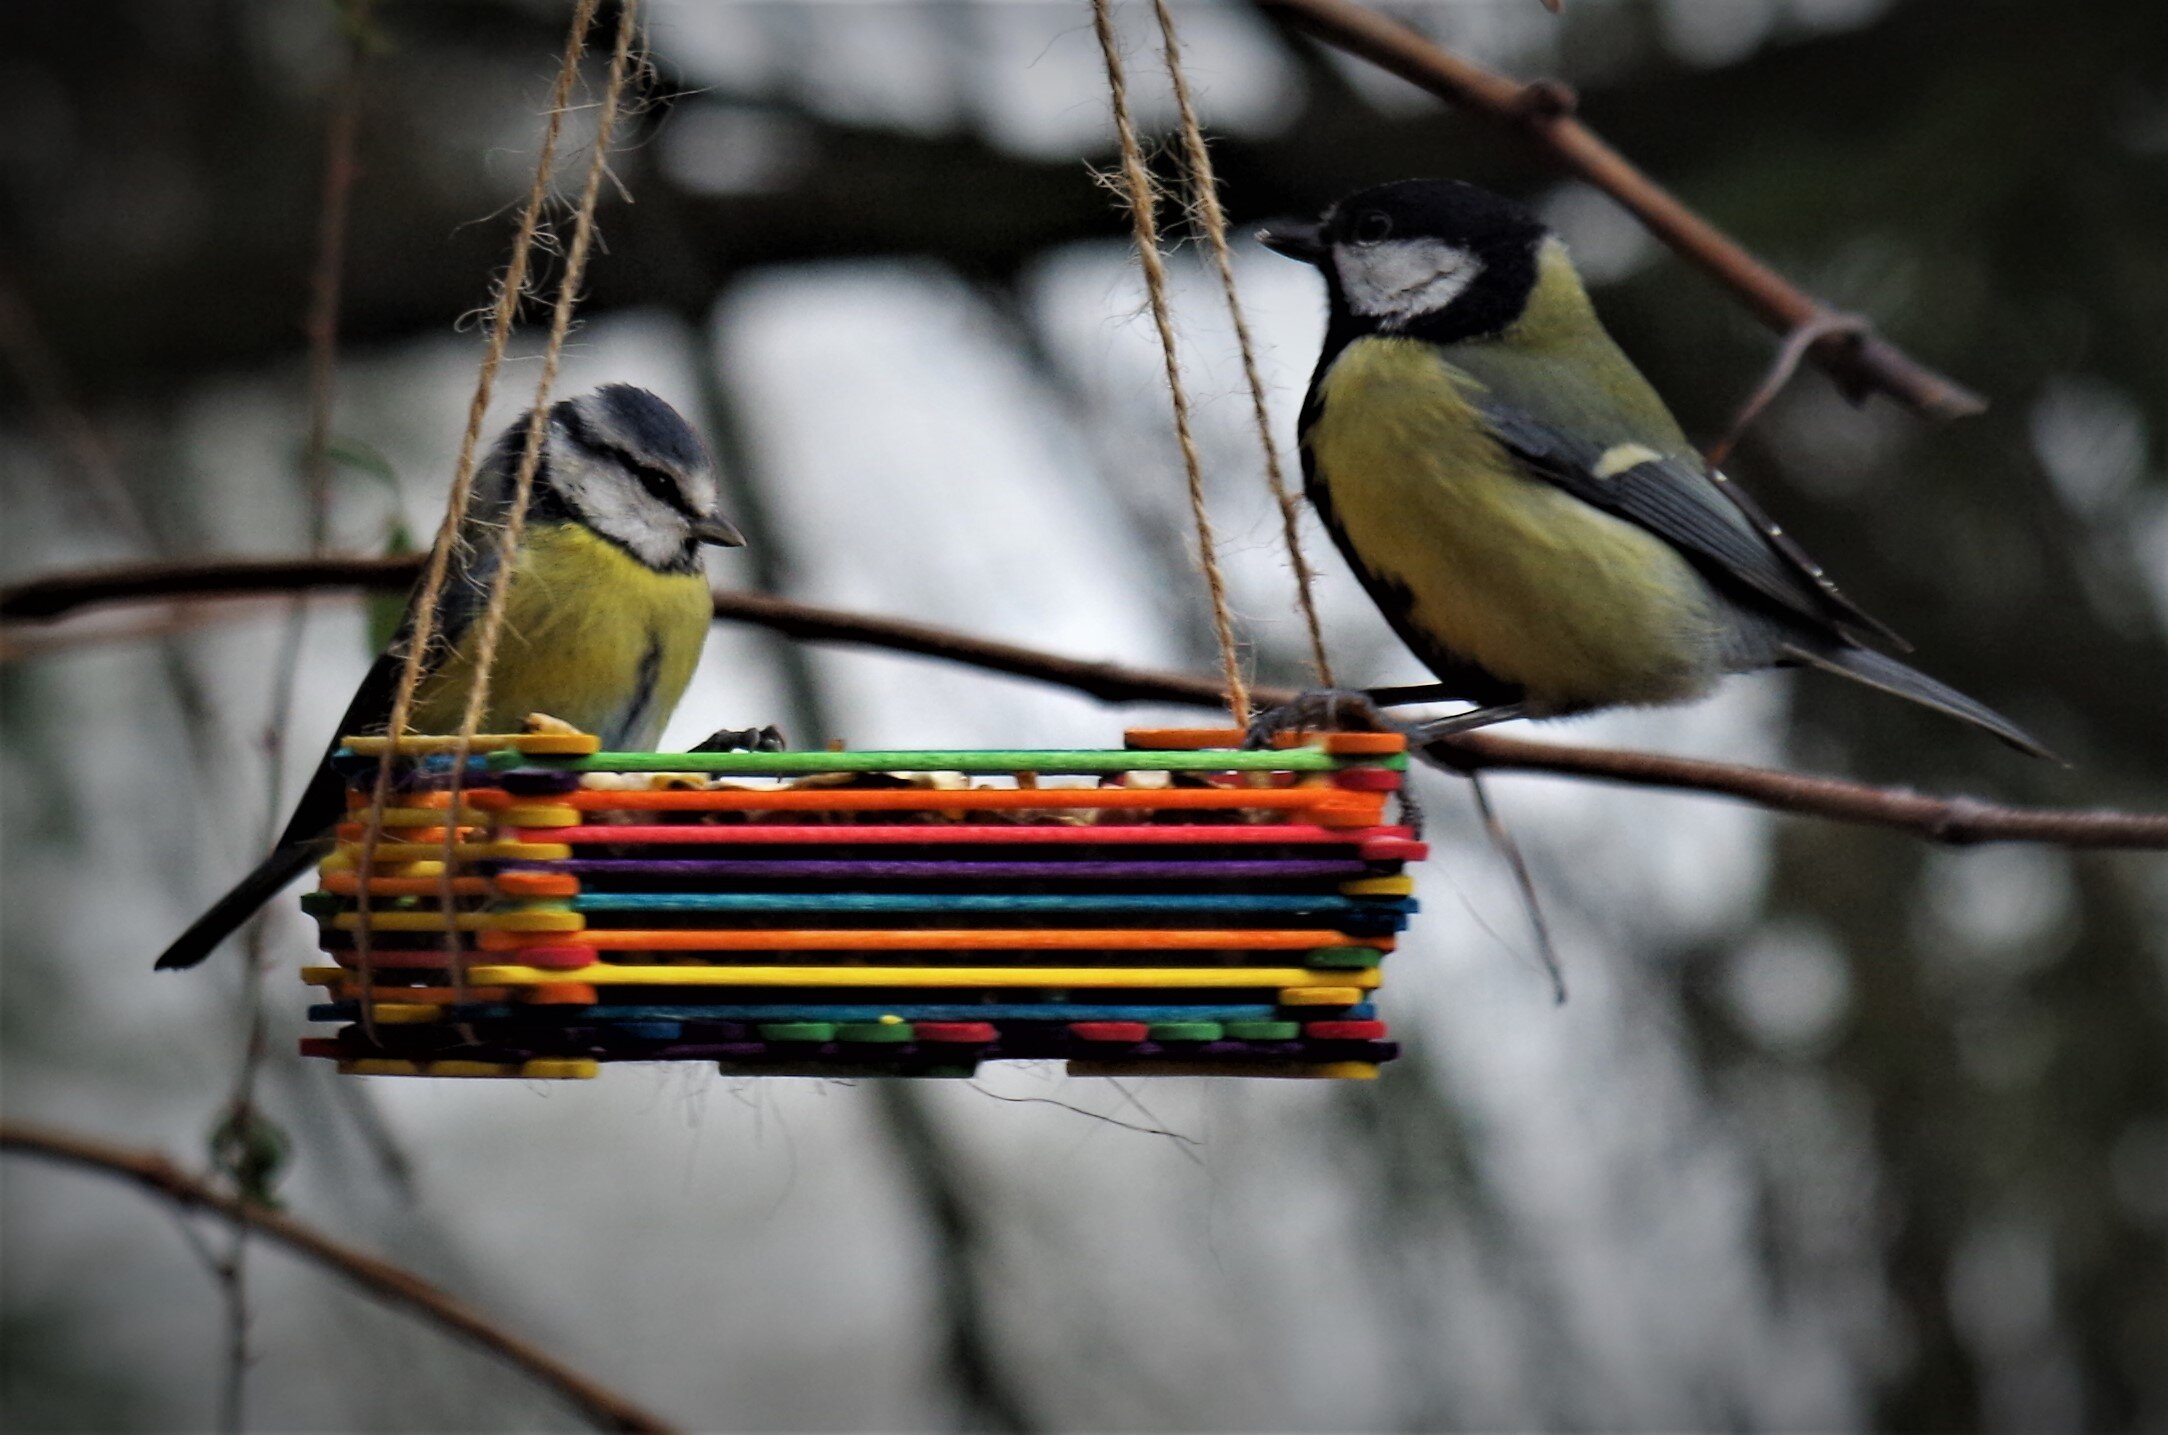
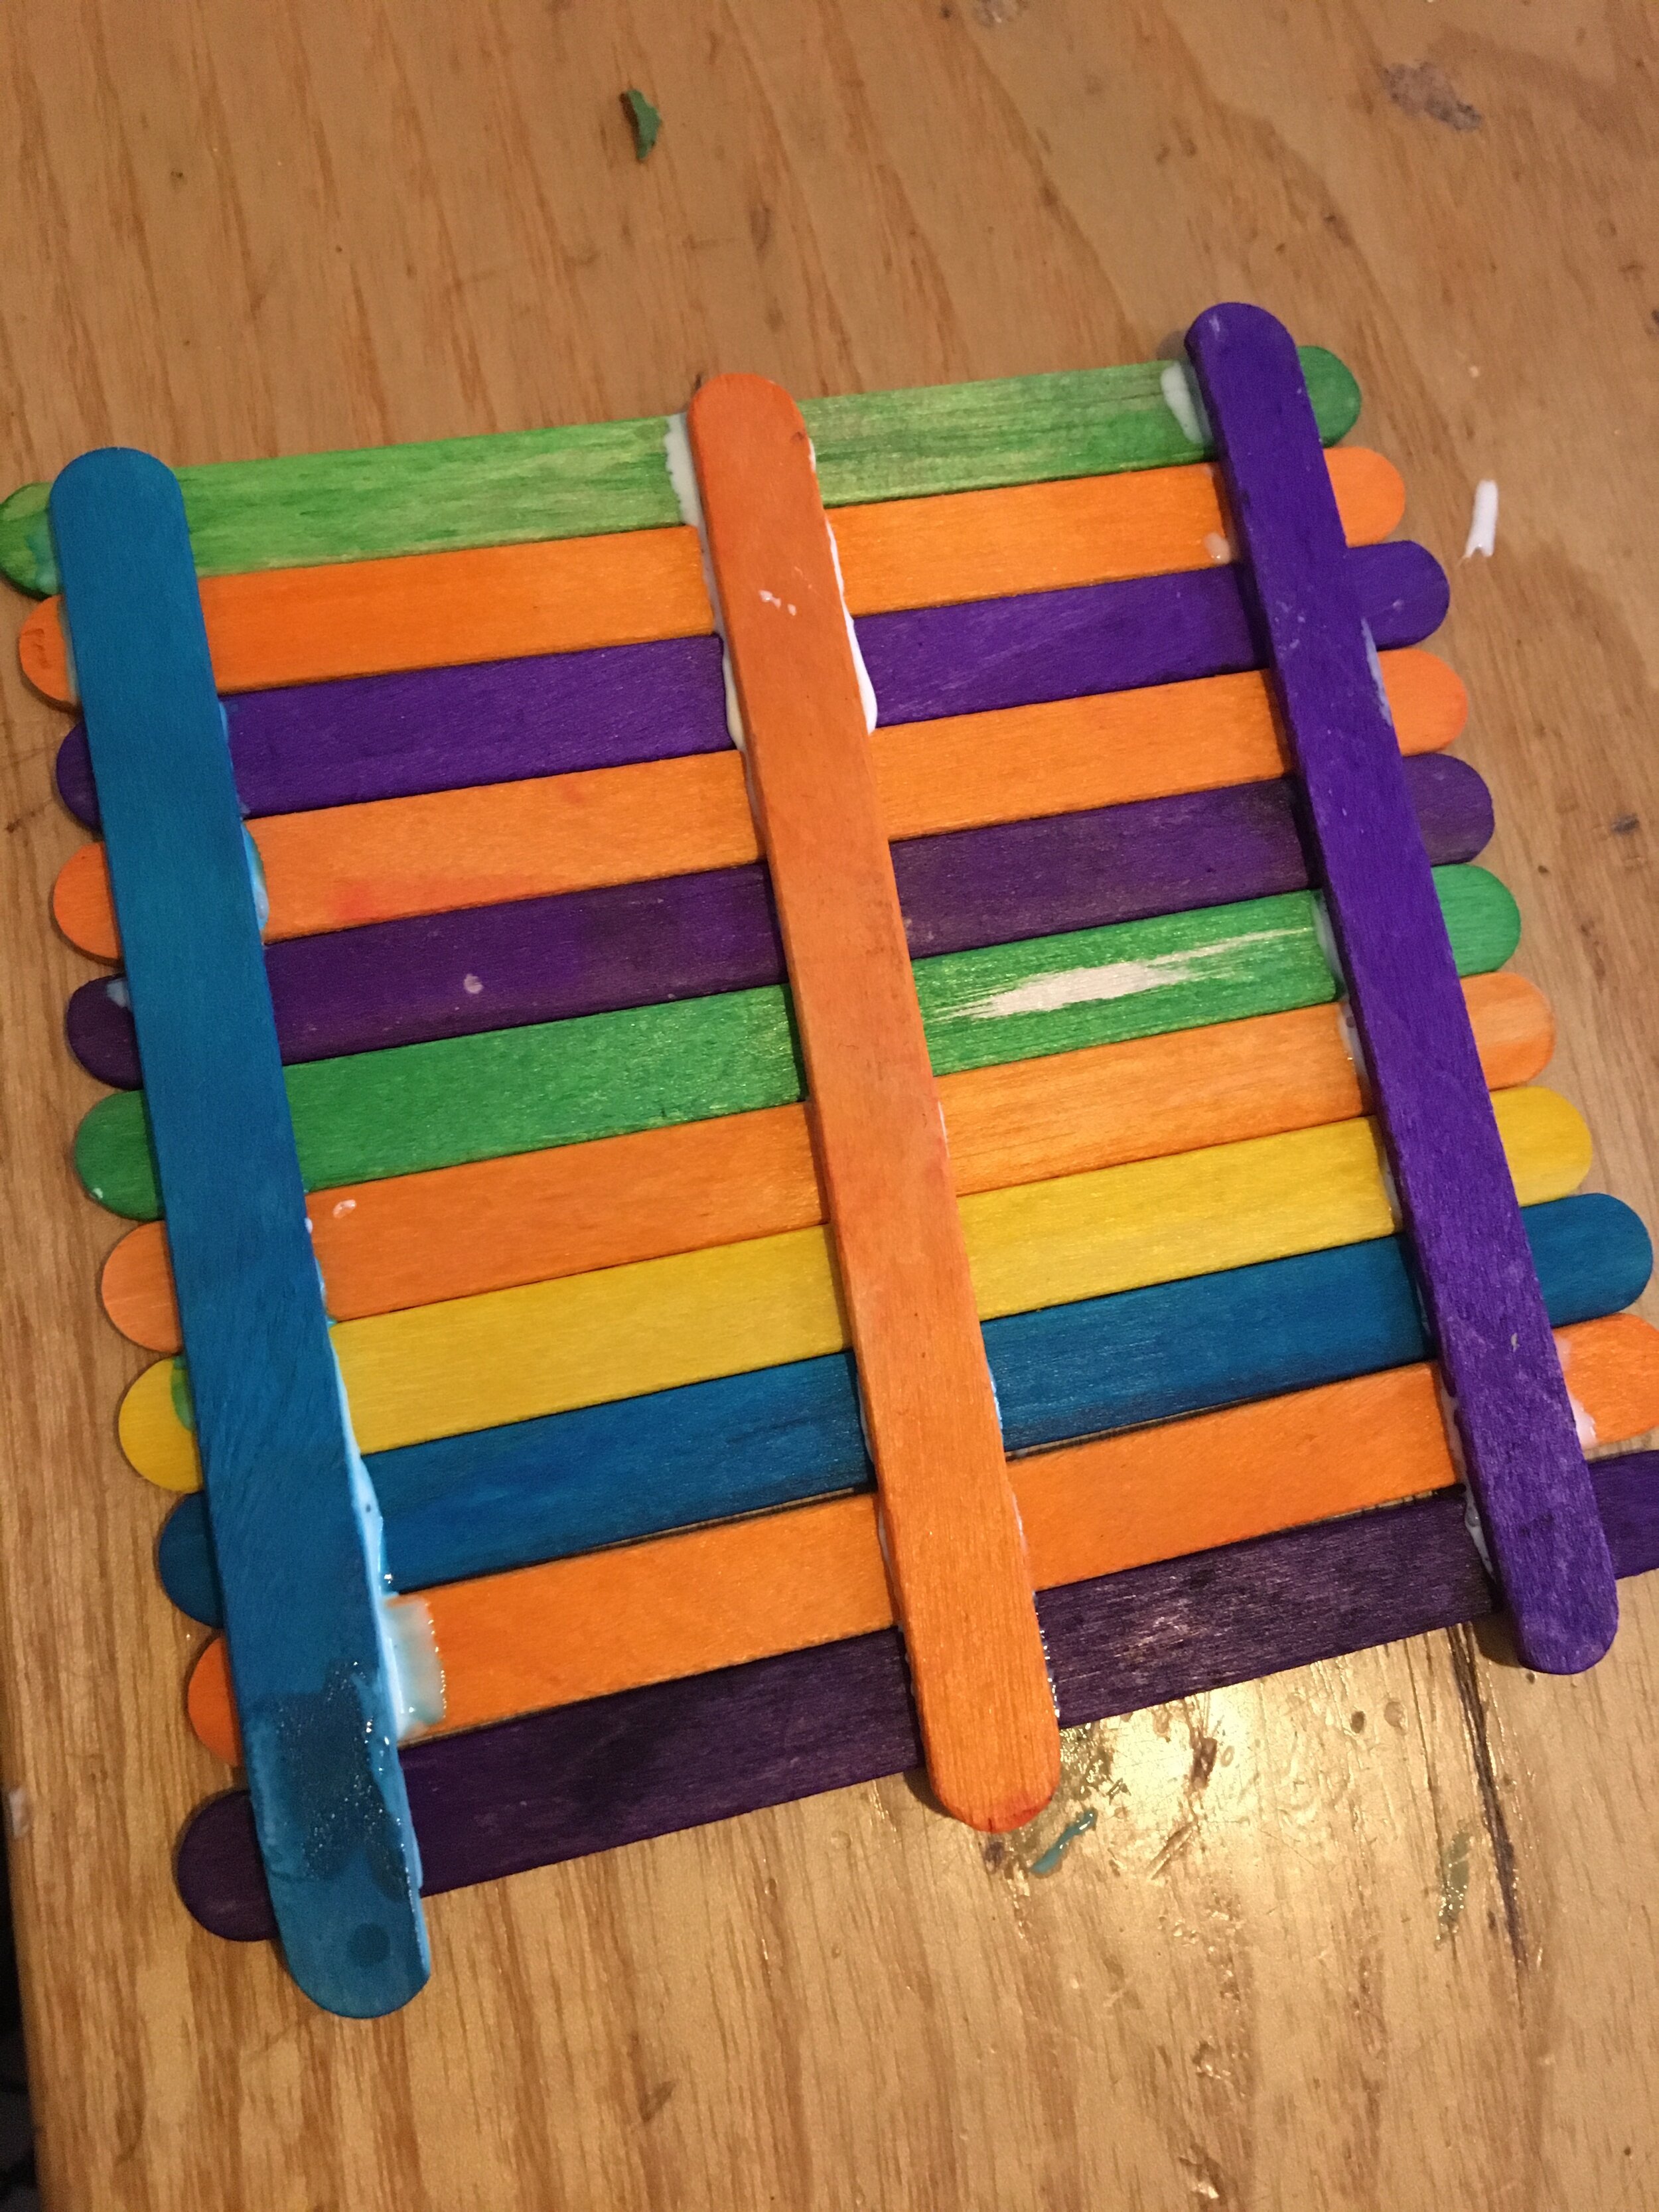
These bird feeders were fun to make and very popular with the birds! We have included natural lolly sticks in the January pack and you could choose to paint or colour these in. The glue will probably work better if you do this at the end.
The pack also contains a pot of wood glue and some string.
Start by making the bottom of the bird feeder by lining up 11 lolly sticks on a table. Secure these by gluing three more lolly sticks on top at a right angle. Turn this over and then start building up the walls by gluing sticks opposite each other. Alternating after each pair of sticks is added Keep going until the walls are around 8 lolly sticks high.
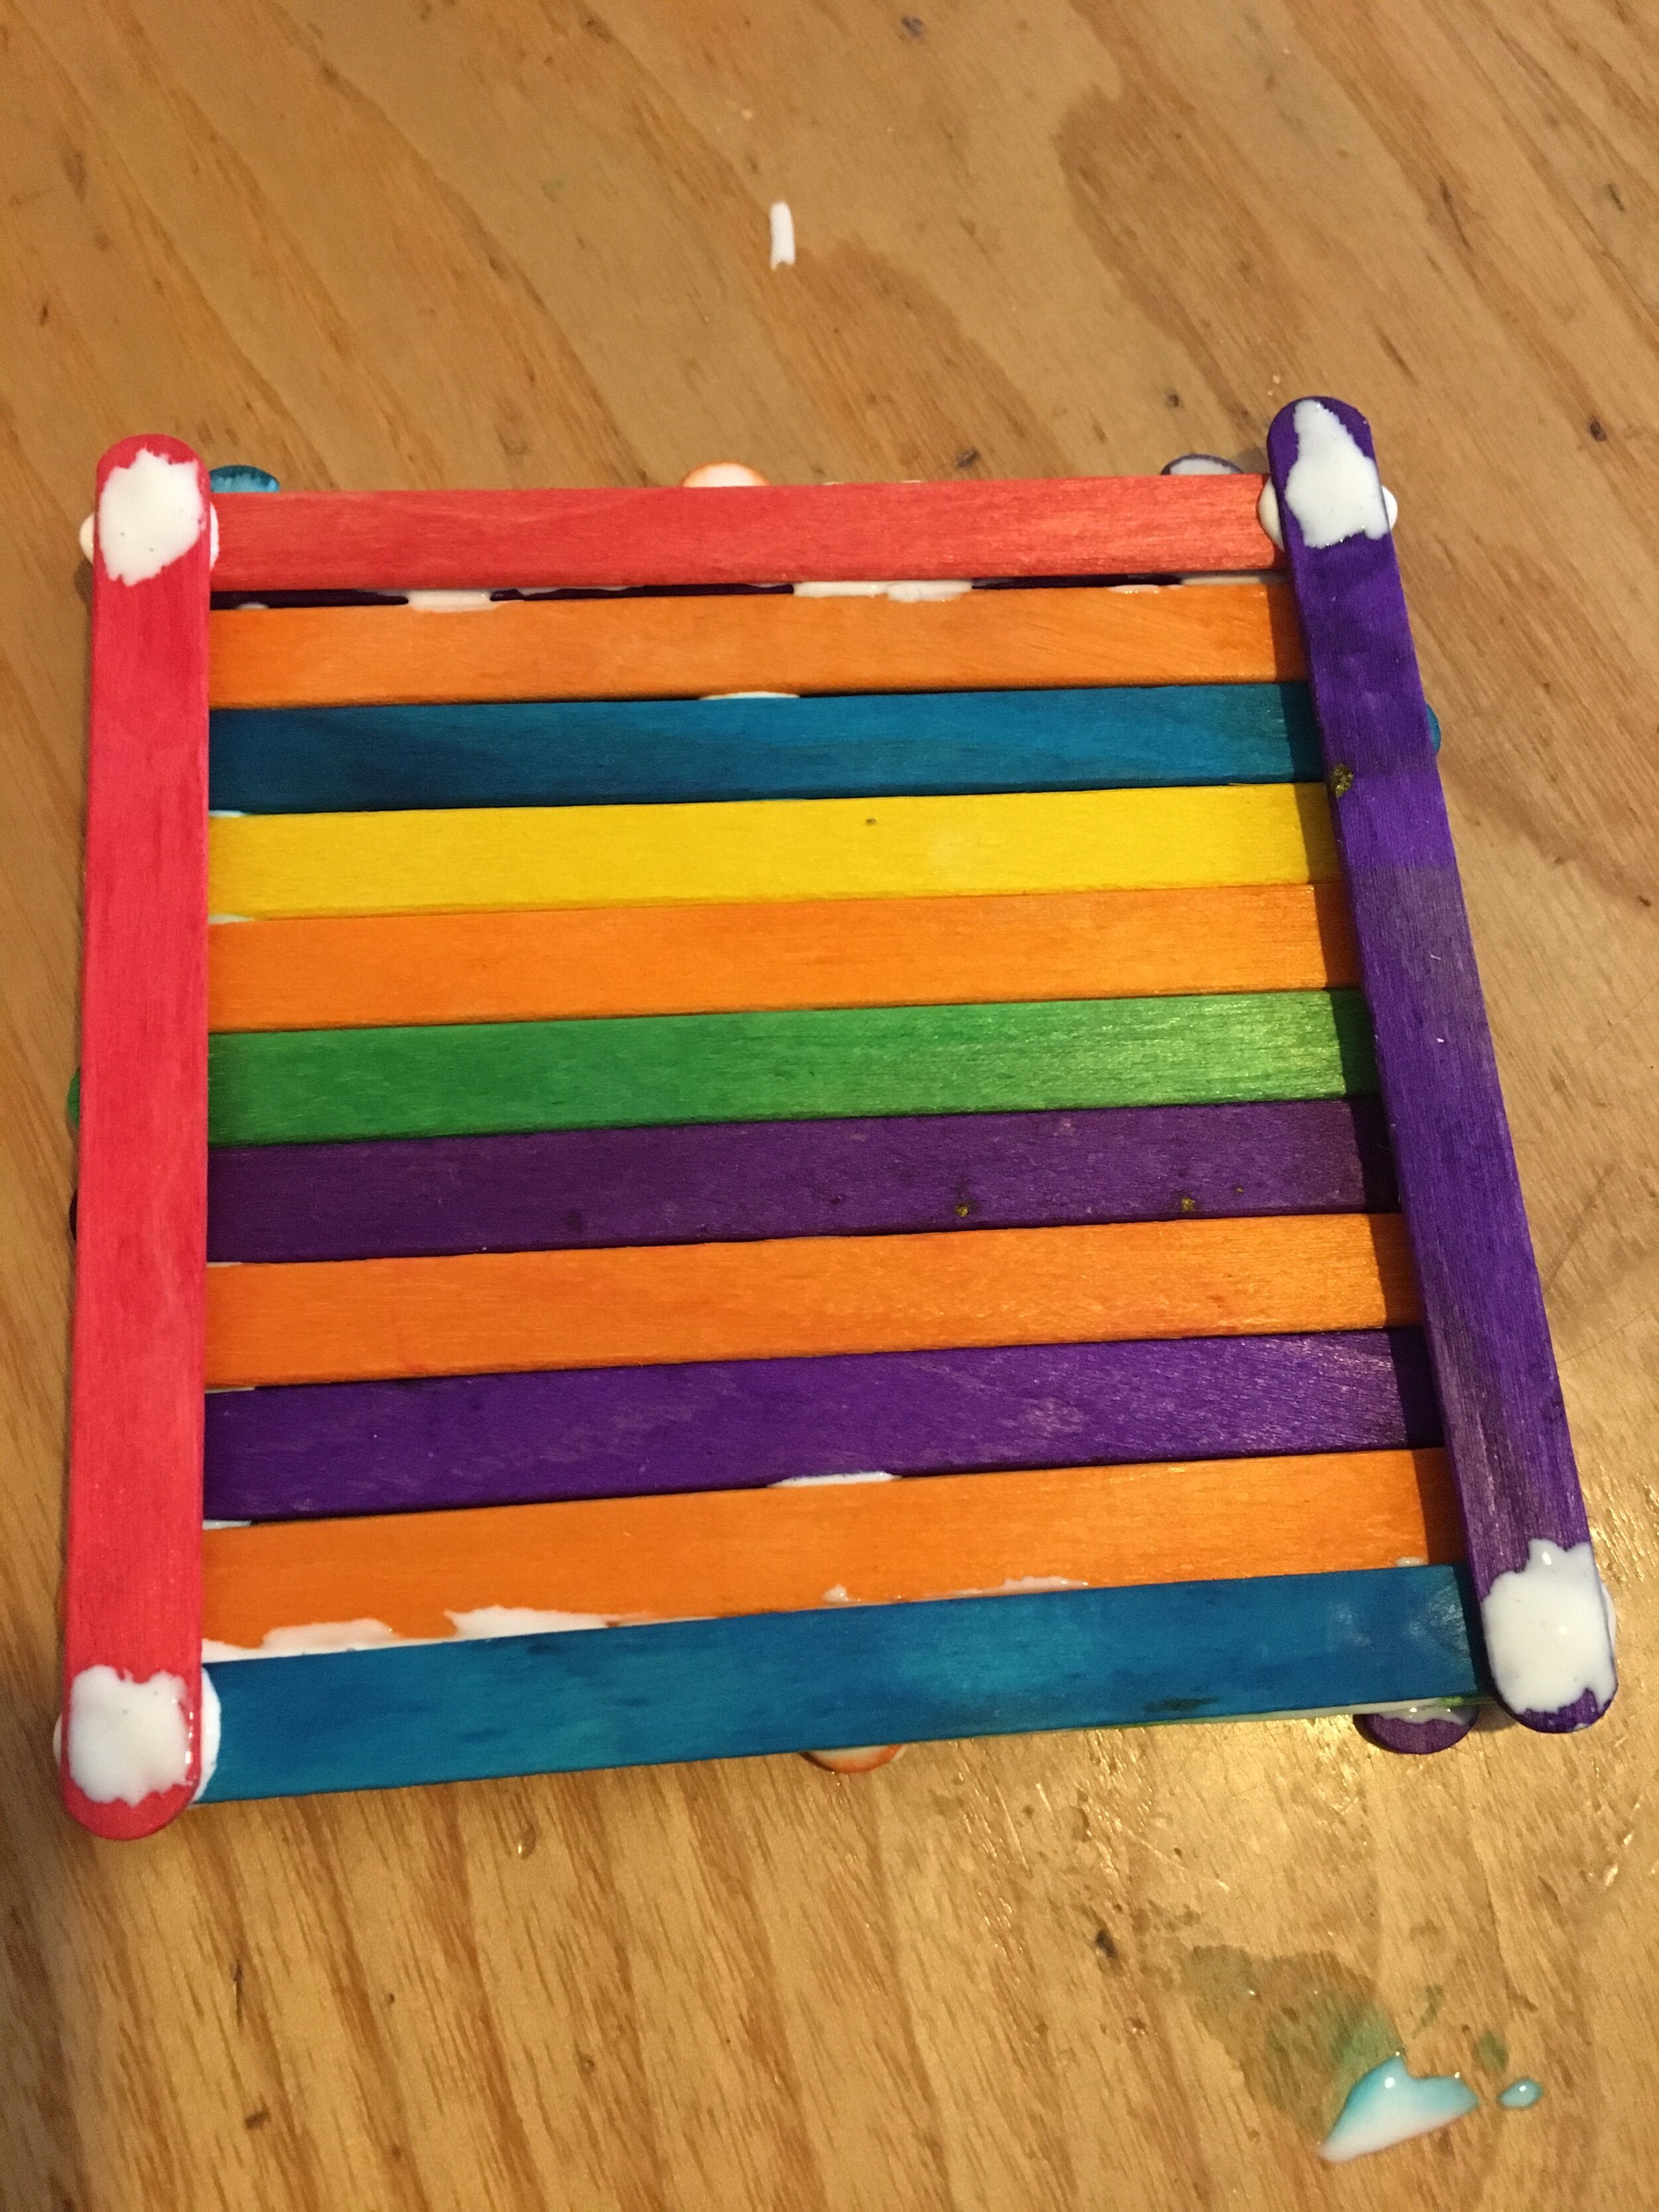
To secure the string turn the bird feeder over and place two lengths of string in between the lolly sticks. Add three more sticks cross ways on top to secure the sting. Once the bird feeder has been turned back over all four lengths of string can be tied together.
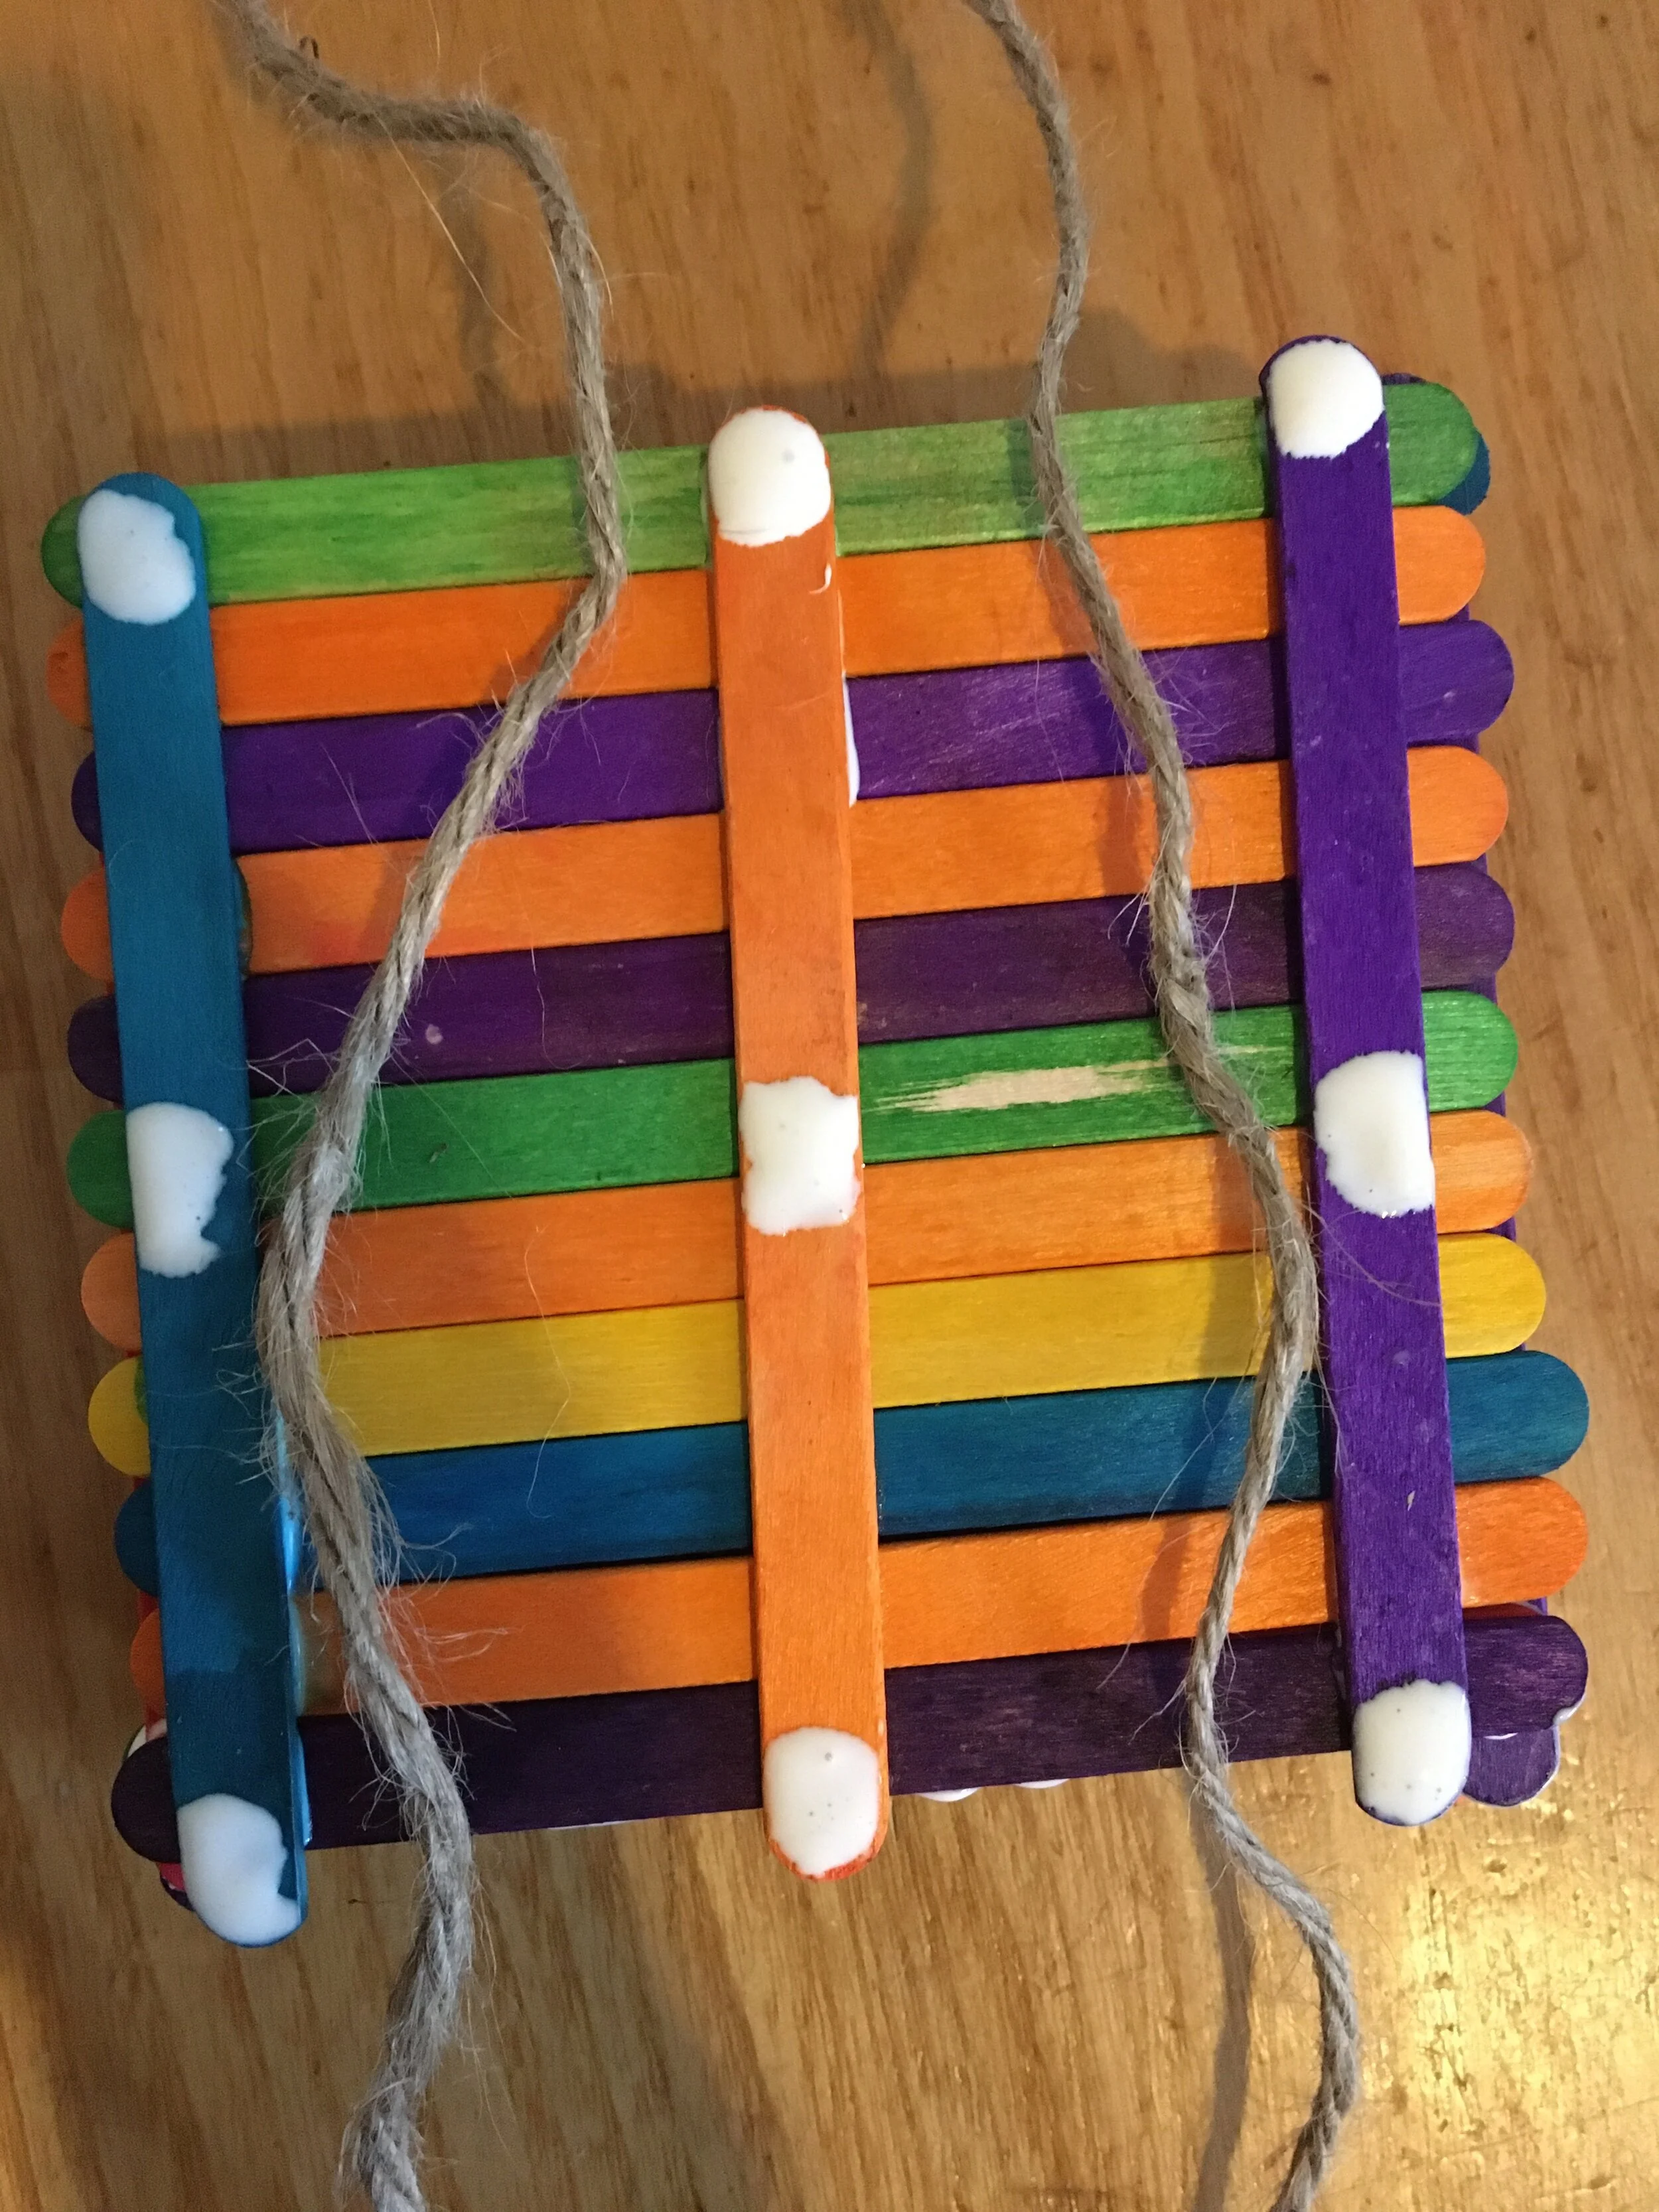
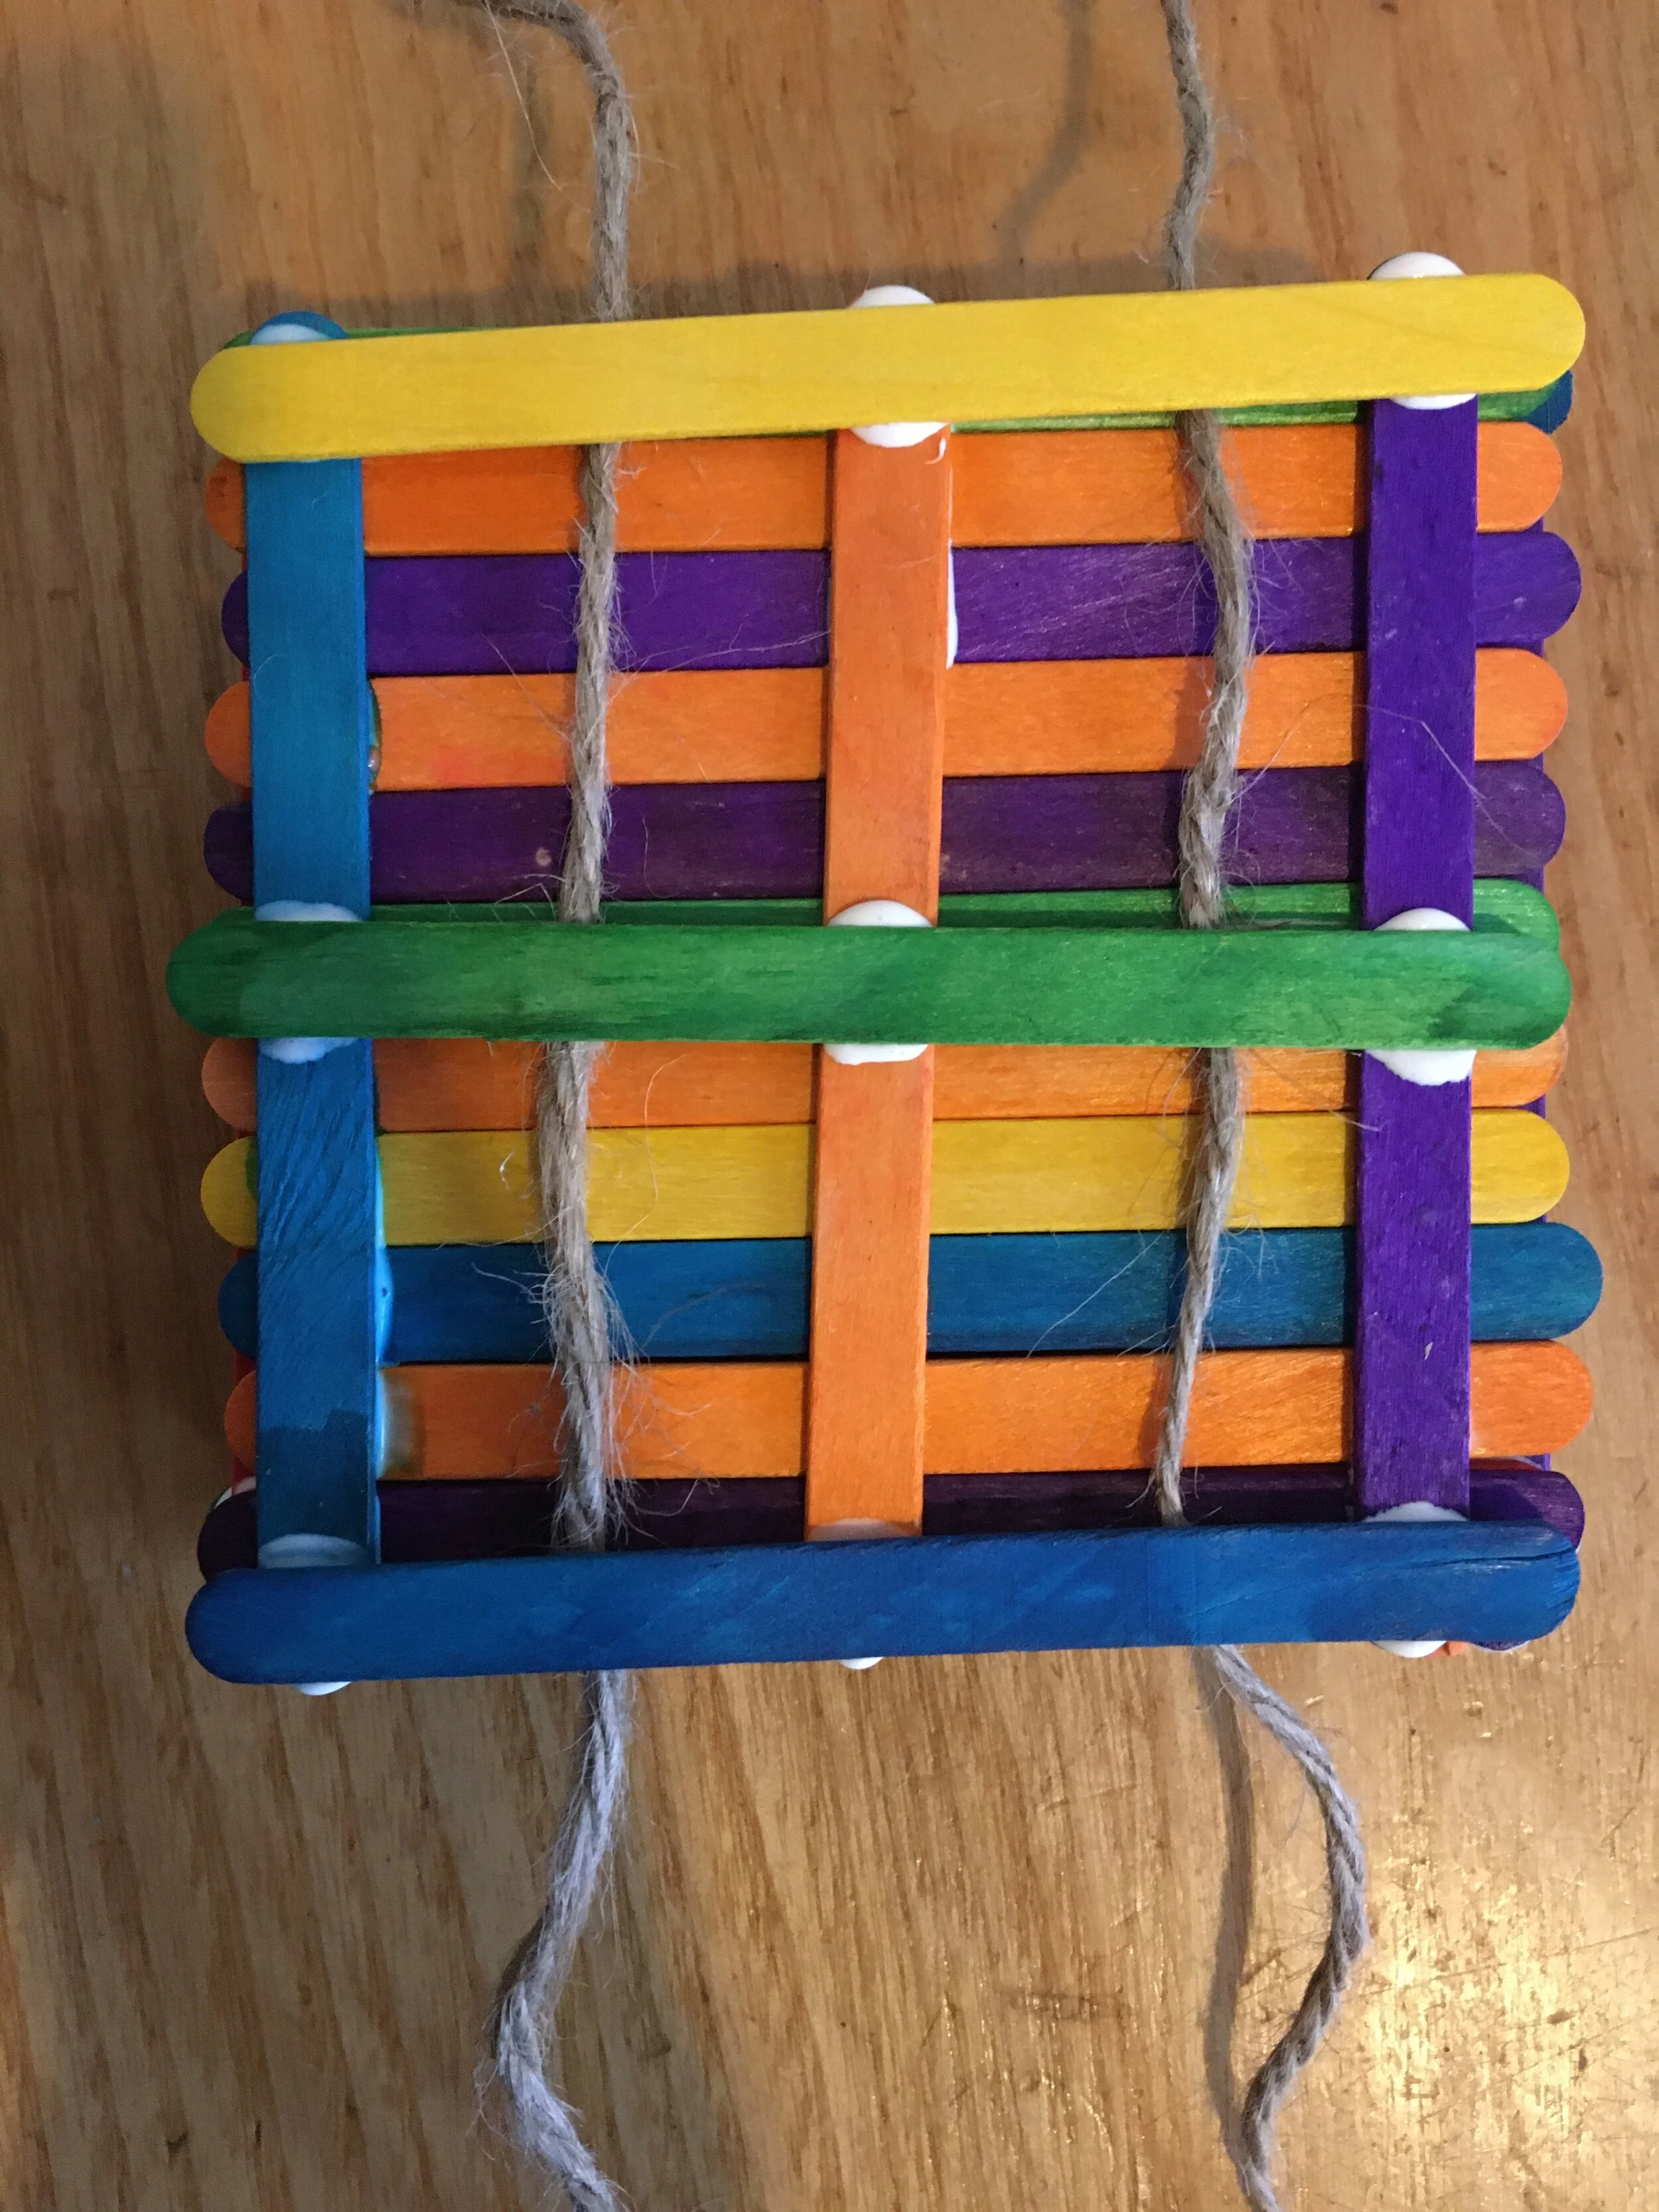
We have included two large lolly sticks to form perches in our January pack. You can decide where you think these should go.
Once the glue has fully dried the bird feeder can be filled with bird seed and hung outside.
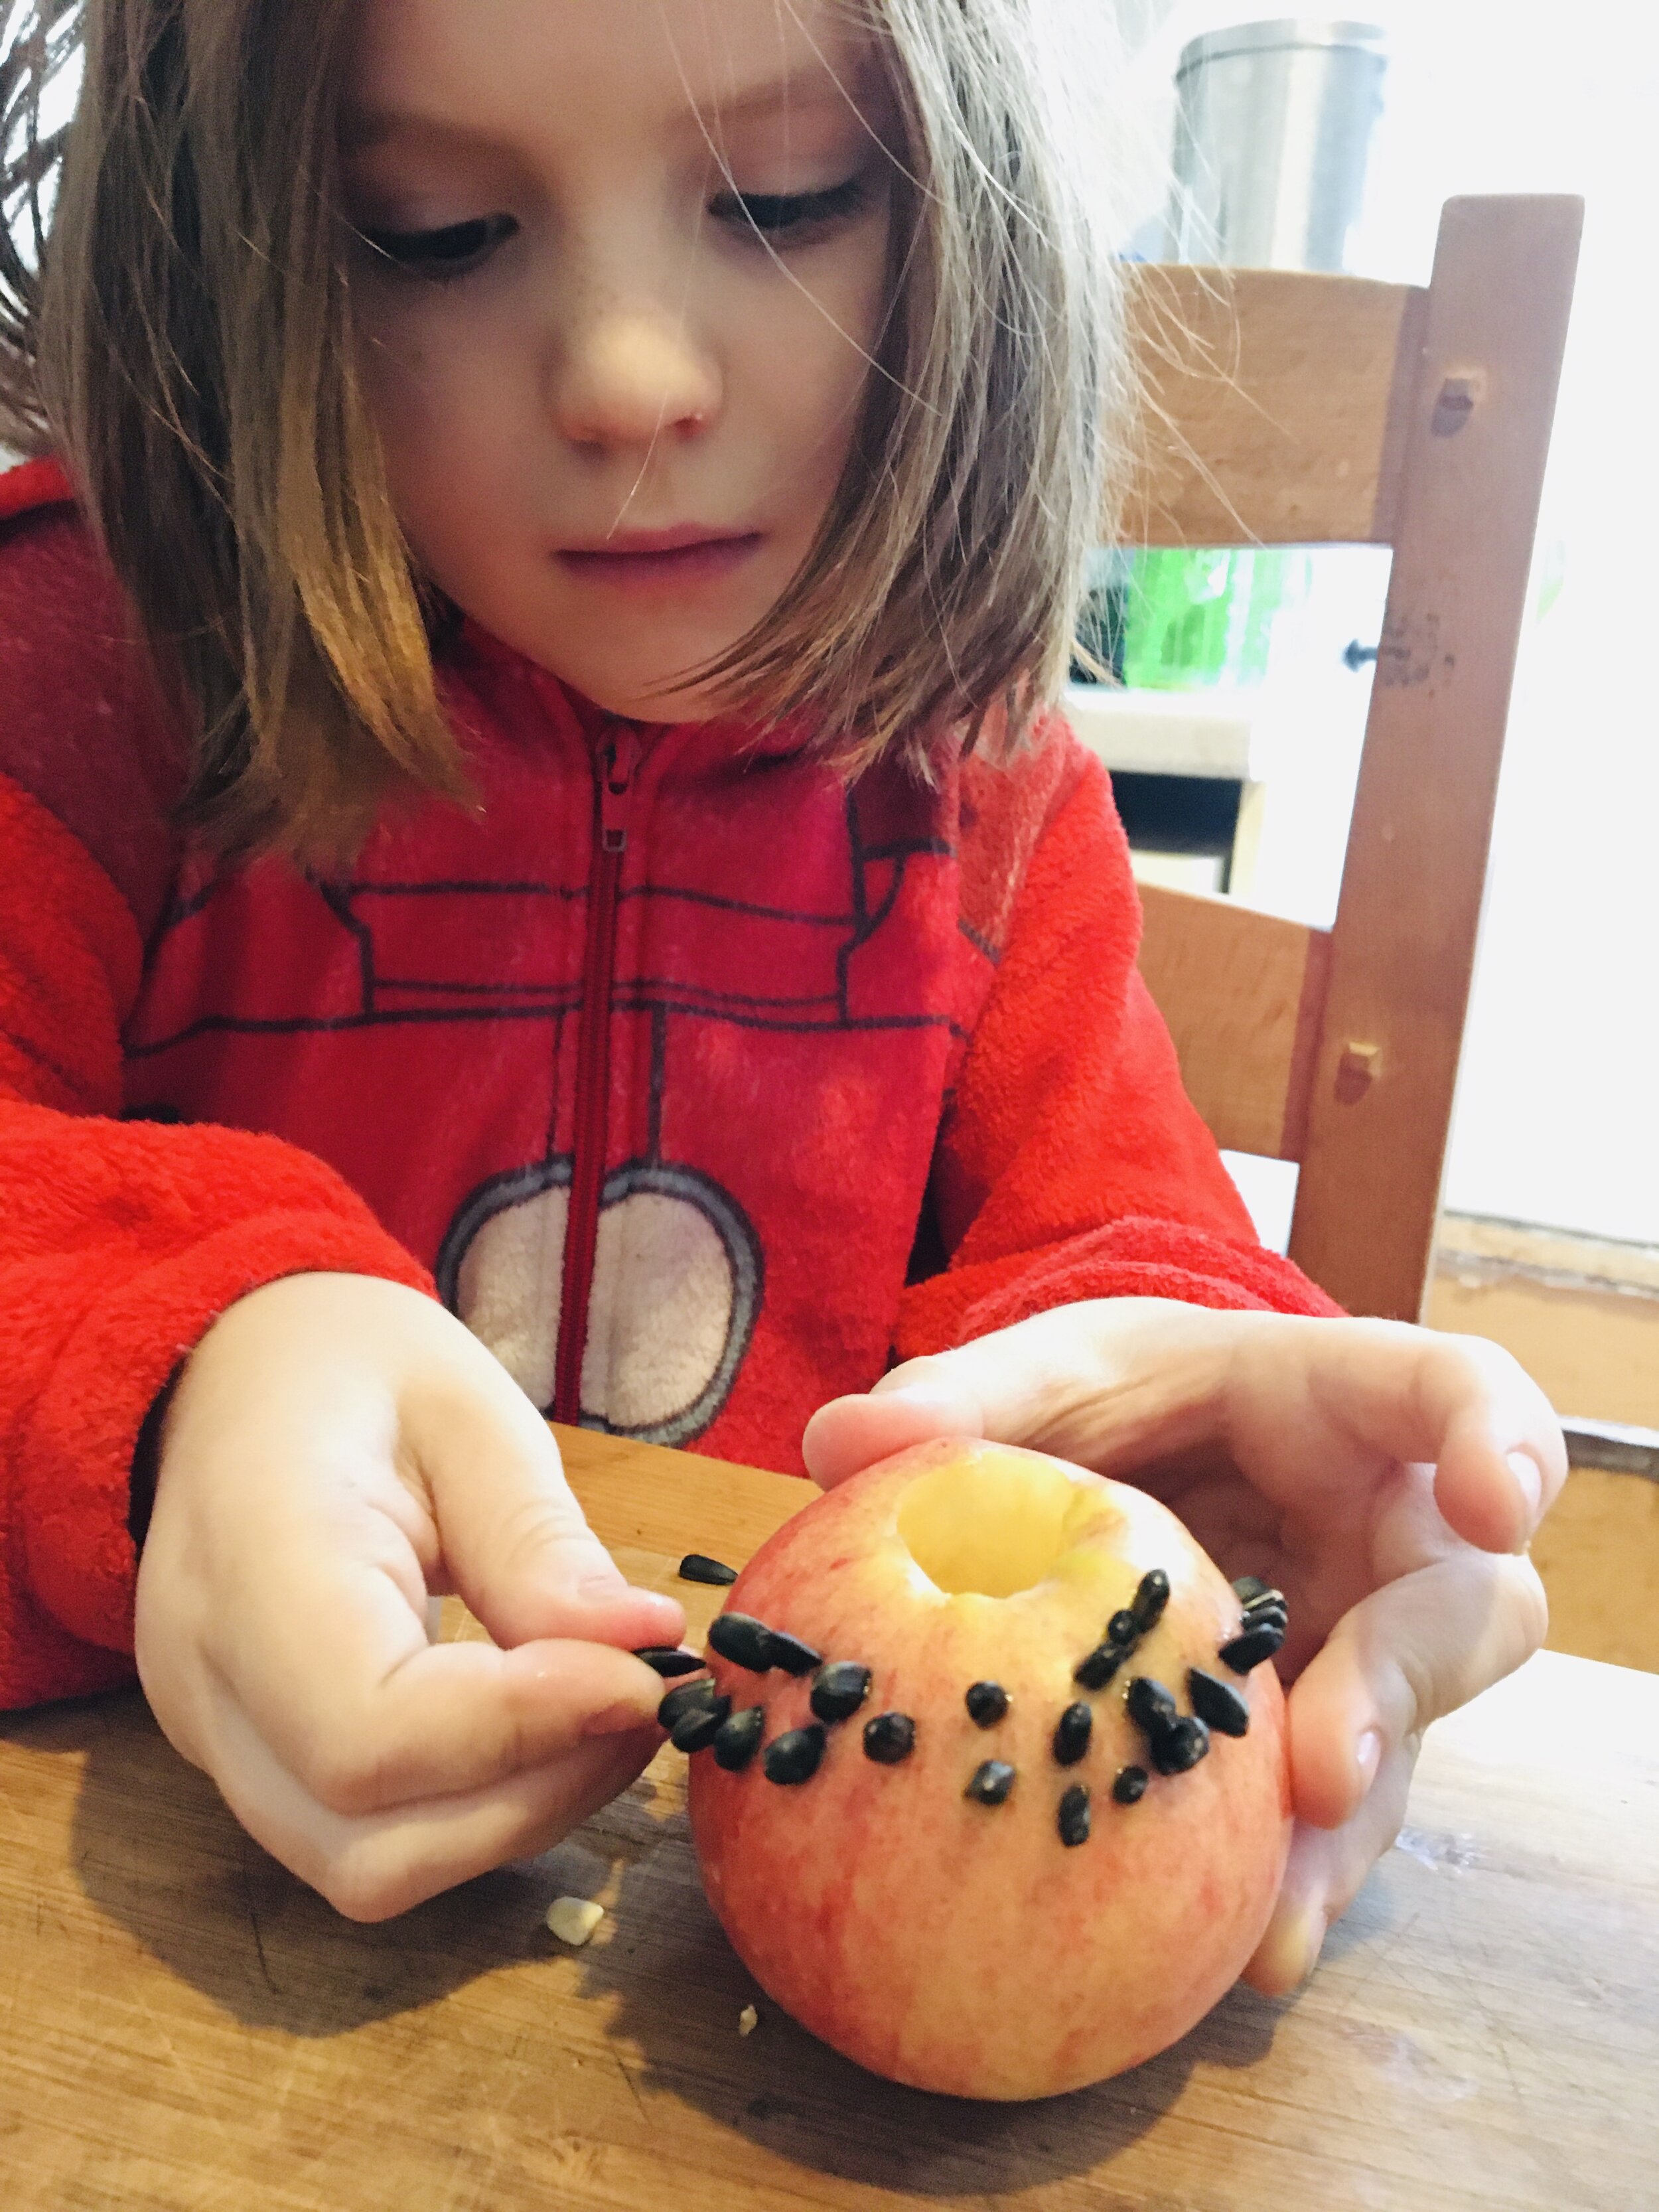

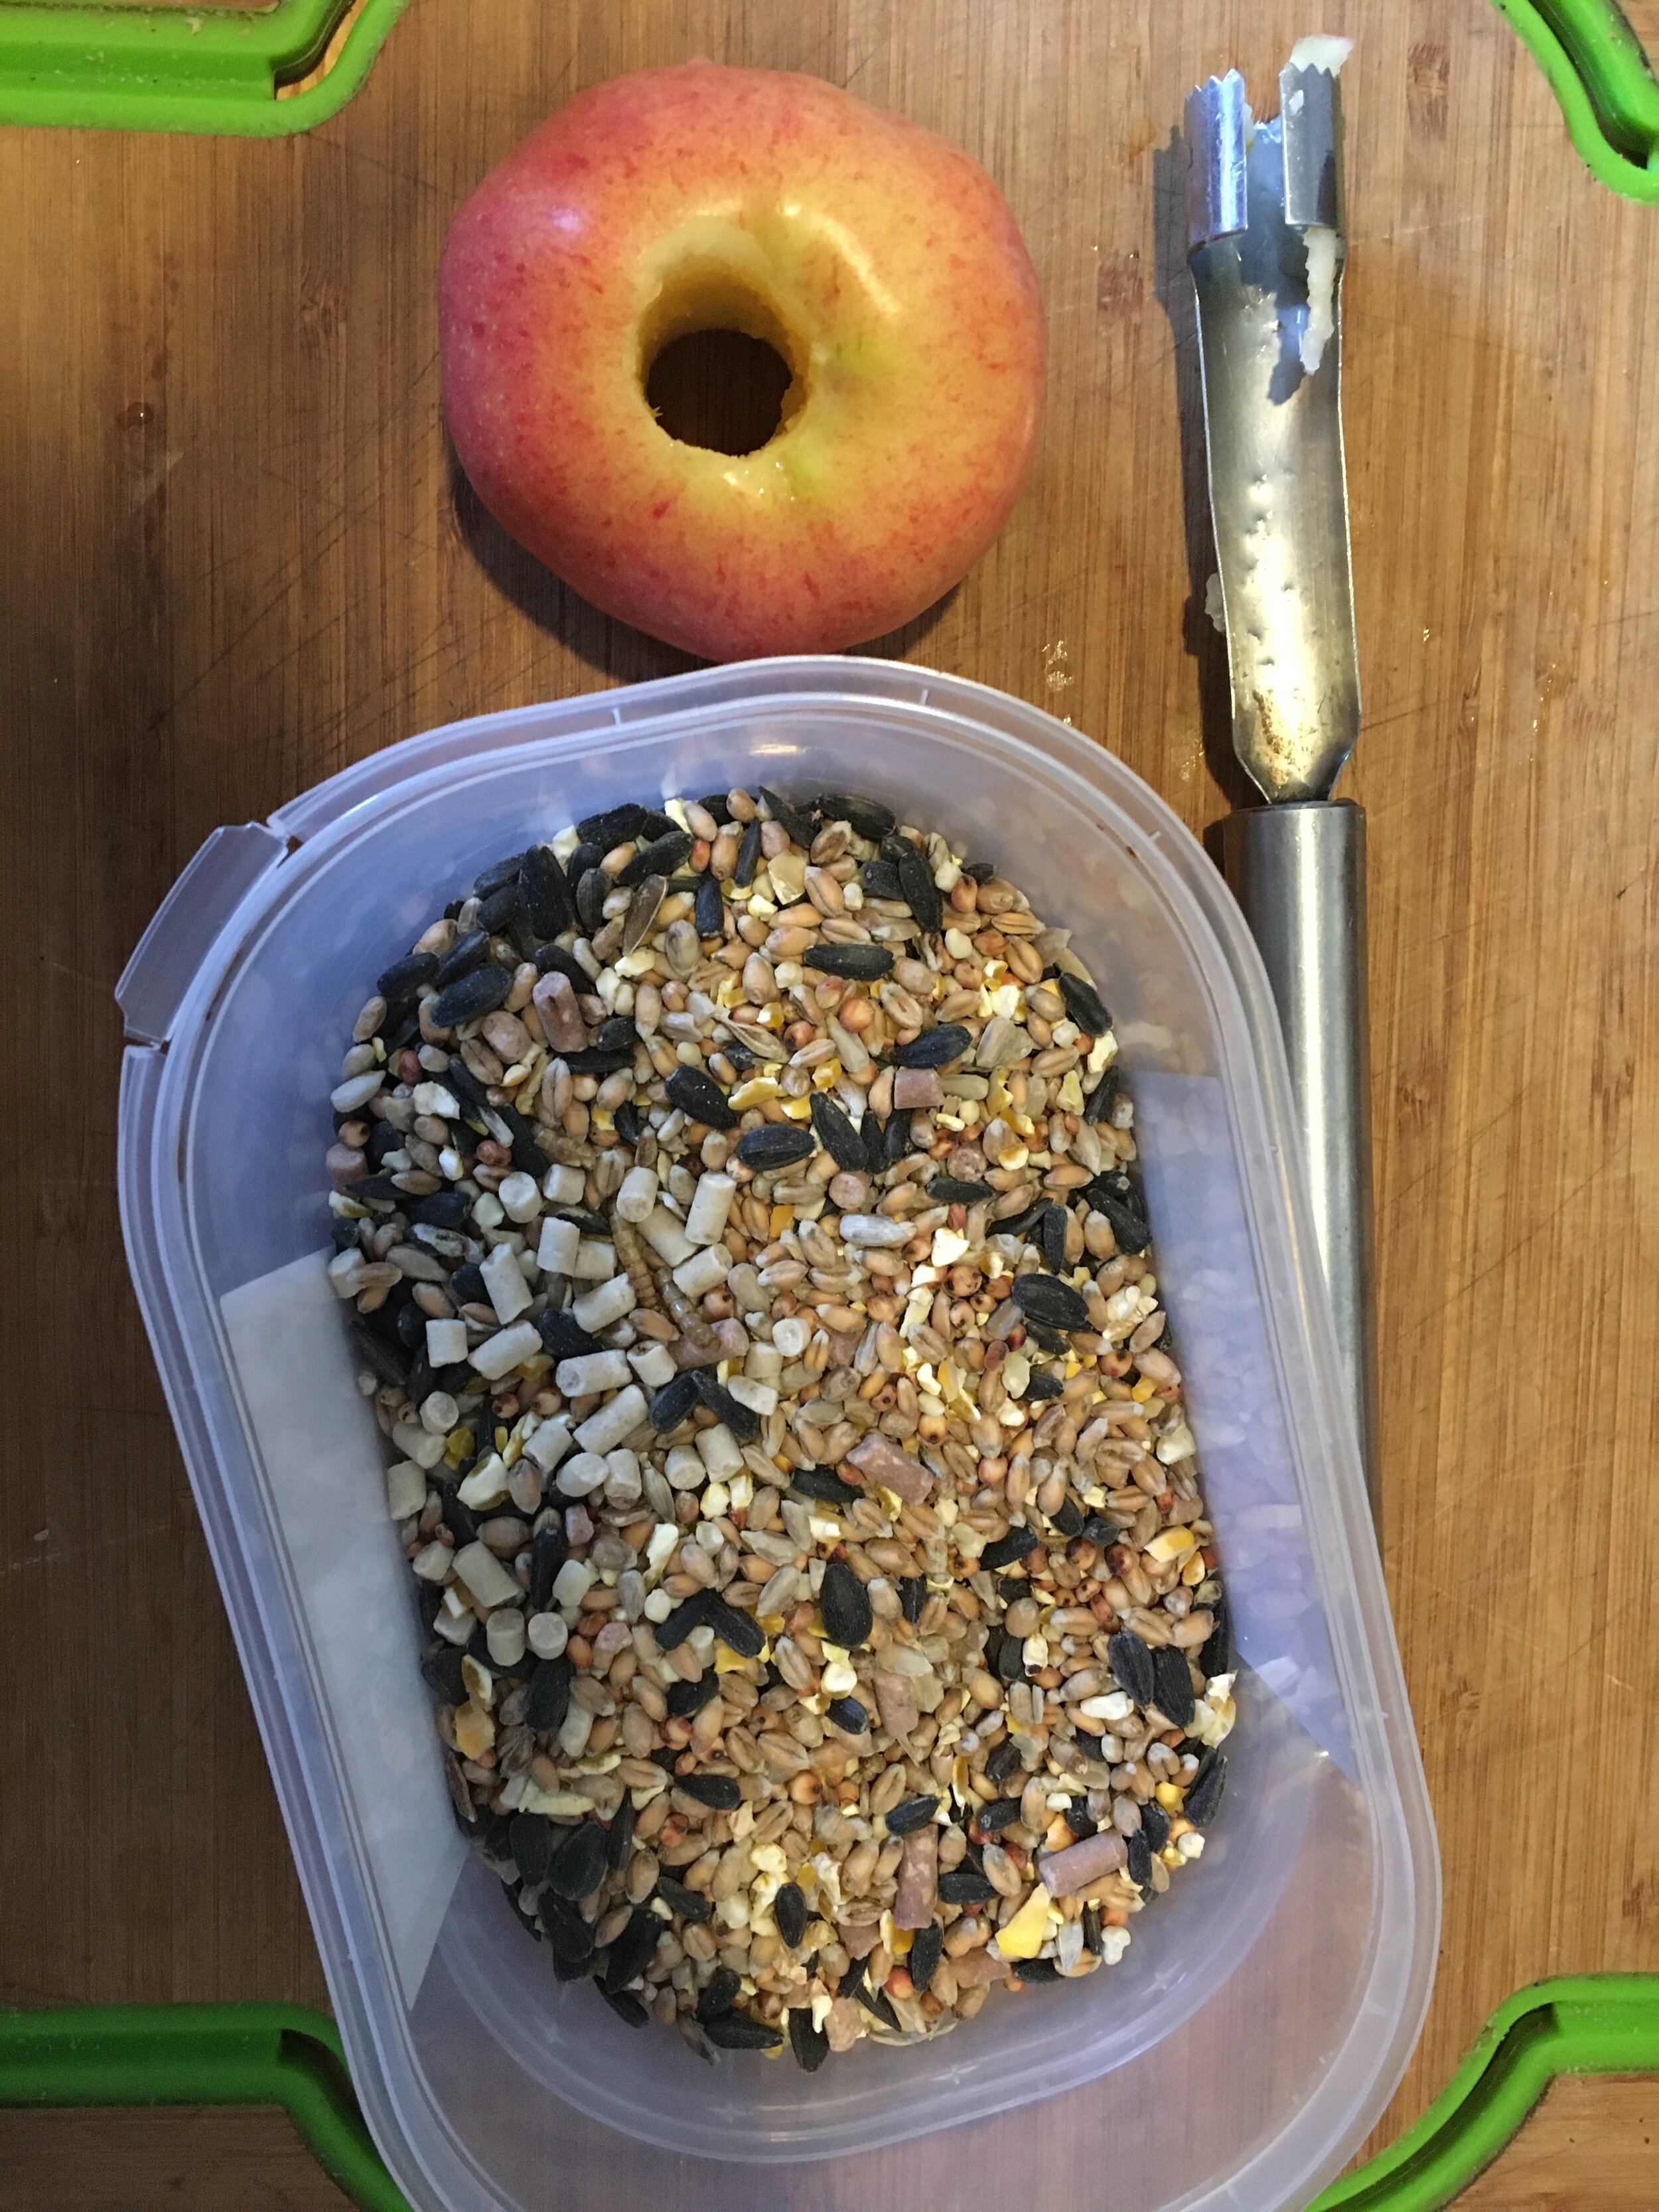
We have been making this simple little bird feeder in the woods for years. Pushing seeds into an apple is rather therapeutic and great for fine motor skills.
To make this bird feeder you need to core an apple. Find a good stick and attached a length of string to it using a Larks Head Knot. Then thread the ends of the string through the hole in the apple. This creates a hanging sting and perch for the birds.
You can then get to work pushing the sunflower seeds contained in the January pack into the apple.

We hope you have fun experimenting with different types of bird feeders. We would love to hear what kinds of birds you spot!
Submit your email address below to receive our news letter.

Nature Nurture Sussex is a Community Interest Company, Registered in England and Wales. Registration Number: 11335398.
Registration address: 2 The Finches, Old Brighton Road South, Pease Pottage, West Sussex, RH11 9AH